Table of Contents >> Show >> Hide
- Before You Start: Make Sure Your Door Can Be Stained
- Tools and Materials You Will Need
- How to Stain a Fiberglass Door: 15 Steps
- Step 1: Pick the Right Day
- Step 2: Remove or Protect Hardware
- Step 3: Set Up a Clean Work Area
- Step 4: Clean the Fiberglass Surface
- Step 5: Mask Glass, Trim, and Weatherstripping
- Step 6: Test the Stain Color
- Step 7: Stir the Gel Stain Thoroughly
- Step 8: Start With Grooves and Detailed Areas
- Step 9: Apply Stain in Sections
- Step 10: Blend the Stain for a Wood-Like Look
- Step 11: Wipe Back Excess Stain
- Step 12: Let the Stain Dry Completely
- Step 13: Apply the First Thin Topcoat
- Step 14: Add Additional Topcoat Layers
- Step 15: Reinstall Hardware and Let the Door Cure
- Common Mistakes to Avoid
- How to Maintain a Stained Fiberglass Door
- Real-World Experience: What Staining a Fiberglass Door Actually Feels Like
- Conclusion
- SEO Tags
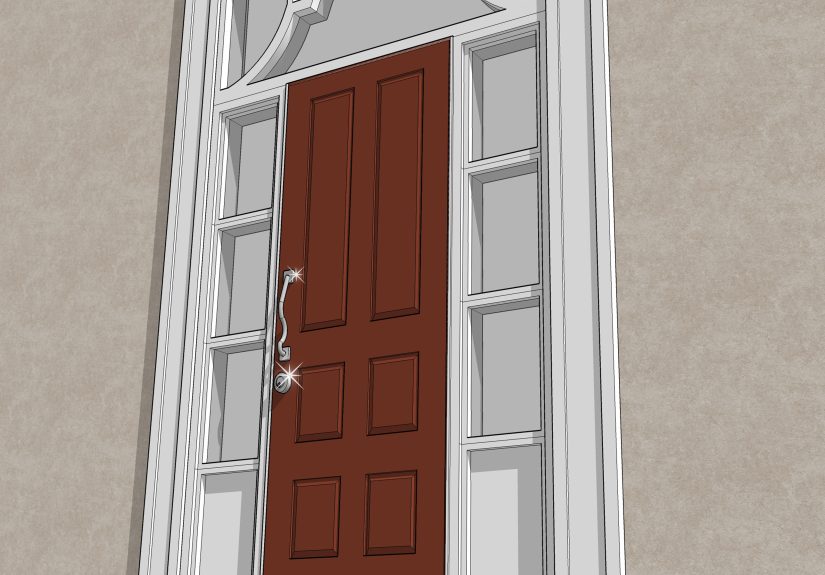
A fiberglass door is the charming trickster of the entryway world. It can look like rich oak, mahogany, or fir, but it does not behave like real wood. That is good news for your weekend schedule and your future maintenance budget. Fiberglass resists warping, dents, and weather better than many traditional wood doors, yet a wood-grain fiberglass door can still deliver that warm, “yes, I have excellent taste” look when stained correctly.
The secret is understanding one important fact: fiberglass does not absorb stain the way wood does. Regular penetrating wood stain usually has nowhere to go, so it sits awkwardly on the surface like a guest who arrived three hours early. For a fiberglass entry door, gel stain is usually the right choice because it has a thicker body, clings to vertical surfaces, and settles beautifully into molded grain texture. Add a clear protective topcoat, and you get a durable finish that can handle sunlight, rain, fingerprints, and the occasional grocery bag collision.
This guide explains how to stain a fiberglass door in 15 practical steps, from choosing materials to applying topcoat and maintaining the finish. Whether your door is brand-new, faded, or simply bored with its current personality, these steps will help you create a clean, professional-looking result without turning your front porch into a crime scene of sticky rags and regret.
Before You Start: Make Sure Your Door Can Be Stained
Not every fiberglass door is meant to be stained. Wood-grain textured fiberglass doors are usually good candidates because the molded surface gives gel stain something to visually grab. Smooth fiberglass doors are generally better painted, not stained, because they lack the grain texture needed to create a believable wood effect. If you are not sure which type you have, check the door manufacturer’s label, installation paperwork, or warranty guide.
Also check whether the door already has a factory finish. A factory-stained or factory-painted door may need special cleaning, scuffing, or refinishing instructions. When in doubt, follow your door manufacturer’s directions first and your confidence second. Confidence is wonderful; a voided warranty is less adorable.
Tools and Materials You Will Need
Gather everything before you open the stain can. Fiberglass door staining rewards patience, but it does not reward frantic mid-project trips to the garage while your stain starts setting up.
- Gel stain approved for fiberglass or non-wood surfaces
- Clear exterior-grade topcoat or polyurethane compatible with the stain
- Mineral spirits or acetone for cleaning, if approved by the door manufacturer
- Clean lint-free rags
- Foam brushes or stain pads
- High-quality natural bristle brush for blending stain
- Synthetic brush for water-based topcoat, if applicable
- Painter’s tape
- Drop cloths or plastic sheeting
- Gloves and eye protection
- Screwdriver or drill for removing hardware
- Small artist brush for corners and touch-ups
- Masking tape for dryness testing
- Stir sticks
Work in a well-ventilated area. Avoid direct sunlight, extreme heat, cold, or high humidity. A mild day is your best friend. A blazing afternoon sun can make the stain tacky too fast, while damp weather can stretch drying time into what feels like a historical era.
How to Stain a Fiberglass Door: 15 Steps
Step 1: Pick the Right Day
Choose a dry day with moderate temperature. A good working range is usually around 50°F to 90°F, depending on the stain and topcoat label. Avoid staining in direct sunlight, during rain, or when dew is present. If the door feels hot to the touch, wait. Stain that dries too quickly can leave streaks, brush marks, or uneven color.
Step 2: Remove or Protect Hardware
Remove the handle, lockset, kick plate, door knocker, and any decorative hardware if possible. If you cannot remove something, mask it carefully with painter’s tape. Do not remove factory-installed weatherstripping, gaskets, or dust pads unless your door manufacturer specifically allows it. Instead, tape them off so stain and topcoat do not gum up the parts that help your door seal properly.
Step 3: Set Up a Clean Work Area
You can stain the door while it is hanging, but removing it and laying it flat on padded sawhorses often gives better control. If the door stays in place, protect the floor, threshold, siding, glass, and nearby trim with drop cloths and tape. Keep pets away unless you want tiny paw prints immortalized in your topcoat.
Step 4: Clean the Fiberglass Surface
Wipe the door with a clean rag dampened with mineral spirits or acetone, if approved for your door. This removes dust, oils, manufacturing residue, and everyday grime. Let the surface dry completely before staining. Do not skip this step. Gel stain sticks best to a clean surface, and dirt under stain is like glitter at a birthday party: once it is there, it is everywhere.
Step 5: Mask Glass, Trim, and Weatherstripping
Use painter’s tape around glass inserts, sidelights, hinges, weatherstripping, and trim you do not want to stain. Press the tape edges firmly so stain cannot creep underneath. For doors with decorative glass frames, take extra time around corners and curves. Careful masking is not glamorous, but neither is scraping dried stain off glass with the energy of a tired raccoon.
Step 6: Test the Stain Color
Always test the gel stain before covering the whole door. Use a fiberglass sample, an extra trim piece, or a hidden area. Stir the stain well; do not shake it unless the label says so. Apply a small amount, brush it out, wipe it back, and let it dry. The color can look different once dry and even more different after topcoat. Testing saves you from discovering too late that “warm walnut” looks more like “haunted espresso” on your specific door.
Step 7: Stir the Gel Stain Thoroughly
Open the can and stir from the bottom until the color and texture are uniform. Gel stain is thick, almost pudding-like, and pigment can settle. Poorly mixed stain may dry unevenly or leave cloudy patches. Stir occasionally during the project to keep the color consistent from panel to panel.
Step 8: Start With Grooves and Detailed Areas
Begin with recessed panels, grooves, glass frames, and decorative details. Use a foam brush, stain pad, or small brush to push stain into the grain and corners. Working detailed areas first helps prevent pale lines around panels and trim. Keep the stain thin and controlled. More stain does not automatically mean better color; sometimes it just means longer drying time and more opportunities for smudging.
Step 9: Apply Stain in Sections
Work one section at a time. A common order is glass frame, deep panel grooves, raised panels, interior flat sections, exterior flat sections, vertical stiles, and horizontal rails. Follow the direction of the molded grain. On a door that imitates wood construction, grain may run vertically on stiles and horizontally on rails. Matching that direction makes the finish look more natural.
Step 10: Blend the Stain for a Wood-Like Look
After applying stain to a section, use a clean brush or rag to blend it. Lightly drag the brush in the direction of the grain to remove swirls, heavy spots, and lap marks. Dab gently in corners to pull out excess stain. For a richer wood effect, leave slightly more color in recessed areas and less on high points. This creates depth, like real wood grain, without making the door look striped or muddy.
Step 11: Wipe Back Excess Stain
If the color is too dark, wipe back excess stain with a lint-free rag. Use light, even pressure in the direction of the grain. If the color is too light, let the first coat dry according to the label, then apply another thin coat. Do not try to achieve a deep mahogany finish by piling on one heavy coat. Thick stain can stay tacky, attract dust, and make the door feel like it was dipped in caramel.
Step 12: Let the Stain Dry Completely
Drying time depends on temperature, humidity, airflow, stain brand, and how heavily it was applied. Some products may dry in several hours, while others need a full day or longer before topcoat. Use the tape test if recommended: press masking tape onto a test sample or hidden stained area, rub it gently, and pull it off quickly. If stain transfers to the tape, wait longer.
Step 13: Apply the First Thin Topcoat
Once the stain is dry, stir the clear topcoat gently. Do not shake it, because bubbles are not the decorative accent you are looking for. Apply a thin, even coat with the correct brush for your product. Brush in the direction of the grain and follow the same section order you used for staining. The topcoat seals the stain, adds durability, and protects the finish from weather and handling.
Step 14: Add Additional Topcoat Layers
Most exterior fiberglass doors need at least two thin coats of clear finish, and some exposure conditions may call for more. Let each coat dry fully according to the label before applying the next. Do not overbrush. Too many brush strokes can disturb the stain underneath or create bubbles. A good topcoat should look wet when applied, not milky, thick, or foamy.
Step 15: Reinstall Hardware and Let the Door Cure
When the finish is dry enough to handle, remove the tape carefully and reinstall hardware. Avoid slamming, scraping, or aggressively cleaning the door while the finish continues to cure. Give it time before hanging wreaths, magnetic decorations, or anything that might press against the fresh finish. Your door has just had a makeover; let it enjoy its spa recovery period.
Common Mistakes to Avoid
Using Regular Penetrating Stain
Fiberglass is non-porous, so regular wood stain often performs poorly. Use gel stain labeled for fiberglass, metal, composite, or non-wood surfaces, and always follow the product instructions.
Sanding the Fiberglass Skin
Many fiberglass door manufacturers warn against sanding the fiberglass surface because it can damage the molded grain or affect the finish. If the existing finish needs repair, follow the manufacturer’s refinishing guide rather than attacking the door with sandpaper like it owes you money.
Skipping the Topcoat
Gel stain provides color, but topcoat provides protection. Without a compatible clear finish, the stain can fade, wear, or become vulnerable to moisture and sunlight. A stained fiberglass exterior door is not truly finished until the topcoat is complete.
Working Too Slowly Across a Large Area
If you spread stain over the entire door before blending, some areas may begin setting up while others are still wet. Work in manageable sections. The goal is smooth color, not a race against chemistry.
How to Maintain a Stained Fiberglass Door
Clean your stained fiberglass door periodically with mild soap and water. Avoid harsh solvents, abrasive pads, and power washing. Inspect the finish once or twice a year, especially if the door faces strong sun, salt air, heavy rain, or snow. If the surface loses gloss, feels rough, or shows fading, it may be time for a fresh clear topcoat.
A covered porch can extend the life of the finish dramatically. Doors exposed to direct afternoon sun may need more frequent maintenance. Think of topcoat like sunscreen for your door: it works well, but it does not last forever.
Real-World Experience: What Staining a Fiberglass Door Actually Feels Like
The first time you stain a fiberglass door, the process may feel strange if you have stained real wood before. With wood, stain soaks in and reveals the grain. With fiberglass, you are creating the illusion of depth on the surface. That means your hands, brush pressure, and timing matter more than brute-force application. It is closer to glazing than traditional staining.
One helpful habit is to step back often. Up close, every streak looks dramatic. From six feet away, the finish may look perfectly natural. Many beginners overwork the stain because they stare at one small area too long. Blend the section, check it from normal viewing distance, and move on. A front door is judged by guests walking up the path, not by a detective with a magnifying glass.
Another practical lesson: corners collect stain fast. Raised panels, glass frames, and decorative grooves can become too dark if you do not pull out excess stain early. Keep a clean rag nearby and lightly dab those spots before they dry. If you want a realistic wood appearance, it is fine for recesses to be slightly darker, but they should not look like someone outlined the door with chocolate syrup.
Lighting also changes everything. A stain color that looks rich and balanced in the garage may look much warmer in afternoon sun. If possible, test your color where the door actually lives. South- and west-facing doors often show color and sheen more intensely because of stronger sunlight. A slightly lighter stain can sometimes age more gracefully than a very dark finish on an exposed entry.
Patience is the quiet hero of this project. Most disappointing results come from rushing: applying topcoat before stain is dry, using heavy coats to speed up color, or closing the door too soon after finishing. Let the stain dry longer if conditions are cool or humid. Let the topcoat cure before adding decorations. Let each layer do its job. The reward is a door that looks custom instead of chaotic.
Finally, save your test sample if you have one. It becomes your future maintenance reference. Months or years later, you can compare the sample to the door and see whether the finish has faded, dulled, or roughened. That little sample may look unimportant today, but future you will treat it like a tiny museum artifact of smart planning.
Conclusion
Learning how to stain a fiberglass door is mostly about preparation, restraint, and protection. Clean the surface thoroughly, use gel stain made for fiberglass, work in small sections, blend with the grain, and seal everything with a compatible exterior-grade topcoat. The process is not difficult, but it does ask you to slow down and respect the material.
A well-stained fiberglass door can give your entryway the warmth of wood without the same level of upkeep. It boosts curb appeal, protects your investment, and makes your home look more polished before guests even ring the bell. And yes, when someone says, “Nice wood door,” you are absolutely allowed to smile mysteriously and accept the compliment.


