Table of Contents >> Show >> Hide
- Quick Pick: Which Menu Bar Website Method Fits You?
- First, Define “Saved to the Menu Bar” (Because Words Matter)
- Method 1: Save Websites to the Menu Bar with Apple Shortcuts (Best Overall)
- Method 2: Build a Menu Bar Bookmark List with xbar or SwiftBar (Power-User Mode)
- Method 3: Put Web Apps Directly in the Menu Bar with MenubarX (Mini Browser Mode)
- Method 4: Safari “Add to Dock” Web Apps (Not Menu Bar, But Often Better)
- Method 5: Lightweight Alternatives (Fast Access Without Menu Bar Surgery)
- How to Keep Your Menu Bar Websites Organized (So It Doesn’t Become Chaos)
- Troubleshooting: When Menu Bar Website Shortcuts Misbehave
- Security & Privacy Notes (Because We’re Adults Here)
- Conclusion: The Best Way to Save Favorite Websites to the Mac Menu Bar
- Experiences: What It’s Like Living with Websites in Your Menu Bar (Real Talk, ~)
The macOS menu bar is the VIP lounge of your screen: it’s always there, it’s always watching, and it’s one click away from making you feel wildly organized. So if you’re constantly opening the same handful of sitesemail, calendars, docs, dashboards, that one recipe you keep forgetting you already know by heart saving them to the menu bar can turn “Where did I put that tab?” into “Boom. Done.”
Here’s the catch: macOS doesn’t ship with a big, obvious “Pin Website to Menu Bar” button the way it does for Wi-Fi or battery. But you can get essentially the same result (and in some cases, something even better) using built-in tools like Shortcuts, plus a couple of popular menu-bar utilities if you want a mini browser living up top.
This guide walks you through the best options, from “Apple-approved and easy” to “power-user delicious.” You’ll get step-by-step instructions, real examples, and a few sanity-saving tips to keep your menu bar from turning into a cluttered yard sale.
Quick Pick: Which Menu Bar Website Method Fits You?
| What you want | Best method | Why it’s great |
|---|---|---|
| One-click launch of favorite sites | Shortcuts in the menu bar | Native, fast, customizable menus |
| A dropdown list of bookmarks | xbar / SwiftBar | Flexible, scriptable, nerd-friendly |
| A mini browser inside the menu bar | MenubarX (menu bar browser) | Web apps open in a popover window |
| App-like websites (not menu bar, but close) | Safari “Add to Dock” web apps | Distraction-free windows, Dock + Spotlight |
First, Define “Saved to the Menu Bar” (Because Words Matter)
When people say “save a website to the Mac menu bar,” they usually mean one of these:
- Launch the site instantly: Clicking a menu bar icon opens a URL in your browser (new tab or new window).
- Choose from a list: One icon opens a dropdown menu of multiple sites (your personal command center).
- Use the site in-place: A tiny embedded browser pops down from the menu bar so the site lives up there.
All three are possible. The “best” one depends on whether you want speed, organization, or a full-on web terrarium in your menu bar.
Method 1: Save Websites to the Menu Bar with Apple Shortcuts (Best Overall)
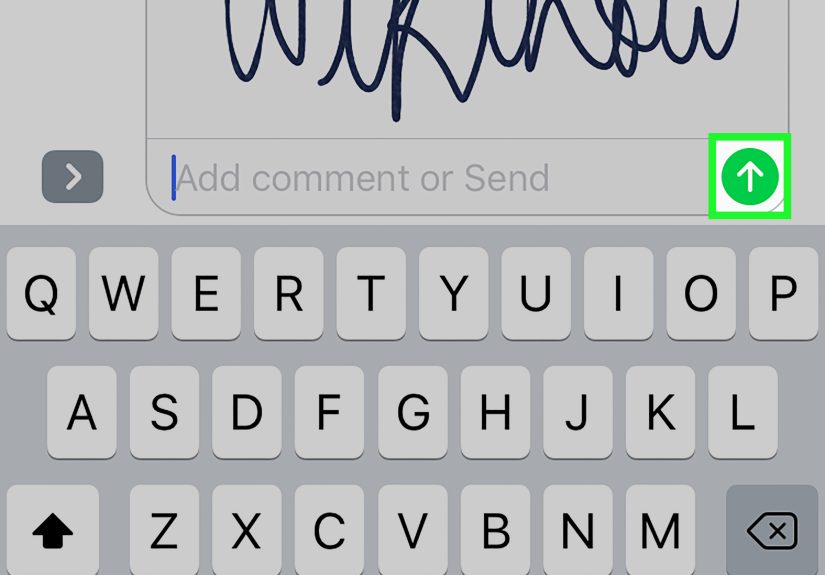
If you want something that feels native, doesn’t require extra apps, and can scale from one site to fifty, this is the move. macOS Shortcuts can run from the menu bar, and your shortcut can open websites, ask you which site you want, or even open different browser profiles.
Step 1: Create a Shortcut That Opens Your Favorite Websites
Open the Shortcuts app on your Mac and create a new shortcut. Then build either a “single-site launcher” or a “menu of sites.”
Option A: One shortcut per website (simple and tidy)
- Create a new shortcut and name it something obvious like Open Gmail or Open Notion.
- Add an action like Open URLs (or “Open URL” depending on your macOS version).
- Paste the site URL (example:
https://mail.google.com). - (Optional) Add Show Web Page or choose your preferred browser if you want consistency.
This is perfect if you only want a few “always-accessible” sites and you like direct buttons.
Option B: One menu bar icon that contains a list of websites (my favorite)
Build a shortcut called something like Favorite Sites that shows a menu:
- Add the action Choose from Menu.
- Create menu items such as Gmail, Google Calendar, Docs, Notion, Company Dashboard.
- Inside each menu item, add an Open URLs action with that site’s URL.
- (Optional) Add separate items for “Work Gmail” vs “Personal Gmail,” or “Docs (Work Profile)” vs “Docs (Personal Profile).”
Now you get one clean menu bar entry and a fast dropdown list. It’s like bookmarks, but with better manners.
Step 2: Put the Shortcut in the Menu Bar
In the Shortcuts app, you can make a shortcut accessible from the menu bar by adding it to the Menu Bar collection/folder (the exact wording varies slightly by macOS version).
- In Shortcuts, look for Menu Bar in the sidebar (you may need to enable it in Shortcuts settings).
- Drag your shortcut (or shortcuts) into Menu Bar.
- A Shortcuts icon appears in the menu bar; click it to run your shortcut(s).
Step 3: Make It Feel Like a Real “Website Button”
A few upgrades make this dramatically nicer:
- Give it a clear name: Use short labels like “Gmail,” “Calendar,” “Docs,” “Dash.”
- Use icons or emojis: A tiny 📨 or 📅 makes scanning faster than reading, especially pre-coffee.
- Add a keyboard shortcut: If you’re serious, make your favorite shortcut launchable without touching your mouse.
- Open in the right browser: If you separate work and personal browsing (or use Chrome profiles), build that into the shortcut.
Practical Examples You Can Copy Today
- “Morning Launch”: Opens 3–5 sites you always check (mail, calendar, task manager, chat) in one click.
- “Client Menu”: Choose from a menu of client dashboardseach item opens a different URL set.
- “Research Kit”: Opens a tab group’s worth of reading (docs + a few search pages) when you start a project.
Method 2: Build a Menu Bar Bookmark List with xbar or SwiftBar (Power-User Mode)
If you want a menu bar item that behaves like a mini “Bookmarks” menuorganized, grouped, and endlessly customizablexbar and SwiftBar are great. They let you run small scripts and display the output in the menu bar as dropdown menus. Translation: you can create a menu titled “Sites,” and inside it, click items like “Gmail,” “Docs,” and “Analytics” to open them instantly.
Why you’d choose this
- Speed + scale: Works beautifully for dozens of links without turning your menu bar into icon soup.
- Organization: Create categories like Work, Personal, Finance, Reading, Admin.
- Automation: Show “recent” links, rotate favorites, or even display status info alongside your links.
Quick Setup (the non-scary version)
- Install xbar or SwiftBar.
- Create a tiny script file in the app’s plugin folder.
- Make it executable.
- Enjoy your new menu bar bookmark launcher like the productivity wizard you secretly are.
A Simple “Favorite Websites” Plugin Script
Below is a basic example. It prints a menu title, a separator, and a list of websites. Clicking a website opens it. (Exact plugin formatting can vary, so treat this as a friendly template.)
Make It Cleaner and Smarter
Once you’ve got the basic version working, you can level up:
- Group links: Use headings like “Work” and “Personal” with separators for readability.
- Add “Open All”: One menu item launches your daily set of sites in one click.
- Show context: Display the day’s top calendar event or a task count in the menu title (if you want to get fancy).
Common “Wait, Why Isn’t This Working?” Fixes
- The script doesn’t appear: Confirm it’s in the correct plugin folder and the filename matches what the app expects.
- Clicks do nothing: Check your URL formatting and whether the plugin system expects
href=or a command likebash=open. - Permissions prompts: macOS may ask for permission the first time an app triggers a browser open; approve it.
Method 3: Put Web Apps Directly in the Menu Bar with MenubarX (Mini Browser Mode)
If what you really want is: “I want Slack/Trello/Calendar/that dashboard to drop down from my menu bar like a little control panel,” then a menu bar browser app is your best friend.
MenubarX is a well-known option because it lets you add web pages to the menu bar and open them in a popover window. In other words, your website isn’t just launchedit’s living up there, rent-free, until you close it.
How to set it up (typical workflow)
- Install MenubarX.
- Add your favorite websites as bookmarks inside the app.
- Click the menu bar icon to open the site in a dropdown window.
- (Optional) Pin or resize the window depending on how you like to work.
When a menu bar browser is the best choice
- Quick checks: You want to glance at a dashboard, timer, or messages without switching windows.
- Limited screen space: You’re on a smaller MacBook display and want “popover productivity.”
- “One site, one place”: You prefer a dedicated mini window instead of tabs multiplying like rabbits.
Tradeoffs to be aware of
- It’s still a browser: If a site is heavy (lots of scripts, video, real-time updates), it may use meaningful resources.
- Privacy matters: Treat it like any browser: keep it updated, avoid sketchy extensions, and don’t paste sensitive tokens into random scripts.
- Not always ideal for complex work: Editing a 30-tab spreadsheet inside a tiny menu bar popover is… ambitious.
Method 4: Safari “Add to Dock” Web Apps (Not Menu Bar, But Often Better)
If your real goal is “turn my favorite websites into app-like shortcuts,” Safari web apps are extremely good. They don’t put sites in the menu bar, but they do give you fast access from the Dock, Spotlight, and Launchpadoften with fewer distractions than a normal browser window.
How to create a Safari web app
- Open Safari and go to the website you want.
- Choose File > Add to Dock (or use the Share menu, depending on your Safari version).
- Name the web app and click Add.
- Launch it like an app from the Dock or Spotlight.
This is fantastic for Gmail, Notion, project tools, and anything you want in its own focused window. If your menu bar plan starts feeling cramped, web apps are a great “Plan B” that often turns into “Plan A.”
Method 5: Lightweight Alternatives (Fast Access Without Menu Bar Surgery)
Sometimes you don’t need the menu bar at allyou just need fewer clicks. These options are quick, built-in, and surprisingly effective:
Drag a website to the Dock
Many browsers let you drag a site icon from the address bar to the Dock, creating a quick launcher shortcut. It’s not the menu bar, but it’s still “one click and go.”
Use the Favorites Bar (Safari/Chrome)
If your browser is always open, the Favorites Bar is basically a “menu bar for websites,” just slightly lower on the screen. Keep it clean: 5–9 top links, folders for everything else.
Pin tabs or use tab groups
If you keep losing the same sites, pinned tabs (and tab groups) prevent your essentials from getting buried under “temporary” research tabs that have been temporary since the last presidential administration.
How to Keep Your Menu Bar Websites Organized (So It Doesn’t Become Chaos)
Saving websites to the menu bar is a productivity win… right up until you add the 19th “essential” site and suddenly your clock is in witness protection. Here’s how to keep it usable:
- Use one launcher, not 12 icons: A single Shortcuts menu (or xbar/SwiftBar menu) scales better than one icon per site.
- Name like a minimalist: “Mail,” “Cal,” “Docs,” “Dash.” Short labels are easier to scan.
- Group by context: Work / Personal / Finance / Reading. Your future self will send a thank-you note.
- Audit monthly: If you haven’t clicked a site from the menu in 30 days, it’s not a favoriteit’s a museum exhibit.
Troubleshooting: When Menu Bar Website Shortcuts Misbehave
The Shortcuts icon isn’t showing in the menu bar
- Make sure you added at least one shortcut to the Menu Bar collection in Shortcuts.
- Check Shortcuts settings to ensure the Menu Bar folder/collection is enabled and visible.
- Confirm your menu bar isn’t set to auto-hide in full screen (it can make you think icons vanished).
My shortcut opens the wrong browser (or the wrong profile)
- Edit the shortcut to explicitly open URLs in your preferred browser if the action supports it.
- If you use multiple profiles, create separate menu items (example: “Docs (Work)” and “Docs (Personal)”).
- As a simple fallback, open the URL normally and let your browser handle profile rules.
xbar / SwiftBar shows the menu, but links don’t open
- Verify your plugin format is correct for your app (some require
href=, some prefer a command). - Test the URL by pasting it in a browsersometimes the issue is a redirect or an invalid scheme.
- Ensure your script is executable and saved with the right file extension/permissions.
Security & Privacy Notes (Because We’re Adults Here)
Saving websites to the menu bar is convenientbut convenience should never require you to hand your security badge to a raccoon in a trench coat.
- Avoid hardcoding logins: Don’t bake passwords, tokens, or private URLs with credentials into scripts or shortcuts.
- Use a password manager: Let autofill handle authentication securely.
- Be careful with third-party menu bar browsers: Treat them like a browser: keep them updated and avoid risky add-ons.
- Work vs personal separation: If you rely on profiles, name shortcuts clearly so you don’t open the wrong account during a screen share.
Conclusion: The Best Way to Save Favorite Websites to the Mac Menu Bar
If you want the cleanest, most “Mac-like” approach, start with Apple Shortcuts in the menu bar. It’s flexible enough to handle a simple one-site launcher or a full dropdown menu of favorites, and it doesn’t require extra software.
If you want an expandable, organized list that can grow with you, xbar or SwiftBar gives you a scalable “bookmark menu” vibeespecially if you like tinkering. And if your dream is a website that literally drops down from the menu bar like a tiny command center, a menu bar browser like MenubarX is made for that.
Pick one method, keep it tidy, and enjoy the small but powerful thrill of clicking your menu bar and immediately landing where you meant to go. (It’s like teleportation, but for productivity.)
Experiences: What It’s Like Living with Websites in Your Menu Bar (Real Talk, ~)
The first time I set up “Favorite Sites” in the menu bar, I felt unstoppablelike I’d just discovered a secret macOS level where everything is faster and no one ever loses a tab again. Naturally, I celebrated by adding way too many links. Because that’s what humans do: we get a new organizational tool, then immediately use it to create a new kind of mess.
The honeymoon phase is incredible. You click once, pick “Gmail,” and you’re in. Click again, pick “Calendar,” and you’re suddenly the kind of person who arrives to meetings on time (or at least opens the calendar as if you might). The menu bar becomes a calm little launcher that doesn’t care how chaotic your desktop looks. That alone is worth the effort.
Then reality sets in: your menu bar is a tiny strip of land, and everyone wants beachfront property. Wi-Fi, battery, VPN, audio, screen recording, cloud sync, keyboard manager, and now your entire internet lifestyle. The trick is learning that menu bar success is less about adding everything and more about choosing the right shape of access. For me, the best “shape” was one icon that opens a listeither a Shortcuts menu or a SwiftBar/xbar menu. One icon stays elegant. Ten icons turns your menu bar into a crowded group chat.
I also learned that not all favorite sites are the same kind of favorite. Some are “launch and work for an hour” sites (Docs, Notion, project tools). Those are best as Safari web apps or normal browser windows, because you want space and focus. Other sites are “check for 30 seconds” sites (a dashboard, a shipping tracker, a timer, a quick calendar glance). Those are where a menu bar browser shines: you drop it down, peek, close it, and you’re back to what you were doing. It’s the digital equivalent of checking your watch instead of opening a wall-sized calendar in the living room.
The most useful shortcut I built wasn’t even a single linkit was a small menu with three categories: Work, Personal, and Admin. Work had email, calendar, and the one dashboard I need daily. Personal had a bank login and a notes page. Admin had stuff I only touch occasionally, like account settings and a help desk portal. The categories mattered because the menu stayed readable even when I added more links later. Without categories, every new favorite is like tossing another sock into an already-full drawer.
Finally, the biggest surprise: after a week, I stopped thinking about it. That’s the whole point. The menu bar isn’t supposed to feel exciting; it’s supposed to quietly remove friction. If you click your menu bar, open your site, and move on with your life, you did it right. If you spend more time tweaking icons than using them, it might be time for an audit. Keep the essentials, delete the “nice-to-haves,” and let your menu bar go back to being a toolnot a museum of intentions.