Table of Contents >> Show >> Hide
- Quick Navigation
- Damaged Hair 101: What “Damage” Actually Means
- How to Restore Damaged Hair: 15 Steps
- Step 1: Figure out your damage “personality”
- Step 2: Stop the damage at the source (at least temporarily)
- Step 3: Get a strategic trim (because split ends don’t “glue back together”)
- Step 4: Wash your scalp on purpose, not your ends by accident
- Step 5: Condition like you mean it (and apply it correctly)
- Step 6: Add a weekly deep conditioning mask
- Step 7: Balance moisture and protein (don’t guessobserve)
- Step 8: Consider a bond-support product (with realistic expectations)
- Step 9: Use a leave-in conditioner (your daily “insurance policy”)
- Step 10: Seal moisture on the ends (especially if you’re dry or curly)
- Step 11: Heat protectant isn’t optional if you use heat
- Step 12: Upgrade your detangling routine (gentle wins)
- Step 13: Choose protective styling and kinder accessories
- Step 14: Protect hair while you sleep
- Step 15: Defend hair from sun, chlorine, and “the outdoors in general”
- A Simple Weekly Routine (So You’re Not Guessing Every Day)
- Common Mistakes That Keep Hair “Stuck” in Damage Mode
- Experiences Related to Restoring Damaged Hair (What People Commonly Notice)
- Wrap-Up
If your hair currently feels like it’s auditioning for the role of “old broom in a haunted house,” you’re not alone.
Heat tools, hair color, tight styles, sun, chlorine, and plain old friction (looking at you, aggressive towel-drying)
can leave strands rough, frizzy, and prone to snapping at the worst possible momentlike right before a photo.
Here’s the honest truth: hair is made of keratin and once a section of hair shaft is damaged, you can’t “heal” it the
way you heal skin. But you can dramatically improve how it looks and feels, prevent further breakage, and help new
hair grow in under better conditions. Think of this as hair rehab: fewer bad decisions, more protective routines, and
a steady return to softness and strength.
Damaged Hair 101: What “Damage” Actually Means
Your hair shaft has an outer protective layer (the cuticle) and inner structure that gives hair its strength and
elasticity. Damage happens when the cuticle is lifted, cracked, or worn down and the inner structure gets weakened.
That’s why damaged hair can feel rough, look dull, tangle easily, and break when you brush or style it.
Signs you’re dealing with real damage (not just a “bad hair day”)
- Breakage: shorter pieces snapping off (not full strands with a root).
- Split ends: ends that fork, feather, or look frayed.
- High porosity: hair soaks up water fast but dries out quickly and frizzes.
- Elasticity issues: wet hair stretches too much and then snapsor doesn’t stretch at all and snaps.
- Texture changes: curls go limp, straight hair gets puffy, or everything feels “crunchy.”
The goal of repair care is to (1) stop whatever is causing new damage, (2) reduce friction and breakage, and
(3) temporarily patch weak spots with conditioning, proteins, and bond-supporting products so the hair behaves better
while it grows out healthier.
How to Restore Damaged Hair: 15 Steps
Step 1: Figure out your damage “personality”
Start by identifying the biggest culprit because the fix should match the cause:
heat damage (flat irons, hot blowouts),
chemical damage (bleach, relaxers, perms),
mechanical damage (rough brushing, tight styles),
or environmental damage (sun, chlorine, salt water, dry winter air).
Example: If you bleach and heat-style, you’ll need stronger conditioning, fewer hot tools, and a gentler detangling plan.
If your main issue is friction (brush + towel + tight ponytail), you may see improvements quickly just by changing habits.
Step 2: Stop the damage at the source (at least temporarily)
No repair routine can outwork daily damage. If you’re using high heat every morning, it’s like trying to mop a floor
while the sink is overflowing. Pick one “damage pause” for the next 4–6 weeks:
- Lower heat settings and cut heat days in half.
- Delay chemical services (bleach, relaxers) or switch to gentler options with a professional.
- Stop yanking through tangles (yes, even when you’re late).
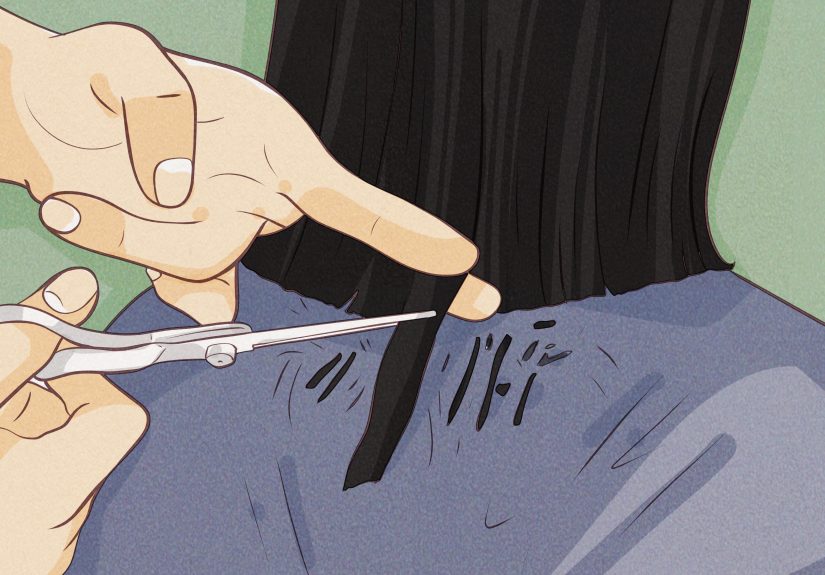
Step 3: Get a strategic trim (because split ends don’t “glue back together”)
Products can make split ends look smoother, but the only true fix is trimming. You don’t always need a dramatic chop.
Ask for a “dusting” or micro-trim to remove the worst fraying while keeping length.
Pro tip: Trim schedules vary, but if you’re seeing lots of splitting, more frequent small trims often protect length
better than waiting until ends look like a shredded ribbon.
Step 4: Wash your scalp on purpose, not your ends by accident
Healthy hair starts at the scalp, but damaged lengths need gentleness. Focus shampoo mainly on the scalp and let the
suds rinse down the lengths. This reduces dryness and friction on already stressed ends.
If your hair is very dry, try spacing washes and using a mild, moisturizing shampoo. If your scalp gets oily or itchy,
keep cleansing consistentbuild-up can make everything feel worse.
Step 5: Condition like you mean it (and apply it correctly)
Conditioner isn’t just “optional hair lotion.” It helps reduce friction, detangles, and improves softness.
Apply conditioner from mid-lengths to ends, then detangle gently with fingers or a wide-tooth comb while it’s slippery.
Let it sit a minute or two before rinsing.
Step 6: Add a weekly deep conditioning mask
A deep conditioner (hair mask) is your weekly repair meeting. Look for ingredients that support softness and slip:
fatty alcohols, conditioning agents, plant oils, ceramides, glycerin, and other moisturizers.
How to use: after shampoo, squeeze out excess water, apply mask thoroughly, and leave it on 10–20 minutes.
Use gentle heat (like a warm towel) if you want a boostbut skip anything that feels like your head is in a sauna.
Step 7: Balance moisture and protein (don’t guessobserve)
Protein treatments can help temporarily reinforce weak areas, but too much can make hair feel stiff and brittle.
Use your hair’s feedback:
- If hair feels mushy, overly stretchy, or won’t hold shape: you may benefit from a light protein product.
- If hair feels hard, dry, and snaps easily: reduce protein and increase moisturizing conditioning.
Start smalluse a protein-containing conditioner or mask once every 1–2 weeks rather than jumping into intense treatments.
Step 8: Consider a bond-support product (with realistic expectations)
“Bond repair” has become a popular label. The science conversation often revolves around hair’s internal bonds and how
chemical processing can weaken structure. Some products are designed to help hair feel stronger and break less.
Just remember: these aren’t magic wands; they’re more like supportive gear that can improve performance if you also
reduce damage.
Best use case: hair that’s been bleached, highlighted, relaxed, permed, or heat-styled heavily. Use as directed and pair
with conditioning so hair stays flexible, not stiff.
Step 9: Use a leave-in conditioner (your daily “insurance policy”)
Leave-in conditioner reduces friction all dayduring detangling, styling, and just living your life.
Apply to damp hair, focusing on mid-lengths to ends. If hair is fine, start with a small amount to avoid heaviness.
Step 10: Seal moisture on the ends (especially if you’re dry or curly)
If your hair dries out quickly, try “seal and protect”:
apply leave-in conditioner, then a tiny amount of oil or serum mainly to the ends.
This can reduce frizz and help prevent moisture loss. Tiny is the keywordunless you want your ends to look like they’re
starring in an olive oil commercial.
Step 11: Heat protectant isn’t optional if you use heat
If you use a blow dryer, curling iron, or flat iron, use a heat protectant every time. It helps reduce the impact of
high temperatures on the cuticle. Then lower the heat setting and do fewer passes.
A practical rule: one slow pass at a safer temp beats three angry passes at maximum heat.
Step 12: Upgrade your detangling routine (gentle wins)
Damaged hair breaks most during detangling. Swap “rip and pray” for a calmer plan:
- Detangle on damp hair with conditioner or a detangling spray.
- Start at the ends and work upward in small sections.
- Use a wide-tooth comb or a gentle detangling brush.
- If you hear snapping, slow downyour hair is sending a voice memo.
Step 13: Choose protective styling and kinder accessories
Tight ponytails, harsh elastics, and constant tension can cause breakage. Try:
low-tension styles (loose braids, soft buns), fabric scrunchies, and avoiding the same exact part every day.
If you wear extensions or tight styles, give your hair breaks and watch for tension at the hairline.
Step 14: Protect hair while you sleep
Nighttime friction is sneaky damage. A satin or silk pillowcase can reduce frizz and breakage.
If your hair tangles easily, loosely braid it or use a soft bonnet.
Bonus: you might wake up with fewer tangles and more “I totally have my life together” energy.
Step 15: Defend hair from sun, chlorine, and “the outdoors in general”
UV exposure and pool chemicals can dry hair out. Practical protection:
- Wear a hat or scarf in strong sun (your hair deserves shade too).
- Before swimming, wet hair with fresh water and apply conditioner to reduce chlorine absorption.
- Rinse hair after swimming and follow with conditioner.
If you have persistent scalp irritation, sudden shedding, or breakage that doesn’t improve after routine changes, consider
talking to a dermatologist or a licensed professional for personalized guidance.
A Simple Weekly Routine (So You’re Not Guessing Every Day)
- Wash day: Gentle shampoo on scalp → conditioner on lengths → leave-in conditioner → tiny oil/serum on ends.
- Once a week: Deep conditioning mask (10–20 minutes).
- Every 1–2 weeks (if needed): Light protein support or bond-support product (follow directions).
- Daily: Low-tension styling, gentle detangling, minimize heat, protect at night.
Common Mistakes That Keep Hair “Stuck” in Damage Mode
- Overdoing protein: If hair feels stiff and brittle, step back and moisturize.
- Skipping trims forever: Split ends travel upward and steal length later.
- Using max heat + no protectant: That’s basically speed-running damage.
- Brushing aggressively when wet: Wet hair is more fragilebe gentle.
- Expecting one product to fix everything: Progress comes from routines, not miracles.
Experiences Related to Restoring Damaged Hair (What People Commonly Notice)
When people start repairing damaged hair, the first “aha” moment is usually realizing how much damage comes from everyday
habitsnot just dramatic stuff like bleaching. One common experience: someone switches from rough towel-drying to gently
squeezing water out with a soft towel or T-shirt, and within a week they notice fewer flyaways and less snapping during
brushing. It’s not glamorous, but it works. The hair doesn’t suddenly become a shampoo-commercial waterfallbut it does
stop acting like it’s made of dry spaghetti.
Another frequent story is the “heat breakup.” Someone who flat-ironed daily decides to cut back to once or twice a week,
uses heat protectant, and lowers the temperature. At first, it feels like a betrayal“Who is this puffy hair and why is it
living on my head?”but by week two or three, the hair often feels softer and looks less dull. The big win is breakage:
fewer short pieces around the crown and fewer snapped ends when detangling. People also realize that fewer passes with the
iron matter more than they thought. Going slower, using a lower setting, and doing one controlled pass can feel like
“adulting” in hair form.
Many people experimenting with masks report a surprisingly emotional relationship with deep conditioning. The first time
they use a mask correctlyon squeezed-out damp hair, left on long enoughthey often notice that detangling becomes easier.
That’s a huge quality-of-life upgrade. Less tangling means less force, and less force means less breakage. For curly and
coily hair especially, the “slip” factor can make wash day feel less like a battle. Some describe it as the difference
between arguing with your hair and negotiating with it.
Then there’s the protein learning curve. A lot of people overdo it at first because “strengthening” sounds like the goal.
They try a strong protein treatment and suddenly their hair feels hard, rough, and weirdly brittle. That moment teaches an
important lesson: strength without flexibility is just stiffness. People who get the best results typically scale back,
use lighter protein less often, and focus on moisture and gentle handling. Once the balance is right, hair often feels more
resilientless stretchy when wet, less snap-prone when brushing, and more cooperative when styled.
Sleep protection is another “why didn’t I do this sooner?” experience. Switching to a satin pillowcase or using a bonnet
doesn’t feel like a big repair stepuntil someone wakes up with fewer tangles, less frizz, and ends that look less fuzzy.
It’s not that satin is magical; it’s that friction is real. People who toss and turn often notice the biggest difference,
especially if their hair is long, curly, or already fragile from coloring.
Finally, the most consistent experience is that repair feels slow… until it suddenly doesn’t. For a few weeks, progress
can look like small wins: fewer snapped strands, easier comb-through, slightly shinier ends. Then one day, someone
realizes their hair is behaving better in the exact situations where it used to failafter a shower, in humidity, during
detangling, or at the end of the day. That’s usually when the routine sticks. Not because the hair is “perfect,” but
because it’s finally predictable. And predictable hair, honestly, is underrated joy.
Wrap-Up
Restoring damaged hair is less about chasing a miracle product and more about building a routine that protects your hair
from the daily stuff that causes breakage: friction, heat, harsh processing, and dehydration. Use conditioning like a
strategy, trim what can’t be saved, and treat your hair like it’s expensive fabricbecause it kind of is. Give it a few
weeks of consistency and you’ll usually see the biggest change where it matters most: less breakage, easier detangling,
smoother ends, and hair that feels like it’s back on your side.


