Table of Contents >> Show >> Hide
- Before You Start: The Golden Rules of Lipstick Stain Removal
- Why Lipstick Stains Are So Hard to Remove
- Method 1: Liquid Laundry Detergent Pretreatment
- Method 2: Dish Soap for Greasy, Waxy Lipstick Marks
- Method 3: Rubbing Alcohol for Pigment-Heavy Stains
- Method 4: Oxygen Bleach Soak for Set-In Stains
- Method 5: Commercial Stain Removers for Quick, Convenient Cleanup
- Method 6: Solvent Method for Tough, Washable Fabrics
- A Bonus DIY Option: Dish Soap, Baking Soda, and Vinegar
- What Not to Do When Removing Lipstick from Clothes
- How to Handle Different Fabrics
- Which Lipstick Removal Method Is Best?
- of Real-Life Experience: What Lipstick Stains Actually Teach You
- Final Thoughts
Few laundry emergencies feel quite as dramatic as discovering a bright lipstick streak on your favorite shirt. One second you are getting ready for dinner, a meeting, or a wedding photo, and the next your blouse looks like it lost a duel with a tube of cherry red. The good news is that lipstick stains are stubborn, not supernatural. With the right method, a little patience, and a firm refusal to panic, you can usually rescue the fabric.
Lipstick is tricky because it is not just one kind of stain. It typically contains wax, oils, and pigment, which means the mark can cling to fibers, smear when rubbed, and set even harder if heat gets involved too early. That is why random scrubbing usually makes the problem worse. Smart stain removal is less about brute force and more about choosing the right approach for the fabric in front of you.
In this guide, you will learn the six best methods to remove lipstick from clothes, plus the mistakes that make stains harder to remove, fabric-specific tips, and real-life experiences that show what actually works when laundry day turns into a crime scene investigation.
Before You Start: The Golden Rules of Lipstick Stain Removal
Before trying any lipstick stain remover method, slow down for thirty seconds and do these basics first:
- Lift off excess lipstick gently. Use a dull knife, spoon, or the edge of a credit card.
- Do not rub. Rubbing pushes wax and pigment deeper into the fabric.
- Check the care label. Use only the hottest water the fabric can safely handle.
- Test first. On delicate or dyed fabrics, test the cleaner on an inside seam or hidden spot.
- Do not machine dry until the stain is gone. Heat can lock in any residue left behind.
- For dry-clean-only clothing, stop early. Blot gently and take it to a professional cleaner as soon as possible.
Think of these rules as the laundry version of “measure twice, cut once.” They are not glamorous, but they save shirts.
Why Lipstick Stains Are So Hard to Remove
If lipstick vanished with plain water, this article would be one sentence long and we would all move on with our lives. Unfortunately, lipstick formulas are built to stay put. Long-wear products are especially clingy, often containing oils, emollients, waxes, and bold pigments designed to survive coffee, lunch, and several dramatic life choices.
That means a successful treatment usually needs to do three things at once: loosen grease, lift pigment, and wash away residue without harming the garment. This is why dish soap, liquid laundry detergent, rubbing alcohol, oxygen bleach, and targeted stain removers appear again and again in expert stain-removal advice.
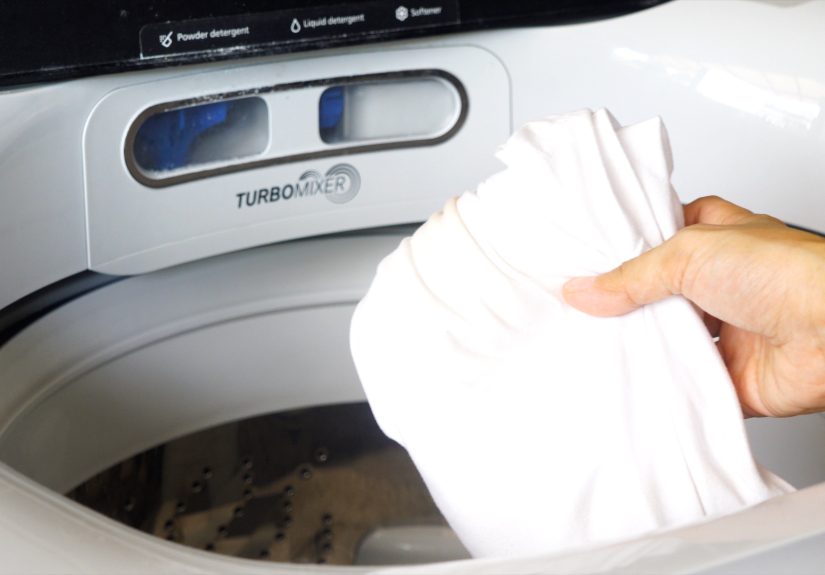
Method 1: Liquid Laundry Detergent Pretreatment
Best for:
Fresh lipstick stains on washable everyday fabrics like cotton, polyester, denim, and blends.
Why it works
A good liquid laundry detergent is one of the easiest ways to tackle lipstick because it is built to handle oily and colored stains. It is often the best first move when you want a simple, low-risk option.
How to do it
- Scrape off excess lipstick with a dull tool.
- Apply liquid detergent directly to the stained area.
- Work it in gently with your fingers or a soft brush.
- Let it sit for about 15 to 20 minutes.
- Wash the garment according to the care label in the warmest safe water.
- Air-dry and inspect before using the dryer.
Why people love this method: It is simple, inexpensive, and usually already sitting in your laundry room, quietly waiting for its moment.
Method 2: Dish Soap for Greasy, Waxy Lipstick Marks
Best for:
Oil-heavy lipstick stains, fresh smears, and fabrics that can handle a direct pretreatment.
Why it works
Dish soap is famous for cutting grease, and lipstick has plenty of it. This makes dish soap one of the most effective household remedies for lipstick on clothing, especially when the stain is new.
How to do it
- Remove the excess lipstick gently.
- Apply a small amount of liquid dish soap to both sides of the stained area, if possible.
- Let it sit for 20 to 30 minutes.
- For a deeper treatment, soak the garment in warm water with a little dish soap for an hour.
- Gently brush from the outside of the stain toward the center.
- Rinse well, then wash as usual.
This method is especially handy for the all-too-common “hug hello, ruin blouse instantly” situation. It is also beginner-friendly, which is useful when you are trying to solve a stain before leaving the house in seven minutes.
Method 3: Rubbing Alcohol for Pigment-Heavy Stains
Best for:
Bold, highly pigmented lipstick colors and stains that laugh at soap alone.
Why it works
Rubbing alcohol can help break down stubborn pigment while also cutting through some of the oily residue. It is a strong option for bright reds, berries, plums, and long-wear formulas.
How to do it
- Place a clean white towel or paper towel under the stain.
- Dab rubbing alcohol onto the stain with a cotton ball or clean cloth.
- Blot gently. Do not scrub like you are trying to erase your taxes.
- Move to a clean part of the cloth as the color transfers.
- Rinse and launder as usual.
Important: Always test rubbing alcohol on a hidden area first. On some delicate, dyed, or specialty fabrics, it can affect color.
Method 4: Oxygen Bleach Soak for Set-In Stains
Best for:
Older lipstick stains, stains that survived the first wash, and lingering pink or red shadow after pretreatment.
Why it works
When the oily part is mostly gone but color remains, oxygen bleach can help lift the leftover dye. It is usually safer for colors than chlorine bleach and is often recommended for washable fabrics when lipstick leaves behind a ghost stain.
How to do it
- Mix oxygen bleach with water according to the product directions.
- Submerge the garment completely.
- Let it soak for several hours or overnight.
- Wash as usual.
- If needed, repeat with a fresh solution before drying.
This is the method that often saves the “I already washed it once and now I regret everything” scenario. It is slow, but slow can still be heroic.
Method 5: Commercial Stain Removers for Quick, Convenient Cleanup
Best for:
Busy households, on-the-go emergencies, and people who prefer a product designed specifically for stain warfare.
Why it works
Commercial stain removers are formulated to break apart oils, waxes, and pigments efficiently. They can be especially useful when you catch the stain quickly or need something travel-friendly.
How to do it
- Blot or scrape away excess lipstick.
- Apply the stain remover according to the label directions.
- Allow the product to sit for the recommended amount of time.
- Wash in the warmest safe water for the fabric.
- Inspect before drying.
These products are great for offices, trips, weddings, and the general category of “not now, laundry chaos.” A stain remover pen or spray can be the difference between saving a shirt and turning a blazer sideways all afternoon.
Method 6: Solvent Method for Tough, Washable Fabrics
Best for:
Very stubborn stains on sturdy, washable fabrics when gentler methods have not fully worked.
Why it works
Some traditional stain-removal methods use a dry solvent, such as mineral spirits or acetone, to help dissolve the waxy base of lipstick before following with alcohol, dish soap, and detergent. This can be effective, but it is a more advanced approach and should be used carefully.
How to do it
- Use only on washable fabrics, not dry-clean-only garments.
- Work in a well-ventilated area.
- Apply a small amount of solvent to the stain with care.
- Gently tap with a soft brush.
- Flush with rubbing alcohol if appropriate.
- Follow with diluted dish soap or detergent.
- Wash according to the care label.
Use caution: This is a last-resort method for hardy fabrics. If the garment is delicate, expensive, sentimental, or labeled dry-clean-only, professional cleaning is the smarter move.
A Bonus DIY Option: Dish Soap, Baking Soda, and Vinegar
Some cleaning experts also recommend making a paste with dish soap and baking soda, applying it to the lipstick mark, and then adding a little vinegar to help loosen the stain before laundering. It can be a helpful home remedy when you want a stronger kitchen-cabinet approach, but it is still wise to patch-test first, especially on darker or more delicate fabrics.
What Not to Do When Removing Lipstick from Clothes
- Do not rub aggressively. You will spread the stain and grind it into the fibers.
- Do not toss it straight into the dryer. Heat can make a bad situation much more committed.
- Do not ignore the care label. Hotter is not always better if the fabric cannot take it.
- Do not use random cleaners without testing. Fabric damage is not a fun plot twist.
- Do not keep layering products without rinsing or reasoning. More chemistry is not always more progress.
How to Handle Different Fabrics
Cotton and polyester
These are usually the easiest to treat with detergent, dish soap, rubbing alcohol, or oxygen bleach if needed.
Denim
Often handles pretreatment well, but darker dyes should still be tested before using alcohol or a stronger product.
Silk, wool, cashmere, and other delicates
Proceed with caution. Test first, use gentler options, and avoid aggressive scrubbing. When in doubt, professional cleaning is your friend.
Dry-clean-only garments
Lift away solids, blot gently, and take the garment to the cleaner quickly. Do not begin a full home experiment on a dress labeled dry-clean-only unless you are feeling unusually adventurous and unusually lucky.
Which Lipstick Removal Method Is Best?
If you want the short answer, here it is:
- Best first step: Liquid laundry detergent
- Best household remedy: Dish soap
- Best for bold pigment: Rubbing alcohol
- Best for set-in stains: Oxygen bleach soak
- Best for convenience: Commercial stain remover
- Best last resort: Solvent method on sturdy washable fabrics
The “best” option depends on the age of the stain, the lipstick formula, and the fabric type. In real life, many successful removals happen in stages: scrape, pretreat, wash, inspect, repeat. It is less a single magic trick and more a smart sequence.
of Real-Life Experience: What Lipstick Stains Actually Teach You
People rarely search for how to remove lipstick from clothes during calm, organized, deeply centered moments. Usually, it happens in a rush. Someone is halfway dressed for work, late for dinner, traveling with one decent blouse, or getting ready for a family event where photographs will absolutely be taken forever. That urgency changes how people approach stain removal. They grab whatever is nearby, rub hard, panic a little, and hope for a miracle. In my experience, the biggest lesson is that lipstick stains reward patience far more than speed.
One of the most common stories goes like this: a bright red or berry lipstick brushes against a shirt collar while getting dressed. The first instinct is to wipe it with a tissue. Unfortunately, that quick swipe often spreads the stain into a larger, duller, more stubborn patch. People are surprised that the real fix starts with doing less, not more. Gently lifting the excess, blotting instead of rubbing, and treating the fabric methodically almost always works better than frantic cleaning.
Another very relatable experience is discovering the stain too late. Maybe the shirt already went through the wash. Maybe it even went through the dryer. At that point, the stain looks faint but oddly permanent, like the garment has developed a grudge. This is where people tend to give up too soon. In practice, many set-in lipstick stains can still be improved dramatically with an oxygen bleach soak or a second round of pretreatment. The stain may not disappear instantly, but persistence often beats panic.
There is also a big difference between cheap lipsticks, creamy balms, satin formulas, and long-wear matte products. Heavier, waxier formulas often respond well to dish soap because grease-cutting power matters. Highly pigmented formulas often need rubbing alcohol or a stain remover that can tackle dye. In other words, the experience teaches you to match the method to the mess. Laundry is annoyingly strategic sometimes.
People also learn quickly that fabric type changes everything. A cotton T-shirt is forgiving. A silk blouse is not. A machine-washable blend might bounce back beautifully after detergent and warm water. A delicate dress may require restraint and a good dry cleaner. One memorable pattern is how often people damage clothing not with the lipstick itself, but with the wrong removal method. Too much scrubbing, too much heat, or too much confidence can cause more trouble than the original smear.
Perhaps the most useful real-world lesson is this: lipstick stains feel dramatic, but they are usually manageable. Most people do not need a secret potion. They need the right order, the right product, and the discipline to keep the item out of the dryer until they are sure the stain is gone. Once you have successfully removed lipstick once or twice, the panic disappears. You stop seeing a ruined shirt and start seeing a fixable combination stain. That is a surprisingly empowering shift for something that began with a lipstick ambush on a Tuesday morning.
Final Thoughts
If you are dealing with a lipstick stain right now, do not declare the garment dead just yet. Start simple. Scrape gently, pretreat intelligently, wash carefully, and always inspect before drying. Most lipstick stains come out with a combination of patience and the right cleaner. Even stubborn stains often improve with a second round.
So yes, your shirt may have had a close encounter with a bold lip color. But with these methods, the fabric still has a fighting chance, and your laundry routine gets to keep its dignity.