Table of Contents >> Show >> Hide
- Why candle wax is such a pain to clean
- What to do first before cleaning any wax spill
- How to remove candle wax from table linens
- How to remove candle wax from hard surfaces
- Common mistakes that make candle wax stains worse
- How to keep future wax spills from becoming a cleanup event
- Real-life wax mishaps and lessons from everyday cleanup
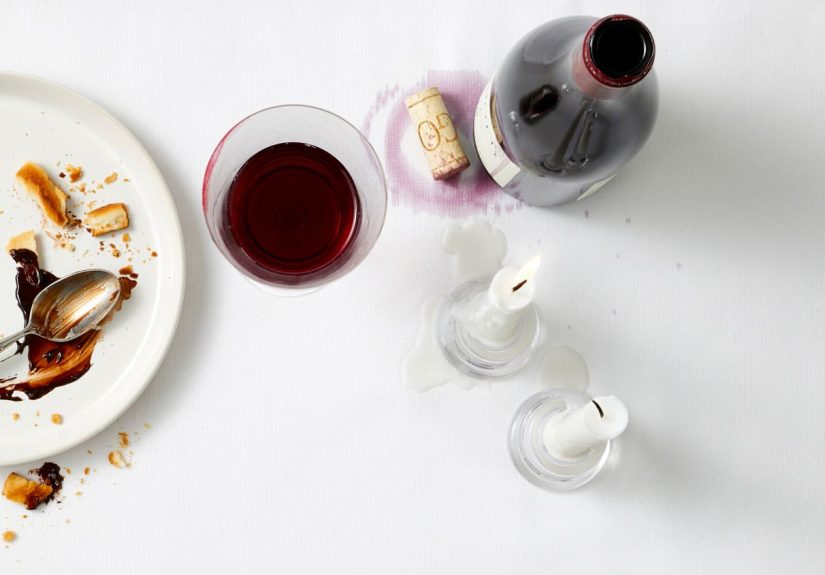
Few things ruin a lovely dinner-table moment faster than candle wax landing exactly where it should not. One second you are enjoying cozy lighting and pretending your dining room belongs in a glossy magazine. The next, a bright blob of wax is hardening on your favorite tablecloth or your wood table is wearing a crusty little wax helmet. Rude.
The good news is that candle wax stain removal is usually more annoying than difficult. The trick is knowing what not to do. Most cleanup disasters happen because people panic, grab a rag, and start wiping warm wax around like they are frosting a cake no one asked for. If you slow down and use the right method for the material, you can usually remove candle wax from table linens and hard surfaces without leaving a mess behind.
This guide breaks down how to get wax out of a tablecloth, how to clean candle wax from wood, glass, painted walls, and other hard surfaces, plus what to do when colored candle dye tries to stick around like an uninvited party guest.
Why candle wax is such a pain to clean
Wax is a double trouble stain. First, it hardens into a solid layer that clings to fabric fibers or surface texture. Second, many candles contain oils, fragrance, and dye, which means that even after the wax is gone, a shadowy stain can still remain. So if you only remove the chunky part and call it a day, the table linen may still look like it lost a fight with a cranberry-red taper candle.
That is why successful candle wax removal usually happens in two stages: remove the wax itself, then treat any leftover oily or colored residue.
What to do first before cleaning any wax spill
- Let the wax cool and harden. Do not wipe melted wax. That only spreads it farther.
- Speed things up with ice if needed. Put ice cubes in a plastic bag and hold it over the wax for a short time.
- Lift, do not gouge. Use a plastic card, plastic scraper, spoon, or dull knife. Save the steak knife energy for dinner, not cleanup.
- Match the method to the material. Fabric, wood, stone, glass, and wallpaper all behave differently.
- Spot-test when using stain removers. Especially on painted, delicate, vintage, or porous surfaces.
How to remove candle wax from table linens
Best method for cotton, linen, polyester blends, and most washable tablecloths
If you want to know how to remove candle wax from table linens without wrecking the fabric, this is the method most people should start with.
- Harden the wax. Let it cool completely, or use an ice bag for a few minutes.
- Scrape off the excess. Gently lift away as much hardened wax as possible with a credit card edge, spoon, or dull knife.
- Sandwich the stain with absorbent paper. Place the wax stain between plain white paper towels, brown paper, or a clean cotton cloth and a paper towel.
- Use low heat. Press with an iron on the lowest setting, with no steam. Keep the iron moving and replace the paper as it absorbs wax.
- Pretreat the remaining mark. Use a heavy-duty liquid detergent, enzyme stain remover, or a small amount of rubbing alcohol if the dye lingers.
- Wash according to the care label. Use the warmest or hottest water that is safe for the fabric.
- Air-dry and inspect. Never toss it straight into the dryer if a stain remains, because heat can set residue.
This method works because low heat pulls embedded wax out of the fibers and into the paper. It is simple, effective, and far less dramatic than trying to scrub wax out by hand for half an hour while muttering about candles never again.
How to remove dye stains after the wax is gone
Colored candles are the overachievers of the stain world. Even after the wax disappears, the dye may still hang on. If that happens, pretreat the spot and wash again. For washable white or colorfast linens, an oxygen bleach soak can help lift the remaining discoloration.
Picture this: a deep red holiday candle drips onto a white cotton tablecloth. You scrape, iron, and wash, and the wax is gone, but a faint pink halo remains. That is not failure. That is the cue for a second round with stain treatment or an oxygen bleach soak, followed by another wash and air-dry check.
What not to do on table linens
- Do not use high iron heat, especially on synthetics.
- Do not rub fresh wax with a cloth or sponge.
- Do not dry the tablecloth until you are sure the stain is gone.
- Do not use random DIY solvents on delicate fibers without testing first.
What about silk, velvet, lace, or dry-clean-only table linens?
For delicate or dry-clean-only fabrics, remove only the loose hardened wax and stop there. That is not giving up. That is being smart. These materials can distort, discolor, or lose texture when hit with the wrong amount of heat, water, or stain remover. If the label says dry clean only, your safest move is to take the item to a professional cleaner and point out the spot.
How to remove candle wax from hard surfaces
Hard surfaces are a mixed bag. Some are forgiving, some are fussy, and some look sturdy while secretly behaving like divas. Here is how to remove wax without making a second problem.
Wood tables and finished furniture
Wood is one of the most common places for candle wax mishaps, especially on dining tables, mantels, and sideboards. The goal is to lift the wax without scratching the finish.
- Let the wax harden, or use ice in a plastic bag.
- Gently pop it off with a plastic card or plastic scraper.
- If a thin film remains, soften it with a hair dryer on low.
- Wipe with a soft cloth as the wax loosens.
- Buff the area dry.
Never attack wood with a metal scraper. That is how a tiny wax drip turns into a permanent “what happened here?” story. On unfinished wood, be even more careful, because wax can settle into the grain. In those cases, a very light touch matters more than speed.
Glass, ceramic, and metal
These surfaces are usually easier. Once the wax hardens, it often pops off cleanly. For candleholders, trays, or removable decor pieces, you can chill them in the freezer so the wax contracts and releases more easily. If the piece can safely handle heat and water, warm soaking can also loosen wax.
After the wax lifts, wash the surface with warm soapy water and dry it thoroughly. If a greasy haze remains on glass, buff with a clean microfiber cloth. This is one of the few times a wax cleanup can end without emotional damage.
Stone, laminate, and sealed counters
For quartz, sealed granite, laminate, or similar countertops, start with the same basic rule: harden, lift gently, and avoid sharp tools. Use a plastic scraper or old card, then wipe the surface clean with a damp microfiber cloth and a mild cleaner that suits the finish.
Avoid overdoing the heat. A hair dryer on low is usually enough if needed. You do not need to roast your countertop like a Thanksgiving turkey. Also avoid abrasive powders unless the manufacturer specifically says the surface can handle them.
Painted walls
Wax on a painted wall looks alarming, but it is often fixable. The safest method is gentle heat plus gentle lifting.
- Use a hair dryer on low or medium from several inches away to soften the wax.
- Lift softened wax with a plastic spoon, a very thin plastic scraper, or a rag.
- Wipe away residue with a barely damp microfiber cloth.
- Dry and buff the wall.
Do not scrub aggressively, and do not soak drywall or sheetrock. Painted walls can survive a careful cleanup, but they do not appreciate enthusiasm.
Wallpaper
Wallpaper calls for the gentlest touch of all. Start with ice in a plastic bag to harden the wax, then see if it will lift with the edge of a credit card. If a thin residue remains, use layered paper towels and the lowest iron setting very briefly, checking often. Too much heat or moisture can damage the paper or adhesive, so slow and careful wins.
Common mistakes that make candle wax stains worse
- Wiping hot wax: spreads the mess deeper into fabric or across the surface.
- Using a sharp blade: risks gouging wood, scratching glass, or damaging finishes.
- Cranking the iron too high: can scorch fabric or melt synthetic fibers.
- Skipping stain treatment: leaves oily or colored residue behind.
- Using the dryer too soon: sets what could have been an easy stain.
- Treating all surfaces the same way: what works on a cotton tablecloth may be terrible for wallpaper or unfinished wood.
How to keep future wax spills from becoming a cleanup event
You do not need to break up with candles. You just need better boundaries.
- Use stable candleholders that catch drips.
- Place candles on trays, coasters, or heat-safe plates.
- Trim the wick to reduce smoking and uneven burning.
- Keep candles away from drafts, fans, and busy elbows.
- Let candles cool fully before moving them.
- For special dinners, put something washable or protective under every candle. Future-you will be thrilled.
Real-life wax mishaps and lessons from everyday cleanup
The most useful thing to understand about candle wax cleanup is that the real challenge is rarely the wax itself. It is the timing, the surface, and the moment of panic. In real homes, wax usually lands in one of three situations: during a holiday dinner, during a power outage, or during a perfectly normal evening when somebody thought a slightly leaning taper candle looked “kind of charming.” It did not. It was plotting.
One of the most common scenarios is the classic white tablecloth and colored candle combo. At first glance, it looks catastrophic. But in practice, the cleanup often goes well if the person cleaning it does not rush. The wax hardens, most of it comes off easily, and the remaining issue is usually the dye. That is why so many people think the method “didn’t work” when really they stopped one step too early. Wax removal and stain removal are related, but they are not the same job.
Wood tables bring a different kind of stress because people worry, reasonably, about ruining the finish. The good news is that wax usually sits on top of a sealed finish rather than becoming part of it. That means patience matters more than force. A plastic card, low heat, and a soft cloth are often enough. The people who get into trouble are usually the ones who grab a metal utensil and try to pry the wax off in one satisfying swoop. Satisfaction is temporary. Scratches are not.
Another real-life pattern shows up after celebrations. Someone blows out candles, warm wax splatters, and the mess is not discovered until the next morning. Oddly enough, that delay can help. Hardened wax is easier to remove cleanly than soft wax, so a next-day cleanup is often easier than a same-minute cleanup. This is one of those rare household moments where procrastination accidentally looks like wisdom.
Hard surfaces also teach an important lesson: “hard” does not mean “indestructible.” Wallpaper can tear. Painted drywall can scuff. Stone can dull if the wrong cleaner is used. Even glass can be weakened by careless scraping. The safest cleanup is usually the least dramatic one. Gentle heat, gentle lifting, gentle wiping. Not glamorous, but effective.
And then there is the emotional side of wax spills, which is real. People tend to assume the item is ruined, especially if the spill happened on heirloom linens, holiday decor, or a dining table they saved up for. In many cases, it is not ruined at all. It just needs a calm, layered cleanup. That is the big takeaway from everyday experience: candle wax looks worse than it usually is. If you avoid panic, avoid high heat, and avoid aggressive scraping, you have a very good chance of saving both the surface and your mood.


