Table of Contents >> Show >> Hide
- Quick Reality Check: What You’re Actually Removing
- Safety First (Yes, Even If You “Never Get Hurt”)
- Tools & Supplies Checklist
- Step-by-Step: Remove the Vinyl Flooring
- Step-by-Step: Remove the Plywood Layer (Underlayment or Subfloor)
- Troubleshooting: Common Headaches (and How to Outsmart Them)
- Disposal and Cleanup
- Common Mistakes to Avoid
- Conclusion
- Extra: Real-World “Been There” Experiences (So You Don’t Have To)
- Experience #1: “It peeled up great… for exactly two feet.”
- Experience #2: “The floor is off, but the adhesive is… forever.”
- Experience #3: “Surprise! There’s a thin plywood layer I didn’t know existed.”
- Experience #4: “The plywood is swollen and crumbling near the toilet/dishwasher.”
- Experience #5: “I found black adhesive and now I’m nervous.”
- Experience #6: “The last 10% took 90% of the time.”
Removing vinyl flooring sounds like a “Saturday morning” project until you realize it’s been glued down by a
previous homeowner’s hatred of free time. Add a plywood layer underneath, and now you’ve got a full-on demo day:
cutting, prying, scraping, and discovering at least three mysterious fasteners that appear to be held in place by
dark magic.
The good news: you can absolutely DIY this if you plan well, work safely, and accept one universal truthyour knees
will be negotiating for better working conditions by hour two. This guide walks you through removing vinyl
(sheet, tile, or plank) and then removing the plywood layer below (often underlayment, sometimes the actual
structural subfloor), with practical tips to keep the mess down and the “oops” moments rare.
Quick Reality Check: What You’re Actually Removing
Before you start ripping and roaring, figure out what layers you have. Many vinyl floors are installed over a thin
plywood underlayment (often 1/4″ to 3/8″) that sits on top of the real
subfloor (commonly 5/8″ to 3/4″ plywood/OSB attached to joists). People casually call both “subfloor,”
which is how DIYers end up removing more floor than they plannedsurprise!
- Vinyl plank (click-lock/floating): Usually comes up fairly cleanly.
- Vinyl tile or sheet vinyl (glued): Removal depends on adhesive type, age, and your luck.
- Plywood underlayment: Typically fastened with a galaxy of staples, nails, or screws.
- Structural subfloor: Fastened into joists; removal is bigger work and may affect walls/fixtures.
A simple way to confirm layers is to remove a floor register/vent cover or threshold strip and peek at the edge.
If you see vinyl + thin plywood + thicker plywood/OSB, you’ve got underlayment over subfloor.
Safety First (Yes, Even If You “Never Get Hurt”)
1) Watch out for asbestos in older floors and adhesives
If your home is older (especially mid-century through late 1970s), treat unknown vinyl tile, backing, and black
adhesive (“cutback” mastic) as suspicious until proven otherwise. If asbestos is a possibility, avoid aggressive
methods that create dust (like sanding or grinding). When in doubt, consider professional testing before demo.
It’s cheaper than turning your remodel into a hazmat-themed season of reality TV.
2) Gear up like you mean it
- Eye protection: Pry bars send staples and wood chips flying with enthusiasm.
- Gloves: Splinters and sharp vinyl edges are petty and relentless.
- Hearing protection: Recip saws and oscillating tools are loud enough to anger your neighbors’ pets.
- Respiratory protection: At minimum a quality dust mask; consider a respirator for heavy dust/adhesive work.
- Knee pads: Not optional unless you enjoy pain as a hobby.
3) Control dust and debris
Close doors, hang plastic sheeting if needed, and keep a shop vac handy (HEPA-rated is ideal). Demo creates
debris that travels like it has airline status. Also: remove or protect HVAC returns in the room so your ductwork
doesn’t become a souvenir collector.
Tools & Supplies Checklist
- Utility knife + plenty of blades
- Flat pry bar / wonder bar + a bigger pry bar for “serious discussions”
- Hammer or small sledge (2–5 lb is a sweet spot)
- Floor scraper (hand scraper) and/or long-handled scraper
- Oscillating multi-tool (great for tight edges and flush cutting)
- Cordless drill/driver or impact driver (for screws)
- Reciprocating saw (optional but handy for cutting stubborn fasteners)
- Circular saw (for cutting plywood into sectionsset depth carefully)
- Cat’s paw nail puller / end nippers / locking pliers (for nails and staples)
- Chalk line or painter’s tape + marker (to mark joists/cut lines)
- Contractor trash bags, debris buckets, and a plan for disposal
Step-by-Step: Remove the Vinyl Flooring
Step 1: Prep the room (you’ll thank yourself later)
- Remove furniture and appliances (or move them completely out of the work zone).
- Take off baseboards and shoe molding if you can do so without destroying them.
- Pull floor vents/register covers and inspect edges for layers.
- Remove thresholds/transition strips at doorways.
Step 2: Figure out how the vinyl is installed
Vinyl generally falls into two worlds: floating (click-lock planks) or
bonded (glued sheet/tile). Your strategy depends on which one you’ve got.
If it’s click-lock (floating) vinyl plank
- Start at an edge or doorway. Remove any quarter round first so the floor can lift.
- Look for the seam direction. Planks usually unclick easier in one direction than the other.
- Lift and angle a plank to disengage the tongue-and-groove, then work row by row.
- Stack planks neatly if you’re trying to salvage them (otherwise, into the demo pile they go).
Floating floors often have an underlayment pad. Roll it up and discard if it’s torn, dirty, or compressed.
If it’s glued-down vinyl (sheet vinyl or vinyl tile)
Your main job is to break the vinyl into manageable pieces and then separate it from the adhesive without
destroying the layer underneath (unless you’re replacing that plywood anywaythen you can get more aggressive).
Option A: Remove vinyl only (trying to keep the plywood underneath intact)
- Cut the floor into strips: Use a utility knife to score 6–12 inch wide strips. Replace blades often.
- Start at a loose spot: Corners, doorways, or seams are your best friends.
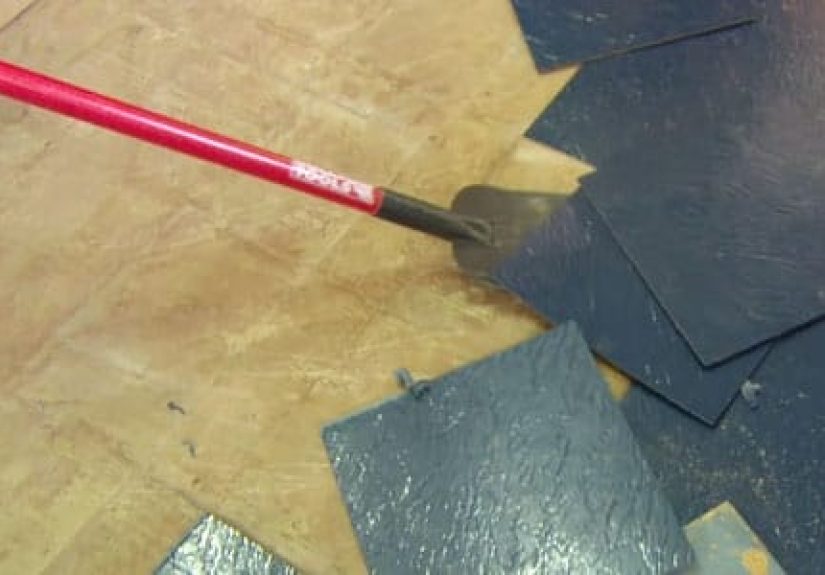
- Peel and scrape: Pull up a strip while sliding a floor scraper underneath to release adhesive.
- Use gentle heat if needed: A heat gun can soften stubborn adhesive. Warm the vinyl as you pulldon’t roast it.
- Work in sections: Keep pieces small enough that you’re not wrestling a floppy, gluey carpet of regret.
Option B: Remove vinyl + plywood together (common and often faster)
If the vinyl is glued to a thin plywood underlayment, sometimes the fastest approach is to remove the underlayment
panels with the vinyl still attached. This is especially useful when the adhesive is tenacious or the plywood is
damaged (water stains, swelling, mold, soft spots).
- Locate the plywood seams (often every 4 feet, sometimes smaller panels).
- Remove fasteners (screws first, then tackle staples/nails as needed).
- Pry up the plywood in sections, lifting the vinyl and underlayment as one unit.
Step 3: Deal with adhesive and backing
After vinyl comes up, you may face paper backing, residual glue, seam sealer, or mystery goo. What you do next
depends on your plan:
- Installing new vinyl or laminate: You typically need a smooth, clean surfaceleftover ridges can telegraph through.
- Installing tile: Follow your underlayment requirements (cement board or uncoupling membrane) and manufacturer specs.
- Replacing plywood anyway: Don’t spend hours scraping perfection out of something you’re removing.
For stubborn adhesive on plywood, many DIYers use scraping plus heat, or an adhesive remover appropriate for flooring
(follow label directions, ventilate well, and keep ignition sources away). Avoid sanding/grinding unknown adhesives,
especially in older homes where asbestos-containing materials may be present.
Step-by-Step: Remove the Plywood Layer (Underlayment or Subfloor)
Step 1: Identify whether it’s underlayment or structural subfloor
Underlayment is usually thinner and fastened frequently (staples everywhere). It may not run under
walls. Structural subfloor is thicker, attached to joists, and runs under walls (because it’s part
of the floor system). If you’re removing the structural subfloor, plan for a more involved job: you may need to
work around plumbing, walls, cabinets, and tubs.
Step 2: Remove fasteners (and yes, there are more than you think)
- Screws: Use an impact driver and the correct bit. Clear debris from heads so you don’t strip them.
- Nails: Pry up panels; remove remaining nails with a cat’s paw or nail puller.
- Staples: Underlayment staples are the worst. Pull them with end nippers/pliers or snap them off if allowed by your next-floor plan.
Pro tip: run a scraper or pry bar across the surface as you go. If it “clicks,” you’ve found a fastener waiting
to ruin your day.
Step 3: Cut the plywood into manageable sections (the “work smarter” move)
If the plywood won’t lift in sheets, cut it into smaller rectangles. A circular saw makes quick work of thisbut
only if you set the depth correctly.
- Set saw depth: Match the plywood thickness (or slightly less). You want to cut plywood, not joists, pipes, or wires.
- Mark joists: If removing structural subfloor, locate joists (stud finder from below, basement access, or measuring from known framing). Snap chalk lines.
- Make cut lines: Aim to cut along the center of joists so the new subfloor edges land on framing.
- Stay back from walls: Use an oscillating multi-tool near edges where a circular saw can’t safely reach.
Step 4: Pry up the plywood
- Start at a cut edge or seam. Drive a flat bar underneath and lift.
- Switch to a larger pry bar for leverage. Use a wood block as a fulcrum to protect joists or finished surfaces.
- If nails won’t release, use a reciprocating saw with a metal-cutting blade to cut fasteners between plywood and joists.
- Remove panels and stack debris out of the way to avoid stepping on fasteners (your shoes are not magnet-proof).
Step 5: Clean up and inspect what’s underneath
Once plywood is out, you’ve earned a pause. Use it to inspect:
- Joists: Look for cracks, rot, or notches from old plumbing/electrical work.
- Moisture damage: Bathrooms and kitchens often have softened areas near toilets, sinks, and dishwashers.
- Mold/mildew: Address the moisture source first. Replacing wood without fixing leaks is just renting problems by the month.
- Fasteners: Pull or hammer down leftover nails/staples so the new subfloor sits flat.
Troubleshooting: Common Headaches (and How to Outsmart Them)
The vinyl tears into tiny strips
That usually means strong adhesive or a backing layer that’s separating. Try smaller strips, more scraping angle,
and gentle heat. If you’re removing the plywood anyway, consider the “remove both together” approach.
The plywood won’t budge
Either you missed fasteners (likely), it’s glued (possible), or it’s swollen and jammed tight (also possible).
Use a scraper to locate nails/screws, then cut the plywood into smaller pieces and pry from multiple edges.
A surprise layer appears (hardwood, tile, or another vinyl floor)
Congratulations, your house is a lasagna. Slow down and decide what the final floor system will be. Sometimes
older hardwood can be saved; other times it’s too damaged. This is a decision pointdon’t demo on autopilot.
There are a billion staples (scientific estimate)
Underlayment staples can be removed with end nippers (grab, rock, pull) or a dedicated staple puller. For rusty or
stubborn staples, heat can help soften any adhesive and make pulling easierbut keep safety in mind and don’t
scorch anything.
Disposal and Cleanup
- Bag and contain debris: Vinyl and adhesive scraps are messy. Heavy-duty contractor bags help.
- Watch sharp waste: Staples and nails pierce bags easilyuse buckets or double-bag if needed.
- Follow local rules: Some areas have special disposal requirements for construction debris (and especially for suspected asbestos materials).
- Final vacuum: Vacuum thoroughly and wipe remaining dust before installing anything new.
Common Mistakes to Avoid
- Setting the saw too deep: Cutting a joist is an expensive way to learn humility.
- Skipping fastener checks: One missed screw can make a panel feel “glued” when it’s just stubborn.
- Over-scraping a plywood surface you’re keeping: Gouges and divots can telegraph through new vinyl.
- Ignoring moisture damage: Fix leaks first, then rebuild. Otherwise, you’re installing new wood into a future swamp.
- Creating unnecessary dust: Demo dust spreads everywhereand older materials may require extra caution.
Conclusion
Removing a vinyl floor and the plywood layer beneath it is equal parts technique and tenacity. Cut the vinyl into
manageable pieces, use scraping and heat strategically, and don’t waste time “perfectly cleaning” a surface you’re
planning to remove. When it’s time for plywood, focus on fasteners first, then cut panels into sections and pry
them up with controlnot rage. (Rage is allowed, but it’s not a tool.)
If you plan carefully, wear the right protection, and respect what might be lurking in older adhesives, you’ll end
up with a clean, solid base ready for the next stepwhether that’s new subfloor, underlayment, or your dream
finished flooring.
Extra: Real-World “Been There” Experiences (So You Don’t Have To)
Every demo job looks straightforward in a 30-second clip online. Real life is… longer. Here are a few common
experiences DIYers report when removing vinyl flooring and plywood layers, along with what usually works best.
Experience #1: “It peeled up great… for exactly two feet.”
The first couple of strips come up like a dream, and you start thinking, “Wow, I’m basically a contractor.”
Then you hit the glued perimeter and the whole vibe changes. This is incredibly common with sheet vinyl: installers
often glue edges more aggressively to prevent curling. The fix is to stop trying to peel giant sections. Cut
narrower strips, keep your scraper sharp, and use gentle heat along the edge as you pull. If you’re keeping the
plywood, work at a low angle so you don’t gouge it. If you’re replacing it, you can be less precious and focus on
speed and control.
Experience #2: “The floor is off, but the adhesive is… forever.”
Old adhesive can feel like it was mixed with superglue and spite. Many people lose hours trying to achieve a
perfectly bare plywood surface when they don’t actually need it. The smarter move is to decide what your next
floor requires. New vinyl and laminate often need smoothness more than “bare wood,” meaning you can scrape down
ridges and high spots rather than erase every stain of glue. For tile, you’ll usually install a proper tile
underlayment system anyway. If you’re swapping the plywood out, stop scraping and start removing the plywood.
The goal is progress, not suffering.
Experience #3: “Surprise! There’s a thin plywood layer I didn’t know existed.”
This is one of the most common discoveries: vinyl installed over a thin plywood underlayment stapled every few
inches. People assume the vinyl is glued directly to the structural subfloorthen wonder why there are 10,000
staples. In this scenario, removal is usually faster if you treat the underlayment as disposable: cut the plywood
into 2′ x 2′ (or similar) sections, pry it up, and deal with staples afterward. An oscillating tool is a hero near
walls and cabinets, and end nippers make staple pulling less miserable. Less. Not “fun.” Just less.
Experience #4: “The plywood is swollen and crumbling near the toilet/dishwasher.”
Water damage changes everything. Swollen plywood loses strength, breaks apart, and refuses to lift in neat sheets.
Here, cutting into smaller sections is your best friend. Use a circular saw set to the plywood thickness and cut
a grid pattern, then pry out pieces. If the damage is near plumbing, be extra cautious with saw depth and tool
placement. Once you open it up, don’t just replace woodidentify the moisture source and fix it. Many DIYers
discover a slow toilet wax ring leak or a dishwasher supply line drip that’s been quietly ruining the floor for
months or years. Repairing the cause is what turns “redo this again later” into “done.”
Experience #5: “I found black adhesive and now I’m nervous.”
That nervous feeling is your brain doing its job. Black mastic and older floor systems can raise asbestos concerns,
and the worst response is to panic-sand it into the air. Many homeowners choose to avoid disturbing questionable
materials and instead remove layers in a way that minimizes dust, or hire a pro for testing/abatement decisions.
Even if your plan is DIY, the safest approach is to avoid aggressive dust-making methods and keep the work area
controlled and well-ventilated. The win isn’t “fastest demo”; the win is “healthy household with a great new
floor.”
Experience #6: “The last 10% took 90% of the time.”
This is the law of demo physics. The first part is dramatic and satisfying; the last part is scraping, pulling,
and hunting hidden fasteners like you’re on a treasure hunt with the worst prize. The trick is to plan for it:
break work into stages, keep blades sharp, rotate tasks (scrape for 20 minutes, pull fasteners for 20 minutes),
and clean as you go so you’re not working on top of debris. Many DIYers also discover that a rented floor scraper
machine can be worth it for large glued areasespecially when you value your time and would prefer your wrists to
remain functional for the rest of your life.


