Table of Contents >> Show >> Hide
- First, Know Your Quartz (So You Don’t Fight the Wrong Battle)
- Safety Before Shine (Because Quartz Dust Is Not a Cute Accessory)
- Choose Your Method: Tumbler, Hand Polish, or Machine
- Method A: How to Polish Quartz Crystals in a Rock Tumbler
- What you’ll need
- Step 1: Sort and inspect your quartz
- Step 2: Coarse grind (shape and remove roughness)
- Step 3: Medium grind (remove coarse scratches)
- Step 4: Fine grind / pre-polish (the shine setup)
- Step 5: Polish (where the magic finally happens)
- Step 6: Burnish (optional, but often worth it)
- Big tumbler rule: Don’t dump slurry down drains
- Method B: How to Hand Polish Quartz Crystals (Wet Sanding + Final Polish)
- Method C: Machine-Assisted Polishing (Diamond Pads, Lapidary Wheels, or a Small Rotary Tool)
- Troubleshooting: Why Your Quartz Still Looks Dull
- Care and Storage: Keep That Shine Longer
- Real-World “Been There” Moments: What Polishing Quartz Usually Feels Like (About )
- Conclusion
Quartz crystals are basically nature’s glass sculpturesexcept tougher, moodier, and way more likely to
humble you with the phrase “Wait… why is it still cloudy?” The good news: quartz can take a gorgeous,
bright polish. The not-so-bad news: getting there is mostly a game of patience, clean habits, and not
skipping grits like a movie recap on 2× speed.
This guide pulls together practical lapidary best practices and safety guidance commonly recommended by U.S.
rock tumbling suppliers, gem/lapidary educators, and workplace safety agencies. You’ll learn three reliable
approachesrock tumbler polishing, hand polishing, and machine-assisted polishingso you can pick the method
that fits your crystal, your budget, and your tolerance for “grit in places grit should never be.”
First, Know Your Quartz (So You Don’t Fight the Wrong Battle)
Quartz is hardgreat for jewelry, stubborn for polishing
Quartz ranks about a 7 on the Mohs hardness scale, which means it resists scratching better than many common
materialsbut it also means you need abrasives that can actually do the job. That’s why quartz polishing
usually relies on silicon carbide (for shaping and sanding), diamond abrasives (especially for faster cutting),
and polishing compounds like cerium oxide or aluminum oxide to create that final shine.
Polish problems are usually scratch problems
If your crystal looks hazy after “polishing,” it’s rarely cursed. It’s usually one of these:
- Leftover scratches from a lower grit you didn’t fully remove.
- Contamination (a rogue coarse grit particle hitchhiking into your fine stage).
- Uneven surfacespits, fractures, and natural texture won’t magically disappear.
- Wrong polish for the job or not enough time in the polish stage.
Safety Before Shine (Because Quartz Dust Is Not a Cute Accessory)
Polishing quartz can create respirable crystalline silica dust if you grind or sand it dry. Safety guidance in the
U.S. commonly emphasizes wet methods (using water at the point of contact) and good ventilation or dust collection
to keep dust out of the air. In plain English: work wet whenever possible, and keep your workspace
clean in a way that doesn’t kick dust back up.
- Wet sanding / wet grinding: Use water so dust becomes slurry instead of airborne particles.
- Eye protection: Tiny grit + water spray + eyes = bad math.
- Mask/respirator (especially for any dry dust): If you must do any dry cleanup, avoid sweeping; use wet wiping or a HEPA vacuum.
- Skin protection: Extended wet work and compounds can irritate skingloves help.
- Age note: If you’re under 18, use adult supervision for power tools and grinders.
Choose Your Method: Tumbler, Hand Polish, or Machine
Method A: Rock tumbler (best “set it and forget it” option)
Tumbling is the most beginner-friendly way to polish small to medium quartz pieces. It’s slower, but it’s consistent,
and it avoids the “one wrong angle and you flat-spot the whole crystal” problem.
Method B: Hand polish (best for one special piece)
Hand polishing is great for a single crystal you want to keep in a natural shape (and you don’t want it bouncing
around in a tumbler like a marble in a dryer).
Method C: Machine-assisted (fastest, but needs practice)
If you have diamond pads, a cabbing setup, or a lapidary polisher, you can get a brilliant finish quicker. But this
method demands careful grit progression, clean technique, and attention to heat and pressure.
Method A: How to Polish Quartz Crystals in a Rock Tumbler
What you’ll need
- Rotary tumbler (or vibratory tumbler) sized for your stones
- Silicon carbide grit stages (commonly: coarse, medium, fine/pre-polish)
- Polish (often cerium oxide or a quality aluminum oxide polish)
- Plastic strainer and bucket (not your kitchen sink’s best friend)
- Soft brush/toothbrush for cleaning crevices
- Optional: plastic pellets or ceramic media (cushioning and better tumbling action)
Step 1: Sort and inspect your quartz
Choose pieces that are similar hardness (quartz with quartz is perfect) and avoid tumbling fragile crystals with deep
fractures unless you’re okay with chips. Mixed sizes are good, but avoid huge size gaps (a boulder and pebbles can
become “boulder wins”).
Step 2: Coarse grind (shape and remove roughness)
Load the barrel about 2/3 full with quartz. Add water to the typical level recommended by your tumbler instructions
(many guides suggest water just below or around the top of the rocks). Add a coarse silicon carbide grit (commonly
around 60/90 for rotary tumbling).
Run time varies by tumbler and roughness, but this stage often takes the longest. Check weekly. Your goal is smooth
edges and a consistent surfacebecause polish won’t hide deep pits; it will just make them look… shiny-pitted.
Step 3: Medium grind (remove coarse scratches)
Rinse thoroughly. Then run a medium grit stage (often around 120/220). This is where you’re replacing deep scratches
with smaller scratches. It sounds pointless until you realize polishing is basically “shrinking scratches until your
eyeballs give up.”
Step 4: Fine grind / pre-polish (the shine setup)
Clean again (seriously). Then run fine grit (often around 500/600). If you’re using a vibratory tumbler, your stage
setup may be fewer steps, but the idea is the same: remove previous scratches completely before moving on.
Step 5: Polish (where the magic finally happens)
Move to polish only when the stones look uniformly smooth with no visible scratches under good light. For quartz,
common polish choices include cerium oxide or high-quality aluminum oxide.
Many tumbling resources emphasize that quartz often benefits from cushioning media (like plastic pellets) in the
later stages to reduce bruising and improve luster.
Step 6: Burnish (optional, but often worth it)
If your stones look a little dull from polish residue, a short “burnish” run can help: clean barrel, clean stones,
then tumble briefly with water and a tiny amount of mild soap. This helps lift leftover filmwithout introducing a
chemistry experiment into your life.
Big tumbler rule: Don’t dump slurry down drains
Grit slurry can harden like cement. Let it settle in a bucket, dispose of solids appropriately, and keep plumbing
out of your hobby budget.
Method B: How to Hand Polish Quartz Crystals (Wet Sanding + Final Polish)
What you’ll need
- Wet/dry sandpaper (a range like 220, 400, 600, 800, 1200, 2000, 3000 is a practical start)
- A small tray/bowl of water for wet sanding
- Soft cloths (microfiber works well)
- Polishing compound (cerium oxide or aluminum oxide)
- Felt pad or soft polishing cloth
- Optional: diamond hand pads for faster cutting
Step 1: Clean the crystal
Use warm water, mild dish soap, and a soft brush. Dirt and grit on the surface can create new scratches while you’re
trying to remove old oneskind of like washing a car with sandpaper. (Which, to be fair, is exactly what you’re about
to dojust with a plan.)
Step 2: Start with the lowest grit that matches the damage
If the quartz is rough or scratched, start around 220–400. If it’s already fairly smooth, you might start higher.
Work wet, using light pressure. Sand in one direction for a bit, then change direction slightly so you can see when
the previous scratch pattern is gone.
Step 3: Progress through grits (and don’t skip)
Move up gradually: 600 → 800 → 1200 → 2000 → 3000 (or similar). Your job at each grit is to erase the scratches from
the grit before it. If you skip, you’re basically asking your polishing compound to do a sanding job it was not hired
to do.
Step 4: Rinse obsessively between grits
This is where most hand polishers win or lose. Rinse the crystal, your hands, and the sanding surface between grits.
One coarse particle can re-scratch the surface and send you back a step.
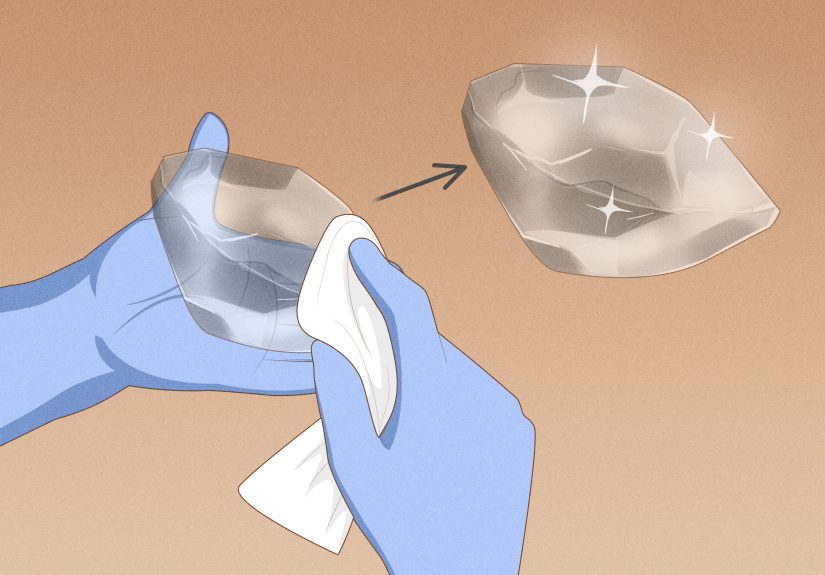
Step 5: Final polish with cerium oxide (or aluminum oxide)
Make a thin slurry (think “milk,” not “peanut butter”) with water and a small amount of polishing powder. Apply it to
a felt pad or soft cloth and rub in small circles with gentle, steady pressure. Keep it slightly damp; too dry can
cause drag and micro-scratches, too wet can wash the polish away before it works.
Step 6: Buff and inspect under strong light
Wipe clean, then check under a bright lamp. If you see a cloudy area, it usually means you still have fine scratches.
Go back one grit (often 1200 or 2000), refine, then polish again.
Method C: Machine-Assisted Polishing (Diamond Pads, Lapidary Wheels, or a Small Rotary Tool)
Best for
- Flat faces, points, or edges you want more uniform
- Faster scratch removal than hand sanding
- People who enjoy gadgets (and cleaning those gadgets)
General step sequence
Use a grit progression that makes sense for quartz: start with a cutting stage (often diamond or silicon carbide),
then refine with increasingly fine abrasives, then finish with an oxide polish.
Tips that prevent heartbreak
- Keep it wet: Water reduces dust and helps prevent heat stress and cracking.
- Use light pressure: Let abrasives workheavy pressure can cause new scratches or flat spots.
- Slow and steady: Rushing is how you get a “polished… but only on the left side” crystal.
- Dedicated pads: Don’t use the same pad for multiple grits; contamination kills shine.
- Finish with cerium oxide: Quartz often responds beautifully to cerium oxide on felt or a suitable lap/pad.
Troubleshooting: Why Your Quartz Still Looks Dull
1) “It’s cloudy even after polish.”
- Most likely: leftover scratches from earlier grits.
- Fix: step back one grit (or two), refine longer, then re-polish.
2) “It was shiny… then got hazy after rinsing.”
- Most likely: polish residue or hard-water film.
- Fix: burnish briefly (tumbler) or wash with mild soap and buff dry (hand/machine).
3) “Random new scratches showed up out of nowhere.”
- Most likely: grit contamination between stages.
- Fix: separate tools per grit, deep-clean between steps, and keep your workspace organized.
4) “The surface has tiny pits that won’t disappear.”
- Most likely: natural texture, fractures, or vugs in the quartz.
- Fix: accept some natural character, or reshape deeper in coarse stages to remove pits (if the crystal shape allows).
Care and Storage: Keep That Shine Longer
- Clean gently: Mild soap and water, then dry with a soft cloth.
- Avoid mystery chemicals: If you can’t pronounce it and it came from a garage shelf, don’t put it on your quartz.
- Store smart: Quartz can scratch softer minerals (and can be scratched by harder ones). Use separate pouches if you store multiple stones together.
Real-World “Been There” Moments: What Polishing Quartz Usually Feels Like (About )
Most people’s first quartz polishing experience follows a predictable emotional arcsort of like a sports movie, but
with more buckets. It usually starts with optimism: you rinse a crystal, hold it up to the light, and think,
“This is going to look like a museum piece by dinner.” Then quartz gently reminds you that time is a social construct.
Early on, the biggest surprise is how much of polishing is actually not polishing. The “wow” shine at the end
depends on the boring middle: removing scratches you can’t always see until the light hits just right. People often
report a moment of confusion when they move to a finer grit and the stone looks worse, not better. That’s normal.
Coarser grits can leave a surface that looks “clean,” but the finer grit reveals a uniform hazemeaning you’re finally
seeing the scratch pattern you’re supposed to remove next. Quartz isn’t trolling you; it’s just honest.
Another classic moment: the Great Contamination Mystery. You’re doing everything rightso you thinkand then, suddenly,
new scratches appear in the final stages like they spawned from the void. In reality, it’s almost always a tiny piece of
coarse grit hiding in a crack, a reused container that wasn’t truly clean, or a “helpful” towel that previously met
sandpaper. Hobbyists often learn to treat each grit stage like it’s a separate food allergy: keep it isolated, label
things, and don’t cross-contaminate.
If you tumble quartz, you’ll probably discover that the barrel becomes a personality in your home. It hums quietly in
the background, and you start timing life events by stages: “Oh, that happened during medium grit week.” Opening the
tumbler after a long run can be genuinely satisfyinglike unwrapping a present you bought yourself, from yourself, and
forgot you ordered. (The present is a rock. But still.) You also learn patience: quartz often wants enough time in
each stage, and the polish stage can take longer than you expect. When it finally pops with that glassy luster, it feels
earned.
Hand polishers often describe the “one face at a time” reality check. You start by focusing on a small area and
suddenly realize how many surfaces a crystal actually has. You’ll likely experiment with angles and pressure, and you
may discover that the best results come from going slower with lighter pressure, especially in the final sanding and
polishing steps. It’s also common to have a favorite “show side” that turns out flawless while another side stays a
little naturaland many people decide that’s part of the charm. Quartz doesn’t need to look factory-made to look
stunning.
The most shared lesson is simple: the shine is the receipt for your process. If you do the grit
progression carefully, keep everything clean, and work wet to control dust, quartz is incredibly rewarding. And if it
takes longer than expected, congratulationsyou’re doing lapidary the traditional way: slowly, carefully, and with a
mild obsession with rinsing things.
Conclusion
Polishing quartz crystals isn’t complicatedbut it is picky. Pick the method that matches your crystal and your setup,
follow a sensible grit progression, keep everything clean between stages, and finish with an appropriate polish like
cerium oxide or a quality aluminum oxide. Do that, and you’ll get a shine that makes quartz look like it’s lit from
the insidewithout needing a magician, a miracle, or a dramatic montage.


