Table of Contents >> Show >> Hide
- Why Cement and Epoxy Make Such a Good Team
- What You Need to Make a Cement and Epoxy Trinket Tray
- Choose the Right Cement and the Right Epoxy
- How to Perfectly Combine Cement and Epoxy to Make a Trinket Tray
- Design Ideas That Make a DIY Tray Look High-End
- Common Mistakes to Avoid
- How to Make Your Trinket Tray Last
- What Makers Usually Learn After Their First Cement-and-Epoxy Tray
- Final Thoughts
- SEO Tags
If you have ever looked at a handmade trinket tray and thought, “That looks expensive enough to live on a marble vanity next to a candle with an impossible name,” good news: you can absolutely make one yourself. Better yet, you can make one with cement and epoxy, which is one of the best material pairings for modern DIY decor. Cement gives you that soft, stone-like, minimalist base. Epoxy brings the glossy drama, color depth, and fancy finish that makes people say, “Wait, you made that?”
The trick is not just using both materials. The trick is knowing how to combine them so the tray looks polished instead of like a science fair project that got into a fight with a hardware store. When done right, a cement and epoxy trinket tray feels sturdy, smooth, modern, and custom. When done wrong, it can crack, bubble, cure unevenly, or wind up looking like a gloomy pancake. Let us avoid the gloomy pancake.
This guide walks you through the best way to combine cement and epoxy for a DIY trinket tray, including material choices, step-by-step instructions, common mistakes, design ideas, and the small details that separate “cute craft” from “I should sell these.”
Why Cement and Epoxy Make Such a Good Team
Cement and epoxy do very different jobs, which is exactly why they work so well together. Cement creates the structure. It gives the tray weight, texture, and that matte architectural look people love in handmade decor. Epoxy adds contrast. It can be clear, tinted, marbled, metallic, or translucent, and it gives the tray shine, color, and moisture resistance.
Here is the most important concept: the best way to combine cement and epoxy is usually in layers, not as one wet mixture. In other words, cast the tray body with cement first, let it set and dry properly, and then use epoxy as an inlay, accent, top coat, or decorative detail. That approach gives you more control over the finish and a much better chance of getting crisp, clean results.
Think of it like interior design for tiny objects. The cement is the wall. The epoxy is the lighting, the art, and the dramatic entrance.
What You Need to Make a Cement and Epoxy Trinket Tray
- A silicone tray mold or a shallow mold in your preferred shape
- A fine, smooth cement-based mix for small cast projects
- A two-part epoxy resin suitable for decorative casting or coating
- Mixing cups for cement and separate clean cups for epoxy
- Wooden stir sticks or silicone mixing tools
- Gloves, eye protection, and a protected work surface
- Fine-grit sandpaper
- Pigments, mica powder, terrazzo chips, or stone fragments if desired
- A small torch or heat gun for epoxy bubbles, if your product instructions allow it
- Painter’s tape, plastic drop cloth, and paper towels
- Optional felt pads for the underside of the finished tray
Choose the Right Cement and the Right Epoxy
Best Cement for a Small Decorative Tray
For a trinket tray, the goal is a smooth cast with clean edges. That means a fine or flowable cement mix is usually easier to work with than a chunky general-purpose concrete mix loaded with large aggregate. Mixes designed for countertop-style casting, repair work, or decorative molded pieces tend to give a neater finish for small forms.
If your mix feels too gravel-heavy for a small mold, your tray may come out rough, pitted, or awkward around the corners. That does not mean it is unusable. It just means you may spend your evening sanding while whispering threats at a very small tray.
Best Epoxy for a Decorative Catchall Tray
Choose a two-part epoxy resin designed for decorative coating or casting, and follow that product’s instructions exactly. Some epoxies are made for thin top coats, while others are made for deeper pours. Some are measured by volume, others by weight. Some cure faster in warm rooms, while others need extra patience.
For this type of project, a clear coating or art resin is usually enough unless you plan to create a deeper river-style section. Clear resin also gives you options: you can leave it crystal clear, tint it with pigment, or swirl in metallic powder for a luxe finish.
How to Perfectly Combine Cement and Epoxy to Make a Trinket Tray
Step 1: Prepare the Mold and Workspace
Start with a level table in a clean, dry, well-ventilated space. Dust matters more than people think, especially once epoxy enters the chat. A single floating cat hair can become a permanent design element.
Set your silicone mold on a firm tray or board so you can move it without flexing it too much. Gather everything before you mix anything. Cement and epoxy are both more fun when you are not sprinting across the room looking for a stir stick.
Step 2: Mix and Pour the Cement Base
Follow your cement product’s water directions closely. This is not a “measure with your heart” moment. Too much water can weaken the piece, increase shrinkage, and leave the surface chalkier or more porous than you want. Too little water can make the mix clumpy and difficult to settle into the mold.
Once mixed, pour the cement into the mold slowly. Tap the mold gently on the table to release trapped air and help the material settle into the corners. You can also lightly vibrate the mold by lifting and tapping the sides. This helps reduce pinholes and voids.
If you want a terrazzo-style look, you can press decorative chips or small fragments into selected areas. If you want a cleaner modern look, keep the base simple and let the epoxy do the visual heavy lifting later.
Step 3: Let It Set, Demold, and Cure
Once the cement has set enough to hold its shape, gently demold the tray. Do not rush this part. Fresh cement may look solid before it is actually ready to be handled. A tray that bends, chips, or crumbles at demolding will make you question many life choices.
After demolding, allow the tray to continue curing and drying thoroughly. This step is where many DIY projects go sideways. Even if the tray feels hard, leftover moisture inside the cement can interfere with epoxy adhesion and clarity. If you want the cleanest result, give the cement enough time to cure well and dry out properly before applying any epoxy layer.
Once the tray is dry, sand the rim, base, and any rough spots with fine-grit sandpaper. Wipe away all dust completely.
Step 4: Decide How You Want to Use the Epoxy
This is the fun part. There are several beautiful ways to combine cement and epoxy in one trinket tray:
- Epoxy center pool: Fill the interior base with a thin glossy resin layer
- Epoxy edge detail: Add a colored band around the rim or one corner
- Marble vein effect: Use white, gray, smoke, or metallic resin to create flowing lines
- Geode look: Build layered color and sparkle in one section of the tray
- Protective clear coat: Keep the cement visible but add subtle sheen and easier wipe-down care
If the tray is especially porous, a very thin sealing coat of epoxy can help before the final decorative pour. This is useful because porous cement can release tiny air bubbles into the resin, which creates cloudiness or pinpricks if you are not prepared.
Step 5: Mix the Epoxy Correctly
If cement is unforgiving about water, epoxy is unforgiving about ratio. Measure the resin and hardener exactly as directed by the manufacturer. Then mix slowly and thoroughly, scraping the sides and bottom of the cup the entire time. Do not whip it like cake batter. That only adds bubbles and chaos.
Many makers get cleaner results by using a “double-mix” method: mix in one cup, transfer to a second clean cup, and mix again. It sounds fussy, but it helps eliminate streaks of unmixed resin hiding along the sides. That small step can save you from tacky spots later.
If your room is chilly, epoxy may thicken, trap more bubbles, and cure more slowly. A comfortably warm room generally works better. Just do not overheat the resin or improvise some kind of lava-lamp situation with it.
Step 6: Pour the Epoxy Into the Tray
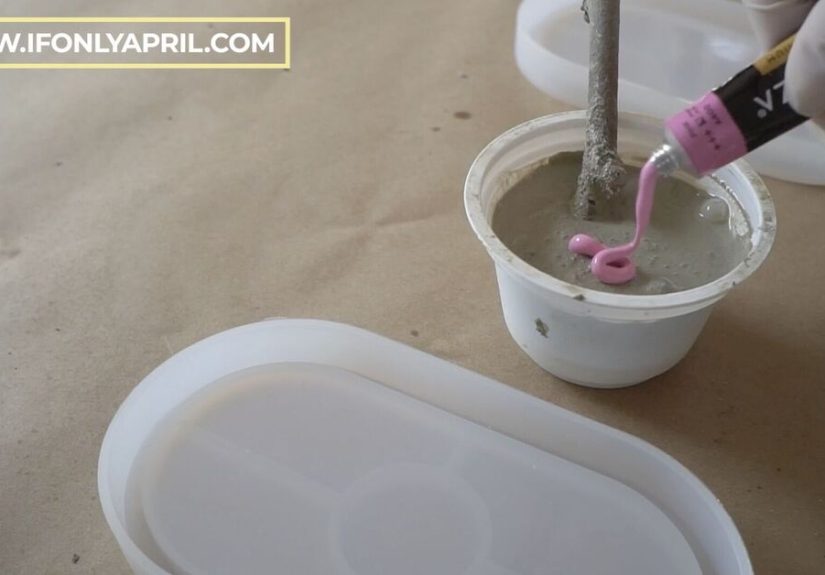
Pour slowly and deliberately. For detailed areas, use a stir stick or toothpick to guide the resin into corners. If you are adding pigment, start with a small amount. Deep, rich color often requires less pigment than beginners expect.
For a sleek modern tray, try clear epoxy over pale gray cement. For something moodier, use smoky black or amber resin in just one side of the tray. For a more elevated handmade look, layer a tinted translucent pour with a few subtle metallic streaks. The goal is contrast, not clutter.
Keep the epoxy layer appropriate for the product you are using. Too thick a pour can generate excess heat, shorten working time, and increase the risk of problems. Small decorative trays usually look best with restrained resin use anyway. A little gloss goes a long way.
Step 7: Remove Bubbles and Let It Cure
After pouring, check for bubbles. Depending on your epoxy, you may be able to use a brief pass with a heat gun or torch. Keep the heat moving and do not overdo it. This is a bubble-removal step, not a dramatic flamethrower moment for social media.
Cover the tray loosely while it cures so dust does not settle into the surface. Leave it on a level surface and resist the urge to poke it every 15 minutes. Epoxy has a way of punishing impatience with fingerprints, dents, or weird texture.
Once fully cured, inspect the tray. If needed, lightly sand rough edges or drips. Add felt pads underneath to protect furniture and make the tray feel more finished.
Design Ideas That Make a DIY Tray Look High-End
If you want your tray to look less “craft day” and more “boutique home store,” keep the design focused. Cement already has visual texture, so epoxy should complement it instead of fighting it.
Minimalist Modern
Use a pale gray cement base with a clear epoxy center. Clean lines, no glitter explosions, no drama. Just quiet luxury with better manners.
Soft Marble Effect
Add white, gray, and a hint of beige pigment to create a marbled epoxy accent. This works beautifully in oval and rounded-rectangle trays.
Smoky Luxe
Pair charcoal cement with translucent black or espresso-tinted resin. This looks especially good as a tray for rings, watches, or keys.
Warm Earthy Style
Use natural cement tones with amber, rust, olive, or sand-colored resin accents. This combination feels modern but not cold.
Statement Piece
Create one dramatic epoxy section with metallic pigment or crushed decorative fragments, leaving the rest of the tray matte cement. A single striking focal area is often more elegant than coating everything in shine.
Common Mistakes to Avoid
Using too much water in the cement mix: This weakens the tray and can make the surface dusty or uneven.
Applying epoxy before the cement is truly dry: Moisture is one of the fastest ways to sabotage clarity and adhesion.
Eyeballing the epoxy ratio: Epoxy chemistry does not reward optimism.
Mixing epoxy too fast: Fast mixing adds extra bubbles and can leave the resin cloudy.
Pouring epoxy too thick: More is not always better. Sometimes more is just hotter, messier, and sadder.
Ignoring temperature: A room that is too cold can slow the cure and make epoxy misbehave. A room that is too hot can shorten working time.
Forgetting surface prep: Dust, oil, moisture, and loose grit all interfere with a clean finish.
How to Make Your Trinket Tray Last
A cement and epoxy tray can be surprisingly durable if you treat it like decor and not like a hockey puck. Keep it indoors, wipe it with a soft damp cloth, and avoid harsh abrasive cleaners. Do not leave standing water in it for long periods, and do not drop heavy metal objects into it from a heroic height.
If the tray is mostly decorative, it can hold rings, necklaces, keys, hair clips, coins, and other everyday small items beautifully. If you want to use it near skincare or perfume bottles, the epoxy section is especially helpful because it is easier to wipe clean than raw cement.
What Makers Usually Learn After Their First Cement-and-Epoxy Tray
The first time people make a tray like this, they usually expect the cement part to be the difficult part and the epoxy part to be the glamorous reward. Then the tray teaches them the truth: both materials are easy once you respect their personalities. Cement is patient but fussy about water. Epoxy is beautiful but deeply committed to precision.
One of the most common experiences is discovering that the tray starts looking good long before it is actually finished. The cement comes out of the mold and you think, “Amazing. I am an artisan.” Then you notice one rough edge, a couple of tiny air pits, and a base that is not perfectly flat. That is normal. Small cast pieces almost always improve after a little sanding and cleanup. Many beginners assume the mold should do all the work. In reality, the mold gives you the shape, but the refinement happens afterward.
Another common lesson is that dry time and cure time are not the same thing. A tray can feel dry to the touch and still not be ready for epoxy. This is where a lot of people get burned, metaphorically speaking. They pour resin onto cement that still holds hidden moisture, and the finish winds up cloudy, bubbly, or uneven. The experience teaches patience fast. Not fun, but very educational.
Makers also learn that subtle design choices usually look the most expensive. The idea in your head might involve three colors of resin, metallic swirls, stone chips, gold leaf, and maybe a dramatic diagonal river. Then the tray dries and gently suggests that one tinted epoxy section would have been plenty. Cement already has visual presence. The best designs often come from restraint: one glossy pool, one marbled corner, one clean border. Suddenly the piece looks modern instead of over-decorated.
There is also a nearly universal first-epoxy moment when you realize that bubbles are not an abstract concept. They are everywhere. Tiny bubbles. Sneaky bubbles. “Where did you all even come from?” bubbles. This is usually when people begin to appreciate slow mixing, careful pouring, and a clean surface. A good tray teaches technique. A bad tray teaches it louder.
Perhaps the best experience of all happens at the very end. You place the finished tray on a dresser, vanity, or entry table, set a watch or ring inside it, and realize the project looks far more polished in real life than it did halfway through. That is the magic of combining cement and epoxy: one material brings weight and calm, the other brings light and movement. Together they make a small object that feels intentional, custom, and more sophisticated than its parts.
And once you finish one, you almost always start planning the next one. A longer tray for keys. A round tray for candles. A gift set in neutral tones. A smoky black version for a desk. Suddenly you are not just making a tray. You are developing a suspiciously specific design language for catchall objects. It happens fast.
Final Thoughts
If you want to perfectly combine cement and epoxy to make a trinket tray, the secret is simple: let each material do what it does best. Use cement for structure, texture, and shape. Use epoxy for detail, gloss, and visual drama. Respect cure times, mix both materials carefully, and keep the design clean enough that the contrast can shine.
The result is a tray that feels handmade in the best possible way: sturdy, stylish, a little luxurious, and just dramatic enough to make your everyday clutter look curated. Which, honestly, is a public service.


