Table of Contents >> Show >> Hide
- What “Professional Results” Really Means
- Tools and Materials You’ll Want (and Why)
- Set Up Your “Home Paint Booth” (Without Building a Booth)
- The Step-by-Step Process
- Step 1: Remove the part (when possible)
- Step 2: Wash, then degrease
- Step 3: Repair damage (chips, scratches, gouges)
- Step 4: Sand like you mean it (but not like you hate it)
- Step 5: Clean again and mask smart
- Step 6: Plastics need special attention
- Step 7: Prime the part (don’t rush this)
- Step 8: Block sand the primer for straight, smooth results
- Step 9: Color coat (basecoat) with calm, repeatable technique
- Step 10: Clear coat for depth, gloss, and protection
- Drying, Curing, and the Part Everyone Skips
- Troubleshooting: Fixing the Usual Suspects
- Pro-Level Habits That Cost $0
- Quick Example Plans (So You Can Start Today)
- of Real-World Experience (AKA: Things I Learned the Hard Way)
- Conclusion
Painting car parts at home is one of those projects that sounds simple until you’re staring at a freshly sprayed panel
that looks like an orange peel wearing a dust sweater. The good news: you can get results that look genuinely
professionalwithout a body shop boothif you treat this like a process, not a vibe.
This guide walks you through the same fundamentals pros rely on: meticulous prep, clean spraying habits, smart product
choices, and patience during curing and finishing. I’ll also show you where DIYers usually go wrong (spoiler: it’s not
“because you used a rattle can,” it’s because you skipped steps and the paint is judging you).
What “Professional Results” Really Means
A pro-looking finish is less about having expensive tools and more about controlling four variables:
surface quality (smooth and properly sanded), cleanliness (no wax, silicone, or dust),
film build (enough coats, applied correctly), and cure + finish (letting paint harden
before sanding/polishing).
If you nail prep and spraying technique, even aerosol paint can look surprisingly close to factory on small parts like
mirror caps, trim pieces, brackets, spoilers, grilles, and motorcycle/car accessories. If you’re painting big panels
(hoods, doors, bumpers), the same rules applyyour margin for error is just smaller.
Tools and Materials You’ll Want (and Why)
Painting options: aerosol vs. spray gun
-
Aerosol (rattle can): Best for small-to-medium parts. Lower setup cost, simpler cleanup, easier for
beginners. Choose high-quality automotive paint and compatible primer/clear. -
HVLP spray gun + compressor: Better control, faster on larger parts, more consistent atomization.
More equipment, more technique, more cleanup. Worth it if you’ll paint often.
Prep supplies (the “make-or-break” category)
- Wax and grease remover (or dedicated automotive degreaser)
- Lint-free towels (pluralbecause you will drop one)
- Tack cloth for final dust pickup
-
Sandpaper assortment: 180–320 (repair shaping), 400–600 (paint prep),
800–1000+ (primer refinement and wet sanding), plus 1500–3000 (finish sanding/polish prep) - Scuff pads (especially helpful on curves and plastic parts)
- Masking tape + masking paper/film (automotive-grade tape helps avoid gooey edges)
- Guide coat (powder or aerosol) to reveal scratches/low spots while sanding
Paint products
- Adhesion promoter for raw/untreated plastics (critical for bumper covers and many trim pieces)
- Primer type matched to the job:
- Self-etching primer: for bare metal (good bite, corrosion resistance)
- Epoxy primer: excellent corrosion protection and adhesion (common “pro” choice)
- High-build primer/surfacer: fills sanding scratches and minor imperfections
- Basecoat + clearcoat (common modern system) or single-stage (color + gloss in one)
- Clearcoat choice: 1K is simpler; 2K is tougher but can involve more hazardous chemistry
Safety gear (non-negotiable)
- NIOSH-approved respirator with the correct cartridges for paint/solvent vapors (and proper fit)
- Nitrile gloves
- Eye protection
- Coveralls or old long sleeves to keep overspray off your skin (and your laundry)
One honest note: many automotive coatings contain nasty solvents; some two-component urethane products can include
isocyanates. If you’re not set up for serious ventilation and proper respiratory protection, choose
safer products and work outdoors when conditions allow (still avoiding wind/dust).
Set Up Your “Home Paint Booth” (Without Building a Booth)
Pros have a controlled booth. You have… a garage and optimism. We can work with that.
Control dust
- Clean the area first: sweep, then lightly mist the floor with water to keep dust down (don’t create a swamp).
- Turn off anything that blows dust around right before spraying (fans are useful, but aim airflow smartly).
- Hang plastic sheeting if you can to create a simple spray zone.
Lighting
You can’t fix what you can’t see. Use bright, angled lighting to spot dry spray, striping, or uneven coverage while
you’re sprayingnot after it dries and laughs at you.
Temperature and humidity
Most DIY automotive products spray best in moderate temps (roughly the “comfortable hoodie” range) and reasonable
humidity. Too cold and paint won’t flow; too hot and it flashes too fast; too humid and you risk blush/haze. Always
read the label and technical sheet for your specific products.
The Step-by-Step Process
Step 1: Remove the part (when possible)
Painting off the car is easier, cleaner, and usually better. You can spray edges properly, avoid hard tape lines,
and keep overspray off everything else you love (or at least tolerate).
Step 2: Wash, then degrease
Wash with soap and water first to remove dirt. Then degrease with wax and grease remover. Why both?
Because soap removes grime; solvent removes wax, oils, silicone, and “mystery shine products from 2019.”
Use the two-towel method: one towel wets the surface with cleaner, the second towel wipes it off before it evaporates
and re-deposits contaminants. Repeat until the towel stops picking up junk.
Step 3: Repair damage (chips, scratches, gouges)
Paint is not magicit won’t hide texture. If your part has chips or scratches, level them now.
- Small scratches: sand smooth and feather the edges so you can’t feel a step with your fingernail.
- Deeper damage: use spot putty or body filler (on appropriate substrates), then sand flat.
- Rust: remove it fully; don’t “paint over hope.” Use the right primer afterward.
Step 4: Sand like you mean it (but not like you hate it)
Sanding does two jobs: it removes flaws and it creates a mechanical “tooth” so primer/paint can grip.
Common sanding roadmap (adjust to your part and products):
- 180–320 grit: shaping repairs, removing failing paint, smoothing scratches
- 320–400 grit: general prep before primer or before topcoating certain systems
- 400–600 grit: final prep for basecoat on many DIY systems (smooth, uniformly dull finish)
- 800–1000+ grit: refining primer, removing minor texture before color, and wet sanding stages
Use a guide coat when sanding primer: it highlights low spots and scratches so you don’t “sand until
you’re bored” (a widely used but scientifically questionable method).
Step 5: Clean again and mask smart
After sanding, blow off dust (or vacuum), wipe with cleaner if compatible, then use a tack cloth right before spraying.
Mask edges cleanly and avoid putting tape in the middle of a panel where a hard line will scream “DIY.”
If you’re blending into adjacent areas on a mounted part, look up techniques like back-taping to soften edges. A soft
transition beats a sharp ridge every time.
Step 6: Plastics need special attention
Many plastics (especially bumper covers and trim) benefit from an adhesion promoter. Clean and scuff
thoroughly first, then apply adhesion promoter per instructions and let it flash fully before primer/basecoat.
Step 7: Prime the part (don’t rush this)
Primer isn’t just “paint before paint.” It’s the foundation that determines whether your topcoat looks smooth and lasts.
Apply light-to-medium coats with consistent overlap, letting each coat flash as directed.
Primer tips that produce pro-looking results:
- Start with a lighter tack coat, then build coverage with medium coats.
- Keep your distance consistent (most DIY aerosols like roughly 6–10 inches; check the label).
- Use 50% overlap on passes so coverage stays even.
- Let primer cure enough to sand cleanly (if it “balls up,” it’s not ready or it’s too cold).
Step 8: Block sand the primer for straight, smooth results
This is where “home paint job” becomes “wow, did you pay someone?” Sand the primer with a block where possible.
Use guide coat, knock down texture, and refine scratches progressively. Your goal is a smooth surface that is uniformly
dull with no shiny low spots.
If you sand through to metal or plastic in spots, that’s not failureit’s information. Spot prime those areas, let dry,
and re-sand.
Step 9: Color coat (basecoat) with calm, repeatable technique
Basecoat is about coverage and evenness, not gloss. Many basecoats go on shiny and then “flash” dull/matte as solvents
evaporate. That dulling is your visual cue that it’s ready for the next coatwithin the product’s recoat window.
How to spray basecoat evenly:
- Start spraying off the edge of the part, sweep across, release off the other edge (reduces heavy spots).
- Use steady speed and consistent overlap.
- Apply multiple light-to-medium coats rather than one heavy coat that runs.
- On metallics/pearls, finish with a slightly lighter “orientation” coat if recommended to keep the flake even.
Example: painting a plastic bumper cover at home
Bumpers are flexible, curved, and dust magnets. After cleaning and scuffing, use adhesion promoter as directed, then
primer if needed, then basecoat in light, even coats. Keep your spray pattern moving around curves so you don’t load up
the high points and starve the recesses.
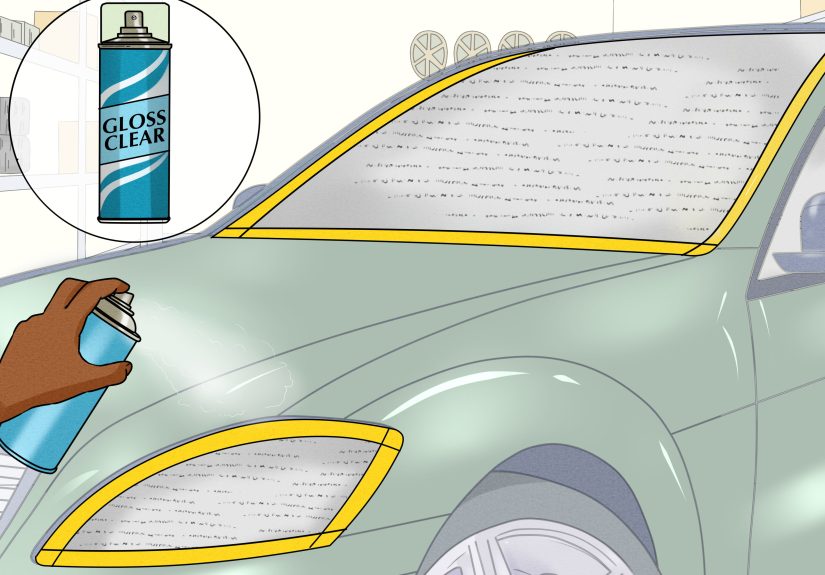
Step 10: Clear coat for depth, gloss, and protection
Clearcoat is what makes color look deep and gives you UV and chemical resistance. It also reveals every mistake,
because clear is basically a spotlight with a mirror finish.
Clearcoat application habits that look pro:
- Apply medium-wet coats that flow together without dripping.
- Maintain overlap and distance; don’t “hunt” the shine by slowing down randomly.
- Respect flash times between coats. Too soon traps solvent; too late can reduce adhesion unless you scuff and recoat.
- Aim for enough clear to allow later sanding/polishing if neededespecially on parts you want showroom-gloss.
Drying, Curing, and the Part Everyone Skips
Paint “dry to the touch” is not the same as “cured enough to sand and polish.” Many DIY disasters happen because the
finish felt dry at midnight and got wet-sanded at 12:07 a.m. (Ask me how I know. Actually don’t. It’s embarrassing.)
Follow your product’s cure guidance. If you can, let the part sit longer than the minimum. Time is a cheat code for
better results.
Optional but powerful: wet sand and polish
If you want that glassy, professional look, this is the finishing step. After the clear has cured:
- De-nib dirt: sand tiny dust specks with 1500–2000 grit (use a soft block and lots of clean water).
- Refine: move to 2500–3000 grit to remove sanding haze.
- Polish: compound, then polish to restore gloss.
The secret is gentle, consistent sanding. You’re leveling the clear, not trying to reach the center of the earth.
Troubleshooting: Fixing the Usual Suspects
Runs and sags
Caused by coats that are too heavy, too close, or too slow. Let it cure, then carefully level with 1500–2000 grit and
polish. Don’t smear it while it’s soft.
Orange peel texture
Often from spraying too dry (too far away, too fast, or too hot/cold for the product). Proper wet coats, correct
temperature, and good overlap help. If it cures with peel, wet sand and polish can dramatically improve it.
Fisheyes (tiny craters)
Classic contamination: wax, silicone, oil. Fix is preventionthorough degreasing and clean towels. If you already have
fisheyes, you may need to sand back, clean aggressively, and recoat.
Dry spray / rough finish
Paint dried mid-air before landing. Spray a little closer (within guidance), slow down slightly, and ensure conditions
aren’t too hot/dry or too windy.
Peeling later
Usually poor prep: insufficient sanding/scuffing, missing adhesion promoter on plastics, coating outside the recoat
window without scuffing, or incompatible products stacked like a bad sandwich.
Pro-Level Habits That Cost $0
- Read every label and tech sheet. Flash times, recoat windows, and prep grits are product-specific.
- Keep a “clean zone.” Clean towels and tack cloth stay sealed until you use them.
- Spray test passes first. Cardboard is cheaper than repainting a bumper.
- Use guide coat when sanding primer. It turns sanding into a repeatable process instead of guesswork.
- Slow is smooth. Smooth is glossy. Glossy is the goal.
Quick Example Plans (So You Can Start Today)
Example A: Painting mirror caps with aerosol (OEM-style gloss)
- Wash + degrease
- Scuff with a gray scuff pad or 600 grit until uniformly dull
- Clean, tack, mask mounting areas
- Adhesion promoter (if raw plastic)
- Primer as needed; sand primer lightly with 800–1000
- Basecoat 2–3 light/medium coats
- Clearcoat 2–3 coats
- Cure, then wet sand (2000–3000) and polish if you want “wet look”
Example B: Painting a valve cover (durable, heat-aware finish)
- Degrease thoroughly (engine parts hold oil like it’s their job)
- Remove old paint/oxidation; sand and clean
- Use primer/paint rated for the temperatures you expect
- Apply thin coats; avoid heavy film build around bolt holes and gasket surfaces
- Let it cure fully before handling and installing
of Real-World Experience (AKA: Things I Learned the Hard Way)
The first time I tried to paint a car part at home, I was convinced the “secret” was buying a better can of paint.
Turns out the secret was not touching the part with my bare hands after degreasing. I’d cleaned it perfectly,
then picked it up like a proud raccoon holding shiny trash. Minutes later, I sprayed primer and watched tiny fisheyes
appear like the surface had developed pores and anxiety. Lesson one: once you degrease, handle parts with gloves and
hold them by unpainted edges or mounting points.
Another humbling moment: dust. I used to think dust nibs were a sign the universe hated me personally. Then I realized
my “paint booth” had a leaf blower personality. I’d sweep the garage, kick up a cloud, and immediately start spraying.
That dust didn’t disappear. It just waited… and landed in my clearcoat like sprinkles on a cupcake I did not ask for.
Now I clean the area first, let the air settle, and lightly mist the floor to trap dust. I also keep my tack cloth in
a sealed bag until the last minute. These are tiny actions, but they’re the difference between “pretty good” and “how
did you do that at home?”
Technique was the next big shift. I used to spray like I was coloring in a book: slow down at the edges, speed up in
the middle, then panic-spray the light spots. That creates stripes, uneven metallics, and texture changes that show up
the moment sunlight hits. The fix was boring but effective: same distance, same speed, same overlap, and start/stop
off the part. It feels robotic at first, but paint loves consistency. Your job is to be the most predictable human in
the garage for about 15 minutes.
Curing taught me patience the way a hot stove teaches respect. I once wet-sanded clearcoat because it felt dry.
It was not dry. It was “dry-ish,” which is the worst kind of dry because it lets you mess things up confidently.
The paper clogged, the surface smeared, and I created a matte finish that looked like I’d painted the part with
disappointment. Now I wait longer than I want to. If the product says a day, I try for two. If it says two, I try for
three. Time costs nothing and saves entire weekends.
Finally, I learned that “professional results” don’t come from one heroic coat. They come from a chain of small wins:
clean surface, correct sanding, proper flash times, controlled coats, and a respectful cure period. When something goes
wrongand it willmost fixes are just sanding and repeating a step with better conditions. Paint isn’t magic. It’s
chemistry and habit. The good news is you can improve both without owning a paint booth or selling a kidney for a spray
gun. Your garage can do great work… as long as you stop treating prep like the opening act.
Conclusion
If you want professional-looking DIY paint results, focus on prep and repeatable technique. Clean like a pro, sand with
a plan, use the right primers and promoters for the material, spray in controlled coats with correct overlap, and let
everything cure before you start chasing perfection with wet sanding and polishing. The finish you want is totally
achievable at homeyou just have to earn it one step at a time.


