Table of Contents >> Show >> Hide
- Quick Formula Refresher (No Drama)
- What You’ll Need
- Step 1: Pick the Right Volume Method (Because Shape Matters)
- Step 2: Prep the Sample (Cleanliness Is Not a Personality Trait, It’s a Measurement Requirement)
- Step 3: Measure Mass (Like You Mean It)
- Step 4: Measure Volume by Geometry (Calipers + Formulas)
- Step 5: Measure Volume by Water Displacement (Graduated Cylinder Method)
- Step 6: Use an Overflow Can (or a Higher-Precision Option) When the Cylinder Isn’t Cutting It
- Step 7: Calculate Density, Sanity-Check, and Report Like a Pro
- Common Mistakes (So You Don’t Accidentally Invent a New Metal)
- Conclusion
- Field Notes: What People Typically Experience When Measuring Metal Density (Extra Practical Insights)
- SEO Tags
Density is one of those sneaky “quiet genius” properties: it doesn’t care if your metal is shiny, rusty, round, or shaped like a tiny modern art disaster. If you can measure mass and volume, you can measure densityand often identify an unknown metal with surprising confidence.
This guide walks you through 7 practical steps used in classrooms, labs, and workshops, with multiple volume methods (calipers, water displacement, overflow can, and a higher-precision option) so you can match the method to the object you actually have in your hand.
Quick Formula Refresher (No Drama)
Density = Mass ÷ Volume
Common lab units: g/cm³ (same as g/mL for volume measured by water methods).
What You’ll Need
- Scale/balance (digital preferred; 0.01 g resolution or better is great)
- Graduated cylinder (50–100 mL is a sweet spot) or an overflow can
- Calipers (digital or Vernier) for regular shapes
- Room-temperature water (distilled if you want fewer headaches)
- Thread/string (for lowering samples), paper towels, and optionally a drop of dish soap (bubble control)
- Safety gear: goggles; gloves if the metal is dirty, sharp, or chemically questionable
Step 1: Pick the Right Volume Method (Because Shape Matters)
Before you weigh anything, decide how you’ll get volume. This prevents the classic mistake of “measuring stuff enthusiastically” and realizing later you measured the wrong stuff.
Use calipers + geometry when the metal has clean dimensions
- Blocks, cylinders, rods, spheres (or close enough that your math teacher won’t cry)
- Best when edges aren’t rounded and surfaces aren’t dented
Use water displacement when the metal is irregular
- Scrap pieces, cast shapes, mystery bolts, “I swear it used to be a bracket” objects
- Best when the object doesn’t absorb water and can be fully submerged
Use a higher-precision approach when you need better accuracy
- Hydrostatic weighing (weigh in air and in water) or mass-based displacement (pycnometry-style)
- Useful when you’re chasing tight tolerances or your displacement readings are too coarse
Step 2: Prep the Sample (Cleanliness Is Not a Personality Trait, It’s a Measurement Requirement)
Density errors often come from boring villains: fingerprints, trapped bubbles, and “mystery grime.” Clean and dry the sample. If it’s oily, wipe it down. If it’s rusty or flaky, gently remove loose debris (don’t grind the part unless you’re okay changing the part).
- Dry matters: water clinging to the metal adds mass and confuses your results.
- Temperature matters: let metal and water come close to room temperature before measuring (especially if it came from a cold garage or sunny window).
- Check for holes/voids: hollow pieces can have “density” that reflects the void, not the metal itself. That can still be usefuljust label it honestly.
Step 3: Measure Mass (Like You Mean It)
Place the metal on the scale and record mass. If you’re using a container (like a small cup to hold tiny parts), tare it first.
Mass tips that save your sanity
- Use the same units throughout (grams makes everything nicer).
- If the sample is small, use a scale with better resolution.
- Handle the metal with a clean tissue or glove if you want to reduce fingerprint oils.
Step 4: Measure Volume by Geometry (Calipers + Formulas)
If your metal is a regular shape, geometry is fast and usually more precise than eyeballing a meniscus in a graduated cylinder.
Common formulas
- Rectangular block: V = L × W × H
- Cylinder: V = π × r² × L (or V = π/4 × d² × L)
- Sphere: V = 4/3 × π × r³
How to measure well
- Measure each dimension at least twice (rotate the object; surfaces lie).
- For cylinders, measure diameter in a few spotsslight out-of-round is common.
- Record dimensions in centimeters if you want volume in cm³ without extra conversions.
Example (cylinder)
Suppose a metal rod has diameter d = 1.20 cm and length L = 4.00 cm.
V = (π/4) × d² × L = (π/4) × (1.20)² × 4.00 ≈ (0.785) × 1.44 × 4.00 ≈ 4.52 cm³.
Step 5: Measure Volume by Water Displacement (Graduated Cylinder Method)
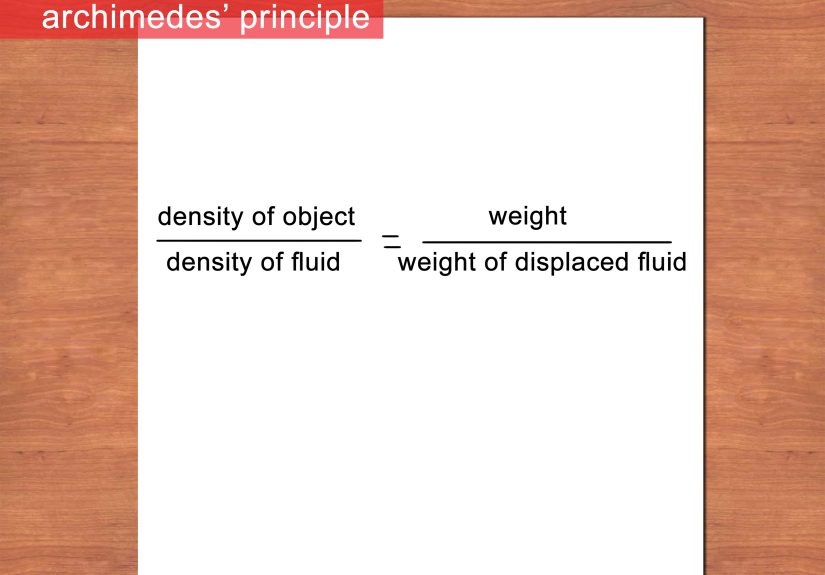
Water displacement is the go-to method for irregular shapes: submerge the metal, watch the water level rise, and use the difference as the object’s volume. Yes, this is Archimedes’ principle doing its thingquietly carrying science on its back again.
Procedure
- Fill the graduated cylinder with enough water to cover the object.
- Record the initial volume (read the meniscus at eye level).
- Gently slide the metal down the inside wall of the cylinderdon’t drop it like a tiny cannonball.
- Remove visible bubbles clinging to the metal (tap lightly or use a stir rod).
- Record the final volume.
- Object volume = final volume − initial volume.
Example (irregular chunk)
Initial water level = 42.0 mL
Final water level = 53.5 mL
Volume = 53.5 − 42.0 = 11.5 mL ≈ 11.5 cm³
Displacement pitfalls (and how to dodge them)
- Bubbles: bubbles make volume look larger than it is. Tap the sample or add a tiny drop of dish soap to reduce surface tension.
- Big objects: if the object is too large for your cylinder, use an overflow can (next step).
- Coarse graduations: if the cylinder only reads to 1 mL, your density result can wobble a lot for small objects.
Step 6: Use an Overflow Can (or a Higher-Precision Option) When the Cylinder Isn’t Cutting It
If your object is awkwardly shaped, too big, or you want a cleaner displacement reading, an overflow can is a classic upgrade. For even more precision, use hydrostatic weighing (weighing in air and while submerged) or a mass-based displacement approach.
Option A: Overflow can displacement (great for larger pieces)
- Place a beaker under the overflow spout.
- Fill the overflow can until it begins to drip; wait until dripping stops naturally.
- Lower the metal in (fully submerged) using a string.
- Collect the overflowed water in the beaker.
- Pour that water into a graduated cylinder and record the volumethis equals the object’s volume.
Option B: Hydrostatic weighing (precision-minded method)
This method uses buoyancy: you weigh the object in air, then weigh it while it’s submerged (without touching the container). The “missing weight” is the buoyant force, which is tied to the volume of displaced liquid.
A commonly used practical form (for water) is:
ρobject ≈ mair / (mair − mwater) × ρwater
where mwater is the apparent mass while submerged.
- Best when you have a density kit, under-hook balance, or a stable setup.
- Be serious about bubbles and keeping the sample from touching the beaker.
- Water density changes slightly with temperature; for casual work, room-temperature approximations are fine, but document your temperature if precision matters.
Option C: Mass-based displacement (pycnometry-style)
In some lab setups, you can determine displaced water volume using mass measurements (instead of reading the meniscus). That’s handy when volume markings are too coarse or you want better repeatability.
- Measure mass of a flask filled to a mark.
- Insert the metal, let water overflow/withdraw displaced water back to the mark.
- Use the mass difference to compute displaced water mass, then convert to volume using water density.
Step 7: Calculate Density, Sanity-Check, and Report Like a Pro
Now compute density using your measured mass and volume:
ρ = m / V
Example calculation
Mass = 92.0 g
Volume = 11.5 cm³
Density = 92.0 / 11.5 = 8.00 g/cm³
Sanity-check with typical metal densities
Real metals vary by alloy composition, porosity, and manufacturing method, but these ballpark numbers are useful for identification.
| Metal (typical) | Approx. density (g/cm³) | What it feels like in real life |
|---|---|---|
| Aluminum | ~2.7 | Lightweight for its size; “wait, that’s metal?” vibes |
| Brass | ~8.5 | Heavy and golden; often used in fittings and hardware |
| Copper | ~8.9 | Heavy and reddish; great electrical conductor |
| Iron/Steel (varies) | ~7.8 | Strong, common, and usually magnetic (but not always) |
| Lead | ~11.3 | Very heavy; soft; handle with care and wash hands |
| Gold | ~19.3 | Comically heavy for its size (also comically expensive) |
| Tungsten | ~19.3 | Very dense; used where you need weight in a small volume |
How to report results (and look smart without being annoying)
- Include units: 8.00 g/cm³, not just “8.”
- Note your method: calipers, cylinder displacement, overflow can, hydrostatic weighing.
- Estimate uncertainty: cylinder graduations and caliper precision matter. If volume is ±0.5 mL, your density may have a noticeable error bar.
- If you’re identifying an unknown metal, mention your nearest match and why (density + magnet test + color + hardness is a strong combo).
Common Mistakes (So You Don’t Accidentally Invent a New Metal)
- Reading the meniscus from above: gives a smaller volume than reality.
- Letting the object touch the cylinder bottom: usually fine for displacement, but it can trap bubbles or crack glass if dropped.
- Ignoring bubbles: the #1 reason “my aluminum has the density of unicorn tears.”
- Measuring a hollow object and expecting solid-metal density: you measured “bulk density,” which is validjust different.
- Rounding too early: keep extra digits in intermediate steps, then round at the end.
Conclusion
Measuring the density of metals isn’t complicatedit’s just picky. Choose the right volume method, measure mass carefully, manage bubbles like they owe you money, and keep your units consistent. Do that, and density becomes a powerful tool for identifying unknown metals, checking material consistency, or validating whether that “mystery ingot” is actually what someone promised it was.
Field Notes: What People Typically Experience When Measuring Metal Density (Extra Practical Insights)
When you actually run density tests (as in: real water, real metal, real gravity), the experience is usually less “textbook elegance” and more “tiny details trying to ruin your day.” The good news is that the patterns repeat, and once you recognize them, your results get better fast.
First, most people discover that volume is the fragile part of the whole operation. Mass is easymodern scales are forgiving and fast. Volume is where measurement uncertainty loves to hang out. If you’re using a graduated cylinder with coarse markings, you’ll notice that the same object can “change density” just by how confidently you read the meniscus. That’s not you being bad at science; it’s the instrument being honest about its limits. A common upgrade is simply switching to a smaller cylinder (finer graduations) for small objects, or switching to an overflow can for larger objects. The moment you match the container to the object, your numbers stop wobbling.
Second, bubbles are dramaticand they show up even when you swear you lowered the sample gently. Rough surfaces, tiny scratches, and textured castings are bubble magnets. People often get a “density” that’s mysteriously low (because volume looked too large), then repeat the test and somehow “fix” it by tapping the object, rotating it underwater, or adding a micro-drop of dish soap. The takeaway: bubbles don’t mean your method is wrong; they mean you need a bubble-removal habit. A simple routine helps: lower slowly, pause mid-submersion, tap lightly, then take the final reading once everything looks calm.
Third, when folks test unknown metals, they learn density is powerful but not psychic. Two different alloys can sit annoyingly close (for example, some brasses and bronzes live in similar neighborhoods), and “steel” is not one densityit’s a family with variety. The best real-world workflow is a combo approach: use density as the main clue, then confirm with a couple low-effort checks: magnet response, color, surface oxidation, hardness (carefully), and sometimes a spark test (only if trained and equipped). In practice, density often narrows it down to 1–2 likely candidates, and the extra clues finish the job.
Fourth, nearly everyone runs into at least one object that’s hollow, porous, plated, or weird. A hollow tube or a piece with internal voids will produce a bulk density that’s lower than the solid metal’s density, and that’s not a failureit’s information. Similarly, porous sintered parts can trap air and soak up water, making displacement unstable. When people notice repeat measurements drifting, it’s often because water is slowly wetting internal pores or sneaking into tiny cavities. The practical solution is to label the result correctly (“bulk density” vs. “material density”) and, if needed, switch methods (hydrostatic setups with better control, or specialized techniques for porous materials).
Finally, people are usually surprised by how much handling and cleanliness matter. Fingerprints sound too small to care aboutuntil you’re measuring a small part and looking for a tight match to a known density. Wiping down samples, drying them consistently, and not letting water cling to the object before weighing are the habits that separate “close enough” results from “wow, that matches the reference table.” The fun part is that these are easy wins: you don’t need expensive equipment to improve resultsyou need a consistent routine.
If you take one practical lesson from the experience side of density testing, make it this: repeat the measurement. Two or three trials reveal whether you’ve got a stable methodor whether bubbles, reading error, or setup issues are steering the number. Density rewards patience, and it punishes chaos. (So, basically, it’s a cat.)