Table of Contents >> Show >> Hide
- Why Faux Wood Grain Works (And Why It Looks More Real Than You’d Think)
- What You’ll Need
- Step 1: Pick a “Wood Species” Look (Your Color Plan)
- Step 2: Prep the Dresser Like You Mean It
- Step 3: Prime for Adhesion (Especially on Laminate)
- Step 4: Paint the Base Coat (Your “Undertone Wood”)
- Step 5: Mix Your Faux Grain Glaze
- Step 6: Create the Faux Wood Grain Pattern
- Step 7: Let It Dry (Then Decide If You Want More Depth)
- Step 8: Protect the Finish With the Right Topcoat
- Step 9: Finish With Hardware and Small Upgrades
- Troubleshooting: Fixing Common Faux Grain Problems
- Quick Wrap-Up
- Bonus: Real Experiences DIYers Share (So You Can Skip the “Oops” Phase)
- SEO Tags
Got a dresser that’s sturdy but looks like it lost a fight with the “beige, glossy, early-2000s” era? Perfect. A faux wood grain paint technique lets you turn “meh” furniture into something that looks surprisingly warm and woodsywithout sanding down to the Stone Age or paying “antique mall” prices.
This guide walks you through an in-depth, beginner-friendly (but pro-looking) approach: clean, prep, prime, base coat, glaze, grain, protect, and finish with the kind of details that make people say, “Wait… you painted that?”
Why Faux Wood Grain Works (And Why It Looks More Real Than You’d Think)
Real wood grain has variation: lighter streaks, darker streaks, tiny “cathedral” arches, and occasional knots. Faux wood grain works because you’re building those same visual cues using two layers:
- A base coat (your “wood undertone,” like pine, oak, or maple)
- A tinted glaze layer (your “grain color,” like walnut or espresso)
The magic ingredient is open time: glaze dries slower than straight paint, giving you time to pull a wood-graining tool through it and shape the pattern before it sets.
What You’ll Need
Tools
- Wood graining rocker/tool (the rubber comb-looking MVP)
- Foam roller or short-nap roller (for smooth coats)
- Angled brush (for corners and trim)
- Lint-free rags or shop towels
- Sandpaper (120–150 grit for scuffing; 220 grit for smoothing)
- Tack cloth or vacuum + microfiber cloth
- Painter’s tape (optional, for clean edges)
- Screwdriver (to remove hardware)
Materials
- Degreaser (or a gentle TSP substitute)
- Primer (bonding primer for laminate/cheap finishes; stain-blocking primer if needed)
- Latex or acrylic paint in two shades: base coat + grain color
- Clear acrylic glaze (or furniture glaze)
- Protective topcoat (water-based polyurethane / polycrylic, or a durable furniture topcoat)
- Wood filler (if you’re patching dents or old hardware holes)
Step 1: Pick a “Wood Species” Look (Your Color Plan)
Choosing colors first prevents the classic DIY moment of standing in the paint aisle whispering, “Why are there twelve kinds of beige and none of them are right?”
Simple, realistic combos
- Light Oak: base = warm tan; grain = medium brown glaze
- Weathered Driftwood: base = greige; grain = cool taupe/gray-brown glaze
- Walnut: base = medium brown; grain = deep espresso glaze
- Pine-ish: base = honey/amber; grain = caramel-brown glaze
Pro tip: Keep the base coat lighter than you think. Real wood reads as “light with darker lines,” not “dark with darker lines.”
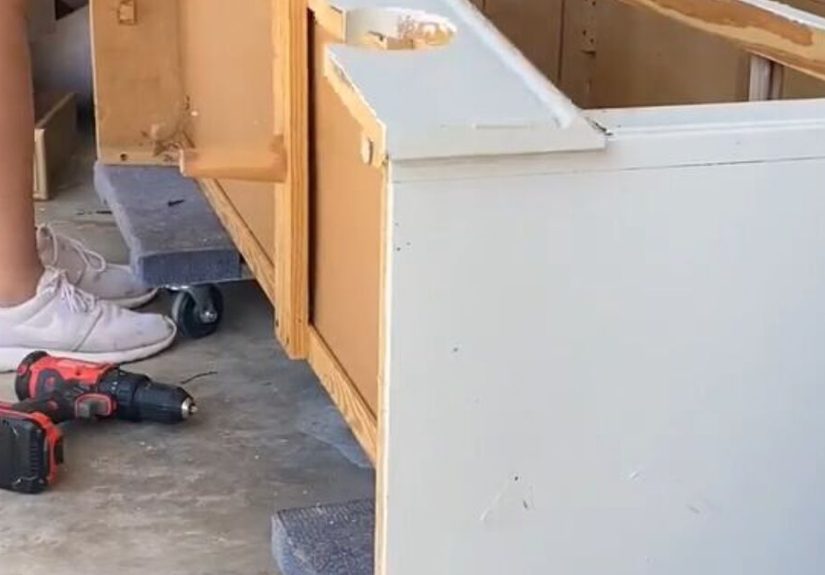
Step 2: Prep the Dresser Like You Mean It
If paint is a handshake, prep is eye contact. Skipping it doesn’t always fail immediatelybut when it fails, it fails loudly.
2A. Remove hardware and label drawers
Take off knobs/pulls. Put screws in a baggie. Label drawers underneath (A, B, C…) so everything goes back where it fits best. Dressers can be oddly pickylike cats.
2B. Clean thoroughly
Furniture holds onto oils (hands, polish, mystery splatters from 2014). Clean every surface with a degreaser, including drawer fronts and edges. Let dry fully.
2C. Scuff sand (don’t overdo it)
You’re not trying to remove the finish; you’re creating tooth. Lightly scuff glossy surfaces with 120–150 grit until they look dull. Wipe dust away.
2D. Fix dents and drama
Fill gouges or old hardware holes with wood filler. Once dry, sand smooth with 220 grit. If the dresser has peeling veneer, glue it down and clamp until set.
Safety note (important, not boring)
If the piece is very old and you suspect lead paint, follow lead-safe practices (or test first). Also, ventilate wellglaze and topcoats may be low odor, but your lungs still deserve nice things.
Step 3: Prime for Adhesion (Especially on Laminate)
If your dresser is laminate, melamine, IKEA-type foil finish, or very slick varnish, use a bonding primer. If you’re painting over knotty wood or a finish that might bleed through, use a stain-blocking primer.
Primer application
- Apply a thin, even coat with a roller for flat hookup-free smoothness.
- Brush only where the roller can’t reach.
- Let it dry as directed, then lightly sand with 220 grit to smooth.
Goal: A smooth, grippy surface that feels like it’s ready for business.
Step 4: Paint the Base Coat (Your “Undertone Wood”)
Roll or brush your base coat in thin layers. Two coats are typical. Let it dry fullydon’t rush, because the grain layer is a “wet technique,” and you’ll want a stable foundation.
Make it look less “painted” already
- Use a roller for the broad surfaces.
- Feather brush strokes along edges with a lightly loaded brush.
- Sand very lightly between coats if needed for a silky surface.
Step 5: Mix Your Faux Grain Glaze
In a disposable cup or small container, mix:
- Clear glaze (the base)
- Grain color paint (tints the glaze)
A practical starting point is a glaze-heavy mix (so it stays workable). Aim for a translucent, syrupy looklike a “wood stain” vibe rather than solid paint.
Test first: Brush the mix onto a scrap board or the back of a drawer. Drag your graining tool through it. Adjust darker/lighter until it matches your vision.
Step 6: Create the Faux Wood Grain Pattern
Work in manageable sections. Glaze dries faster than you think once you’re distracted by how cool the first pass looks.
6A. Apply glaze in a strip
Brush or roll a thin, even layer of tinted glaze onto a section about the width of your wood graining tool. Keep the layer consistenttoo thick can look gummy, too thin can look faint.
6B. Drag and rock the tool
Place the graining tool at the top edge of the wet glaze and slowly pull downward (or along the grain direction you want). As you pull, gently rock or pivot the tool to create natural variationthose “cathedral” arches and subtle shifts that read like real wood.
6C. Repeat with variation (nature hates copy-paste)
- Change your rocking rhythm slightly from pass to pass.
- Occasionally lift and re-set the tool to break up the pattern.
- Soften harsh lines with a dry brush or rag (light touch!).
6D. Add knots and character (optional but powerful)
Real wood has imperfections. You can mimic them by lightly twisting the tool in a small spot to form a knot-like swirl, or by using a small artist brush to add a tiny dark accent, then feathering it out.
6E. Blend seams
When you start a new section, overlap slightly and blend where the patterns meet. If a seam looks too obvious, lightly brush over it with glaze and re-pull the tool gently to unify the flow.
Step 7: Let It Dry (Then Decide If You Want More Depth)
After the grained layer dries, step back. Look at it in daylight and in warm indoor light. Faux finishes can shift dramatically depending on lighting.
If you want a richer wood look
- Add a second, lighter glaze pass for subtle layering, or
- Spot-deepen a few areas with a slightly darker mix (less is more).
Step 8: Protect the Finish With the Right Topcoat
Dressers get touched constantlydrawer pulls, jewelry, coffee cups you swear won’t sweat. Protect your hard work.
Topcoat options
- Water-based polyurethane/polycrylic: clear, durable, and generally less yellowing than oil-based.
- Furniture topcoat: a manufacturer’s recommended clear finish can be a great match for painted furniture.
- Wax: pretty and soft-looking, but less durable than poly for high-use surfaces.
Application tips for a smooth clear coat
- Use thin coats and avoid over-brushing (this is where bubbles are born).
- Let coats dry fully and lightly sand with 320 grit between coats if needed.
- Do 2–3 coats for a dresser top; drawer fronts can often do well with 1–2.
Important: “Dry” isn’t the same as “cured.” Many finishes take days to weeks to fully harden. Be gentle early onno dragging heavy decor across the top like it’s a gym sled.
Step 9: Finish With Hardware and Small Upgrades
Hardware is the jewelry of furniture. Even simple swaps can elevate the whole piece.
- Try warm brass for a modern vintage look.
- Matte black works well with walnut tones.
- Wood knobs can lean into the “real wood” illusion.
If drawers stick, wax the runners lightly or check for paint build-up along edges.
Troubleshooting: Fixing Common Faux Grain Problems
“It looks like zebra stripes.”
Your contrast is too high or the pattern is too repetitive. Solution: soften with a light glaze wash, then re-grain with gentler variation.
“My glaze dried before I could grain it.”
Work in smaller sections and keep your glaze mix more translucent. You can also slightly mist your tool (not the surface) to help it glide.
“It looks muddy.”
The layer might be too thick or overworked. Let it dry, then add a lighter base-toned glaze wash to brighten, or sand very lightly and redo one thin grained layer.
“The topcoat feels rough.”
Dust nibs happen. Lightly sand with very fine grit (320–400), wipe clean, then add one final thin coat.
Quick Wrap-Up
A faux wood grain dresser makeover is one of those rare DIY wins that looks high-end but is mostly patience + the right layering. If you clean thoroughly, prime properly, and grain in thin, controlled sections, you’ll get a finish that reads like real wood from across the roomand still looks impressively believable up close.
And if your first attempt isn’t perfect? Congratulationsyou’re officially doing faux finishing correctly. Real wood isn’t perfect either. It’s just confident about it.
Bonus: Real Experiences DIYers Share (So You Can Skip the “Oops” Phase)
People who try a faux wood grain paint technique on a dresser tend to have the same mini-journey: confidence, excitement, one moment of panic, then a sudden obsession with making everything in the house look like “warm walnut.” Here are some real-world patterns DIYers often reportand how to use them to your advantage.
1) The “I didn’t realize my dresser was basically a grease sponge” moment
Even if furniture looks clean, drawer fronts and edges hold onto hand oils, old polish, and residue from cleaners that leave invisible film. Many first-timers notice paint beading slightly or primer feeling weirdly slick in spots. The fix is almost always the same: a second, more thorough degreasing (especially around handles) and a quick scuff sand to reset the surface. Once that’s done, everything behaves like it should.
2) The “wood grain tool makes me feel like a wizard… for five minutes” phase
The first pull of a graining tool is extremely satisfyinguntil you realize your second pull looks exactly the same. DIYers often say the biggest learning curve is avoiding repetition. Real wood varies constantly, so the trick is to intentionally change your movement: rock faster, rock slower, pause slightly, lift and restart, or angle the tool just a touch. That little bit of randomness is what makes the finish believable, not the fanciest supplies.
3) The “my seam lines are louder than my playlist” problem
Because glaze needs to be worked in sections, people commonly end up with visible start/stop marksespecially on wide dresser sides or long drawer banks. The most common successful workaround is overlapping sections slightly and blending at the seam with a nearly dry brush or a soft rag before the glaze sets. Some DIYers also find it easier to grain an entire drawer front in one pass (left-to-right) rather than trying to stitch together multiple vertical strips.
4) The “why does it look different at night?” surprise
Faux wood finishes can shift in tone under different lighting. A warm oak look in daylight can read more orange under warm bulbs, while driftwood tones can skew a little green-gray under certain LEDs. Many DIYers test their base coat and glaze on the back of a drawer, then move it around the room at different times of day. It sounds extrauntil it saves you from repainting a whole dresser because your “soft walnut” turned into “spicy pumpkin latte” after sunset.
5) The “topcoat anxiety” debate
A lot of people worry that a clear coat will ruin the faux grain (too shiny! too plasticky!). The experiences that end happiest usually involve choosing the right sheen (often satin or matte) and applying thin coats without over-brushing. DIYers also frequently mention that the piece looks slightly “cloudy” mid-application, then clears as it dries. The payoff is worth it: drawer fronts get handled constantly, and a good protective finish helps the makeover actually last in real lifenot just in a triumphant before/after photo.
Bottom line: faux wood graining is less about perfection and more about controlled variation. Once you embrace that, your dresser makeover stops looking “painted” and starts looking like the kind of custom piece people ask you aboutusually right after they run their hand across it and say, “No way… this is paint?”


