Table of Contents >> Show >> Hide
- Why a DIY Picket Fence Is Worth It
- Before You Build: Plan First, Dig Second
- Tools and Materials You’ll Likely Need
- How To Make Your Own Picket Fence: Step by Step
- Best Finishes for a Picket Fence
- Common DIY Picket Fence Mistakes To Avoid
- How Long Does a DIY Picket Fence Project Take?
- Real-World Experiences From Building a DIY Picket Fence
- Conclusion
- SEO Tags
A picket fence has a funny way of making a house look like it has its life together. The lawn could be one missed mowing away from rebellion, the porch light might flicker like it’s auditioning for a ghost story, and yet a tidy picket fence still says, “Yes, this is a respectable home.” That is the magic of the classic picket fence: part curb appeal, part boundary marker, part timeless American charm.
The good news is that building your own picket fence is absolutely doable for a handy homeowner. The better news is that it does not require wizard-level carpentry. What it does require is careful planning, accurate layout, solid post installation, and enough patience to install pickets without turning your fence into a wooden wave machine.
In this guide, you’ll learn exactly how to make your own picket fence from start to finish. We’ll cover planning, materials, layout, post setting, picket installation, finishing, maintenance, and the real-world lessons that make the difference between “adorable front-yard fence” and “why is it leaning like it knows a secret?”
Why a DIY Picket Fence Is Worth It
A picket fence is one of the most approachable fence styles for a DIY project. It is usually shorter than a privacy fence, uses simpler materials, and gives you flexibility in both design and budget. You can go classic with evenly spaced white pickets, rustic with stained cedar, or slightly more custom with scalloped tops, decorative post caps, or an arched gate.
It also solves several problems at once. A picket fence can mark your property edge, keep kids or pets inside a designated area, discourage casual foot traffic, and dramatically boost curb appeal. It will not give you fortress-like privacy, but that is not really its job. A picket fence is the friendly handshake of fencing. It says, “Here’s the edge of my space,” not, “Abandon hope, all ye who enter here.”
Before You Build: Plan First, Dig Second
1. Check local rules and HOA requirements
Before you buy a single board, check your local building code, zoning rules, and HOA guidelines if they apply. Fence height, placement, gate swing, setback rules, and even approved colors can vary. This is the least glamorous part of the project, but it is far more fun than rebuilding a fence because someone from the city says it is six inches too far forward.
2. Confirm your property line
Do not eyeball this. “Somewhere around that flower bed” is not a legal boundary. Review your survey if you have one, check public records if needed, and talk with neighbors when the fence line affects shared edges. A friendly conversation before construction is much cheaper than an awkward one after concrete is in the ground.
3. Call 811 before digging
This step is non-negotiable. Fence posts require holes, and holes can find buried utilities faster than you can say “That definitely was not just dirt.” Contact 811 a few business days before you dig so utility lines can be marked. Even shallow digging counts.
4. Decide on your fence style
Traditional picket fences are usually around front yards, gardens, pathways, or decorative side-yard areas. Choose your height, picket shape, spacing, and finish before shopping. Popular options include:
- Flat-top pickets for a clean, simple look
- Pointed pickets for classic cottage-style charm
- Dog-ear pickets for a softer shape
- Scalloped or arched runs for more visual interest
- Painted white for traditional appeal or stained wood for a warmer, natural look
5. Choose the right material
Wood remains the classic choice for a picket fence because it is easy to cut, customize, paint, and repair. Cedar is a favorite because it naturally resists insects and decay and looks great with stain or paint. Pressure-treated lumber is usually more budget-friendly and works well for structural parts such as posts and rails. If you use treated lumber, make sure your screws, nails, and hardware are rated for it.
A practical approach is to use pressure-treated posts for durability below and near grade, then cedar rails and pickets for beauty above ground. That combination gives you strong bones and a prettier face, which, frankly, is a strategy many of us would appreciate in daily life.
Tools and Materials You’ll Likely Need
Exact supplies vary by design, but a basic DIY picket fence usually calls for:
- Fence posts
- Rails or stringers
- Pickets
- Concrete mix
- Gravel
- Exterior-rated screws or galvanized nails
- Gate hardware if adding a gate
- Post caps if desired
- Paint, stain, or sealer
- Post-hole digger or auger
- Shovel
- Level and post level
- Mason’s line
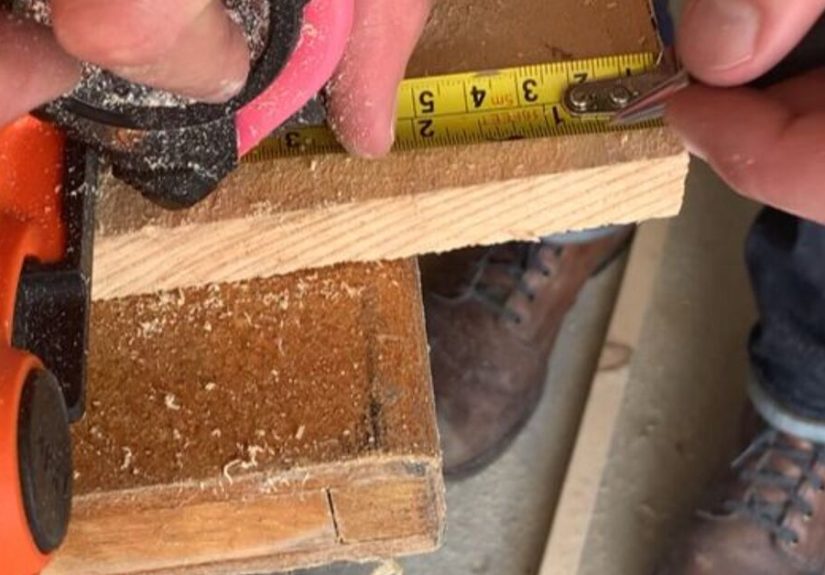
- Tape measure
- Drill/driver or nailer
- Circular saw or miter saw
- Bracing scrap wood
- Safety glasses, gloves, and hearing protection
How To Make Your Own Picket Fence: Step by Step
Step 1: Measure and lay out the fence line
Start by measuring the full perimeter or section where the fence will go. Use stakes and mason’s line to mark the run. This line becomes your visual guide for alignment, so take your time here. A clean layout saves a shocking amount of frustration later.
Mark post locations as you go. Many picket fence runs use posts spaced in regular intervals, but the exact distance depends on your design, your materials, and your local code. If you are building with preassembled panels, base your layout on panel length. If you are building from individual pickets and rails, map out the span so your final section does not end with a weird skinny panel that looks like an afterthought.
Step 2: Mark gate openings now, not later
If your fence includes a gate, plan it before digging. Mark the gate opening, account for hardware clearance, and think about swing direction. A gate is one of those features that seems obvious until it opens into a bush, scrapes a walkway, or bumps a post cap like two shopping carts in a grocery store aisle.
Step 3: Dig the post holes
Once utilities are cleared and the layout is set, dig your post holes. Hole depth depends on your fence height, local frost line, and code requirements. As a rule, posts need to be deep enough to create a stable foundation. In colder climates, post holes often need to extend below the frost line to reduce movement over time.
Add gravel at the bottom of each hole for drainage. This helps keep moisture from sitting directly under the post and gives the base a more stable footing. Make the holes wide enough to allow for proper post placement and concrete around the post.
Step 4: Set the posts carefully
Place each post in its hole, line it up with the mason’s line, and check it for plumb with a post level. Brace it temporarily with scrap wood. Then add concrete according to the product directions. Some builders prefer concrete for all posts; others reserve it especially for gate posts and high-stress areas. Either way, stability matters more than speed here.
As you set each post, recheck alignment. A fence can forgive a lot, but it does not forgive crooked posts. If your posts wander, the rails wander, the pickets wander, and soon your charming picket fence looks like it had a long night.
Allow the concrete to cure fully before adding rails. Rushing this step is a classic DIY mistake. Wet concrete does not care about your weekend schedule.
Step 5: Attach the rails
Once the posts are secure, attach the horizontal rails. Most shorter picket fences use top and bottom rails, while taller or more customized designs may use a third middle rail. Keep rail placement consistent from section to section.
Use exterior-rated screws or galvanized fasteners. If your fence will be painted, neat rail placement matters even more because paint does not hide bad carpentry; it simply highlights it in brighter detail.
On sloped ground, decide whether you want the fence to step down in sections or follow the contour more gradually. A stepped fence creates level rails with visible drops between sections. A contoured fence follows the grade and often looks softer, though it takes more layout work. For gentle slopes, many DIYers prefer the contoured look for picket fencing.
Step 6: Install the pickets
Now the fun part begins: the fence finally starts to look like a fence. Use a string line at the top to keep picket height consistent. Start with the first picket at a post or gate post, check it for plumb, and fasten it securely.
Then use a spacer block to set the gap before attaching the next picket. This little scrap of wood becomes your best friend. It keeps spacing consistent, speeds up the work, and helps you avoid the dreaded “looks fine until you stand back” problem.
Check every few pickets with a level. Wood can vary slightly, rails can move a hair, and human beings are famously overconfident after the first five boards. Small corrections along the way prevent large headaches at the end.
If you want a decorative top line, such as a gentle arch or scallop, mark the pattern before cutting or installing. For uneven terrain, a simple picket jig can make height adjustments more consistent and much less annoying.
Step 7: Build or hang the gate
Your gate should match the fence style, but it also needs extra strength. Gates move, sag, twist, and generally behave like the drama queens of the fence world. Use solid framing, quality hinges, and proper support between gate posts.
Test the swing before calling it done. It should open smoothly, latch cleanly, and avoid dragging over the ground. If the gate feels just a little off now, it will feel very off after rain, heat, use, and time start doing their thing.
Step 8: Add finishing touches
Finish with post caps, trim, or decorative details if you want a more polished look. Then paint, stain, or seal the fence as appropriate for your wood type. A white painted fence delivers that iconic storybook feel, while a clear or semi-transparent stain shows off the grain and looks more natural.
If you used pressure-treated wood, let it dry enough before finishing. Painting or staining too early can trap moisture and shorten the life of the finish.
Best Finishes for a Picket Fence
Your finish affects both appearance and maintenance. Here is a simple way to think about it:
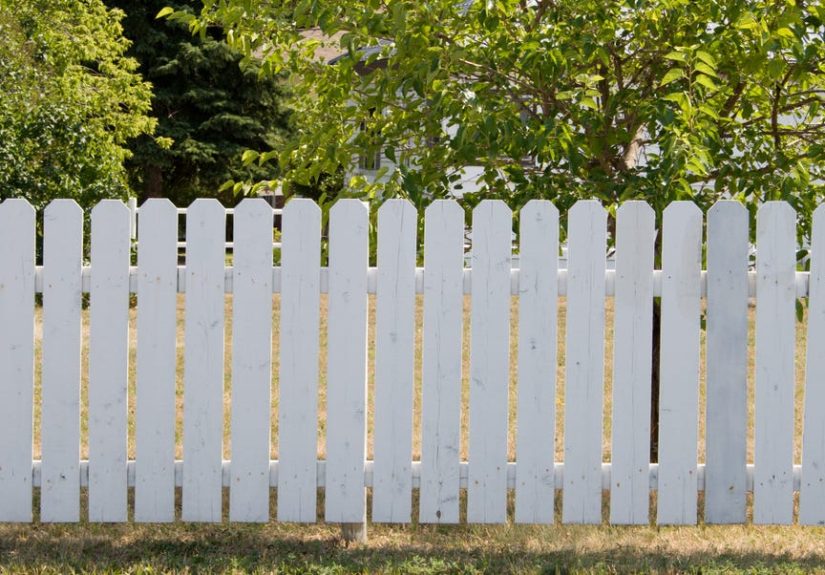
- Paint: Best for the classic white picket fence look. It hides wood grain but gives the most iconic style.
- Stain: Great if you want to show off cedar or another attractive wood species.
- Clear sealer: Maintains a more natural look, though it may need more frequent upkeep depending on exposure.
Whichever finish you choose, plan for ongoing maintenance. Sun, rain, and temperature swings are relentless. The fence is outside all day doing weather combat while you are indoors pretending your coffee counts as productivity.
Common DIY Picket Fence Mistakes To Avoid
- Skipping permits or HOA checks
- Failing to confirm the property line
- Digging before calling 811
- Setting posts too shallow or out of plumb
- Forgetting drainage at the bottom of post holes
- Using the wrong fasteners with treated lumber
- Installing pickets without a spacer block or top guide line
- Rushing the gate build
- Applying finish before the wood is ready
- Ignoring maintenance once the fence is installed
How Long Does a DIY Picket Fence Project Take?
That depends on the fence length, soil conditions, weather, the number of gates, and whether you are working solo or with help. A simple short run may fit into a productive weekend, while a larger custom fence often stretches across several days or more once layout, concrete curing, cutting, and finishing are included.
The biggest time savers are excellent planning, pre-measured layouts, a clear design, and having all materials on site before you start. The biggest time-wasters are unplanned trips to the store, crooked posts, and uttering the phrase, “I’m sure I can eyeball it.”
Real-World Experiences From Building a DIY Picket Fence
One of the most common experiences first-time fence builders talk about is how different the yard looks once string lines go up. What seemed straight from the porch suddenly reveals dips, awkward corners, roots, and surprise slopes. In other words, the yard stops being a pleasant green backdrop and starts acting like a very opinionated project manager. That is why layout work matters so much. Many DIYers say the smartest thing they did was spend more time measuring than they thought necessary, because every later step became easier.
Another frequent lesson is that post-setting determines the whole mood of the project. People often go into the job excited about picket styles, paint colors, or cute post caps, then quickly realize the real battle is won or lost underground. If the posts are straight, deep, and stable, the rest of the fence feels manageable. If even one key post is off, the work ripples outward. Many homeowners describe the moment they step back after setting the first few posts as the moment the project becomes real. It is also the moment they discover whether their “close enough” standard needs a stern talking-to.
There is also a shared experience around picket installation: it starts off feeling repetitive, then becomes strangely satisfying. Once the rails are up and the first few pickets are installed with a spacer block, the fence begins to transform fast. Homeowners often say this is the most rewarding stage because the project finally looks intentional instead of like a collection of holes, braces, and lumber receipts. This is usually when neighbors begin wandering by with questions, compliments, or the classic line, “Looks great. You know, I’ve been thinking about doing a fence too…” which is flattering right up until they say it while you are covered in sawdust and trying to level the thirty-second picket.
Weather is another major character in the story. Sun exposure, unexpected rain, and muddy soil show up in almost every fence-building experience. A bright, cool day can make the work feel smooth and almost relaxing. A hot afternoon can turn a simple alignment check into a personal feud with gravity. Many DIYers come away saying the best decision they made was breaking the project into stages instead of trying to do everything in one marathon session.
Then there is the emotional payoff. A finished picket fence changes the look of a home immediately. People often describe it as the moment the front yard starts looking “finished,” even if the landscaping is still a work in progress. Flowers look more intentional against it. Walkways feel framed. The house gains a little personality. For many, the fence becomes more than a boundary. It becomes a visible reminder that they made something practical, attractive, and lasting with their own hands. And yes, they will absolutely point it out to every visitor for the next year. As they should.
Conclusion
Learning how to make your own picket fence is really about mastering a handful of fundamentals: plan carefully, respect local rules, mark utilities, set solid posts, keep everything plumb, and stay consistent with spacing and height. Do those things well, and the rest becomes a very manageable DIY build.
A picket fence is one of the rare projects that delivers both immediate curb appeal and everyday usefulness. It can define your yard, improve the look of your home, and give you the kind of old-school charm that never really goes out of style. Build it carefully, finish it properly, maintain it over time, and you will end up with a fence that looks like it belongs there and feels like something to be proud of.