Table of Contents >> Show >> Hide
- Understanding the Parts of a Leather Glove
- Best Leather for Making Gloves
- Tools and Supplies You Need
- Step 1: Measure Your Hand
- Step 2: Draft a Simple Leather Glove Pattern
- Step 3: Make a Test Glove First
- Step 4: Cut the Leather Carefully
- Step 5: Sew the Fourchettes Between the Fingers
- Step 6: Insert and Sew the Thumb
- Step 7: Sew the Side Seam and Shape the Wrist
- Step 8: Turn, Test, and Refine the Fit
- Step 9: Finish and Condition the Gloves
- How to Care for Handmade Leather Gloves
- Helpful Tips for Better Leather Gloves
- Common Mistakes to Avoid
- Personal Experience: What Making Leather Gloves Teaches You
- Conclusion
Learning how to make leather gloves sounds like one of those old-world skills reserved for mysterious craftspeople in aprons, surrounded by brass tools and very strong opinions about thread. But the truth is friendlier: with the right leather, a careful pattern, patient stitching, and a willingness to make one “practice glove” that may look like it belongs to a raccoon, you can create a custom pair that fits your hands beautifully.
Leather gloves are practical, stylish, and surprisingly personal. A well-made pair can protect your hands, complete a winter outfit, upgrade a costume, or become a handmade gift that says, “I care about you enough to measure your knuckles.” This guide walks through the full process: choosing leather, drafting a glove pattern, cutting the pieces, sewing the fingers and thumb, finishing the wrist, and caring for the final pair.
Understanding the Parts of a Leather Glove
Before cutting anything, it helps to know the basic anatomy of a glove. Glove makers use a few traditional terms that sound fancy but are easy to understand once you see them in action.
Trank
The trank is the main body of the glove. It includes the palm, back of the hand, and finger shapes. In many glove patterns, the trank is one large mirrored piece that folds around the side of the hand.
Fourchettes
Fourchettes are the narrow strips sewn between the fingers. They create depth, flexibility, and that nice three-dimensional fit. Without fourchettes, your glove may feel like a leather envelope with ambition.
Thumb Piece
The thumb is usually cut separately and inserted into an opening in the trank. The thumb area requires careful stitching because it moves constantly and needs enough room to bend naturally.
Quirks
Quirks are small diamond or triangular pieces sometimes added at the base between fingers or near the thumb. They provide extra room and reduce stress at tight corners. Beginners can make gloves without separate quirks, but they are useful for a more refined fit.
Best Leather for Making Gloves
The best leather for gloves is soft, flexible, and thin enough to sew without turning your hands into medieval armor. Glove leather needs stretch, especially across the knuckles. If the leather is too stiff, the finished gloves may look impressive on the table but feel like punishment when worn.
Lambskin
Lambskin is soft, smooth, and elegant. It is a favorite for dress gloves because it feels comfortable and shapes nicely around the fingers. It is not the toughest choice for heavy work, but it is excellent for fashion gloves.
Deerskin
Deerskin is soft, stretchy, and durable. It has a slightly spongy feel and handles movement well, making it a strong choice for casual gloves, driving gloves, or outdoor gloves. It can cost more than some other leathers, but it is forgiving and comfortable.
Goatskin
Goatskin offers a good mix of strength and flexibility. It is often used for work gloves because it resists abrasion better than many soft leathers while still allowing dexterity.
Cowhide
Cowhide is durable and widely available, but many cowhide pieces are too thick for fitted gloves. If you use cowhide, choose a thin garment-weight hide rather than heavy tooling leather.
For a first pair, look for leather around 1 to 2 ounces in weight, or roughly 0.4 to 0.8 millimeters thick. Soft garment leather, thin deerskin, lambskin, or goatskin are usually easier to manage than stiff vegetable-tanned leather.
Tools and Supplies You Need
You do not need a museum-grade glove-making workshop to begin, but the right tools make the project much easier. Gather everything before you start, because trying to hold slippery leather while hunting for a needle is a quick way to discover new forms of frustration.
- Soft leather, large enough for both gloves
- Paper or cardstock for pattern drafting
- Pencil, ruler, and flexible measuring tape
- Sharp scissors or rotary cutter
- Cutting mat
- Leather needles or glover’s needles
- Waxed polyester, nylon, or linen thread
- Awl or stitching chisel for pre-punching holes
- Clips instead of pins
- Leather glue or contact cement, optional
- Thimble or finger protector
- Leather conditioner for finishing
A sewing machine can be used for some leather gloves if it can handle leather and if you have the right needle, thread, and presser foot. However, many handmade leather gloves are sewn by hand because the seams are small, curved, and easier to control slowly.
Step 1: Measure Your Hand
Custom fit is the biggest reason to make your own leather gloves. Measure your dominant hand because it is often slightly larger. Keep your hand relaxed, not spread like you are about to high-five a wall.
Important Measurements
- Hand circumference around the knuckles
- Wrist circumference
- Length from wrist to tip of middle finger
- Palm length from wrist to base of fingers
- Length of each finger
- Thumb length and thumb circumference
When measuring finger length, measure from the webbing between the fingers to the fingertip. For the thumb, measure from the base where it joins the hand to the tip. Add a small amount of ease so the gloves are wearable. Leather stretches, but it should not be forced to perform miracles.
Step 2: Draft a Simple Leather Glove Pattern
Place your hand on paper and trace around it with your fingers slightly apart. Keep the pencil upright, not angled under your fingers. If the pencil slides inward, the glove will become too tight, and your fingers will file a formal complaint.
After tracing, smooth the lines. Add seam allowance around the edges, usually about 1/8 inch to 1/4 inch depending on your stitching method and leather thickness. For fine dress gloves, narrow seam allowances reduce bulk. For a beginner project, a slightly wider allowance gives you more room to work.
Pattern Pieces to Create
- One trank pattern for each glove
- Three fourchette strips per glove, placed between the fingers
- One thumb pattern per glove
- Optional wrist cuff or hem extension
Mark the stretch direction on your pattern. Most glove leather stretches more in one direction. You generally want the main stretch to go around the hand, across the knuckles, rather than lengthwise from wrist to fingertips.
Step 3: Make a Test Glove First
Before cutting into your good leather, make a test glove from cheap fabric, faux leather, felt, or scrap leather. This test version is called a mockup or muslin. It may not behave exactly like leather, but it reveals major fit problems.
Try on the test glove and check the finger length, palm width, thumb angle, and wrist opening. If the fingers are too short, add length at the tips. If the palm pulls across the knuckles, add width. If the thumb feels like it is pointing toward another zip code, adjust the thumb opening and angle.
This step is not glamorous, but it saves material. Leather remembers mistakes. Fabric forgives. Choose forgiveness first.
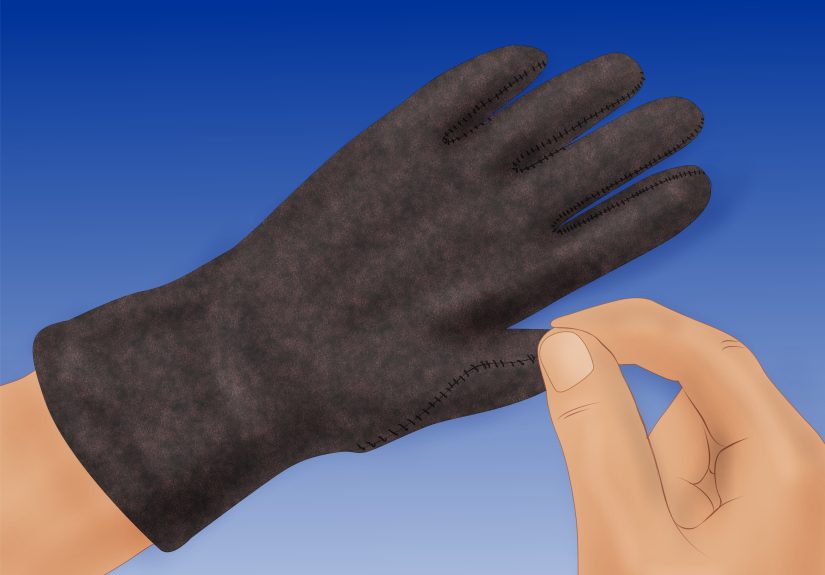
Step 4: Cut the Leather Carefully
Lay the leather flesh-side up on your cutting surface. Position the pattern pieces so the stretch runs across the hand. Avoid scars, thin spots, holes, or uneven areas unless you want the finished gloves to have unexpected “character.”
Trace the pattern lightly with a silver leather pen, chalk pencil, or fine marker on the wrong side. Cut slowly with sharp scissors or a rotary cutter. Do not tug the leather while cutting because stretching the edge can distort the shape.
Cutting Tips
- Cut mirror-image pieces for left and right gloves.
- Keep finger slits clean and precise.
- Cut fourchettes evenly so both gloves match.
- Label pieces lightly on the wrong side.
- Use clips, not pins, because pinholes in leather are permanent.
Step 5: Sew the Fourchettes Between the Fingers
Start with the fourchettes, the narrow strips that run between the fingers. Place the right sides together if you want the seam turned inward, or wrong sides together if you are making an exposed seam style. For a refined glove, internal seams are common, but exposed seams can be attractive on casual or rustic gloves.
Use small, even stitches. If sewing by hand, pre-punch holes with an awl or stitching chisel. Saddle stitching is a strong method because two needles pass through the same holes from opposite sides, creating a durable seam. Keep the tension firm but not aggressive. Pull too hard, and the seam may pucker.
Beginner-Friendly Stitching Advice
- Start at the base of the finger and work toward the fingertip.
- Match edges carefully as you sew curves.
- Use shorter stitches around fingertips for a smoother shape.
- Backstitch or tie off securely at stress points.
- Trim excess seam allowance only after checking the fit.
Sewing the fingers is the most time-consuming part of making leather gloves. Take breaks. Stretch your hands. Remind yourself that even professional glove makers did not master finger seams while rushing through lunch.
Step 6: Insert and Sew the Thumb
The thumb is where many glove projects become dramatic. The trick is to align the thumb piece with the thumb opening gradually rather than forcing it all at once. Clip or lightly glue a small section at a time, making sure the thumb points naturally forward and slightly outward.
Sew around the thumb opening with small stitches. Watch for puckers, especially near the base of the thumb. If the leather bunches, stop and redistribute the fullness. A tiny amount of easing is normal because thumbs are three-dimensional and annoyingly independent.
After sewing, try the glove on gently. If the thumb is too tight, do not yank it. Remove stitches and adjust the seam. Leather can stretch, but strained seams may tear later.
Step 7: Sew the Side Seam and Shape the Wrist
Once the fingers and thumb are assembled, sew the outer side seam from the fingertip area down toward the wrist, depending on your pattern style. Then decide how you want the wrist finished.
Simple Wrist Finishes
- Folded hem: Fold the wrist edge inward and stitch it down for a clean finish.
- Raw edge: Leave the edge unfinished if the leather does not fray and the style is casual.
- Elastic wrist: Add a short elastic section inside the wrist for a snug fit.
- Snap closure: Add a small strap and snap for a classic driving-glove look.
- Cuff extension: Make a longer wrist piece for warmth or style.
If adding snaps, test placement before punching holes. Hardware holes are permanent, and leather has no “undo” button.
Step 8: Turn, Test, and Refine the Fit
Turn the glove right-side out slowly. Use your fingers or a blunt tool to ease the fingertips into shape. Avoid sharp tools that may puncture the leather. Put the glove on and flex your hand several times.
The glove should feel snug but not restrictive. Leather gloves often loosen slightly with wear, so a close fit is good. However, numb fingertips, pulling seams, or a thumb that traps your hand in a claw position are signs that adjustments are needed.
Common Fit Problems and Fixes
- Fingers too long: Shorten the pattern at the fingertips.
- Fingers too tight: Widen the fourchettes slightly.
- Palm too tight: Add width across the knuckles.
- Thumb pulls: Adjust the thumb angle or enlarge the thumb opening.
- Wrist too loose: Add elastic, a strap, or a narrower wrist shape.
Step 9: Finish and Condition the Gloves
Once both gloves fit well, trim bulky seam allowances carefully. You can press seams lightly with your fingers or a smooth tool. Avoid high heat because heat can dry, shrink, or damage leather.
Apply a small amount of leather conditioner if the leather feels dry. Use a soft cloth and work lightly, especially on delicate lambskin. Let the gloves absorb the conditioner, then buff them gently. Do not soak them in oil or wax unless the product is designed for glove leather.
How to Care for Handmade Leather Gloves
Good leather gloves can last for years if treated well. Store them flat or gently shaped, away from direct sunlight and heat. If they get wet, blot them with a towel and let them air dry naturally. Never put leather gloves in a dryer, on a radiator, or near a heater unless your goal is to make tiny crunchy hand sculptures.
For dirt, use a soft dry cloth first. For stains, use a leather cleaner suitable for the type of leather. Always test any cleaner or conditioner on a hidden area before applying it to the entire glove. If your gloves are suede or nubuck, use products specifically made for those finishes.
Helpful Tips for Better Leather Gloves
Making gloves is detailed work, but small improvements make a big difference. Choose thinner leather than you think you need. Keep your stitch length consistent. Make the right and left gloves at the same time so you repeat each step evenly. Most importantly, do not skip the test glove.
If you want warmer gloves, add a thin lining made from silk, lightweight wool, fleece, or knit fabric. Draft the lining from the same pattern but reduce bulk at the seams. For work gloves, choose tougher leather and reinforce high-wear areas such as the palm and thumb crotch. For fashion gloves, focus on sleek seams, smooth leather, and elegant wrist finishing.
Common Mistakes to Avoid
Using Leather That Is Too Thick
Thick leather creates bulky seams and stiff fingers. It may be fine for heavy-duty mitts, but fitted gloves need thin, flexible leather.
Skipping Seam Allowance Planning
Too much seam allowance makes the fingers bulky. Too little leaves no room for secure stitching. Choose a consistent allowance and test it before cutting the final hide.
Ignoring Stretch Direction
Leather stretch affects comfort. If the stretch runs the wrong way, the glove may feel tight across the knuckles even if the pattern looks correct.
Pulling Stitches Too Tight
Tight stitching can pucker leather and reduce flexibility. Aim for secure, even tension.
Expecting the First Pair to Be Perfect
Your first pair teaches you the most. It may not be flawless, but it will make the second pair dramatically better.
Personal Experience: What Making Leather Gloves Teaches You
Making leather gloves is one of those projects that quickly teaches humility. At first, the pattern looks simple. A hand shape, a thumb, a few narrow stripshow hard could it be? Then you start sewing the fourchettes, and suddenly every finger has its own personality. The index finger behaves. The middle finger gets dramatic. The ring finger refuses to line up. The pinky, naturally, is small but emotionally powerful.
The biggest lesson is that fit matters more than speed. A leather wallet can be slightly uneven and still work. A glove has to move with your hand. If one finger is too tight, you notice immediately. If the thumb angle is wrong, the whole glove feels awkward. That is why the test glove is not optional. It is the quiet hero of the project.
Another experience many beginners share is learning to respect leather as a material. Fabric can be pinned, ripped out, pressed, and adjusted many times. Leather is more permanent. Every needle hole stays. Every cut matters. This sounds intimidating, but it also makes the craft satisfying. You become more deliberate. You slow down. You measure twice, then measure again because leather is not cheap and confidence is not a measuring tool.
Hand stitching also changes the pace of the project. It is slower than machine sewing, but that slowness gives you control. Around fingertips and thumbs, control is priceless. Small stitches create smoother curves. Even tension keeps the leather from puckering. After a while, the rhythm becomes calming: punch, stitch, pull, check, repeat. It is almost meditative, assuming meditation occasionally involves muttering at a thumb seam.
Choosing leather is another part of the learning curve. A beginner may naturally reach for a sturdy hide, thinking stronger is better. For gloves, softer is often smarter. Thin deerskin or lambskin can feel much easier to shape than heavy cowhide. Once you feel the difference, you understand why glove leather is its own category.
The final reward comes when you turn the glove right-side out and try it on. Even if it has a tiny wrinkle or one fingertip is slightly rounder than the others, it feels special because it was made for a real handyour hand. Handmade leather gloves carry the marks of attention. They are practical, personal, and a little bit old-fashioned in the best possible way.
If you make a second pair, you will almost certainly improve the pattern. You may widen the thumb, slim the fingers, add a snap, or try a contrast stitch. That is the addictive part of glove making: once the basic structure makes sense, every pair becomes a new experiment. Dress gloves, driving gloves, costume gloves, winter gloves, garden glovesthe same foundation can lead in many directions.
The best advice from experience is simple: start with affordable leather, make a mockup, keep your stitches small, and do not judge the project halfway through. Gloves look strange before they look finished. Trust the process, adjust patiently, and enjoy the fact that you are learning a skill most people never attempt. That alone deserves a round of applausepreferably while wearing your new handmade leather gloves.
Conclusion
Making leather gloves is a detailed but rewarding project that combines pattern drafting, leather selection, careful cutting, and patient stitching. The most important steps are measuring accurately, choosing soft and flexible leather, testing the pattern before cutting the final hide, and sewing the fingers and thumb with steady control.
Your first pair may not look like luxury boutique gloves, and that is perfectly fine. It will teach you how leather behaves, how glove pieces fit together, and how small adjustments change comfort. With practice, you can create custom leather gloves that are stylish, durable, and shaped for your own hands.
Note: Always use sharp tools carefully, protect your work surface, test cleaners or conditioners before applying them, and make a practice glove before cutting valuable leather.


