Table of Contents >> Show >> Hide
- Why Rainbow River Rocks Work So Well
- Materials and Tools
- Step 1: Choose Your Rainbow Style
- Step 2: Prep the Rocks Like You Mean It
- Step 3: Paint the Rocks (Two Easy Methods)
- Step 4: Seal the Rocks for Outdoor Life
- Step 5: Design the River Path in Your Yard
- Step 6: Build a “Dry Riverbed” Base
- Step 7: Install the Rainbow Rocks (The Fun Part)
- Pro Tips That Make It Look Expensive
- Troubleshooting and Longevity
- Cost and Time (Realistic Expectations)
- Magical Variations to Try
- Conclusion: A Backyard Feature That Sparks Joy
- DIYer Experiences: What You Learn After Living With a Rainbow Rock River
Some yard projects are practical (hello, downspout extensions). Some are pretty (hi, hydrangeas). And then there are the projects that make your backyard feel like it has a tiny portal to a cheerful alternate dimension. A DIY rainbow “river” made from painted river rocks is firmly in that third category.
The concept is simple: paint smooth river rocks in bright rainbow colors, seal them so they can handle real-world weather, then “landscape” them into a winding riverbed through your yard. The result looks whimsical, intentional, and surprisingly high-endlike a fancy garden designer got bored one weekend and decided to have fun.
This guide walks you through rock prep, painting methods (spray or brush), sealing for outdoor durability, and how to install your rainbow rocks in a way that looks natural instead of “I spilled a bag of Skittles on the lawn.”
Why Rainbow River Rocks Work So Well
River rock already has a calming, curated look because it’s smooth and consistent. When you add color, you keep the zen vibe while turning the feature into a focal point. It’s also flexible: you can go bold and saturated, soft and pastel, or even an ombré gradient that looks like it belongs in a watercolor painting.
- Budget-friendly impact: Paint is cheaper than most hardscape upgrades, and rocks are easy to source.
- Customizable scale: A tiny “stream” beside a flower bed looks great, and so does a bigger river across the yard.
- Low commitment: If you hate it later, you can rearrange itno jackhammer required.
- Family-friendly: Kids can help paint. Adults can “help” by doing the sealing and pretending the drying time is a personal challenge.
Materials and Tools
Rocks
- Smooth river rocks (varied sizes look most natural)
- Optional: larger “border” stones or small boulders for the edges
How many rocks? For a narrow 10-foot river, you might use a few dozen to a couple hundred depending on rock size and how thick you lay them. For a wider, denser “river,” plan for morebecause rocks multiply when your back is turned.
Paint Options
- Spray paint (fast coverage; great for bold color)
- Outdoor/patio craft paint (durable; brush-friendly; less overspray)
- Acrylic craft paint (works well, especially with sealing, but choose outdoor-rated or multi-surface when possible)
Sealer (Don’t Skip This Outdoors)
- Clear acrylic spray sealer (easy, even coverage)
- UV-resistant clear coat (helps reduce sun fading)
- Optional: brush-on outdoor decoupage/sealer for extra protection
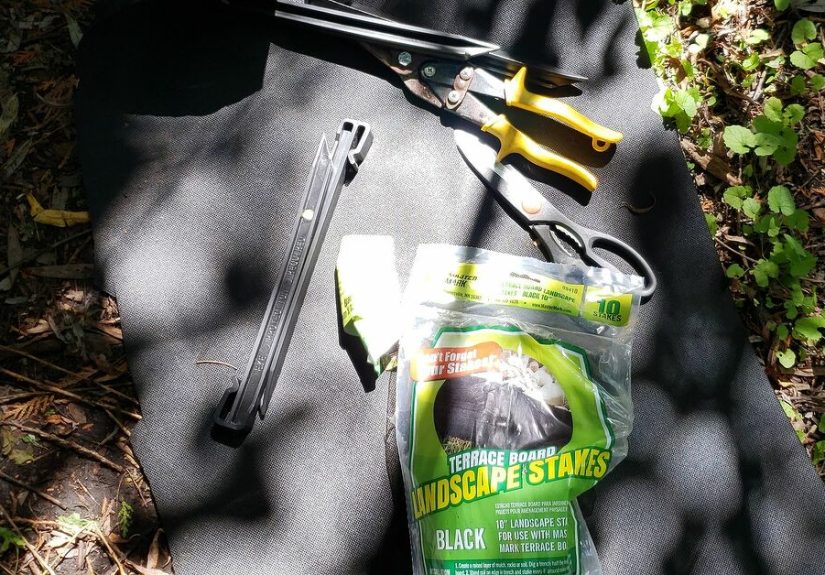
For Building the “River”
- Garden hose or rope (to plan the curve)
- Shovel or spade
- Landscape fabric (helps with weeds and keeps the rock bed cleaner)
- Landscape staples/pins
- Edging (optional but helpful for clean lines)
- Rake and gloves
Step 1: Choose Your Rainbow Style
Before you paint a single rock, decide how you want the color to flow. This is the difference between “enchanted stream” and “accidental craft explosion.”
- Classic rainbow bands: Red → orange → yellow → green → blue → purple, repeating in segments.
- Gradient ombré: Colors blend into each other smoothly (more rocks, more finesse, more “wow”).
- Pastel rainbow: Softer and dreamyespecially pretty with cottage-style gardens.
- Patterned rainbow: Solid colors + dots/stripes/swirls for a playful look.
Step 2: Prep the Rocks Like You Mean It
Paint sticks best to clean, dry surfaces. Rocks are porous and love holding onto moisture, dust, and mystery grime. Give them a fair shot at becoming yard art.
- Wash: Scrub rocks with water (and a bit of dish soap if needed). Remove dirt and loose debris.
- Dry completely: Let them air-dry in the sun, then give them extra time. “Feels dry” and “is dry” are not always the same thing.
- Optional base coat: If you want ultra-bright colors, a quick white base coat helps the rainbow popespecially on darker stones.
Step 3: Paint the Rocks (Two Easy Methods)
Method A: Spray Paint (Fast + Bold)
This method is ideal when you’re painting lots of rocks or you want saturated color without brush marks.
- Set up a spray station: Cardboard, drop cloth, or a big piece of scrap plywood in a well-ventilated area.
- Spray in thin coats: Several light passes beat one heavy coat (less drips, better finish).
- Flip and repeat: Once the first side is dry to the touch, flip and coat the other side.
- Let cure: “Dry” happens quickly; “cured” takes longer. Give them time before sealing.
Pro tip: Spray paint is speedy, but wind is its own personality. If it’s breezy, paint on a calmer day unless you want a rainbow gradient on your shoes, too.
Method B: Outdoor Craft Paint (More Control)
Brush-on patio/outdoor craft paint is great if you want specific designs, patterns, or a softer look.
- Apply a base coat: Use a medium brush for coverage. Two coats often look best.
- Add details: Dots, stripes, simple waveskeep it readable from a few feet away.
- Dry between coats: Rushing creates tacky paint and fingerprints that haunt you forever.
Step 4: Seal the Rocks for Outdoor Life
If your rainbow river is going outside, sealing is what turns “cute craft” into “yard feature that survives weather.” Look for a clear sealer that’s suitable for outdoor use, and consider UV-resistant options if your river sits in full sun.
- Make sure paint is fully dry: Give it plenty of timeespecially if you used thick paint layers.
- Apply sealer in thin coats: Light coats reduce cloudiness, drips, and sticky finishes.
- Do multiple coats: Two to three coats is a strong starting point for outdoor durability.
- Let it fully cure: Don’t install right away. Freshly sealed rocks can scuff if they rub together too soon.
Finish choice: Gloss makes colors pop and looks “wet,” satin is a happy medium, and matte looks natural but may show wear sooner. If rocks might be stepped on, avoid super-glossy finishes on walking surfacesthey can get slippery when wet.
Step 5: Design the River Path in Your Yard
This is where your project starts looking like intentional landscaping instead of a craft fair that escaped into the wild.
Pick the Right Spot
- Along a fence line: Instant “feature border” without stealing usable lawn space.
- Next to a flower bed: Adds contrast and keeps bed edges tidy.
- Near drainage areas: A dry creek bed look can also help visually guide runoff zones.
- In front yard: Big curb appealjust keep it cohesive with your home style.
Lay Out the Shape
Use a garden hose or rope to form a gentle S-curve. Slight meanders look more natural than sharp turns. Step back and check it from multiple anglesyour eyes should say “stream,” not “lightning bolt.”
Step 6: Build a “Dry Riverbed” Base
For the most polished look, install your rainbow rocks like a dry creek bed: shallow excavation, fabric, then layered stone. This helps with weeds, keeps the rocks from sinking into soil, and makes the whole thing look like it belongs there.
- Excavate: Dig a shallow channel (roughly a few inches deep) along your outline.
- Add landscape fabric: Lay it down and pin it securely. Overlap seams so weeds don’t throw a surprise party between panels.
- Border with larger stones: Place bigger rocks along the edges for a defined “bank.”
- Fill the center: Add smaller river rock/gravel as a base layer if you want extra stability (especially for larger rivers).
Natural look tip: Mix sizes and slightly “tuck” some rocks into others. Perfect rows look artificial; gentle randomness looks like nature did it (even if nature definitely did not do it in rainbow colors).
Step 7: Install the Rainbow Rocks (The Fun Part)
Now you get to paint with rocksliterally. Plan your color flow so it looks intentional.
Option 1: Color Bands
Lay a “section” of red rocks, then orange, then yellow, and so on. Keep each section roughly the same length for a clean, graphic look.
Option 2: Ombré Gradient
Blend colors by mixing transition stones between bands (red-orange, orange-yellow, etc.). If you don’t have transition stones, alternate two colors in a short “blending zone.”
Option 3: “Rainbow Pebble Mix”
Scatter all colors evenly for a confetti-style river. This is the easiest layout and still looks magicalespecially in smaller areas.
Pro Tips That Make It Look Expensive
- Use neutrals as “breathers”: A few natural stones mixed in can make the colors feel more intentional and less overwhelming.
- Create a focal point: Add a small bridge, a stepping stone crossing, or a decorative boulder “waterfall” area at one end.
- Frame it with plants: Low groundcovers, ornamental grasses, or solar lights make it feel like a designed space.
- Repeat a color elsewhere: A matching planter or garden flag ties it together.
Troubleshooting and Longevity
If Paint Chips or Peels
- Most often: rocks weren’t fully dry, or paint went on too thick.
- Fix: sand the rough spots lightly, repaint thin coats, reseal.
If Colors Fade
- Sun exposure is the usual culprit.
- Fix: choose a UV-resistant clear coat, and reseal on a maintenance schedule (especially in full sun).
If the River Looks “Flat”
- Add larger stones on edges, mound slightly in the center, or create gentle “pools” and “narrows.”
- Use lighting: a few low solar lights instantly add dimension at night.
Cost and Time (Realistic Expectations)
Time: Painting is quick, but drying and curing are what make it a multi-day project. Expect at least a weekend if you’re painting lots of rocks and sealing properly.
Cost: Costs vary by rock quantity and whether you buy in bags or bulk. Paint and sealer are usually the smaller part of the budget; the rocks add up faster as the river grows. The good news: you can start small, then expand later without redoing everything.
Magical Variations to Try
- Glow-in-the-dark accents: Add a few glowing stones so the river “sparkles” at night.
- Metallic highlights: A light dusting of metallic paint on a few rocks looks like “sunlight on water.”
- Hidden messages: Paint tiny words on a few rocks for a scavenger hunt vibe.
- Seasonal swaps: Add a handful of themed rocks (flowers in spring, stars in summer, pumpkins in fall, snowflakes in winter).
Conclusion: A Backyard Feature That Sparks Joy
A rainbow rock river is the kind of yard decor that makes people stop mid-sentence and say, “Wait… that’s adorable.” It’s colorful without being complicated, creative without needing fancy tools, and flexible enough to fit almost any outdoor space.
Whether you build a tiny rainbow stream beside your front steps or a big winding river through your garden beds, the key is simple: prep well, paint in thin layers, seal like you mean it, and install it like landscapingnot like a rushed craft project. Then step back and enjoy your yard’s new magical upgrade.
DIYer Experiences: What You Learn After Living With a Rainbow Rock River
Once the paint dries, the sealer cures, and your rainbow river is officially installed, a funny thing happens: you start noticing how your yard “behaves” around it. DIYers often say the river becomes a little outdoor mood ring. Bright sunlight makes the colors look punchier and almost glossylike the rocks are lit from within. Overcast days soften the palette, and suddenly the same river reads more like a calm watercolor. That’s not a problem; it’s part of the charm. Your yard feature ends up feeling alive, changing with the light like real water does.
Another common discovery: placement matters more than you expect. If the river sits under a tree that drops leaves, you’ll do a quick sweep more often (and you’ll become oddly proud of how fast you can “tidy the stream”). If it’s near sprinklers, you may notice dulling or mineral spots depending on your waterespecially on glossy sealers. The easy fix is to rinse occasionally and consider a satin finish if you hate spotting. DIYers also learn that rocks shift a little over time, especially after heavy rain. That’s normal. Think of it as your rainbow river slowly “settling into the landscape,” not “my river is falling apart.” A five-minute re-fluff with gloved hands is usually all it needs.
Then there’s the durability learning curve. Many people start with one coat of sealer, feel optimistic, and later realize the outdoors does not care about optimism. Sun and weather are persistent. The good news is that maintenance is straightforward: a quick clean, a light scuff if needed, and a refresh coat of clear sealer brings the color back. DIYers in full-sun yards often prefer UV-resistant topcoats to keep reds and purples from fading fastest. If you built the river where it gets dappled shade part of the day, you may barely notice wear for a long time. That’s why some folks intentionally tuck the river along a fence line or bed edge where it’s protected and still visible.
One of the best “unexpected perks” people mention is how social the project becomes. Neighbors ask about it. Kids point it out. Guests take pictures. Some DIYers even turn it into a mini tradition: every spring they repaint a small batch of rocks and “release” new colors into the river like an annual art drop. If you have children helping, the rocks can become memory markers“This blue one is from the summer we planted tomatoes,” or “That purple one is the one Dad dropped on his foot and pretended he was fine.”
Finally, DIYers tend to realize that perfection is overrated here. The river looks best when it feels playful and slightly organic. A few rocks with brush texture, a couple with tiny speckles, and even one or two “oops” rocks actually make it more charming. It’s yard decor with personality. And honestly? If a rock turns out weird, you can always place it near the back like it’s the shy cousin at a family reunion. The rainbow river will still be magical, and you’ll still get that little spark of joy every time you walk past it.


