Table of Contents >> Show >> Hide
- What Are Lace Cement Planters?
- Why Make DIY Lace Cement Planters?
- Materials and Tools You Will Need
- Safety First: Cement Is Cute, But It Is Not Cupcake Frosting
- Choosing the Right Lace or Fabric
- Choosing the Best Mold Shape
- How to Make DIY Pretty Lace Cement Planters
- Best Plants for Lace Cement Planters
- Creative Design Ideas
- Common Mistakes to Avoid
- How to Care for DIY Lace Cement Planters
- Real-Life Experience: What I Learned Making Lace Cement Planters
- Conclusion
There are two kinds of people in the world: people who see an old lace doily and think, “Grandma,” and people who see it and think, “That would look incredible dipped in cement and wrapped around a flowerpot.” If you are in the second group, congratulationsyou have excellent taste and possibly a craft table that has seen things.
DIY pretty lace cement planters are a charming mix of rustic concrete, delicate texture, and garden-ready usefulness. They look boutique, but the process is surprisingly approachable: soak lace, crochet doilies, or textured fabric in a cement slurry, shape it around a mold, let it cure, then finish it with paint, sealant, and a plant that deserves a fancy new home.
This project is perfect for patios, windowsills, herb gardens, wedding centerpieces, handmade gifts, and anyone who wants garden decor that says, “I made this,” without also saying, “Please do not inspect the back.” Below is a complete guide to making lace cement planters that are pretty, durable, and plant-friendly.
What Are Lace Cement Planters?
Lace cement planters are decorative containers made by coating lace, crochet doilies, old curtains, or other open-weave fabric with a cement mixture. Once the cement hardens, the fabric keeps its delicate pattern while the planter gains a sculptural, stone-like form.
The result is a beautiful contrast: soft lace texture frozen into hard cement. It feels a little like garden magic, except the wand is a bucket, and the spell requires rubber gloves.
Unlike poured concrete planters, lace cement planters are usually thinner, lighter, and more ornamental. They are excellent for succulents, small herbs, trailing plants, air plants, faux greenery, or decorative cachepots. For larger plants, you will want thicker walls, stronger reinforcement, and more careful curing.
Why Make DIY Lace Cement Planters?
There are plenty of planters in stores, but DIY lace cement planters have a personality that mass-produced pots rarely capture. Each lace pattern creates a different look. A round doily makes a romantic scalloped bowl. A lace curtain panel can become a tall textured container. A crochet table runner can wrap around a cylindrical mold and become a planter with cottage-garden drama.
They are also budget-friendly. Many materials can be reused from around the house: plastic bowls, food containers, old towels, lace scraps, yogurt tubs, buckets, or thrift-store doilies. With one bag of Portland cement or a fine cement-based mix, you can make several small planters.
Another benefit is flexibility. You can leave the planter raw gray for a modern farmhouse look, dry-brush it white for vintage charm, paint it terracotta, add metallic highlights, or seal it for outdoor use. In other words, this project can be classy, shabby chic, minimalist, boho, or “I had leftover paint and confidence.”
Materials and Tools You Will Need
Basic Materials
- Portland cement, fine cement mix, or a smooth cement-based craft mix
- Concrete bonding additive or acrylic fortifier, optional but helpful
- Water
- Lace doilies, crochet pieces, lace fabric, or textured cotton fabric
- Plastic bowls, cups, buckets, or containers for molds
- Cooking spray, petroleum jelly, or plastic wrap for mold release
- Fine sandpaper or sanding sponge
- Outdoor-safe sealer or masonry sealer
- Acrylic paint, chalk paint, or outdoor paint, optional
- Potting mix and small plants
Tools
- Mixing bucket or tub
- Stir stick, trowel, or gloved hands
- Rubber or nitrile gloves
- Dust mask or respirator for dry cement powder
- Safety goggles
- Plastic sheet, trash bag, or drop cloth
- Scissors
- Drill with masonry bit, if adding drainage holes after curing
- Spray bottle for misting during curing
Safety First: Cement Is Cute, But It Is Not Cupcake Frosting
Before mixing anything, take cement safety seriously. Dry cement powder can irritate your lungs and eyes, and wet cement is highly alkaline. That means it can irritate skin or even cause burns if left in contact too long. Always wear gloves, goggles, long sleeves, and a mask when handling dry cement. Work outdoors or in a well-ventilated area, and keep clean water nearby for quick rinsing.
Do not let children or pets wander into the mixing area. Also, do not rinse cement slurry down household drains. Let leftover cement harden in a disposable container, then dispose of it according to local waste rules. Your plumbing did not sign up for a concrete-based life change.
Choosing the Right Lace or Fabric
The best lace for cement planters has enough texture and openness to show a pattern after coating. Crochet doilies work beautifully because they are absorbent and structured. Cotton lace, old table runners, and lace curtains can also work well.
Avoid slick synthetic lace that refuses to absorb the cement slurry. If the material feels shiny, slippery, or plastic-like, test a small piece first. The cement needs to cling to the fibers, not slide off like it has weekend plans.
For a romantic planter, choose floral lace or scalloped doilies. For a modern look, use geometric lace or a repeated mesh pattern. For a rustic garden bowl, use thicker crochet pieces. The thicker the fabric, the more cement it will hold, which usually creates a stronger planter.
Choosing the Best Mold Shape
Your mold determines the planter shape. Plastic bowls are ideal for rounded planters. Plastic cups or nursery pots make smaller containers. Buckets create taller planters. Disposable food containers can work, too, especially if you cover them with plastic wrap first.
Plastic is usually easier to release than glass or metal. If you use glass, be extra careful because cement can grip tightly as it cures. Flexible plastic gives you the best chance of removing the planter without drama.
For a lace bowl planter, drape the cement-coated lace over the outside of an upside-down bowl. For a more traditional pot, place cement-coated lace inside a container and press another smaller container into the center to form the planting space. For beginners, the draped-over-a-bowl method is usually easiest.
How to Make DIY Pretty Lace Cement Planters
Step 1: Prepare Your Workspace
Cover your work surface with a plastic drop cloth or trash bag. Cement is messy, and lace makes it messier in a strangely elegant way. Set out your molds, lace, gloves, water, cement, and tools before you start mixing.
Spray the mold with cooking spray or cover it with plastic wrap. This helps the cured planter release more easily. Wipe away extra oil so it does not pool and create greasy spots in the cement surface.
Step 2: Mix the Cement Slurry
For lace planters, you want a smooth slurry, not chunky concrete with gravel. A good starting mixture is about five parts sifted Portland cement to one part bonding additive, then enough water to create a pudding-like consistency. If using a premixed fine cement craft product, follow the package instructions and adjust slowly with water.
Add water gradually. Too much water weakens the final piece and makes the mixture drip off the lace. Too little water makes it hard to saturate the fabric. Aim for a texture similar to thick pancake batter or pudding. It should coat the lace completely but not run like soup.
Step 3: Soak the Lace
Place the lace into the cement slurry and press it down until every fiber is coated. Use gloved hands to massage the mixture into the pattern. This is the step where the planter gets its strength, so do not rush it.
Lift the lace and let excess cement drip back into the bucket. You want the lace fully coated, but not so overloaded that the pattern disappears. If the holes in the lace become clogged, gently wipe or tap the fabric to reopen some of the design.
Step 4: Shape the Planter
Drape the coated lace over your prepared mold. Adjust the folds while the cement is wet. If using a round doily, center it over an upside-down bowl so the edges hang evenly. If using a rectangular piece of lace, overlap the ends slightly and shape it around the mold.
For a neat rim, fold the lace edge slightly inward or trim excess fabric before dipping. For a more organic look, let the edges drape naturally. This is where handmade charm comes from. A little asymmetry looks artistic; a lot of asymmetry looks like the planter heard bad news and fainted. Find the balance.
Step 5: Add Drainage Planning
Drainage is essential if you plan to plant directly into the cement planter. Without drainage holes, water can collect around roots and cause rot. You can create drainage in a few ways.
The easiest method is to use the lace cement piece as a decorative cachepot and place a nursery pot with drainage inside it. This keeps the cement planter cleaner and protects the plant. If you want the planter itself to hold soil, insert a short piece of straw, dowel, or plastic tubing near the bottom while shaping. Remove it once the cement begins to firm up. You can also drill a drainage hole after the planter cures fully, using a masonry bit and gentle pressure.
Step 6: Let It Cure Slowly
Let the planter sit undisturbed for at least 24 to 48 hours before removing it from the mold. Thin lace cement pieces are fragile early on, so patience matters. Cement gains strength over time, and slow curing helps reduce cracking.
Lightly mist the planter with water once or twice a day for the first few days, especially if the weather is hot or dry. Covering it loosely with plastic can help hold moisture. Do not place it in direct blazing sun while it cures. Fast drying may feel efficient, but it can make the planter brittle.
Step 7: Remove the Mold
Once the planter feels firm, carefully loosen it from the mold. Flex plastic molds gently. If you used plastic wrap, peel it away slowly. Do not force the planter if it resists. Give it more time, wiggle carefully, and speak to it in a calm voice if necessary. Cement responds best to patience, not panic.
After unmolding, let the planter cure longer before sanding, painting, or planting. A week is useful for small decorative pieces, while two to four weeks is better for stronger, more durable planters.
Step 8: Sand Rough Edges
Use fine sandpaper or a sanding sponge to smooth sharp edges, bumps, and rough spots. Wear a mask while sanding because cement dust is not something you want to breathe. Focus on the rim, base, and any areas that may scratch furniture or hands.
Do not over-sand the lace texture. The pattern is the star of the show. You are just removing the tiny bits that say, “I was born in a bucket.”
Step 9: Seal the Planter
Concrete and cement can release alkalinity into soil, which may affect sensitive plants. Sealing the inside of the planter helps create a barrier. If planting directly into the container, apply an outdoor-safe masonry sealer or concrete sealer to the inside. For decorative use, a lighter seal may be enough.
Another option is to soak the cured planter in water for a few days, changing the water daily, before sealing. Some DIYers also use a mild vinegar-water rinse after curing to help reduce surface alkalinity. Always rinse well and let the planter dry completely before adding soil.
Step 10: Paint or Finish
Raw cement gray is beautiful, especially with lace texture. But if you want more personality, paint the planter after it cures. White paint creates a vintage ceramic look. Terracotta paint gives a Mediterranean feel. Black or charcoal looks modern and dramatic. Metallic wax or dry-brushed gold can highlight the raised lace pattern.
For outdoor planters, choose exterior paint and finish with a weather-resistant sealer. For indoor planters, protect surfaces with felt pads or a saucer, because cement can hold moisture.
Best Plants for Lace Cement Planters
Small plants work best because lace cement planters are often lighter and thinner than standard concrete pots. Succulents are a natural choice because they like well-draining soil and do not need constant watering. Try echeveria, haworthia, sedum, string of pearls, or small jade plants.
Herbs such as thyme, oregano, and chives can also look lovely in cement planters if drainage is excellent. For a romantic porch display, use small trailing annuals like sweet alyssum, lobelia, or creeping Jenny. Indoors, air plants are practically cheatingin the best waybecause they require no soil and look beautiful tucked into shallow lace bowls.
Avoid planting acid-loving plants directly in unsealed cement containers. Plants such as azaleas, blueberries, and some ferns may struggle if the planter raises soil alkalinity. If you love those plants, use a plastic nursery pot inside the lace cement planter instead.
Creative Design Ideas
Vintage White Lace Planter
Use a round crochet doily, drape it over a bowl, cure it, and dry-brush the finished planter with white paint. Add a small lavender plant or faux greenery for a farmhouse-style centerpiece.
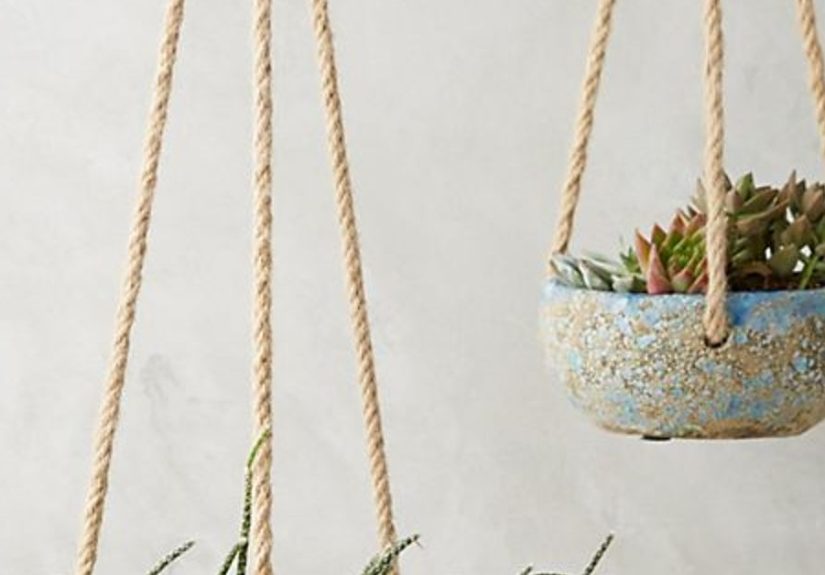
Boho Hanging Lace Cement Planter
Before the cement fully hardens, create three small holes around the upper edge using straws or skewers. After curing, thread jute rope through the holes and hang the planter with a lightweight trailing succulent.
Modern Charcoal Lace Pot
Paint the finished planter matte charcoal and lightly brush the raised lace texture with pale gray. This creates contrast without looking overly sweet.
Wedding or Party Centerpieces
Make several small lace cement bowls using matching doilies. Fill them with moss, candles in glass holders, succulents, or mini floral arrangements. They look expensive, but your budget can remain emotionally stable.
Common Mistakes to Avoid
Using Concrete With Large Aggregate
Standard concrete mix often contains gravel. That is great for sidewalks, not so great for delicate lace. Use Portland cement, mortar-like fine mix, or a smooth craft cement for better detail.
Making the Slurry Too Watery
A watery mixture may drip away from the lace and leave weak spots. Add water slowly and stop when the mix is thick enough to cling.
Unmolding Too Soon
Thin cement lace can crack if moved before it has enough strength. Give it time. Your future planter will thank you by not becoming a sad pile of crunchy lace.
Skipping Drainage
Pretty planters still need plant logic. If water has nowhere to go, roots can suffer. Add a hole, use a nursery pot insert, or reserve the planter for decorative use.
Skipping Sealer for Live Plants
If soil touches cement directly, sealing helps protect both the planter and the plant. It also makes cleaning easier and reduces water absorption.
How to Care for DIY Lace Cement Planters
Handle lace cement planters gently, especially if they are thin. They are sturdy once cured, but they are not indestructible. Avoid dropping them, dragging them across rough surfaces, or leaving water trapped inside during freezing weather.
Clean them with a soft brush or damp cloth. Avoid harsh chemical cleaners. If the planter is outdoors, reseal it once a year or whenever water stops beading on the surface. For indoor use, place a saucer underneath to protect furniture.
If using the planter as a cachepot, remove the inner nursery pot when watering. Let it drain fully before placing it back inside the cement container. This keeps the lace planter looking fresh and prevents moisture from sitting in the bottom.
Real-Life Experience: What I Learned Making Lace Cement Planters
The first time you make DIY lace cement planters, you may imagine a peaceful afternoon of artistic garden crafting. There will be soft music, a tidy worktable, and perhaps a cup of tea. In reality, cement has a way of turning even the most graceful person into a raccoon with a home improvement hobby. That is normal. The project is still worth it.
One of the biggest lessons is that the lace matters more than you think. A flimsy synthetic lace may look beautiful when dry, but once dipped, it can collapse, stretch, or refuse to hold cement evenly. Thicker cotton crochet pieces are much easier for beginners because they absorb the slurry and keep their shape. If you are shopping at a thrift store, look for doilies with a little weight and texture. If the doily feels like it could survive a church basement potluck from 1978, it is probably a strong candidate.
Another lesson is to make more than one planter at a time. Cement mixing creates mess, and cleaning up takes effort, so it makes sense to dip several pieces while the slurry is ready. Start with one “practice” doily. This first piece teaches you how wet the mixture should be, how the lace drapes, and how much time you have before things begin to stiffen. The practice planter may not be perfect, but it often becomes the one you love most because it has character. In DIY language, “character” means “slightly crooked but emotionally valuable.”
Mold choice also changes everything. A bowl with a gentle curve creates elegant folds. A steep-sided container creates sharper pleats. A too-small mold can make the lace bunch up awkwardly, while a too-large mold may stretch the pattern flat. Before dipping the lace, test the dry fabric over several containers. Adjust it until you like the shape. Once it is covered in cement, you will have less time to debate your artistic destiny.
Curing is where many beginners get impatient. The planter may feel hard after a day, but that does not mean it is ready for rough handling. Thin edges chip easily when young. If you can wait several days before unmolding and longer before planting, the result is usually stronger. Misting helps, too. Cement likes a slow cure, not a desert-speed dry-out under the afternoon sun.
Painting is another place where small choices make a big difference. Solid paint can hide the lace texture if applied too heavily. Dry brushing works beautifully because it catches the raised pattern and leaves shadows in the recesses. White over gray looks vintage. Gold over black looks dramatic. Pale green over cement feels garden-soft and natural. Test paint on the back or underside first so you do not accidentally turn your elegant planter into something that looks like a haunted cupcake wrapper.
Finally, the most practical experience is this: use nursery pots inside whenever possible. Direct planting is fine if you add drainage and seal the planter, but a removable inner pot makes watering easier, protects the cement, and lets you swap plants seasonally. In spring, add herbs. In summer, use trailing flowers. In fall, tuck in ornamental peppers or mini mums. In winter, fill the planter with pinecones, moss, or faux greenery. A lace cement planter does not have to be a one-season project; it can become a year-round piece of handmade decor.
Conclusion
DIY pretty lace cement planters are the perfect blend of delicate design and garden toughness. With lace, cement, a simple mold, and a little patience, you can create planters that look handmade in the best possible way: textured, charming, imperfect, and completely unique.
The key is to use the right materials, protect yourself while working with cement, choose a mold that supports the lace shape, cure the planter slowly, and add drainage or a nursery pot insert for healthy plants. Once you understand the basic process, the creative options are endless. You can make romantic doily bowls, modern painted pots, hanging planters, wedding centerpieces, patio accents, and thoughtful handmade gifts.
Note: This article is written in original, web-ready American English and is based on practical DIY cement planter methods, common concrete craft safety practices, curing guidance, drainage principles, and real-world planter care considerations.