Table of Contents >> Show >> Hide
- Why People Love an Orbeez Stress Ball
- What You Need
- How to Make an Orbeez Stress Ball: 10 Steps
- Step 1: Soak the Orbeez Until They Are Fully Expanded
- Step 2: Drain the Beads Well
- Step 3: Choose a Strong Balloon
- Step 4: Stretch the Balloon Before Filling
- Step 5: Insert the Funnel Into the Balloon Neck
- Step 6: Spoon the Orbeez In Slowly
- Step 7: Test the Firmness
- Step 8: Gently Release Excess Air
- Step 9: Tie the Balloon Securely
- Step 10: Squeeze-Test and Clean It Up
- Common Mistakes to Avoid
- Safety Tips for an Orbeez Stress Ball
- How to Make It Even Better
- Frequently Asked Questions
- Experience: What Making an Orbeez Stress Ball Is Actually Like
- SEO Tags
If your hands need something to do besides doomscrolling, pen-clicking, or mysteriously opening the snack cabinet for the fourth time, an Orbeez stress ball is a surprisingly fun fix. It is squishy, colorful, slightly ridiculous in the best way, and easy enough to make without a degree in balloon engineering. Better yet, this DIY project combines a satisfying sensory texture with a simple craft that does not require a glitter explosion or a trip to a specialty store.
The idea is simple: hydrate water beads, tuck them into a balloon, seal everything up, and squeeze away. But the difference between “Wow, this feels amazing” and “Why is my kitchen covered in tiny jelly marbles?” comes down to technique. In this guide, you will learn exactly how to make an Orbeez stress ball in 10 steps, what materials work best, which mistakes to avoid, and how to make the finished ball last longer.
One quick reality check before we begin: water beads can be dangerous if swallowed, especially for babies, toddlers, pets, and anyone who might mistake them for candy. So this is a craft for older kids, teens, and adults with supervision and common sense fully switched on. In other words, make it for stress relief, not as a snack-shaped science experiment.
Why People Love an Orbeez Stress Ball
A homemade Orbeez stress ball has a very specific appeal. Unlike a flour-filled stress ball, which feels dense and doughy, a water-bead stress ball feels cool, bouncy, and textured. The beads roll against each other when you squeeze, which gives it that oddly addictive sensory feel. It is less “office supply” and more “tiny spa for your fingertips.”
Another plus is customization. You can choose clear beads, rainbow beads, pastel beads, neon beads, or a single color if you prefer your relaxation tools to match your vibe. Some people make them soft and loose. Others pack them fuller for a firmer squeeze. There is room to experiment, which is part of the fun.
What You Need
- 1 packet of Orbeez or similar water beads
- 1 to 2 balloons, preferably thick latex balloons
- 1 small funnel
- 1 bowl of water
- 1 spoon
- 1 towel or paper towels
- 1 cup or bowl for draining the beads
- Optional: a second balloon for extra durability
That is it. No chemistry set. No power tools. No dramatic movie montage. Just a few basic supplies and a little patience.
How to Make an Orbeez Stress Ball: 10 Steps
Step 1: Soak the Orbeez Until They Are Fully Expanded
Start by pouring the dry water beads into a bowl and adding water according to the package directions. Most water beads need time to fully hydrate, so do not rush this part. Tiny dry beads will not give you the nice squishy texture you want, and they are much harder to manage when filling a balloon.
Let them sit until they are plump, smooth, and evenly expanded. If some are still tiny and some are giant, give them more time. A stress ball filled with uneven beads can feel lumpy, like a massage tool designed by chaos itself.
Step 2: Drain the Beads Well
Once the beads are fully expanded, drain off the extra water. This step matters more than people think. If you leave too much water mixed in, the balloon can become slippery, messy, and more likely to leak later. You want the Orbeez hydrated, not swimming.
Spread them on a towel or let them sit in a strainer for a few minutes. They should still feel wet to the touch, but there should not be puddles tagging along.
Step 3: Choose a Strong Balloon
Pick a balloon that feels thick and stretchy. Cheap, flimsy balloons are basically tiny betrayal machines. Since water beads create a textured pressure from the inside, a sturdier balloon works much better and lasts longer.
If you want extra durability, plan to double-layer the finished stress ball by slipping a second balloon over the first. This is especially helpful if the ball will be squeezed often or tossed into a backpack.
Step 4: Stretch the Balloon Before Filling
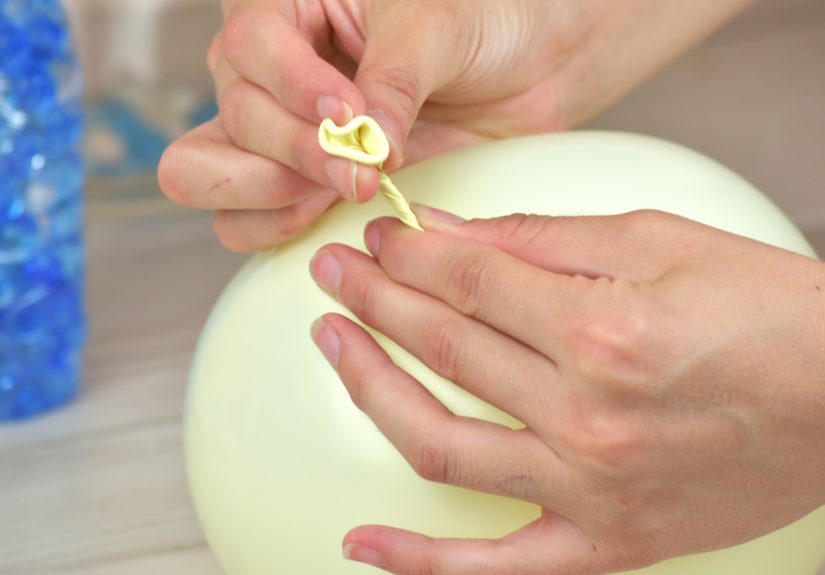
Inflate the balloon once, then let the air out. This simple trick pre-stretches the latex and makes it easier to fill. It also reduces the odds of fighting the balloon neck like it owes you money.
After deflating it, gently stretch the opening with your fingers. Do not yank too hard. Balloons have feelings. Or at least limits.
Step 5: Insert the Funnel Into the Balloon Neck
Place the funnel securely into the balloon opening. This is the most important setup step because it keeps the process controlled. If the funnel is too wide, switch to a smaller one or use a narrow bottle-neck funnel. The goal is to guide the beads in without launching them across the room.
Hold the balloon neck tightly around the funnel so it does not slip off mid-fill. That is the kind of drama nobody needs.
Step 6: Spoon the Orbeez In Slowly
Add the hydrated beads a little at a time. Slow and steady wins this race and prevents a jam in the funnel. If the beads get stuck, use the handle of a spoon or a chopstick to nudge them through gently. Do not stab aggressively unless your plan includes balloon failure.
Keep going until the balloon begins to take shape. Most people like a palm-sized stress ball that is easy to hold and squeeze, so stop before it becomes too large or tight.
Step 7: Test the Firmness
Before tying the balloon, hold it in your hand and check the feel. Do you want it softer and more squishy? Leave more room inside. Prefer something firmer with more texture? Add a few more beads. This is your moment to customize the final result.
A good Orbeez stress ball should feel full enough to hold its shape but still flexible enough to squeeze comfortably. Overfilling is one of the fastest ways to turn your masterpiece into an indoor cleanup event.
Step 8: Gently Release Excess Air
Pinch the balloon neck and press out as much extra air as possible before tying it. Too much trapped air makes the ball feel more like a balloon than a stress toy. You want bead-filled squish, not squeaky bounce.
Be careful here. If you squeeze too hard or let go too fast, the beads can try to escape. It is not dangerous to your ego only if nobody sees it.
Step 9: Tie the Balloon Securely
Tie a tight knot close to the beads. Make sure the knot is snug, because a loose tie can cause leaking or gradual deflation. If the neck feels too long after tying, you can trim a little excess latex with scissors, but do not cut too close to the knot.
If you want a stronger finish, insert the tied stress ball into a second balloon with the neck cut off, then pull the second balloon around it. This creates a thicker outer layer and makes the ball look smoother too.
Step 10: Squeeze-Test and Clean It Up
Now for the best part: squeeze it. Roll it between your hands. Press your fingers into it. See how it responds. If it feels too loose, you may want to remake it with a bit more filling. If it feels dangerously tight, definitely do not keep testing your luck like a cartoon inventor.
Wipe the outside dry, store it in a cool place, and keep it away from sharp objects, heat, pets, and small children. Congratulations. You have officially made a homemade Orbeez stress ball and possibly unlocked a new hobby.
Common Mistakes to Avoid
Using Too Much Water
The beads should be hydrated, but the inside of the balloon should not be sloshy. Excess water weakens the overall feel and can make the balloon more likely to leak.
Overfilling the Balloon
If the balloon is stretched too tightly, it is more likely to pop. Leave a little give. Your stress ball should relieve pressure, not embody it.
Using Thin Party Balloons
Thin balloons can work in a pinch, but thick balloons last longer and feel better in your hand. If thin balloons are all you have, double-layer them.
Skipping Safety
Water beads are not appropriate for babies, toddlers, or pets. Do not leave them lying around where someone could swallow them or put them in their ear or nose. Also, if the balloon tears, dispose of the contents immediately.
Safety Tips for an Orbeez Stress Ball
- Use this craft only with older children, teens, or adults who understand it is not edible.
- Keep unused and finished water beads away from babies, toddlers, and pets.
- Do not use a damaged balloon. Replace it right away.
- Store the finished stress ball in a container or drawer when not in use.
- Discard the stress ball if it becomes sticky, punctured, moldy, or starts leaking.
- Wash hands after handling, especially before eating.
How to Make It Even Better
Once you know the basic method, you can tweak the experience. Use clear balloons to show off colorful beads. Mix two shades for a layered look. Make a small one for a desk drawer and a bigger one for movie-night squeezing. You can even create a themed set by color, like cool blues for calm, bright neons for energy, or pastels for a softer aesthetic.
Some people also prefer a mixed filling. Adding a small amount of soft slime or hair gel with the Orbeez creates a different texture, but it also increases mess and changes the feel. If you want the classic bead texture, stick with just well-drained hydrated beads.
Frequently Asked Questions
How long does an Orbeez stress ball last?
If it is made with a strong balloon and stored properly, it can last from several days to a few weeks or longer. Heavy squeezing, heat, and rough handling shorten its life.
Can I use dry Orbeez instead of soaked ones?
No. Dry beads are too small and will not create the satisfying texture you want. They also may continue expanding later, which can ruin the shape of the ball.
Can I freeze it?
Freezing is not ideal. The balloon can stiffen, and the texture becomes less pleasant. Cool is fine. Arctic science project is not necessary.
What should I do if it pops?
Clean up the beads immediately and throw them away safely. Do not leave them on the floor, especially if children or pets are nearby.
Experience: What Making an Orbeez Stress Ball Is Actually Like
The funniest thing about making an Orbeez stress ball is that the project feels calm and chaotic at the exact same time. At first, it looks absurdly simple. You see a bowl of tiny dry beads, a balloon, and a funnel, and you think, “This will take five minutes.” Then the beads start expanding, the balloon acts dramatic, the funnel gets stubborn, and suddenly you are negotiating with craft supplies like a hostage mediator. That said, once you get the hang of it, the process becomes weirdly satisfying.
For many people, the best part is watching the beads transform in water. They start out looking like sprinkles that lost confidence, then slowly puff up into glossy little spheres. There is something undeniably satisfying about that change. It feels halfway between a science experiment and a sensory craft, which is probably why so many people try it at least once. The filling step is usually the messiest part, but it is also where the project becomes real. When the first spoonful slides into the balloon and the shape starts forming in your hand, you get that tiny rush of victory usually reserved for parallel parking on the first try.
The finished texture is where the experience really pays off. A good Orbeez stress ball does not feel mushy in a boring way. It feels alive with movement. The beads shift under your fingers, bunch up, then roll away as you press again. Some people like squeezing it while reading, studying, or sitting through long meetings that absolutely could have been an email. Others keep one near a laptop just to keep their hands busy when they are thinking. It is not magic, and it is not therapy in balloon form, but it can be a pleasant, grounding little object to fiddle with.
There is also a trial-and-error element that people do not always expect. Your first version may be too loose. The second may be overstuffed and look like it is one dramatic squeeze away from retirement. By the third try, though, most DIYers figure out the sweet spot. That small learning curve is part of the charm. You are not just making a stress ball; you are customizing one that suits your hand, your pressure, and your tolerance for risk involving latex.
And yes, the experience gets even better when you make it with someone else. Kids old enough to follow safety rules often love the color choices and the tactile fun. Teens enjoy the customization. Adults pretend they are helping, then quietly keep the finished ball for themselves. It is one of those rare crafts that does not demand perfection. If it is squishy, secure, and not leaking, you basically won. That is a refreshing standard in a world full of tutorials that somehow expect homemade projects to look like they were assembled by a design team with studio lighting.
In the end, making an Orbeez stress ball is less about crafting a flawless object and more about enjoying the process. It is hands-on, a little silly, and surprisingly satisfying. Even the minor frustrations become part of the story. If you end up with one perfect stress ball and one balloon casualty, congratulations, you had the authentic experience.