Table of Contents >> Show >> Hide
- Before You Mix Anything: Know What You’re Trying to Kill
- The Best All-Purpose DIY: Vinegar + Soap (No Salt)
- The “Use With Caution” Classic: Vinegar + Salt + Soap (Hardscape Only)
- Horticultural Vinegar (10–20% Acetic Acid): Powerful, But Not “Kitchen Cute”
- Boiling Water: The “Tea Kettle Takedown”
- Other Natural Weed Killers With Real-World Track Records
- How to Apply DIY Weed Killer Like a Pro (Without Nuking Your Petunias)
- Stop Weeds from Coming Back: Prevention Beats Spray Battles
- FAQ: Quick Answers to Common DIY Weed Killer Questions
- Conclusion
Weeds are the uninvited guests of the garden world. You didn’t send them an invite, you don’t know how they got
your address, and yet there they aresprawled across your driveway like they pay rent.
The good news: you can knock back many common weeds with an all-natural weed killer DIY mix made from
simple household ingredients. The even better news: you can do it without turning your yard into a science fair volcano.
The “read-the-fine-print” news: “natural” doesn’t automatically mean “harmless,” and some popular recipes can damage
soil or nearby plants if you use them carelessly.
Below you’ll get the practical, evidence-based approach: what works, what’s hype, where each method belongs (and
where it absolutely does not), plus pro-level application tips so you kill weedsnot your favorite flowers.
Before You Mix Anything: Know What You’re Trying to Kill
Annual vs. perennial weeds
Most DIY “homemade herbicide” sprays are contact killers. They burn the leaves they touch. That’s great
for young annual weeds (think tiny seedlings that popped up after rain). It’s less impressive on
perennials (dandelion, bermudagrass, bindweed) that can regrow from deep roots and stored energy.
Contact vs. systemic (why DIY mixes often need repeat rounds)
Store-bought systemic herbicides move through the plant and can kill roots. Most DIY natural weed killers do not.
That means you’re often playing “whack-a-weed” for a few roundsespecially on mature weeds. Don’t be discouraged;
just plan for follow-up.
Where are the weeds growing?
- Cracks in pavement / between pavers: You can use stronger options here because you’re not trying to preserve soil life or nearby roots.
- Mulch beds: Contact sprays can work, but overspray is a real problem. Shield your ornamentals.
- Lawns: DIY non-selective sprays will damage grass. (Yes, even “natural” ones.)
- Vegetable gardens: Use extreme care. Many “natural” sprays still burn edible plants on contact.
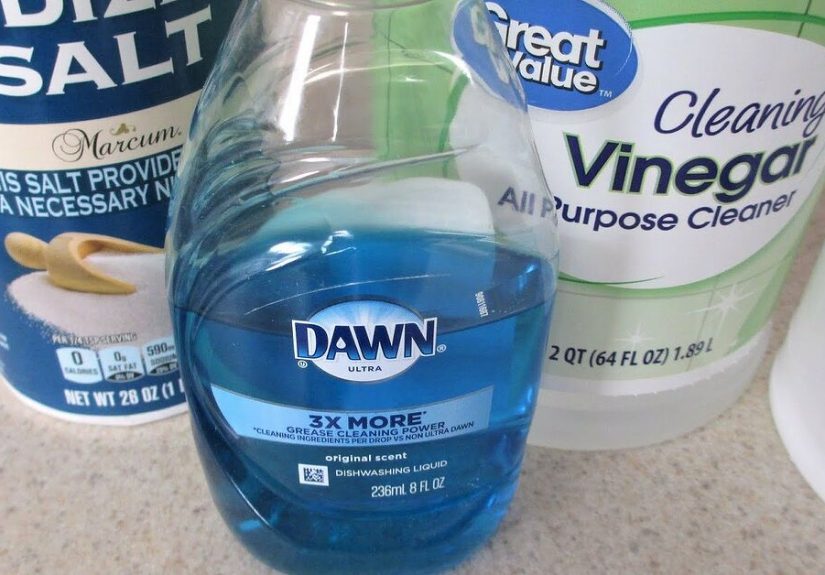
The Best All-Purpose DIY: Vinegar + Soap (No Salt)
If you want a natural herbicide that’s easy to mix and less likely to ruin soil structure, start here.
Household vinegar is usually around 5% acetic acid. It can dry out and burn tender weed growthespecially seedlings.
Soap helps the solution stick to waxy leaves instead of beading up and rolling away like it has somewhere better to be.
Recipe: Vinegar + Soap Spray
- 1 gallon household white vinegar (5% acidity)
- 1–2 tablespoons liquid soap (Castile soap or mild dish soap)
- Optional: a spray bottle for small jobs or a pump sprayer for bigger areas
How to mix and apply
- Add vinegar to your sprayer first.
- Add soap last, gently, to avoid creating a bubble festival.
- On a dry day, spray weeds until leaves are evenly coated (not dripping like they just lost a water balloon fight).
- Aim for direct contact with the weed leaves. Avoid your plantsthis spray is non-selective.
- Re-check in 24–48 hours. Re-spray survivors as needed.
Where this works best
- Newly emerged annual weeds
- Weeds in gravel paths and fence lines (where overspray won’t hit beloved plants)
- Edges of beds (with careful aim and shielding)
Where this disappoints (and why)
Big, established weeds may wilt dramaticallythen bounce back like they had a motivational speech. That’s because
their roots survive. If you want long-term control, you’ll combine spraying with prevention (mulch, pulling, blocking light).
The “Use With Caution” Classic: Vinegar + Salt + Soap (Hardscape Only)
This is the viral vinegar weed killer recipe you’ve seen everywhere. It can work fast on cracks and
pavers. But salt can build up and damage soil, nearby plants, and the long-term health of your landscape.
So we’re going to be very clear: this is a spot treatment for places you do not want anything growing.
Recipe: Paver/Driveway Weed Killer
- 1 gallon household white vinegar (5%)
- 1 cup table salt
- 1 tablespoon liquid soap
How to use it safely
- Dissolve salt in some warm vinegar (or warm water), then add the rest of the vinegar.
- Pour into a sprayer and add soap last.
- Apply directly to weeds in cracks and crevicesavoid runoff into beds or lawn edges.
- Do not apply before heavy rain (you don’t want salty runoff traveling).
Why the “hardscape only” rule matters
Salt doesn’t just “kill weeds.” It can make soil less hospitable for many plants for months, and it can injure roots
of nearby ornamentals. Translation: it’s great for driveway cracks, terrible for garden beds.
Horticultural Vinegar (10–20% Acetic Acid): Powerful, But Not “Kitchen Cute”
Stronger vinegar products marketed for weed control can be 10–20% acetic acid (sometimes higher). They can improve
burn-down on young weeds and can do more visible damage on larger weedsbut they also come with real safety concerns.
At these concentrations, vinegar can cause serious eye injury and skin irritation.
Smart approach
- Prefer labeled herbicidal products and follow the label like it’s the final exam.
- Wear gloves, closed-toe shoes, long sleeves, and eye protection.
- Use a low-wind day and a targeted nozzle to reduce drift.
Where horticultural vinegar shines
- Weeds in gravel
- Weeds along fences
- Hardscape cracks
- Young weeds in areas where you can safely avoid desirable plants
Boiling Water: The “Tea Kettle Takedown”
Boiling water is the simplest all-natural weed killer: no bottle, no mixing, no mystery ingredients.
It’s also extremely effective at burning what it touches. The catch: it’s still a contact method,
meaning roots may survive, and it’s best on young weeds and places where other plants aren’t nearby.
How to do it without an emergency room cameo
- Boil water in a kettle (a spout gives better aim).
- Wear sturdy shoes and keep kids/pets well away.
- Slowly pour directly onto the weed crown and leaves.
- Expect to repeat for stubborn perennials.
This method is excellent for weeds in sidewalk cracks and patio seams. It’s not ideal in thick plantings where
a splash could cook your groundcover.
Other Natural Weed Killers With Real-World Track Records
1) Herbicidal soaps (fatty acid-based)
These products use salts of fatty acids to disrupt plant cell membranesanother contact approach. They’re popular in
lower-toxicity weed control and are often used for spot treatments. If you want “natural” but more consistent than
pantry chemistry, this category is worth considering.
2) Citrus oil / d-limonene sprays
Citrus-oil herbicides (often featuring d-limonene) can strip the waxy cuticle on leaves, causing rapid dehydration.
They’re typically non-selective contact killers and can work quickly in warm, dry conditions.
3) Citric acid (and other acid-based blends)
Citric acid-based weed killers can burn foliage and are usually used as contact sprays. They can be effective on
small weeds, and many formulations are designed for spot spraying.
4) Corn gluten meal (pre-emergent): prevention, not rescue
Corn gluten meal gets talked about as an “organic weed control” option because it can inhibit root formation in
germinating seeds. The key phrase is germinating seeds. It won’t knock down established weeds the way
vinegar or boiling water can. Research and real-world results are mixed depending on timing, rate, and conditionsso
think of it as one tool in a prevention plan, not a miracle cure.
How to Apply DIY Weed Killer Like a Pro (Without Nuking Your Petunias)
Choose the right day
- Dry weather: Apply when rain isn’t expected for at least 24 hours.
- Low wind: Drift is how “targeted spraying” becomes “surprise pruning.”
- Warm and sunny: Contact sprays generally work better when weeds are actively growing.
Use precision tools
- A small spray bottle for single weeds
- A pump sprayer for larger patches
- Cardboard or a plastic shield to protect desirable plants
- A marker (chalk or flags) to track what you treated
Expect (and plan for) repeats
Many homemade weed killers don’t have residual activity in soil. That’s good for the environment, but it also means
new seedlings can pop up later. A second pass is normalespecially for tough weeds.
Safety is not optional
Even “natural” ingredients can irritate skin and eyes. Wear gloves and eye protection, avoid inhaling spray mist,
and store mixtures away from children and pets. Also: don’t spray edible plants unless the product is specifically
labeled for that use and you follow its directions.
Stop Weeds from Coming Back: Prevention Beats Spray Battles
Mulch like you mean it
A 2–3 inch layer of mulch blocks light and makes it harder for weed seeds to germinate. Top it up as it decomposes.
Bonus: it also makes pulling the occasional weed way easier.
Pull early, pull smart
Young weeds are easier to pull and easier to kill. If you remove them before they set seed, you’re not just solving
today’s problemyou’re reducing next month’s.
Close the gaps
Bare soil is an open invitation. Dense planting, groundcovers, edging, and pathway maintenance reduce the space
weeds can colonize.
For pavers and cracks
Sweep polymeric sand into joints (where appropriate), and keep debris from collecting in cracks. Weeds love a little
dirt buffet in a pavement seam.
FAQ: Quick Answers to Common DIY Weed Killer Questions
Does vinegar kill weeds permanently?
It can kill small annual weeds effectively, but many perennials regrow because vinegar is usually a contact burn-down.
You may need repeat applications and better prevention.
Is adding salt necessary?
Not for many jobs. Salt increases risk of long-term soil damage and should be limited to hardscape cracks where you
truly don’t want plants.
Can I use Epsom salt instead of table salt?
Epsom salt (magnesium sulfate) isn’t a reliable weed killer and may even act more like a nutrient in some situations.
If a recipe “works” with Epsom salt, the vinegar is usually doing the heavy lifting.
What’s the most “pet-safe” natural weed killer?
No spray is “pet-proof.” Your safest move is preventing access until treated areas are dry, storing ingredients
securely, and using the least hazardous method for the locationoften targeted boiling water in cracks or careful
hand removal plus mulch in beds.
What if nothing works?
If you’re fighting deep-rooted perennials, shift strategies: dig out roots, smother with cardboard/mulch, or consider
a labeled herbicide appropriate for the site and follow directions precisely. Integrated weed control is often the
fastest path to sanity.
Conclusion
A good all-natural weed killer DIY plan isn’t about one magical sprayit’s about matching the method to
the location and the weed’s life cycle. Use vinegar + soap for everyday seedling problems, reserve salt mixes for
hardscape cracks only, and consider boiling water when you want the simplest option. Then lock in results with mulch,
early pulling, and fewer bare-soil invitations.
Real-World Experience Notes ()
Here’s what many first-timers discover after trying a homemade weed killerusually while holding a sprayer
and questioning their life choices.
1) The “It Worked… Kinda” moment. The first spray often looks amazing at hour six. Weeds droop, discolor,
and act like they’ve just watched a sad movie. Then two days later, a few stand back up like nothing happened. That’s
normal. Contact sprays can scorch leaves without fully finishing the jobespecially if the weed is mature or has a deep
root system. The fix isn’t to panic and double your ingredients into a corrosive cocktail. The fix is to repeat
and to hit weeds when they’re young.
2) Wind is the sneaky villain. People tend to underestimate drift. A gentle breeze can move fine droplets
onto nearby plants, and because vinegar-based sprays are non-selective, your prized flowers can get “accidentally
trimmed.” The best habit: treat spraying like painting with a roller. Go slow, get close, and use a shield (a piece of
cardboard works) when you’re near anything you like.
3) Salt regret is real. Salt mixes can be satisfying on driveway cracksfast results, low effort. But if
salty runoff reaches a bed edge or lawn, you might later notice weak growth, browning, or a stubborn patch that won’t
recover quickly. That’s why experienced gardeners treat salt like glitter: once it’s out there, it’s going to show up
in places you didn’t intend. Save salt for “nothing should grow here” zones only.
4) Timing beats intensity. The most consistent results come from treating weeds during warm, dry weather
and after you’ve had a window without rain. Spraying right before a storm can reduce effectiveness and increase runoff.
Spraying right after rain can also underperform because leaves may be hydrated and the solution can dilute on contact.
A good rhythm is: spot-spray, wait, re-spray survivors, then switch to prevention.
5) Prevention feels boringuntil it feels like a superpower. Once you mulch properly, fill bed gaps with
plants, and keep crack joints clean, weed pressure drops dramatically. That’s when DIY sprays stop being an exhausting
weekly chore and start being a quick touch-up tool. In other words: the real win isn’t “stronger vinegar,” it’s fewer
places for weeds to get comfortable.


