Table of Contents >> Show >> Hide
- Why a Stenciled Pegboard Organizer Works So Well
- Plan Before You Paint: The 10-Minute Checklist That Saves 10 Headaches
- Materials and Tools
- Step-by-Step: Make Your Stenciled Pegboard Organizer
- Step 1: Cut the pegboard (if needed) and prep the edges
- Step 2: Prime first (yes, really)
- Step 3: Paint the base coat
- Step 4: Plan your stencil placement (so it looks intentional)
- Step 5: Stencil the pattern (clean lines, not blurry sadness)
- Step 6: Optional but smartseal it
- Step 7: Add a frame (optional, but it makes it look “finished”)
- Step 8: Mount the pegboard correctly (the “hooks need breathing room” part)
- Accessorize Like You Mean It: Hooks, Cups, Shelves, and Baskets
- Stencil Design Ideas That Look Great in Real Life
- Troubleshooting: Fix the Common “Oops” Moments
- Bring It Home: Your Wall, But Smarter
- Real Experiences: What I Learned Making a Stenciled Pegboard Organizer (So You Don’t Have To)
- SEO Tags
If your desk, craft corner, or garage workbench looks like a tiny tornado applied for a job and got hired…
congratulations: you’re the perfect candidate for a stenciled pegboard organizer.
It’s part storage system, part wall art, and part “I totally have my life together” illusion.
Pegboard is already a superstar at vertical organization. Add stenciling, and suddenly your tools, supplies, and
daily clutter aren’t just storedthey’re displayed with purpose. The best part? You can customize the size,
colors, pattern, and accessories to fit exactly what you need (not what the store thinks you need).
Why a Stenciled Pegboard Organizer Works So Well
A pegboard organizer is basically a flexible “choose your own adventure” storage wall. Hooks move. Cups swap.
Shelves slide. When life changes (new hobby, new job, new obsession with washi tape), your board changes too.
It’s functional
- Home office: headphones, charging cables, sticky notes, pens, and a little tray for “mystery screws.”
- Craft room: scissors, rulers, paints, ribbon spools, and jars of brushes that multiply overnight.
- Kitchen/coffee bar: mugs, measuring spoons, small baskets for tea packets and filters.
- Garage/workshop: hand tools, tape measures, safety glasses, and drill bits you swear you put back.
It’s decorative
Stenciling turns pegboard from “utility wall” into “look at my cute organized space.” You can go bold and graphic,
soft and subtle, or label-style to create zones (like “Mail,” “Keys,” and “Things I’ll Totally Deal With Tomorrow”).
Plan Before You Paint: The 10-Minute Checklist That Saves 10 Headaches
1) Pick the spot and measure it
Decide where your pegboard will live and what it needs to hold. Measure the wall space (width and height),
and note any obstacles (outlets, light switches, trim, or a door that rudely insists on opening).
2) Decide what you’ll store
Make a quick list of items you want on the board. Then group them by frequency:
daily (front-and-center), weekly (still easy to reach), and rarely
(top corners or a basket).
Example: If you’re building a pegboard for a study desk, you might reserve the middle area for pencils,
markers, and headphones; keep a small shelf for your calculator and charging dock; and use a basket at the top for
extra notebooks. For a craft board, the “VIP zone” might be scissors, tape, and your favorite paintbrushes.
3) Choose your pegboard type
- Classic hardboard pegboard (usually 1/4″): affordable, easy to cut and paint, widely available.
- Metal pegboard panels: durable and sleek, often used for heavier items (and sometimes pricey).
- Plastic/composite pegboard: moisture-friendly for laundry rooms or basements.
For most DIY stenciled boards, classic hardboard pegboard is the sweet spot: it takes paint well and works with
standard accessories.
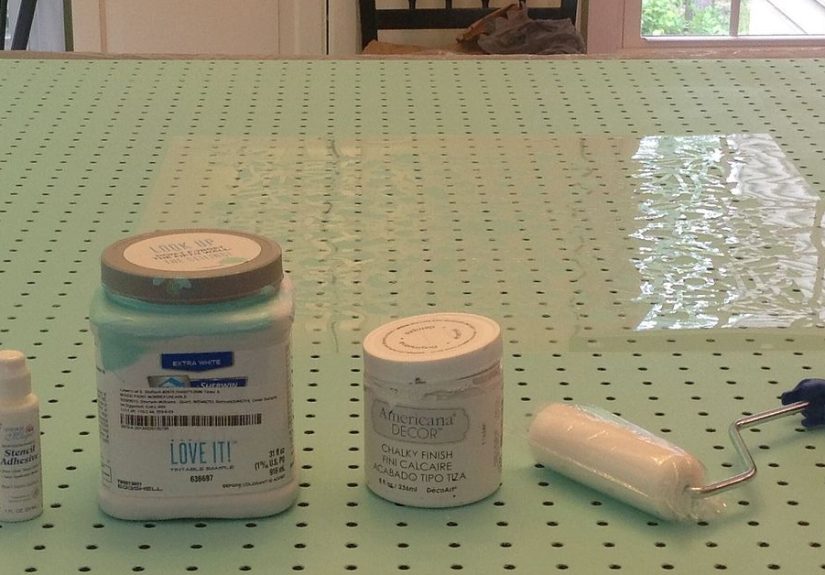
Materials and Tools
Materials
- Pegboard panel (cut to your desired size)
- Furring strips or spacers (to create a gap behind the pegboard for hooks)
- Wood screws (length depends on your wall and spacer thickness)
- Washers (help prevent screw heads from pulling through pegboard holes)
- Wall anchors (if you can’t hit studs)
- Primer (important for raw brown pegboard)
- Base paint (latex wall paint or spray paint)
- Stencil + stencil tape (or painter’s tape)
- Stencil brush, foam pouncer, or small foam roller
- Optional: repositionable spray adhesive for the stencil
- Optional: clear topcoat/sealer (water-based polyurethane or clear spray)
- Pegboard hooks, cups, baskets, shelves, bins (whatever your clutter needs)
- Optional: wood for a frame (1×2 or similar) + stain/paint
Tools
- Measuring tape, pencil, level
- Stud finder (highly recommended)
- Drill/driver + drill bits
- Saw for cutting (hand saw, jigsaw, circular sawuse what you have safely)
- Sandpaper (120–220 grit)
- Drop cloth and painter’s tape
Safety note: If you’re using power tools, wear eye protection, work in a ventilated area, and get adult
help if you’re not confident. Organization is great; fingers are also great. Keep both.
Step-by-Step: Make Your Stenciled Pegboard Organizer
Step 1: Cut the pegboard (if needed) and prep the edges
If your pegboard isn’t already the right size, mark your cut lines and cut slowly to reduce chipping. Lightly sand
the cut edges and corners so they feel smooth and don’t snag sleeves or skin. Wipe away dust with a dry cloth.
Step 2: Prime first (yes, really)
Raw pegboard can be thirsty and uneven. Primer helps paint stick and keeps your base coat from looking patchy.
Apply primer in thin, even coatsespecially if your pegboard is the classic brown hardboard style.
Pro tip: Thin coats matter because pegboard holes can clog with heavy paint. Whether you’re rolling or
spraying, build color gradually instead of trying to “one-coat wonder” your way into a plugged-up board.
Step 3: Paint the base coat
Choose a base color that works with your room and your stencil color(s). A light neutral base (white, cream, pale gray)
makes patterns pop. A moody base (navy, charcoal, forest green) looks dramatic and hides scuffs.
- Foam roller method: gives smooth coverage with less dripping into holesuse light pressure.
- Spray paint method: fast and hole-friendlyuse multiple light coats.
Let the base coat dry fully. If you stencil too soon, the stencil can lift tacky paint and you’ll invent new words.
Step 4: Plan your stencil placement (so it looks intentional)
Decide where the stencil pattern will go:
- All-over pattern: wallpaper vibe, big visual impact.
- Top band or side panel: decorative but still mostly “clean” for accessories.
- Center medallion: a focal point that leaves the rest simple.
- Zoned blocks: different patterns for different storage areas (great for shared spaces).
Use a level and light pencil marks to keep the design straight. Pegboard’s grid of holes can actually help you align
patternsthink of it as built-in graph paper.
Step 5: Stencil the pattern (clean lines, not blurry sadness)
Secure the stencil using stencil tape or painter’s tape. For extra crisp results, you can use a light coat of
repositionable spray adhesive on the back of the stencil (spray it away from your project, let it get tacky, then apply).
Load your stencil brush or foam pouncer with paint, then offload most of it onto a paper towel.
Stenciling is one of those rare times in life where using less makes you look like more of an expert.
- Dab/pounce motion: up-and-down taps help reduce paint bleed under the stencil.
- Light layers: build color with 2–3 light passes instead of one heavy pass.
- Work in sections: especially if your stencil has delicate cutouts that like to lift.
When you finish a section, carefully lift the stencil straight up. If you’re repeating the pattern, realign using your
pencil marks (and the pegboard holes as a guide). Wipe the stencil occasionally so dried paint doesn’t transfer.
Step 6: Optional but smartseal it
If your pegboard will get daily use (especially in a workspace or kid zone), a clear topcoat can help protect the pattern
from scratches and smudges. Use a water-based clear coat if you want to avoid yellowing over time.
Apply thin coats and let them dry fully.
Step 7: Add a frame (optional, but it makes it look “finished”)
A simple wood frame turns pegboard into a piece of decor. Cut 1×2 boards to fit the edges, sand lightly,
then stain or paint. Attach the frame to the pegboard edges with wood glue and brad nails (or small screws).
Bonus: a frame can hide rough cut edges and make the board look custom-built.
Step 8: Mount the pegboard correctly (the “hooks need breathing room” part)
Pegboard needs a gap behind it so hooks can insert and lock in. The common solution is attaching
furring strips (thin wood strips) to the wall first, then screwing the pegboard into those strips.
- Find studs: Use a stud finder and mark stud locations with pencil.
- Install furring strips/spacers: Screw strips into studs, keeping them level.
- Position the pegboard: Hold it in place (a helper is nice here) and level it.
- Pre-drill if needed: Especially if your board or strips are prone to splitting.
- Screw it in: Use washers under screw heads so they grip the pegboard without pulling through.
If you can’t hit studs: use heavy-duty wall anchors rated for the weight you plan to hang.
Pegboard is strong, but drywall has opinions.
Accessorize Like You Mean It: Hooks, Cups, Shelves, and Baskets
This is where the organizer becomes your organizer. Start with the items you use most often,
then fill in the rest.
Easy accessory combos that work
- Office combo: 2–3 hooks for headphones + a small shelf for chargers + cup for pens.
- Craft combo: baskets for ribbon + hooks for scissors + small bins for glue sticks and clips.
- Entryway combo: hooks for keys + mail basket + tiny shelf for sunglasses.
- Workshop combo: sturdy hooks for hand tools + a basket for tape and fasteners.
Weight tip: Put heavier items closer to mounting points and use sturdy pegboard hardware designed for
heavier loads. If something feels wobbly, it’s not being “quirky”it’s warning you.
Stencil Design Ideas That Look Great in Real Life
Tone-on-tone (low drama, high style)
Use the same color in two shadeslike light gray base with medium gray stencilfor a subtle pattern that reads as
“designer” without yelling across the room.
Bold geometric (maximum personality)
Try a crisp pattern like triangles, scallops, or a modern lattice. Keep the rest of the space calm so it doesn’t look
like your wall joined a marching band.
Label zones (pretty and practical)
Stencil headings like “CUT,” “TAPE,” “PAINT,” or “CHARGE” above each section. It’s especially helpful in shared spaces
where multiple people “borrow” supplies and forget where they live.
Troubleshooting: Fix the Common “Oops” Moments
Problem: Paint bled under the stencil
- Use less paint (offload more than you think you should).
- Switch to a dabbing/pouncing motion instead of brushing sideways.
- Secure the stencil better with tape or light tack adhesive.
Problem: Pegboard holes got clogged
- Use thinner coats next time (especially on primer and base paint).
- Clear holes gently with a small dowel, skewer, or the blunt end of a drill bit by hand (no power needed).
Problem: The pattern looks crooked
- Use a level and center guideline before you stencil.
- Align the stencil using the pegboard hole grid as a reference.
Problem: Paint scratches easily
- Add a clear topcoat for durability (especially for high-touch areas).
- Give paint extra cure time before heavy usedry and cured are not the same thing.
Bring It Home: Your Wall, But Smarter
A stenciled pegboard organizer is one of those rare DIY projects that gives you a double win:
it makes your space look better and function better. Once it’s up, you’ll wonder how you lived without it
and you’ll probably start eyeing another wall like, “You know what… we could organize that too.”
Real Experiences: What I Learned Making a Stenciled Pegboard Organizer (So You Don’t Have To)
The first time I made a stenciled pegboard organizer, I thought the project would be “easy afternoon DIY.”
You knowpaint, stencil, hang, admire, become a new organized person by dinner. What actually happened was a very
educational journey featuring a slightly crooked pattern, one accidentally clogged corner, and a moment where I
realized pegboard hooks can’t magically work if the board is mounted flat to the wall. (Pegboard hooks are not
mind readers. They require space. They require physics.)
The biggest surprise was how much the prep affected the final look. I was tempted to skip primer because
the pegboard was “just going to be covered in stuff.” But primer made the base coat smoother and more even, and it
also kept the pegboard from drinking paint like it had been stranded in the desert. When I compared a primed section
to an unprimed test piece, the unprimed one looked duller and unevenlike it was quietly disappointed in my choices.
Stenciling taught me the ultimate DIY lesson: less paint equals better results. My first pass was a little
too enthusiastic, which meant the paint tried to sneak under the stencil edges. The fix was simple: offload paint onto
a paper towel until the brush felt almost dry, then dab gently in layers. The second attempt looked cleaner instantly.
It also took longer, but that’s the trade: speed gives you fuzzier edges; patience gives you crisp lines and bragging rights.
I also learned to plan the stencil placement around where accessories would go. I originally put the prettiest part of
the pattern right where my biggest basket needed to hang, which is like framing a beautiful picture and then parking a
truck in front of it. Now I like to stencil in a band across the top or create a border, then keep the main hanging zone
simpler. That way, the design still shows and the board doesn’t feel visually chaotic once you add hooks, cups, and bins.
Mounting was the “adulting” step of the project. Adding furring strips (or spacers) behind the pegboard felt like an extra
choreuntil I tried inserting hooks without them. With no gap, the hooks wouldn’t seat properly and popped out when I
grabbed something. Once the board was mounted with a real gap behind it, everything clicked into place. If you only remember
one practical thing from this entire article, let it be this: pegboard needs breathing room.
Finally, the most satisfying part was the organizing phasebecause you get instant feedback. When I put my most-used items at
eye level and grouped similar tools together, my workspace felt easier to use immediately. And when I left a little open space
for “future me” (who always arrives with new supplies), the setup stayed functional instead of feeling maxed out on day one.
That’s the quiet secret of pegboards: the best ones aren’t packed tightthey’re designed to evolve.
Now, every time I add a new hook or swap a basket, I feel like I’m customizing my space instead of fighting it. And yes,
I still occasionally create a small “temporary pile” nearby. But the difference is: now that pile has a timer on it, because
the pegboard is right thereready to turn chaos into something that looks oddly intentional.


