Table of Contents >> Show >> Hide
- Why Reuse Leftover Soap Pieces?
- What Kind of Soap Scraps Can You Use?
- Supplies You Will Need
- Step-by-Step Guide: How to Make a New Bar of Soap from Leftover Soap Pieces
- Alternative Method: The No-Melt Soap Scrap Pouch
- Common Mistakes to Avoid
- How to Customize Your Recycled Soap Bar
- Can You Sell Soap Made from Leftover Soap Pieces?
- How Long Does Rebatched Soap Last?
- Is Recycled Soap Hygienic?
- Practical Experience: What You Learn After Making Soap from Scraps
- Conclusion
Every bathroom has one: a sad little soap sliver clinging to the soap dish like it has unfinished business. It is too small to use comfortably, too big to throw away without guilt, and somehow always slippery enough to launch across the shower like a tiny scented hockey puck. Good news: those leftover soap pieces do not have to go to waste. With a little heat, a splash of water, and a mold, you can turn soap scraps into a brand-new bar that looks rustic, works beautifully, and makes you feel like the practical hero of your own home.
Learning how to make a new bar of soap from leftover soap pieces is one of the easiest zero-waste bathroom projects you can try. You do not need lye, fancy chemistry equipment, or a laboratory coat. This method is often called rebatching, hand-milling, or reforming soap. In simple terms, you grate or chop existing soap, gently soften it with water, press it into a mold, and let it dry until it becomes firm again.
This guide explains the full process, including what tools you need, which soap scraps work best, how to avoid mushy soap, and how to customize your new bar with simple ingredients. By the end, you will know exactly how to rescue those tiny soap leftovers from the trash and give them a second life.
Why Reuse Leftover Soap Pieces?
Reusing soap scraps may sound old-fashioned, but it is surprisingly smart. First, it saves money. A few slivers may not look valuable, but over time, they add up. If your household uses bar soap regularly, collecting the last bits can easily create a full-size bar every few months.
Second, it reduces waste. Bar soap is already a more packaging-friendly option than many bottled body washes, but using every last piece makes it even better. Instead of sending perfectly usable soap to the landfill, you turn it into something practical.
Third, homemade recycled soap has character. It may not look like a glossy spa boutique bar, but it has charm. Think of it as the sourdough loaf of the bathroom: slightly imperfect, deeply useful, and made with satisfying thriftiness.
What Kind of Soap Scraps Can You Use?
Most leftover bar soap pieces can be reused, including hand soap, body soap, facial cleansing bars, castile soap, glycerin soap, and handmade soap. However, the best results usually come from combining similar types of soap. For example, mild body soap scraps mix well with other mild body soap scraps. Strong deodorant bars, exfoliating bars, medicated bars, and heavily perfumed soaps can behave differently when heated, so use them carefully.
Avoid mixing household cleaning bars with body soap. A laundry bar or stain-removing bar may be useful, but it belongs in cleaning projects, not in a shower bar. Also avoid using soap pieces that smell rancid, look moldy, or have been sitting wet in a closed container for too long. Soap scraps should be dry before you store them.
Best Soap Scraps for Rebatching
- Plain body soap slivers
- Hand soap pieces
- Unscented or lightly scented bars
- Natural handmade soap scraps
- Glycerin soap pieces
- Castile-style soap leftovers
Soap Scraps to Use With Caution
- Strongly scented soaps, because fragrances may clash
- Exfoliating bars, because they may become gritty
- Charcoal soaps, because they may darken the entire batch
- Medicated or acne-treatment bars, because they may contain active ingredients
- Antibacterial bars, especially if you are unsure of the ingredients
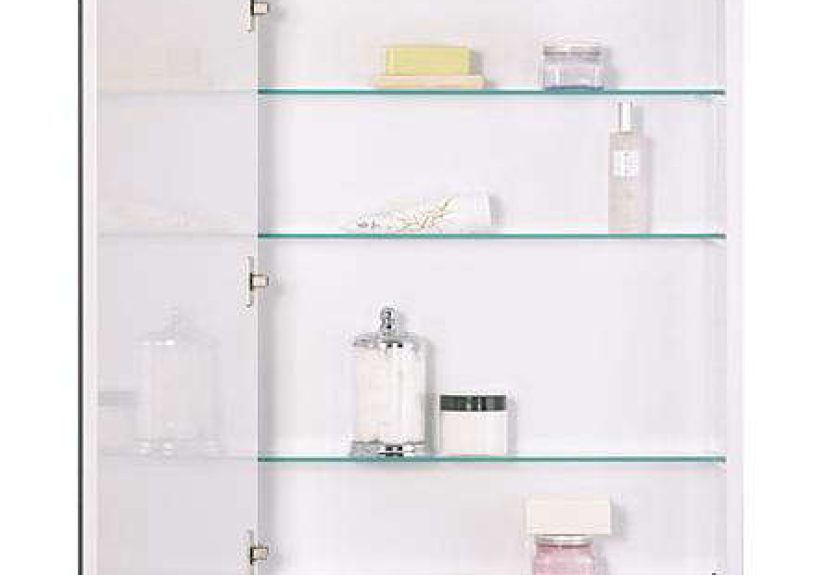
Supplies You Will Need
You probably already have most of the supplies in your kitchen. Use tools that are easy to wash, and avoid aluminum cookware because some soap ingredients may react with it. Stainless steel, glass, silicone, and heat-safe plastic are better choices.
Basic Tools
- 1 to 2 cups of leftover soap pieces
- Cheese grater, knife, or food processor
- Heat-safe bowl or small saucepan
- Double boiler setup or microwave-safe bowl
- Wooden spoon or silicone spatula
- Distilled water
- Soap mold, silicone muffin cup, small loaf pan, or clean food container
- Parchment paper if using a rigid mold
- Clean towel
Optional Add-Ins
- A few drops of essential oil
- Finely ground oatmeal
- Dried herbs or flower petals
- A small amount of honey
- A pinch of cosmetic clay
- A few drops of skin-safe fragrance oil
Be conservative with add-ins. Soap scraps already contain fragrance, color, oils, and cleansing ingredients. Adding too much extra material can make your new bar soft, crumbly, or irritating to the skin. In soap rebatching, less is usually more.
Step-by-Step Guide: How to Make a New Bar of Soap from Leftover Soap Pieces
Step 1: Collect and Dry the Soap Scraps
Start by collecting leftover soap pieces in a dry container. Let each piece dry completely before adding it to the jar or bag. This prevents the scraps from becoming slimy. A breathable container, small basket, or open jar works better than a sealed plastic bag if the pieces are still damp.
Once you have enough scraps, sort through them. Remove hair, lint, or anything that makes you question your life choices. If the soap has been sitting around for months and smells off, toss it. The goal is recycled soap, not a science fair experiment.
Step 2: Grate or Chop the Soap
Grating the soap helps it melt more evenly. Use a cheese grater for dry scraps or a knife for softer pieces. Smaller shreds are better because they soften faster and require less water. If you have a food processor dedicated to crafts, you can use it, but do not use your best kitchen appliance unless you enjoy carrot cake with a hint of lavender soap.
For one medium bar, aim for about 1 cup of grated soap. If you have more scraps, simply scale up the water slowly. The trick is to add just enough liquid to soften the soap, not so much that you create a bubbling swamp.
Step 3: Add a Small Amount of Water
Place the grated soap into a heat-safe bowl or saucepan. Add 1 to 2 tablespoons of distilled water per cup of soap shreds. Distilled water is preferred because it contains fewer minerals than tap water, which can help the soap behave more predictably.
Do not drown the soap. Too much water is the most common mistake when making soap from scraps. It may seem helpful at first, but extra water makes the finished bar soft and increases drying time. Start small. You can always add a little more later.
Step 4: Melt the Soap Gently
The safest method is a double boiler. Fill a saucepan with a few inches of water, bring it to a gentle simmer, and place a heat-safe bowl over the top. Add the grated soap and water to the bowl. Stir occasionally as the soap softens.
The soap will not melt into a perfectly smooth liquid like chocolate. Rebatched soap usually becomes thick, sticky, and mashed-potato-like. That is normal. The texture may look a little lumpy, but those lumps often disappear or blend in once the bar dries.
If using a microwave, heat the soap in short 10- to 15-second bursts, stirring between each round. Watch closely because soap can puff up quickly. Do not walk away. Soap has a dramatic personality when overheated.
Step 5: Stir Until Soft and Moldable
Keep stirring until the mixture becomes soft enough to press into a mold. If it is still too dry and crumbly, add water one teaspoon at a time. If it looks soupy, continue heating gently and stirring until some moisture evaporates.
At this stage, you may add optional ingredients. A teaspoon of finely ground oatmeal can make the bar feel gentle and creamy. A few drops of essential oil can refresh the scent. A pinch of clay can add color and texture. Keep additions minimal so the soap remains firm.
Step 6: Press the Soap Into a Mold
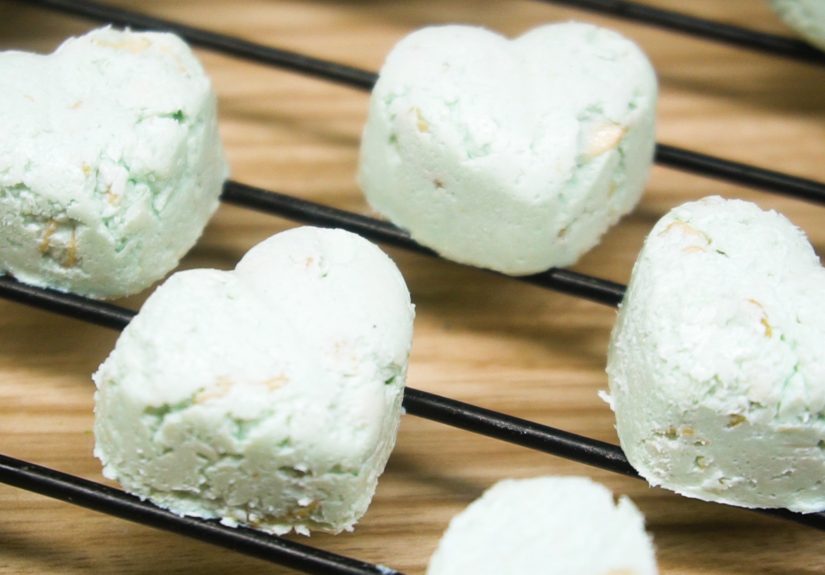
Spoon the softened soap into your mold. Press it down firmly with a spatula, spoon, or gloved hand. Air pockets can make the finished bar weak, so pack the soap tightly. Tap the mold gently on the counter to help it settle.
Silicone molds are easiest because the soap pops out cleanly. If using a small loaf pan or plastic container, line it with parchment paper first. You can also use a muffin tin for round soap pucks. These may not win a beauty contest, but they will lather, clean, and proudly represent your frugal genius.
Step 7: Let the Soap Harden
Leave the soap in the mold for 24 to 48 hours. Once it feels firm enough to handle, remove it from the mold and place it on a rack or clean towel. Let air circulate around the bar.
Rebatched soap needs drying time. Depending on how much water you used, the bar may need one to three weeks to become hard and long-lasting. A bar that feels slightly soft after two days is not ruined. It simply needs more time to dry.
Step 8: Trim, Smooth, and Store
After the soap has dried, trim rough edges with a knife if desired. You can also smooth the surface with a damp cloth. Store the finished bar in a dry place until ready to use.
Once the bar enters the shower or sink area, use a draining soap dish. A bar that sits in water will soften quickly. Good drainage is the secret to helping any bar soap last longer, whether it came from a fancy shop or from your excellent little scrap-saving operation.
Alternative Method: The No-Melt Soap Scrap Pouch
If you want the easiest possible method, skip melting altogether. Place soap scraps inside a cotton washcloth, mesh soap saver bag, or clean organza pouch. Wet the bag, rub it between your hands, and use it like a regular bar of soap.
This method is perfect when you have many tiny pieces but do not feel like heating anything. It is also great for travel, guest bathrooms, camping, or keeping by the kitchen sink. The soap saver bag creates lather while holding all the slippery fragments together. Basically, it turns chaos into cleanliness.
Common Mistakes to Avoid
Adding Too Much Water
Too much water creates soft soap that takes forever to dry. Add liquid slowly, and remember that different soap types soften at different speeds.
Expecting a Perfectly Smooth Bar
Rebatched soap often looks rustic. That is part of its charm. If you want a polished, transparent bar, melt-and-pour soap base is a better option.
Using Too Many Fragrances
Mixing rose, peppermint, sandalwood, citrus, and mystery hotel soap may create a scent best described as “confused gift shop.” Use similar scents together or add only a tiny amount of fragrance.
Overheating the Soap
High heat can make soap foam, dry out, or develop an odd texture. Gentle heat is best. Think warm spa, not volcanic eruption.
Using Unsafe Add-Ins
Do not add fresh fruit, fresh herbs, milk, or random pantry items unless you know how they behave in soap. Fresh ingredients can spoil. Stick with dry, finely ground, skin-safe additions.
How to Customize Your Recycled Soap Bar
One of the joys of making a new bar of soap from leftover soap pieces is customization. You can keep it simple or turn it into a mini craft project. Here are a few easy ideas.
Oatmeal Comfort Bar
Add 1 teaspoon of finely ground oatmeal per cup of grated soap. This creates a gentle texture and a cozy, natural look.
Citrus Kitchen Bar
Use plain soap scraps and add a few drops of lemon or orange essential oil. Keep the scent light. Citrus oils can be strong, and your hands should not smell like they just fought a fruit salad.
Clay Spa Bar
Add a pinch of cosmetic clay for color and a silky feel. Kaolin clay is mild and commonly used in skin-care products.
Garden-Inspired Bar
Add a tiny amount of dried lavender, calendula, or chamomile. Use dried botanicals sparingly because too many petals can feel scratchy or turn brown over time.
Can You Sell Soap Made from Leftover Soap Pieces?
For personal use, rebatching soap scraps is simple. Selling soap is different. In the United States, soap labeling and product claims can affect whether a product is treated as soap, a cosmetic, or even a drug. If a product claims to moisturize, deodorize, treat acne, soothe eczema, kill germs, or provide medical benefits, it may fall under different rules.
If you plan to sell rebatched soap, research federal, state, and local requirements first. You should also know exactly what ingredients are in the original soap scraps. For home use, the process is casual. For business use, it needs documentation, labeling accuracy, and safety awareness.
How Long Does Rebatched Soap Last?
A well-dried rebatched soap bar can last several weeks in regular use, especially if stored on a draining soap dish. The final hardness depends on the type of soap, how much water you added, and how long you allowed it to dry.
If the bar becomes mushy quickly, it likely contains too much water or is sitting in a wet dish. Let the next batch dry longer, use less water, and keep the bar elevated between uses.
Is Recycled Soap Hygienic?
For normal household use, soap scraps can be reused safely when handled sensibly. Rinse off old pieces, let them dry, and avoid scraps that look dirty, spoiled, or suspicious. Soap works by helping lift oils, dirt, and germs from the skin so they can be rinsed away with water. Still, cleanliness matters during the project. Use clean tools, clean molds, and dry storage.
If someone in the household has a skin infection, open wounds, or a contagious illness, it is better not to share personal soap scraps. When in doubt, keep soap personal or start fresh.
Practical Experience: What You Learn After Making Soap from Scraps
The first time you make a new bar of soap from leftover soap pieces, you may expect a smooth, creamy pour. Then reality arrives with a spoonful of sticky soap paste that looks like scented mashed potatoes. This is completely normal. Rebatched soap is not supposed to behave like melted candle wax. It softens, clumps, stretches, and slowly becomes moldable. Once you accept the texture, the process becomes much easier.
One helpful experience is learning to separate soap scraps by scent family. Clean, fresh, herbal, and citrus soaps usually mix well. Sweet vanilla, floral, and spicy soaps can also work together. But combining every scent in the bathroom drawer can produce a bar with an identity crisis. A good rule is to smell the scraps together before melting them. Hold the pieces in your hand, take a quick sniff, and ask yourself, “Would I want this scent following me around before breakfast?” If the answer is no, sort the scraps into smaller batches.
Another lesson is that patience beats extra water. Many beginners add more water because the soap does not melt quickly. This makes sense in the moment, but it often leads to a soft bar that needs ages to dry. A better approach is to cover the bowl for a few minutes while heating gently. The trapped steam helps soften the soap without flooding it. Stir, wait, and let the heat do its job.
Molds also make a big difference. Silicone molds are the easiest option because they flex. Small yogurt containers, muffin cups, and mini loaf pans can work too, but rigid containers may need parchment paper. If the soap refuses to release, place the mold in the freezer for 20 minutes, then try again. The cold can help the bar contract slightly.
In daily use, handmade scrap soap feels a little different from a store-bought bar. It may have visible flecks of color, a textured top, or a layered look. That is not failure; that is personality. Some of the best bars look like tiny terrazzo tiles, with bits of white, green, pink, and beige suspended together. Others turn into one solid color, especially if you use dark or strongly colored scraps.
The most satisfying part is realizing how much soap you used to throw away. Those tiny pieces that once slipped down the drain or stuck sadly to the soap dish can become a full bar with very little effort. After a few batches, saving soap scraps becomes automatic. You may even find yourself eyeing the last sliver and thinking, “You, my slippery friend, have a future.”
For families, this project can also be a fun lesson in resourcefulness. Children can help sort dry soap pieces by color or scent, while adults handle grating and heating. The final bar becomes a visible reminder that small habits matter. It is not about becoming perfectly zero-waste overnight. It is about noticing what still has value and finding a simple way to use it.
Conclusion
Making a new bar of soap from leftover soap pieces is simple, affordable, and oddly satisfying. You collect the scraps, grate them, soften them gently with a small amount of water, press them into a mold, and let them dry. The result is a practical recycled soap bar that helps reduce waste and stretches your household budget.
The key is to keep the process gentle. Use clean, dry scraps. Add water slowly. Avoid overheating. Let the finished bar cure until firm. Do that, and your leftover soap pieces can become something useful instead of bathroom clutter.
Note: This article is intended for general DIY household use. Avoid using spoiled, dirty, medicated, or harsh cleaning soap scraps on skin, and check proper labeling rules if you plan to sell homemade or rebatched soap.