Table of Contents >> Show >> Hide
- What Is a Shaker Style Door?
- Two Ways to Make a DIY Shaker Style Door
- Measure Like a Pro (So Your Door Actually Fits)
- Tools and Materials for a DIY Shaker Style Door
- Step-by-Step: Build a New Shaker Style Door from Scratch
- Step-by-Step: Turn a Flat Door into a Shaker Style Door
- Finishing Your DIY Shaker Style Door
- Common Mistakes (and How to Avoid Them)
- Real-Life Experiences: What DIYers Learn Making Shaker Style Doors
- Conclusion: A Big Style Upgrade for a Small Price
If your interior doors are as flat and boring as a rental apartment’s white wall, a DIY Shaker style door might be exactly what your home is begging for. Shaker doors are simple, clean, and surprisingly forgiving for beginner DIYers. Even better, you don’t have to buy expensive new doorsoften you can transform the doors you already have with a handful of boards, some plywood or MDF, and a free weekend.
In this guide, we’ll walk through everything you need to know: what makes a door “Shaker,” how to choose materials, two main build methods (from scratch or upgrading a hollow-core door), and pro tips for painting and finishing. We’ll also wrap up with real-world lessons learned so you can avoid the “why is this door shaped like a potato?” phase of DIY.
What Is a Shaker Style Door?
A Shaker door is a classic frame-and-panel design: four simple boards (called rails and stiles) surrounding a flat center panel. No ornate molding, no raised profilesjust crisp, clean lines. That minimal look came from the Shaker community’s emphasis on simplicity and function, and it still works beautifully in modern homes, from farmhouse and cottage style to sleek Scandinavian and minimal interiors.
Whether you’re updating kitchen cabinets or bedroom doors, the Shaker idea is the same: straight lines, flat panel, subtle detail. The beauty is in the proportions and the finish, not in fancy carving.
Two Ways to Make a DIY Shaker Style Door
Before you start buying lumber like you’re opening a small hardware store, decide which project you’re actually doing:
Option 1: Build a New Shaker Door from Scratch
This is ideal if:
- Your existing door is damaged, warped, or the wrong size.
- You want a solid-feeling door with new, custom dimensions.
- You’re comfortable cutting boards and assembling a frame and panel.
You’ll build a rectangular frame from rails and stiles, then drop in a plywood or MDF panel. This method borrows heavily from standard Shaker cabinet door construction: 1×3 boards or similar for the frame, and 1/4-inch to 1/2-inch sheet material for the center.
Option 2: Upgrade a Hollow-Core Door into Shaker Style
If your door is structurally fine but looks like a cheap builder-basic slab, you can:
- Leave the original flat door in place.
- Glue on “faux” rails and stiles (thin boards or MDF strips).
- Fill, sand, and paint to create the Shaker look.
This approach is extremely budget-friendly and popular on DIY sites like Hometalk and other interior door makeover tutorials: you’re basically creating the illusion of a Shaker frame on top of what you already have.
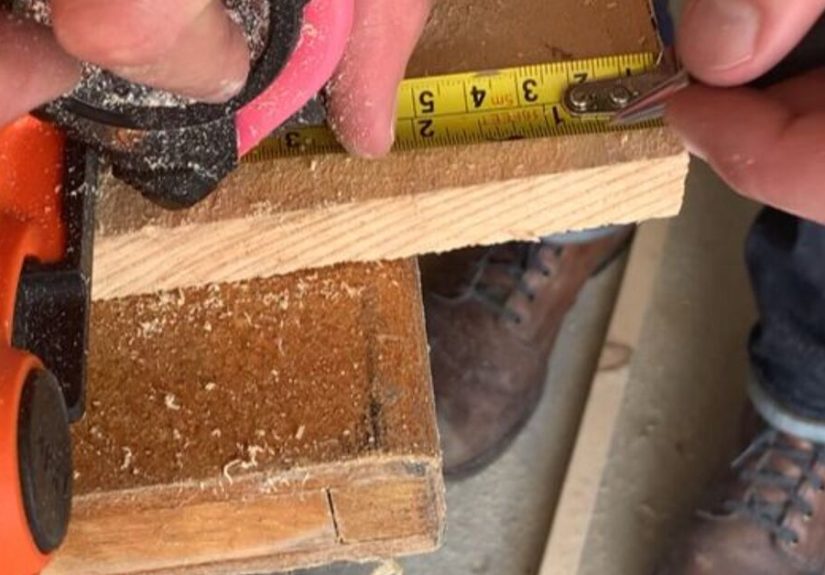
Measure Like a Pro (So Your Door Actually Fits)
Whether you’re upgrading or building from scratch, accurate measurements are non-negotiable. Here’s the quick checklist:
- Door height: Measure from floor to top of existing door or inside the jamb opening at three points (left, center, right). Use the smallest number.
- Door width: Measure across the top, middle, and bottom. Again, use the smallest measurement.
- Thickness: Standard interior doors are often 1 3/8 inches thick. If you’re building from scratch, aim for similar thickness so hardware works correctly.
- Hinge and latch locations: If this is a replacement door, mark hinge distances from the top and bottom and note hinge size, plus latch and handle locations.
Pro tip: If you’re just adding trim to the front of a hollow-core door, you don’t change thickness muchjust don’t go so thick that the door rubs on the jamb after painting.
Tools and Materials for a DIY Shaker Style Door
You can tackle this project with a pretty modest toolkit. Different tutorials use different toolssome rely on router bits and table saws, others show how to build Shaker-style doors with just a circular saw, saw guide, and wood glue.
Common Tools
- Tape measure and pencil
- Combination square or speed square
- Circular saw with guide rail, or miter saw
- Table saw (optional but helpful for ripping boards)
- Clamps (bar or pipe clamps for glue-ups)
- Drill/driver and bits
- Random orbital sander and sanding pads (120–220 grit)
- Caulk gun (for filling tiny gaps around applied trim)
- Paintbrushes and/or foam rollers
Suggested Materials
- Frame boards: 1×3 or 1×4 poplar or pine for rails and stiles
- Panel: 1/4-inch plywood or MDF (smooth and paint-friendly)
- Adhesive: Quality wood glue
- Fasteners: 18-gauge brad nails or trim screws (optional but helpful)
- Filler: Wood filler or spackle, plus paintable caulk
- Primer and paint: Interior trim or door paint in your favorite color (white, greige, or black are classic Shaker choices)
Safety first: wear eye protection, ear protection when cutting, and a dust mask when sanding or cutting MDF (that fine dust is no joke).
Step-by-Step: Build a New Shaker Style Door from Scratch
This method gives you a solid, satisfying door with a true frame-and-panel structure. It’s inspired by standard Shaker cabinet door construction, just scaled up for an interior door.
Step 1: Design Your Door Layout
A classic Shaker door has:
- Two long vertical pieces (stiles)
- Two shorter horizontal pieces (top and bottom rails)
- Optional mid-rails to create two or three panels
Decide if you want:
- One large panel (simple, modern, and easy to build)
- Two panels (often one smaller at top, one larger at bottom)
- Three or more panels for a more formal look
Sketch the layout with rough dimensions so you know where each rail lands.
Step 2: Cut Rails and Stiles
From your 1×3 or 1×4 boards, cut:
- Two stiles equal to your desired door height.
- Two rails equal to door width minus twice the stile width (plus or minus any joinery adjustment).
For example, if your door is 30 inches wide and your stiles are each 3 inches wide, your rails will be roughly 24 inches long. Double-check the math based on actual measured board widthsnominal “1×3” boards typically measure about 2 1/2 inches wide.
Step 3: Choose Your Joinery Method
Traditional Shaker doors use cope-and-stick router bits or mortise-and-tenon joints. If you’re not set up for that, you still have solid options:
- Pocket hole screws: Fast, strong enough for interior doors if done correctly and combined with glue.
- Dowels: Simple dowel joinery plus glue gives a strong, clean frame.
- Loose tenons or dominos: Great if you own the tools.
Whichever method you choose, dry-fit the frame first on a flat surface to make sure everything is square.
Step 4: Create the Panel Groove or Rabbet
For a classic frame-and-panel door, you’ll cut a groove along the inside edge of the rails and stiles to accept the center panel. This can be done:
- With a router table and Shaker rail-and-stile bit set
- With multiple passes on a table saw to create a centered groove
- Or, more simply, by cutting a rabbet on the back of the assembled frame and dropping the panel into it
The rabbet method is beginner-friendly: assemble the frame, then use a router or table saw to cut a recessed lip on the backside where the panel will sit.
Step 5: Cut and Install the Center Panel
Cut your 1/4-inch plywood or MDF panel slightly smaller than the opening inside the frame or the rabbeted areausually about 1/4 inch smaller in both directions to allow for easy fit and some movement if using solid wood.
For plywood or MDF panels in interior doors, most DIYers simply glue the panel into the rabbet and nail with a few brads to hold it in place while the glue dries. Because the panel isn’t solid wood, you don’t have to worry much about seasonal movement.
Step 6: Glue-Up and Clamp the Door
Spread wood glue on the joints, assemble the frame with the panel in place, and clamp everything on a flat surface. Check:
- That the door is square (measure diagonals; they should match).
- There are no large gaps between joints.
- The panel sits flat and flush in the rabbet or groove.
Wipe away excess glue with a damp cloth before it dries. Let the door cure for several hours or overnight, depending on glue instructions.
Step-by-Step: Turn a Flat Door into a Shaker Style Door
If your existing hollow-core door is structurally fine, this method gives you the Shaker look with far less work.
Step 1: Prep the Old Door
- Remove the door from the hinges and lay it flat on sawhorses.
- Take off handles, hardware, and any hooks.
- Lightly sand the surface with 120-grit to remove gloss and help new trim adhere.
- Wipe off dust with a tack cloth or damp rag.
Step 2: Plan Your Trim Layout
Mark your “faux” rails and stiles with a pencil:
- Two long vertical stiles along each edge, set in slightly if you like.
- Top and bottom rails, plus optional mid-rails for two- or three-panel designs.
Typical trim width is around 2 1/2 to 3 inches. Keep proportions consistent door to door for a cohesive look in your hallway.
Step 3: Cut Trim Pieces
Use 1/4-inch MDF strips or thin plywood. Cut:
- Stiles to match door height (minus a little clearance at top and bottom if needed).
- Rails to span between stiles.
Cut ends square for that crisp Shaker vibe. A miter saw makes this very quick, but a circular saw with a square and clamp works too.
Step 4: Attach the Shaker “Frame”
Run a bead of construction adhesive or wood glue on the back of each piece, place it on your pencil lines, and press firmly. Use brad nails to “pin” the trim while the glue dries, or tape if you don’t have a nailer.
Work from the stiles first, then rails, checking for level and keeping edges aligned so your faux panels look straight and professional.
Step 5: Fill, Caulk, and Sand
Once the adhesive dries:
- Fill nail holes with wood filler or spackle.
- Caulk along the outside edges where trim meets the old door for a seamless look.
- Lightly sand filler smooth and knock down any sharp corners.
This step is like makeup for your door. Done well, it hides the fact that you basically glued a new style on top.
Finishing Your DIY Shaker Style Door
The difference between “Did you buy that?” and “Oh, you built that?” is usually in the finish.
Prime Like You Mean It
MDF and raw wood both love to soak up paint. Use a good bonding primer, especially on MDF edgesthey drink paint like it’s cold lemonade in July. Priming evens absorbency and prevents blotchy, dull sections.
Pick a Shaker-Approved Color
Historically, Shaker style leaned toward simple painted finishes and natural wood. Today, popular door colors include:
- Clean white for a bright, airy look
- Soft gray or greige for a modern farmhouse feel
- Bold black or deep navy for dramatic contrast
Use the Right Roller
For a smooth, factory-style finish:
- Use a high-density foam roller for the flat panels.
- Use an angled brush to cut in along the rails and stiles.
- Work in long strokes in the direction of the wood grain.
Apply two coats of paint, lightly sanding between coats with very fine sandpaper if you feel any roughness.
Common Mistakes (and How to Avoid Them)
- Warped door: Assemble and clamp your door on a truly flat surface. Check for twist before the glue dries.
- Visible seams and gaps: Don’t skip filler and caulk. Tiny gaps around trim show up dramatically once painted.
- Off-center panels: Double-check your layout and measurements before gluing anything down. Pencil lines are cheaper than new trim.
- Paint drips in corners: Use less paint near inside corners of the “frames” and lightly feather it out with a brush.
- Hardware misalignment: If you’re building a completely new door, transfer hinge and latch measurements carefully from the original door or the jamb.
Real-Life Experiences: What DIYers Learn Making Shaker Style Doors
If you hang around woodworking forums, social groups, or DIY blogs long enough, you’ll see the same themes pop up from people building Shaker cabinet doors and interior doors at home. Here are some of the most useful lessons that come up again and again.
1. Flat Is Everything
The number-one complaint from first-time builders isn’t “my joints failed”it’s “my door is twisted.” Even a slight twist becomes obvious when the door is closed. The fix? Clamp on a flat surface and check those diagonals. Some DIYers even use the garage floor or a thick piece of MDF as a reference surface and walk around measuring corner to corner until the frame is perfectly square.
2. MDF and Plywood Are Your Friends
While traditionalists may swear by solid wood panels, many modern DIYers have discovered that MDF and plywood are more forgiving, especially for painted Shaker doors. They don’t move seasonally like solid wood, they’re smoother for paint, and they’re inexpensive. A lot of beginner-friendly tutorials specifically recommend MDF panels with poplar or pine frames for an ideal balance of cost and stability.
The trade-off: MDF edges need good priming, and you don’t want to leave them exposed to moisture (like in a bathroom with no fan). Seal well and you’re fine.
3. Fancy Joinery Is Optional
Yes, cope-and-stick joints with a matched router bit set are beautiful and incredibly strong. But plenty of DIYers build long-lasting Shaker doors with pocket holes or dowels plus glue. The key is careful layout, clamping, and not rushing the glue-up. In many real-world builds, the paint and panel help lock everything together, especially once the door is mounted and not abused.
4. The “Fake Shaker” Method Is Shockingly Effective
Upgrading hollow-core doors with applied trim might sound like cheating, but the results can be just as impressive as building new. People who have done whole hallways this way often report that guests assume they replaced every door. As long as the layout is symmetrical and the edges are cleanly caulked, no one is getting down on the floor to inspect your joinery.
This method is also perfect if you’re experimenting with style. Don’t like the layout? You’ve invested some MDF and a Sunday afternoonnot a full custom door order.
5. Prep and Paint Take Longer Than Building
A running joke in the DIY world is that the “building” part of any project takes 20% of the time, while sanding, priming, and painting take the other 80%. Shaker doors are no exception. Getting that silky, professional finish is mostly about patience:
- Let primer dry fully.
- Lightly sand between coats.
- Don’t rush to rehang the door before the paint has cured.
The good news: once you find a rhythm, you can batch multiple doors and transform an entire hallway or room over a couple of weekends.
6. Start with One Door, Then Scale Up
If you’re feeling overwhelmed, start with one interior doormaybe a closet or office door that doesn’t get center-stage traffic. Use that as your “test door.” Take notes on what worked (tools, trim width, paint sheen) and what you’d tweak next time. Once you’re confident, move on to the more visible doors in your home.
Many DIYers say that by the third door, they’re flying through the process: measuring, cutting, gluing, and painting with much more confidence and speed. The style becomes almost like a templatesimple, repeatable, and reliably good-looking.
Conclusion: A Big Style Upgrade for a Small Price
A DIY Shaker style door is one of those home projects that punches far above its weight. With basic tools and a bit of patience, you can turn forgotten, flat doors into architectural features that completely change the vibe of a room. Whether you go all-in and build a new frame-and-panel door from scratch, or simply apply trim to a hollow-core slab, the result is the same: clean lines, timeless style, and a space that feels more custom and intentional.
If you love the kind of clever, budget-friendly transformations you see on Hometalk, this is exactly that kind of projectjust enough challenge to be satisfying, but not so complex that you need a full workshop. Start with one door, dial in your technique, and before long your entire hallway will look like it came straight out of a design magazine, not the clearance aisle.