Table of Contents >> Show >> Hide
- Table of Contents
- Plan It Like You Mean It
- Dimensions That Actually Work
- Materials & Tools
- The Build Strategy: Modular Boxes
- Step 1: Build a Level Base (Toe-Kick Platform)
- Step 2: Build the Bookcase Boxes (Carcasses)
- Step 3: Install, Shim, and Anchor to Studs
- Step 4: Shelves That Don’t Sag Into Sadness
- Step 5: Face Frames, Trim, and the “Built-In” Illusion
- Step 6: Fill, Sand, Prime, Paint (a.k.a. The Glow-Up)
- Optional Upgrades
- Common Mistakes (and How to Fix Them)
- Conclusion
- Bonus: of Real-World Built-In Bookshelf Experience
A built-in bookshelf is basically an architectural cheat code: it makes a room look custom, expensive, and
suspiciously “I have my life together,” even if the most organized thing you own is your junk drawer.
The good news? You can build one yourself with common tools, a little patience, and a willingness to accept
that your walls are not, in fact, perfectly straight. (They never are. Your house is not a museum. It’s a
lovable liar with drywall.)
This guide walks you through planning, building, installing, trimming, and finishing a built-in bookcase
that looks like it grew out of the wallwithout the mysterious contractor invoice.
Plan It Like You Mean It
Most “DIY built-in bookshelf disasters” are actually “planning disasters” wearing a tool belt.
The build itself is straightforward. The trick is making the finished unit look like it belongs there,
not like it arrived last week from a parallel universe.
Measure the space (and then measure the space again)
Start with a tape measure, a notepad, and a healthy distrust of your own memory. Record:
wall width, ceiling height (check both ends and the middle), baseboard height/thickness,
and any obstacles (outlets, vents, return grilles, switch plates, door casing, crown molding).
- Check the floor: Use a long level (or laser) to find high/low spots. Built-ins love a level base.
- Check the walls: Put a level vertically to see how out-of-plumb they are. This affects scribing later.
- Find studs: Mark stud locations lightly with painter’s tape. You’ll need them for anchoring.
Decide what “built-in” means for your project
Built-ins come in a few flavors:
- Full wall bookcase: floor-to-ceiling shelving across a wall (library vibes).
- Alcove or niche shelves: shelves inside an opening (simpler, often faster).
- Base cabinets + upper shelves: the classic lookclosed storage below, display and books above.
- Pre-made hack: turning ready-made cases into built-ins with trim (still legit).
For the most “custom” results, this article focuses on the base + upper bookcase approach built from plywood boxes,
then finished with face frames and trim.
Dimensions That Actually Work
A built-in bookshelf should fit your stuff and look proportional. Use these field-tested guidelines
as a starting point, then customize.
Typical shelf depth
- Books: 10" to 12" deep is a sweet spot for most books and decor.
- Big art books / records / chunky decor: up to about 11" to 12" (sometimes more if needed).
- Media equipment: if you’re housing AV gear, plan deeper shelves (often 18" to 20").
Shelf spacing that feels “right”
If you’re building adjustable shelves, you’re basically buying yourself future-proofing. Still, it helps
to plan a “default” look:
- General books: 8" to 12" spacing works for most collections.
- Tall books: plan a few bays with 12" to 14" clearance if you own coffee-table books or binders.
Width and sag (the physics you can’t negotiate with)
Long shelves + heavy books = shelf sag. You can fight it with smarter design:
keep shelf spans reasonable, use thicker materials, and stiffen the front edge with a solid wood nosing.
Materials & Tools
You don’t need a pro cabinet shop. You do need the right materials, accurate cuts, and enough screws
to make your hardware store cashier recognize you on sight.
Materials (common choices)
- 3/4" plywood: for sides, tops, bottoms, fixed shelves, and dividers (paint-grade or hardwood veneer).
- 1/4" plywood: for backs (adds rigidity and makes installation easier).
- 1×2 or 1×3 lumber: for face frames, nailers, and trim build-out.
- Shims: composite shims are great for leveling and don’t crush as easily as soft wood.
- Fasteners: cabinet screws / construction screws for studs, brad nails for trim, wood glue.
- Fill + finish: wood filler, paintable caulk, primer, paint (or stain + clear coat for stain-grade builds).
- Shelf hardware (optional): shelf pins and a drilling jig for adjustable shelves.
Tools (minimum + nice-to-have)
- Tape measure, pencil, square, long level (or laser level)
- Circular saw (track saw = extra credit) or table saw
- Miter saw (for trim), drill/driver, stud finder
- Clamps, brad nailer (or hammer + finish nails), sander
- Pocket hole jig (optional but very helpful for clean assembly)
The Build Strategy: Modular Boxes
The most reliable way to build a built-in bookshelf is to build it like cabinets: make sturdy plywood boxes
(called carcasses), install them level and plumb, then dress the front with face frames and trim.
Why this works: it’s easier to build square boxes in your garage than to build a perfect bookcase while crouched
in a corner of your living room whispering threats at your baseboard.
Step 1: Build a Level Base (Toe-Kick Platform)
A toe-kick base does three important things: it levels the whole unit, it gives you that “custom cabinetry” look,
and it hides the floor’s little secret: it’s not level.
How to build the platform
- Mark the footprint: Lightly mark where the built-in will sit. Account for baseboard thickness if needed.
-
Build a ladder frame: Use 2x4s or ripped plywood strips to make a rectangle (and cross braces) that matches
your cabinet footprint. - Level it: Shim under the frame until it’s dead level front-to-back and side-to-side.
- Anchor it: Screw into studs (where possible) so it doesn’t shift while you install cabinets.
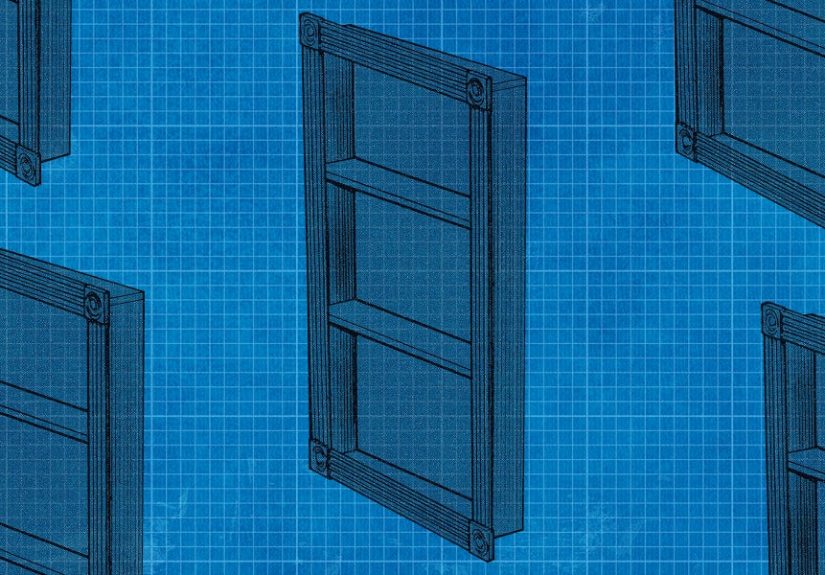
Step 2: Build the Bookcase Boxes (Carcasses)
Build your unit as one or more boxes depending on wall length and how easily you want to move pieces around.
Modular units are easier to transport, easier to level, and easier to tweak when your wall does something weird.
(Walls love doing weird things.)
Cut your parts
Cut sides, tops, bottoms, fixed shelves, and dividers from 3/4" plywood. Cut backs from 1/4" plywood.
If you’re building uppers above base cabinets, plan the upper carcass depth around typical book depth (often 10"–12").
Box assembly options
- Simple + strong: glue + screws with pre-drilled holes (works great for paint-grade).
- Cleaner joinery: dadoes/rabbets for shelves and backs (more pro, more time).
- Fast and tidy: pocket screws for internal joints (great for DIYers with limited clamps).
Don’t skip the back
A 1/4" plywood back adds rigidity and helps keep the case square. If you rabbet the back edge of the sides,
the back panel sits flush and the cabinet hugs the wall more cleanlyespecially if drywall joints are a little proud.
Example layout (simple, realistic)
Let’s say you have an 8-foot-wide wall section and want a classic look: two lower cabinets plus two tall bookcases above.
You might build two 24"-wide base cabinets with a center gap (or add a third base cabinet), then stack/attach two upper carcasses.
The exact widths depend on stud placement, outlet locations, and whether you want symmetrical bays.
Step 3: Install, Shim, and Anchor to Studs
Installation is where a DIY bookshelf transforms into a built-in bookshelf. The goal is simple:
everything level, everything plumb, everything tightly fastened to the wall studs.
Install base cabinets (if you have them)
- Set cabinets on the leveled toe-kick platform.
- Clamp adjacent cabinets together, align the faces, then screw them together through the sides.
- Shim behind cabinets as needed so they sit plumb.
- Screw through the back/nailer strips into studs.
Install upper bookcase boxes
- Dry fit first: set the carcasses in place to confirm sizing and alignment.
- Shim smart: shim at stud locations so screws don’t bow the cabinet.
- Anchor to studs: drive cabinet screws into studs through solid nailers or the case sides.
- Join units: clamp and screw adjacent carcasses together so they act as one.
Step 4: Shelves That Don’t Sag Into Sadness
Shelves are where function meets physics. You want them adjustable and strongor at least strong enough
that your favorite hardcover series doesn’t slowly sink like it’s being pulled into a literary black hole.
Adjustable shelves (recommended)
Drill shelf pin holes in consistent vertical rows. A shelf pin jig makes this fast and keeps holes aligned,
usually with standardized spacing increments. Use metal shelf pins rated for the load you expect.
Fixed shelves (strategic use)
One or two fixed shelves can add a lot of stiffness, especially in tall units. Think of fixed shelves like
the “spine” of the carcassappropriate for a bookshelf, honestly.
Three ways to reduce shelf sag
- Shorten spans: add vertical dividers or design narrower bays.
- Thicken shelves: double up plywood or use thicker stock for longer spans.
- Stiffen the front edge: glue and nail a solid wood nosing (a small front “lip” adds surprising strength).
Step 5: Face Frames, Trim, and the “Built-In” Illusion
This is the fun part: the moment your project stops looking like “plywood boxes” and starts looking like
“custom millwork.” Face frames and trim hide seams, cover gaps, and make everything look intentional.
Face frames: the clean front edge
A face frame is typically made from 1×2 or 1×3 lumber. It covers plywood edges and gives you crisp lines.
You can build one large frame for a multi-unit run, or individual frames for each carcass and then join them.
Filler strips: because walls are not square
Expect gaps at the sides where the cabinet meets the wall. That’s normal. Use filler strips scribed to the wall
to close gaps. Scribing is just carefully trimming a piece so it matches the wall’s wavy personality.
Baseboard and crown: the “it was always there” look
- Baseboard: run it across the front of the toe-kick so the unit ties into the room.
- Crown molding: cover the top gap and visually connect the unit to the ceiling.
- Edge trim: add casing-style trim at the outer edges for a framed-in effect.
Step 6: Fill, Sand, Prime, Paint (a.k.a. The Glow-Up)
Finishing is where good DIY turns into great DIY. Also where you learn that dust is not a suggestionit’s a lifestyle.
Prep like a pro
- Fill: wood filler on nail holes, seams, and imperfections.
- Sand: smooth everything, especially face frames and trim joints.
- Vacuum + wipe: remove dust (yes, again). Tack cloth helps.
- Prime: primer improves adhesion and gives you a uniform base coat.
- Paint: use thin coats for a smoother finish. Let coats dry fully.
Paint vs. stain
Most DIY built-in bookshelves are paint-grade because it’s forgiving and blends trim beautifully.
If you’re going stain-grade, you’ll want higher-end plywood, careful edge-banding, and a finishing schedule
that rewards patience (and punishes rushing).
Let it cure before you load it
Fresh paint can feel dry quickly but still be soft underneath. Give it time before sliding in heavy books,
baskets, or decor. Your shelves will thank you by not wearing “mystery scuff marks” on day two.
Optional Upgrades
If you want your built-in bookshelf to feel truly custom, these upgrades add a lot of wow without adding chaos
(well… not too much chaos).
Lighting
- LED strip lights: easy to hide and great for even glow.
- Puck lights: more focused light for display shelves.
- Hidden wire channels: plan paths early so cords don’t photobomb your shelves.
Cabinet doors and drawers
Lower cabinets with doors keep the visual clutter down. They’re also perfect for hiding routers,
board games, and the instruction manual you swear you’ll read someday.
Built-in ladder rail
For tall library-style shelves, a rolling ladder is peak main-character energy. Also genuinely useful
if your shelves go high.
Common Mistakes (and How to Fix Them)
Mistake: Building to “perfect” measurements instead of real walls
Walls bow, floors slope, ceilings wave. Fix: leave small gaps where needed and cover them with scribed fillers and trim.
Mistake: Not anchoring to studs
A freestanding bookcase can stand alone. A built-in should be anchored. Fix: locate studs, add nailers, and use proper cabinet screws.
Mistake: Long shelves with no stiffening
Shelves sag slowly, then suddenly it’s all you can see. Fix: shorter spans, thicker shelves, and/or a stiffened front edge.
Mistake: Rushing the finish
Paint highlights flaws like it’s being paid per imperfection. Fix: fill, sand, prime, then paint in patient coats.
Conclusion
Building a built-in bookshelf is a project with a big payoff: more storage, more style, and a room that suddenly feels
“finished.” The keys are simple but non-negotiable: plan your layout, build square carcasses, install everything level
and plumb, anchor to studs, and use trim strategically to make the whole unit look seamless.
If you take your time with the measuring and finishing steps, you’ll end up with a DIY built-in bookcase that looks
customeven if your home’s walls tried their best to sabotage you.
Bonus: of Real-World Built-In Bookshelf Experience
The first time I built a built-in bookshelf, I assumed two things: (1) I was a reasonably intelligent adult, and (2) my wall was straight.
One of those assumptions survived. (Spoiler: it was not the wall.)
My plan was simple: base cabinets on the bottom, open shelves on top, all painted a clean white. I had a cut list, a fresh blade,
and a playlist that made me feel like the main character in a home improvement montage. Then I put my level against the floor and
discovered the room had been quietly sloping since approximately 1978. I stared at the bubble like it had personally betrayed me.
The toe-kick platform saved the day. I shimmed the base until it was level and suddenly the whole project felt possible again.
Lesson #1: build a level reference plane and let the rest of the bookshelf follow it. You can’t “eyeball” level.
Eyeballs are enthusiastic, but they are not precision instruments.
Next came installation. I dry-fit the carcasses and discovered the wall bowed just enough that the cabinet touched in the middle
but left gaps at the top and bottom. This is the part where DIYers either panic or learn to love trim.
I chose “love,” mostly because “panic” doesn’t sand well. I used shims at stud locations, tightened screws gradually, and kept checking plumb.
Lesson #2: shim where you screw. If you crank a screw into a stud without a shim behind the cabinet, you can twist the box,
and then your doors (or shelves) will never feel quite right.
The most humbling moment was scribing filler strips. In my mind, scribing was a gentle, artisanal actlike woodworking calligraphy.
In reality, it was me holding a pencil against a lumpy wall and realizing the line I drew looked like it was recorded during an earthquake.
Still, I trimmed carefully (a little at a time), test-fit obsessively, and eventually the gap disappeared. Lesson #3:
scribe slowly, test often. The wall will not become straighter out of sympathy.
Then came paint. I thought one coat would be “fine.” The bookshelf disagreed. After primer and two finish coats,
the unit finally looked like a built-in instead of a science project. But the real secret was the boring stuff:
filling nail holes, sanding joints, and caulking small seams. Lesson #4: the finish work is the built-in.
The boxes are just the skeleton; the prep is the glow-up.
Finally, I loaded the shelves… and watched one long shelf dip ever so slightly under a row of heavy hardcovers.
It wasn’t dramatic, but it was enough to haunt me. I fixed it by adding a solid wood nosing to stiffen the front edge.
Lesson #5: design for weight. Books are deceptively heavy, and gravity is undefeated.
The end result was absolutely worth it: a wall that looked custom, a room that felt more finished, and a storage solution
that made daily life easier. Plus, every time someone says, “Wow, those look built-in,” you get to casually say,
“Oh, these? Yeah, I made them,” and pretend you weren’t once on the floor whispering threats at a baseboard.


