Table of Contents >> Show >> Hide
- What Is Weather Stripping (and Why It Matters)?
- Common Types of Weather Stripping for Homes
- Tools & Supplies You’ll Need
- Step-by-Step: How to Install Weather Stripping on Doors & Windows
- How to Replace Weather Stripping on Car Doors
- Common Weather Stripping Mistakes (and How to Avoid Them)
- DIY vs Hiring a Pro
- Long-Term Maintenance Tips
- Real-World Experiences: What DIYers Learn About Weather Stripping
If you can feel a chilly breeze sneaking under your front door or hear the wind whistling through your car door seals, your weather stripping is basically waving a white flag. The good news? Replacing or adding weather stripping is one of the cheapest, easiest DIY upgrades you can do for your home and carand it pays you back in comfort and lower energy bills.
In this guide, we’ll break down the different types of weather stripping, show you step-by-step how to install it on doors, windows, and car doors, and share real-life tips so you avoid the classic rookie mistakes. No fancy tools, no contractor billjust some tape, a utility knife, and a little patience.
What Is Weather Stripping (and Why It Matters)?
Weather stripping is any material installed around movable partslike doors and windowsto seal gaps where air, water, dust, and noise sneak through. Think of it as a soft gasket that lets the door or window move, but hugs it tightly when it’s closed.
Those tiny gaps might not look like much, but they act like open straws between indoors and outdoors. Properly sealing leaks around doors and windows with weather stripping and caulk can help cut heating and cooling costs, improve comfort, and reduce drafts and cold spots. Combined with insulation, you’re also helping your HVAC system work less hard, which can extend its life and shrink your utility bills.
On cars, weather stripping (often called door seals or weather seals) keeps rain, wind noise, road dust, and temperature extremes out of the cabin. When it fails, you may see water leaks, hear loud wind at highway speeds, or notice the door doesn’t “thunk” shut like it used to.
Common Types of Weather Stripping for Homes
Before you start sticking random foam everywhere, it helps to know what type of weather stripping is best for your situation. Different gaps and locations call for different materials.
1. Foam Tape Weather Stripping
Best for: Window sashes, door frames, irregular gaps, and quick fixes.
Foam tape is one of the most popular options for DIYers. It usually comes as a roll of compressible foam with adhesive backing on one side. You cut it to length, peel, and stick. When the door or window closes, the foam compresses, filling small to moderate gaps and blocking drafts.
Pros: Inexpensive, easy to install, great for uneven surfaces.
Cons: Not as durable as heavier rubber or vinyl; may compress and lose effectiveness over time, especially on high-traffic doors.
2. V-Strip (Tension Seal)
Best for: Double-hung windows, sliding windows, and the sides of doors.
V-strip, also called tension seal, is a thin, flexible strip of plastic or metal folded into a “V” shape. One side attaches to the frame; the other flexes, pressing against the moving part when it closes. This creates a springy seal that adapts to small movement and warped frames.
Pros: Long-lasting, great for narrow but consistent gaps, good for older or slightly warped frames.
Cons: Installation takes a bit more care than foam tape and may require nails or screws if not self-adhesive.
3. Felt Weather Stripping
Best for: Interior doors, low-use doors, mild climates.
Felt strips might be reinforced with a metal or plastic carrier. They’re inexpensive and often stapled or nailed in place. Felt won’t hold up as well to heavy use or moisture, so it’s better inside the home or for rarely used exterior doors.
Pros: Very budget-friendly, easy to install.
Cons: Shorter lifespan, not ideal for very drafty or wet areas.
4. Rubber or Vinyl Gaskets
Best for: Exterior doors with larger gaps and longer-term performance.
Rubber and vinyl gaskets come as pre-formed seals or mounted in aluminum channels that screw to the door frame. When the door closes, the gasket compresses, forming a tight, durable seal.
Pros: Very durable, great for bigger or uneven gaps around exterior doors.
Cons: Higher cost, more involved installation (usually screws rather than peel-and-stick).
5. Door Sweeps and Door Shoes
Best for: The gap at the bottom of the door.
A door sweep is a metal or plastic strip with a rubber or nylon blade that mounts to the bottom edge of a door, brushing against the threshold. Door shoes wrap around the bottom of the door with a built-in gasket.
Pros: Excellent for stopping drafts, light, and even pests from sneaking under doors.
Cons: Require careful measuring and sometimes trimming the door or sweep.
Tools & Supplies You’ll Need
You don’t need a full workshop to install weather stripping, but having the right basics makes the job cleaner and faster. Gather:
- Measuring tape
- Pencil or marker
- Utility knife or heavy scissors
- Screwdriver or drill (for sweeps and aluminum-mounted seals)
- Cleaning supplies: mild detergent, rag, and possibly rubbing alcohol
- Weather stripping of your choice (foam tape, V-strip, rubber gasket, door sweep, etc.)
- Optional: Putty knife or scraper to remove old adhesive
For car weather stripping, add:
- Automotive weatherstrip adhesive (usually a black or yellow rubber cement)
- Plastic trim removal tool or flathead screwdriver (for carefully prying out old seals)
- Masking tape to hold the new seal while the adhesive cures
Step-by-Step: How to Install Weather Stripping on Doors & Windows
Step 1: Find the Leaks
On a windy day, close your doors and windows and slowly move your hand around the edges. If you feel cold air, you’ve found a leak. You can also:
- Shine a flashlight from outside at night to see where light passes through.
- Use a strip of tissue or a candle (carefully!) to see if the flame or paper flickers.
Step 2: Remove Old Weather Stripping
Peel away any cracked, brittle, or flattened weather stripping. Use a putty knife or scraper to remove old adhesive. Don’t rush this partif you stick new weather stripping over crumbling glue, it won’t adhere properly and will fall off sooner.
Step 3: Clean and Dry the Surface
Wipe the frame or sash with mild soap and water to remove dust and oils. For really grimy surfaces, a quick wipe with rubbing alcohol helps the adhesive grab. Let everything dry completely before proceeding.
Step 4: Measure Carefully
Measure the top, sides, and bottom (if using a sweep) of the door or window. Add about 5–10% extra length to account for waste and trimming. It’s better to cut a little long and trim back than find yourself short by half an inch.
Step 5: Cut and Test Fit
Cut your weather stripping pieces to length with a sharp utility knife or scissors. Dry-fit each piece in place before removing adhesive backing or driving any screws. Close the door or window to see if it still operates smoothly without binding.
Step 6: Install the Weather Stripping
For Foam Tape and Adhesive Strips
- Peel a short section (6–12 inches) of the backing, not the entire strip at once.
- Press the foam firmly into the corner or along the frame, working in small segments.
- Continue peeling and pressing until the entire length is in place.
- Close the door or window to compress the foam and check the seal.
For V-Strip
- Position the “V” so one leg sticks to the frame and the other leg presses against the moving part.
- If it’s adhesive-backed, peel and press into position along the side or top jamb.
- For non-adhesive V-strip, tack or screw the strip in place through the flange.
- Close the door or sash. The V should compress, not flatten completelyif it does, you may need to reposition or trim it.
For Door Sweeps
- With the door closed, hold the sweep on the inside (or outside, depending on style) so the rubber just kisses the thresholdno big gap, no dragging.
- Mark the screw holes with a pencil.
- Pre-drill small pilot holes if needed.
- Attach with screws, starting in the middle and working outward so the sweep stays straight.
- Open and close the door to make sure it doesn’t scrape or bind.
Step 7: Test and Fine-Tune
Once everything is installed, close the door or window and check:
- Does it latch smoothly?
- Can you see light anywhere along the edges?
- Do you still feel a draft?
If the door is hard to close, the material may be too thick or installed slightly out of line. Trim small sections, reposition, or switch to a slimmer profile if needed.
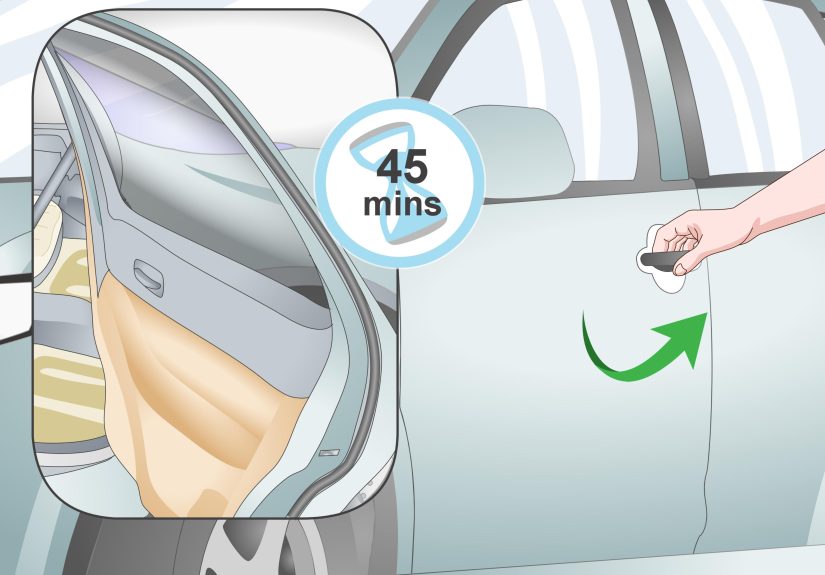
How to Replace Weather Stripping on Car Doors
Car door weather stripping tends to fail with age, sun, and constant opening and closing. Signs you need new seals include wind noise at highway speeds, water leaks after rain or a car wash, visible cracks in the rubber, or doors that rattle instead of sealing tightly.
Step 1: Inspect the Old Seals
Open each door and gently press along the rubber seals. Look for:
- Cracks, splits, or missing chunks of rubber
- Areas where the seal has pulled away from the metal
- Flattened sections that no longer spring back
Step 2: Remove the Old Weather Stripping
Most automotive weather stripping is either pressed into a channel, clipped, or glued in place. Starting at one end:
- Use your fingers or a plastic trim tool to gently pull the seal away.
- Check for hidden clips and release them as you go.
- Remove as much old adhesive as possible with a scraper or adhesive remover made for automotive use.
Step 3: Clean the Surface
Wipe the channel or mounting surface with a cleaner recommended for your car’s finish. This step is crucialfresh adhesive won’t stick to dusty, oily, or sticky residue.
Step 4: Dry Fit the New Seal
Press the new weather stripping into place without glue first. Make sure:
- The corners line up properly.
- Any molded “joints” or formed sections match your door’s shape.
- The seal isn’t twisted.
Step 5: Apply Adhesive (If Needed)
For seals that require glue:
- Lift one section at a time and apply a thin bead of weatherstrip adhesive to both the metal and the underside of the seal.
- Let it tack up for a minute or two (follow the product instructions).
- Press the seal firmly into place, working your way around the door.
- Use small pieces of masking tape to hold tricky curves while the adhesive cures.
Step 6: Let It Cure, Then Test
Allow the adhesive to cure fully (often several hours). Then close the door gently and check for:
- Even contact all the way around the door opening.
- No pinched or folded sections of the seal.
- Reduced wind noise and no leaks during a hose test or next rainstorm.
Common Weather Stripping Mistakes (and How to Avoid Them)
- Using the wrong thickness: Too thick, and the door won’t close properly; too thin, and drafts remain. If you have to slam the door, that’s your cue.
- Skipping the cleaning step: Dust and grease are the natural enemies of adhesive. Take ten minutes to clean now so the strip doesn’t fall off in two weeks.
- Leaving gaps at the corners: Corners are prime leak spots. Overlap pieces slightly or use pre-formed corner sections when possible.
- Stopping at the door but ignoring the sweep: Sealing the sides and top is great, but the bottom gap is often where the biggest draft lives.
- Not checking operation after installation: Always open and close the door multiple times before calling it done.
DIY vs Hiring a Pro
Most basic weather stripping jobsfoam tape on windows, V-strip on sashes, door sweeps, and even many car door sealsare well within DIY range. You’ll mainly need patience, an eye for alignment, and a steady hand with a utility knife.
Consider calling a pro if:
- Your door frame is badly warped and may need planing or adjustment.
- You see signs of water damage, rot, or rust around the door opening.
- Your vehicle has complex seals integrated with trim pieces or airbags that you’re not comfortable removing.
Even if you hire out the tricky stuff, understanding how weather stripping works helps you maintain it and spot problems early.
Long-Term Maintenance Tips
- Inspect once or twice a year: Look for cracks, gaps, or flattened spots and replace sections as needed.
- Clean gently: Wipe rubber and vinyl seals with a damp cloth. Some car owners like to use a rubber conditioner to keep automotive seals flexible.
- Watch for subtle signs: Drafty spots, higher-than-normal energy bills, or new wind noise in the car are often your first clues that a seal is failing.
Real-World Experiences: What DIYers Learn About Weather Stripping
Weather stripping looks simple, but most homeowners and car owners pick up a few “wish I’d known that” lessons along the way. Here are some experience-based tips to help you skip the frustration stage.
1. Start with One Door or Window
It’s tempting to buy a giant roll of foam and attack every opening in your house. A smarter approach is to pick the worst offender firstthe drafty front door, the bedroom window that whistles, or the car door that leaks. Once you get the hang of measuring, cutting, and aligning, the rest of the house (or car) goes faster and smoother.
Many DIYers discover that the first door takes an hour, the second takes 30 minutes, and by the third they’re moving like a pro.
2. Don’t Fear Removing Old, “Good Enough” Stripping
One common mistake is trying to patch new weather stripping over old material “to save time.” In practice, this usually leads to lumpy, unreliable seals. Experienced homeowners learn that it’s almost always better to strip everything down to clean wood, metal, or vinyl and start fresh. The job looks cleaner, works better, and lasts longer.
3. Your House Will Feel Different (in a Good Way)
People are often surprised at how much more comfortable a sealed home feelseven before the first energy bill shows up. Rooms near exterior doors suddenly feel less “drafty.” The hallway that used to be chilly in winter or hot in summer becomes more neutral. If you work from home, you may notice fewer temperature swings during the day.
Small details like fewer rattles, less outside noise, and doors that close with a solid, cushioned feel can make your home feel more solid and higher quality.
4. Cars Feel Newer with Fresh Seals
On the automotive side, worn weather stripping is something drivers often ignore until there’s an obvious leak. After replacement, the difference can be dramatic. Road noise drops, rain stays outside where it belongs, and the climate control system doesn’t have to work as hard. Doors may even feel more substantial when they close, with that satisfying “thunk” you associate with a well-built vehicle.
DIYers who replace their own car seals often say it’s one of the most satisfying weekend projects because the results are immediate: no more soggy carpets after storms, no more wind roaring by your ear on the highway.
5. Matching the Material Matters
Experience quickly teaches that not all weather stripping is created equal. Foam tape is perfect for a quick fix on a bedroom window but may not survive repeated slams on a busy front door. Rubber and vinyl gaskets cost more upfront but pay off in durability where doors are used dozens of times a day.
Similarly, on cars, buying vehicle-specific weather stripping instead of generic bulk rubber usually leads to a cleaner fit around curves and corners. The extra upfront cost often saves you time wrestling with trimming and stretching.
6. Take Before-and-After Notes
Many homeowners only realize how much of a difference weather stripping made after comparing energy bills or comfort levels season to season. If you want to see the impact clearly, jot down:
- Which doors and windows you sealed
- What type and thickness of weather stripping you used
- The approximate date of installation
Later, when you check your energy bills or notice improved comfort, you’ll be able to tie those improvements directly to your effortsand repeat the winning combinations in other parts of the house.
7. It’s a Perfect “Gateway” DIY Project
If you’re new to DIY, weather stripping is a confidence builder. You learn how to measure, cut accurately, and work with hand toolswithout the risk of ruining expensive materials. Once you see how manageable it is, you may find yourself tackling more projects: installing a new lockset, adjusting strikes and hinges, or even replacing a door altogether.
The bottom line: learning how to install weather stripping on your home and car is a simple skill that pays off every season. You’ll stay more comfortable, protect your belongings from moisture and drafts, and keep a little extra money in your pocketall with a project you can knock out in an afternoon.


