Table of Contents >> Show >> Hide
- The 5-Minute “Pre-Game” That Prevents Wall Regret
- Pick the Perfect Spot: Height, Spacing, and “Does This Look Weird?”
- Choose Picture Hanging Hardware Like You Mean It
- Measure Once, Patch Never: Marking Tricks That Actually Work
- Step-by-Step: How to Hang a Picture Frame on Drywall
- Step-by-Step: How to Hang a Heavy Picture Frame (Without Tempting Fate)
- How to Create a Gallery Wall Without Losing Your Weekend (or Your Spirit)
- Common Picture Hanging Mistakes (and How to Fix Them Fast)
- Damage-Free Hanging: When Nails Aren’t an Option
- Quick Reference Cheat Sheet
- Conclusion: Hang It Once, Love It Daily
- Bonus: Real-World Picture-Hanging Experiences (So You Don’t Repeat Them)
- The “I Hung It at Eye Level… While Standing on a Ladder” Experience
- The “Drywall Anchor That Looked Strong… Until It Wasn’t” Experience
- The “Wire Frame That Always Tilted Forward Like It Was Judging Me” Experience
- The “Gallery Wall That Started Cute and Ended in Chaos” Experience
- The “Command Strips Worked Great… Until Summer Humidity” Experience
- The “Plaster Wall Surprise” Experience
- The “I Finally Bought a Laser Level and Now I Won’t Shut Up About It” Experience
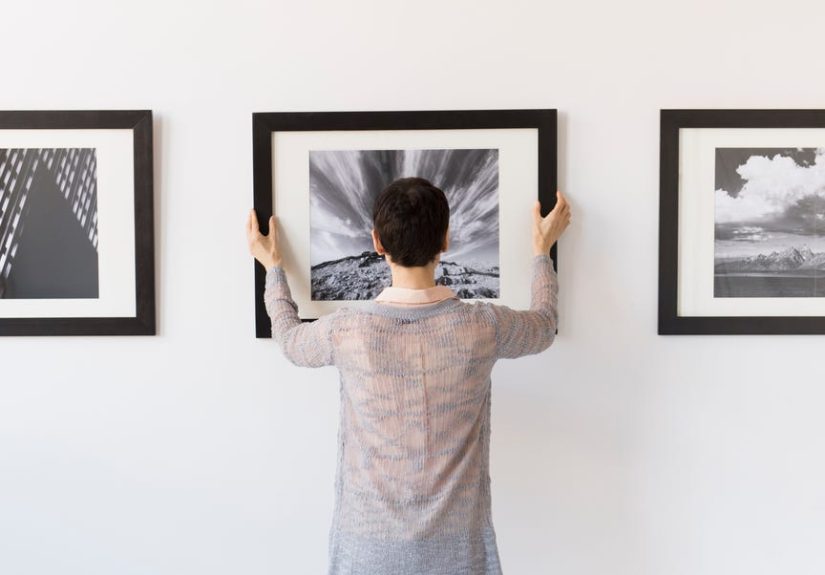
Hanging a picture frame should be a victory lap, not a full-contact sport with drywall. Yet somehow,
it’s the task most likely to leave you with: (1) a crooked frame, (2) mystery holes, and (3) the
sinking realization that you mounted it exactly where the sunlight will blast it like a tanning bed.
The good news: you can hang a picture frame straight, secure, and perfectly placed on the first trywithout
a PhD in geometry or a personal relationship with spackle. This guide walks you through placement, hardware
choices, measuring tricks, and step-by-step methods for everything from lightweight prints to heavy mirrors,
plus gallery wall sanity-saving tactics.
The 5-Minute “Pre-Game” That Prevents Wall Regret
1) Know what you’re hanging (weight + hardware)
Flip the frame over and identify what it’s working with:
sawtooth hanger, D-rings, wire, or a French cleat.
If you still have the packaging, check the weight. If you don’t, step on a bathroom scale holding the frame,
then subtract your weight. (Congratulations: you just did “homeowner math.”)
2) Know what you’re hanging into (wall type)
- Drywall: common in most modern homes; easy to patch, easy to mess up.
- Plaster: older homes; tougher surface, more crack-prone; pre-drilling matters.
- Brick or masonry: you’ll likely need a masonry bit and proper anchors.
- Tile: extra caution; avoid cracking; specialized bits and patience required.
3) Gather the right tools (you don’t need a whole garage)
- Tape measure
- Pencil (erasableunlike your regret)
- Level or laser level
- Stud finder (for heavier frames and peace of mind)
- Hammer and/or drill with bits
- Appropriate picture hooks, screws, or anchors
- Painter’s tape (for planning, marking, and catching drill dust)
4) A quick safety note that’s worth your attention
Stud finders aren’t just for studsmany models help you avoid pipes or wiring. When in doubt,
don’t drill where outlets, switches, or plumbing runs are likely to hide. If you feel resistance
that seems “wrong,” stop and reassess. Your wall should not spark.
Pick the Perfect Spot: Height, Spacing, and “Does This Look Weird?”
The classic “57-inch rule” (museum-approved, home-friendly)
A widely used starting point is to place the center of the artwork about 57 inches
from the floorroughly average eye level. This creates a cohesive look when you have multiple frames in one room.
If your household is especially tall (or your ceilings are lofty), nudging toward 60 inches can feel more natural.
Above furniture: don’t let art float like a lonely satellite
Hanging art above a sofa, console, or bed? Anchor it visually to the furniture.
A common guideline is to place the bottom of the frame roughly 6–8 inches
above the top of the furniture (sometimes up to 10–12 inches depending on proportions).
The goal: “connected,” not “escaping.”
Use the tape test (a.k.a. “Try before you drill”)
Before you commit to holes, outline the frame with painter’s tape or tape up paper templates. Step back.
Sit down. Stand up. Walk into the room like a guest. If it looks too high, it probably is.
(This is not a judgment. It’s a law of interior design physics.)
Choose Picture Hanging Hardware Like You Mean It
The right hanger depends on two things: weight and where the support comes from
(stud vs. drywall vs. masonry). When you pick hardware, always follow the manufacturer’s rated limits.
The best hardware in the world can’t save you from ignoring the label.
Option A: Into a stud (strongest and simplest for heavy frames)
For heavier frames, mounting into a stud is the gold standard. Studs are typically spaced
16 or 24 inches apart, so sometimes the “perfect” spot needs a plan Blike a French cleat,
multiple anchors, or shifting the layout slightly.
- Screw into stud: best for heavy art, mirrors, and anything you don’t want to hear crash at 2:00 a.m.
- Picture hook into stud: works for medium loads when positioned correctly.
Option B: Drywall (no stud available)
Drywall alone doesn’t hold much without help. That’s where anchors come in. The anchor style matters:
- Plastic expansion anchors: light-duty; fine for small frames.
- Self-drilling anchors: convenient; good for medium loads when properly rated.
- Molly bolts: expand behind drywall for a solid hold (more steps, more strength).
- Toggle bolts / toggle anchors: excellent for heavier loads when no stud is available.
For anything heavy, consider using two fasteners (when the frame allows) to distribute weight and reduce tilt.
Also: if the frame is valuable or irreplaceable, treat “close enough” as the enemy.
Option C: Damage-minimizing systems (renters and commitment-phobes)
Adhesive strips can be great for lightweight framesif you use them correctly. Clean the wall, follow curing times,
and respect frame size and weight limits. Some brands recommend waiting after painting before application, and many
explicitly warn against using strips for valuable or irreplaceable items, wallpaper, or certain locations (like over beds).
Option D: French cleat (the “I’m not playing around” solution)
If you’re hanging something heavy (large art, mirrors, oversized frames), a French cleat spreads the load and keeps
the frame snug to the wall. It’s also wonderfully forgiving for leveling during installation.
Translation: it’s what you use when you want stability, not suspense.
Measure Once, Patch Never: Marking Tricks That Actually Work
Measure the “hang point,” not the top of the frame
The nail or screw doesn’t go where the top edge of your frame goes. It goes where the hanger sits.
That distance varies by hardware:
- Sawtooth hanger: measure from the top of the frame down to the sawtooth peak that will rest on the nail.
- D-rings (no wire): measure from the top to the ring holes; two D-rings often provide better stability.
- Wire: pull the wire upward (like it would be when hanging) and measure from the top of the frame to the wire at its “hang tension.”
- French cleat: measure from the top of the frame to the cleat’s “hook line.”
Use painter’s tape as a disposable notepad
Put a strip of painter’s tape on the wall where you’ll mark. Pencil your dot(s) on the tape.
When you’re done, peel it off. Less smudging, less “why is there a gray graphite cloud on my paint?”
The toothpaste trick (yes, really)
For one-hook frames, put a tiny dab of thick white toothpaste on the hanger, press the frame gently where you want it,
then remove the frame. The toothpaste transfers a mark to the wallyour hook pointwithout guesswork.
Wipe clean afterward. It’s weird. It works. Your dentist may feel honored.
Catch drill dust with tape (your vacuum will thank you)
Fold a piece of painter’s tape into a little “shelf” under where you’re drilling. It catches the dust and debris.
Peel and toss. It’s like a tiny disposable butler for your wall.
Step-by-Step: How to Hang a Picture Frame on Drywall
Scenario 1: Lightweight frame with a sawtooth hanger
- Decide placement: mark the center height (often ~57 inches to center) and the frame’s horizontal center.
- Measure hang offset: from top of frame to sawtooth peak that will sit on the nail.
- Transfer measurement: from your desired top-of-frame line down by the offset to find nail location.
- Mark the spot: pencil dot on painter’s tape.
- Install fastener: tap in a picture nail/hook at a slight downward angle (or use a small screw if needed).
- Hang the frame: place sawtooth on nail/hook.
- Level check: adjust slightly; sawtooth makes tiny shifts easy.
- Stabilize: add small bumpers or museum putty behind bottom corners to prevent sliding and wall scuffs.
- Step back: admire your work like you’re being interviewed by a home makeover show.
Scenario 2: Medium frame with D-rings (recommended for stability)
- Install two D-rings on the frame (if not already there), aligned and level.
- Measure from the top of the frame down to the D-ring hang points.
- Mark two wall points at the same height using a level or laser level.
- If you’re hitting studs, use screws. If not, use anchors rated for the frame’s weight.
- Hang the frame on both hooks/screws and confirm it sits flush and level.
Scenario 3: Wire-backed frame (use two hooks for less tilt)
Wire can make big frames tilt forward, especially if the wire is pulled too tight. A smarter approach is
two hooks spaced apart so the frame hangs more securely and stays flatter to the wall.
- Make sure the wire is in good shape and attached to solid D-rings (not flimsy staples).
- Choose your frame position and mark the frame centerline on the wall.
- Pull the wire up on the frame (as if hanging) and measure from top of frame to the wire at the “hang point.”
- Transfer that measurement onto the wall to locate hook height.
- Measure the distance between the D-rings and mark two hook points symmetrically around center.
- Install two picture hooks (into studs if possible, otherwise use rated anchors).
- Hang the wire across both hooks; adjust until level.
- Add bumpers/putty at the bottom corners to prevent sway and wall marks.
Step-by-Step: How to Hang a Heavy Picture Frame (Without Tempting Fate)
Best practice: studs + screws (when possible)
- Use a stud finder to locate studs near your desired placement.
- Mark stud centers lightly in pencil (or on tape).
- If the frame can hang from one point: use a heavy-duty screw into the stud (not a tiny nail).
- If the frame needs two points: level your marks across studs; use two screws.
- Hang and test gently by lifting and re-seating; confirm no movement.
When studs don’t line up: consider a French cleat
A French cleat is two interlocking beveled stripsone on the wall, one on the frame. Mounted correctly,
it distributes weight and helps keep large frames level and close to the wall. For big, heavy pieces,
it’s one of the most secure options you can install.
- Attach the cleat’s wall piece into studs with appropriate screws.
- Level the cleat carefully (this is where a laser level feels like a superpower).
- Attach the matching cleat piece to the frame.
- Lift and drop the frame onto the cleat until it locks in place.
- Add small bumpers if needed to keep the bottom from shifting.
How to Create a Gallery Wall Without Losing Your Weekend (or Your Spirit)
Rule #1: Lay it out on the floor first
Arrange frames on the floor until the composition looks right. Take a photo.
This becomes your map when you’re staring at a blank wall wondering why you thought “gallery wall”
sounded like a relaxing hobby.
Use paper templates for near-zero mistakes
- Trace each frame on kraft paper or printer paper and cut it out.
- Label each paper template (“Frame A,” “the weird oval one,” etc.).
- Mark the hanger position on each template (where the nail/hook needs to go).
- Tape templates to the wall and adjust until spacing feels balanced.
- Level key rows or anchor pieces so the whole arrangement doesn’t drift.
Spacing that looks intentional
Consistent spacing is what makes a gallery wall feel designed. Many decorators aim for about
2–3 inches between frames, adjusting slightly for frame size. Pick a spacing rule
and stick with it like it’s your favorite coffee order.
Start with an anchor piece
Choose the largest or most visually important frame as your anchor. Place it first (often near the visual center),
then build outward. If you start with a tiny frame in the corner, you’re basically asking your layout to go feral.
Common Picture Hanging Mistakes (and How to Fix Them Fast)
Mistake: Hanging everything too high
If the art feels like it’s hovering above the room, lower it. A good check: if you have to tilt your head back
to see it comfortably, it’s too high.
Mistake: Using the wrong anchor
If the hanger is pulling out, stop. Don’t “just tighten it more” like the wall owes you money.
Upgrade the anchor (or move to a stud) before gravity collects its debt.
Mistake: Crooked frame
Use bumpers or a small dab of museum putty at the bottom corners to prevent micro-slips.
Also, check that your hanger points are truly levelone slightly higher hook can make a frame look perpetually annoyed.
Mistake: Frame tilts forward
Try two hooks for wire-backed frames, reduce excessive wire tension, and use bumpers.
If the frame is large and heavy, consider switching to D-rings without wire or a French cleat.
Damage-Free Hanging: When Nails Aren’t an Option
Adhesive picture hanging strips
Adhesive strips can work beautifully for lightweight frames when you:
clean the wall first, press firmly, wait the recommended time before hanging,
and stay within the product’s weight and size limits. Be extra cautious with humidity, textured surfaces,
and freshly painted walls.
Picture ledges and rails
If you like to swap art often, a picture ledge lets you change frames without adding new holes.
In some homes, traditional picture rails near the ceiling can also be used with hooks and cord systems
for flexible, low-damage displays.
Quick Reference Cheat Sheet
- Best overall placement starting point: center of frame around 57–60 inches from the floor
- Above furniture: bottom of frame typically 6–8 inches above the furniture
- Heavy frames: studs + screws, or a French cleat
- No studs available: rated drywall anchors (toggle/molly for heavier loads)
- Wire-backed frames: two hooks reduces tilt and improves stability
- Gallery wall: paper templates + consistent spacing = fewer holes
Conclusion: Hang It Once, Love It Daily
Hanging a picture frame “right the first time” is really just three decisions made well:
placement (height and alignment), hardware (matched to weight and wall type),
and marking (measuring the hang point, not guessing). Do those three things and you’ll
avoid the classic spiral of: hole → patch → repaint → move frame → repeat.
Take five minutes to plan, use the right anchor or stud, and let levels and templates do the thinking for you.
Your walls stay clean, your frames stay straight, and gravity stays boredexactly as it should.
Bonus: Real-World Picture-Hanging Experiences (So You Don’t Repeat Them)
If you want to feel better about your own picture-hanging anxiety, here’s a comforting truth:
almost everyone learns this skill the same wayby making one completely avoidable mistake, then swearing
they’ll “do it right next time.” Consider these common scenarios a friendly warning label.
The “I Hung It at Eye Level… While Standing on a Ladder” Experience
A classic: you climb up, eyeball the placement, and proudly hang the frame… only to step back and realize it’s
perched near the ceiling like it’s trying to escape. What happened? You used your ladder eye level,
not normal human eye level. The fix is simple: pick a center-height target (often around 57–60 inches), mark it,
and measure your hanger offset properly. Bonus tip: sit down on the sofa and check the view from the place
you’ll actually be living your life.
The “Drywall Anchor That Looked Strong… Until It Wasn’t” Experience
This usually begins with optimism and ends with a small crater. Someone grabs a random anchor from a drawer,
installs it, and hangs a frame that’s “not that heavy.” Then, days or weeks later, gravity files a complaint.
The lesson: anchors are not all the same. Plastic expansion anchors have their place, but heavier frames often
need stronger solutions like a properly rated self-drilling anchor, a molly bolt, or a toggle-style anchor
or better yet, a stud. The best moment to upgrade your hardware is before you hear the crash.
The “Wire Frame That Always Tilted Forward Like It Was Judging Me” Experience
Wire-backed frames can be sneaky. You hang them on one hook, step back, and notice the top edge leaning away
from the wall. You press it flat. It springs back. You consider negotiating. The fix is usually structural:
use two hooks to distribute the wire load and reduce tilt, avoid pulling the wire too tight on the frame,
and add small bumpers at the bottom corners so the frame rests evenly. For very large pieces, switching to
D-rings without wire or using a French cleat can feel like switching from flip-flops to hiking bootssuddenly
everything is stable.
The “Gallery Wall That Started Cute and Ended in Chaos” Experience
Gallery walls are where good intentions go to test your patience. The usual mistake is hanging the first piece,
then “building around it” with vibes alone. Spacing drifts, rows slant, and suddenly every frame looks like it
came from a different universe. The cure is planning: lay everything out on the floor, take a reference photo,
and use paper templates taped to the wall. It feels slow at firstbut it’s dramatically faster than patching
eight holes because you kept moving “just one frame.”
The “Command Strips Worked Great… Until Summer Humidity” Experience
Adhesive hanging strips can be fantasticwhen used for the right items, on the right surfaces, with the right
prep. The real-world failure story often involves skipping the cleaning step, hanging too soon, using them on
textured walls, or trusting them with something too heavy (or too precious). If you’re going adhesive, follow
directions: clean the wall, press firmly, wait the recommended time before hanging, and stay within stated
limits for both weight and frame size. For anything valuable or irreplaceable, many experienced decorators
prefer mechanical support (studs, anchors, cleats) because it’s less “hope-based engineering.”
The “Plaster Wall Surprise” Experience
In older homes, plaster walls can be tougher than drywall but also less forgiving. People often treat plaster
like drywall, hammer in a nail, and end up with a crack or a chip. The better approach: pre-drill carefully,
use appropriate anchors when needed, and take your time. Plaster rewards patience. It punishes speed.
The “I Finally Bought a Laser Level and Now I Won’t Shut Up About It” Experience
This is the happiest ending. After one too many crooked frames, someone buys a laser level.
Suddenly gallery walls align. Rows look intentional. Hanging art becomes a calm, precise activity instead of
interpretive dance with a tape measure. Is a laser level required? No. Does it make you feel like a home-improvement
wizard? Absolutely. And honestly, we all deserve that.
The takeaway from these real-world moments is simple: measure the hang point, match hardware to weight and wall type,
and plan layouts before you drill. Do that, and your walls stay cleaner, your frames stay straighter, and your home
looks like it was styled on purposebecause it was.