Table of Contents >> Show >> Hide
- Why Frame a Puzzle Instead of Taking It Apart?
- What You Need Before You Start
- Step 1: Decide Whether the Puzzle Is Worth Framing
- Step 2: Prep Your Workspace Like a Calm, Organized Genius
- Step 3: Glue the Front in Thin, Even Coats
- Step 4: Reinforce the Back if the Puzzle Needs Extra Support
- Step 5: Mount the Puzzle on Foam Board or Backing Board
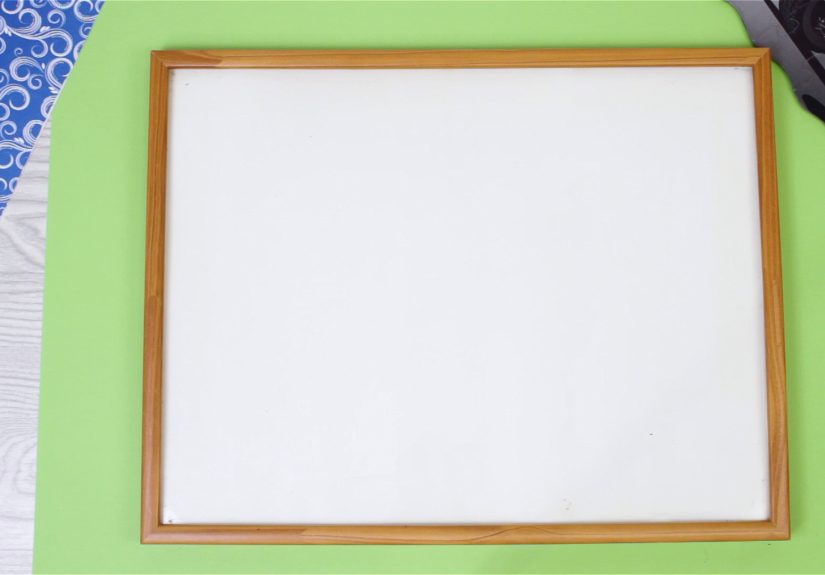
- Step 6: Measure the Finished Puzzle and Choose the Right Frame
- Step 7: Assemble the Frame Carefully
- Step 8: Hang It, Style It, and Protect It
- Common Mistakes to Avoid
- Quick Example: Framing a 1,000-Piece Landscape Puzzle
- Final Thoughts
- Experiences People Often Have When Framing a Puzzle
- SEO Tags
Finishing a jigsaw puzzle feels a little like climbing a mountain in socks: strange, heroic, and weirdly emotional. After hours of sorting sky pieces that all look identical and hunting for that one corner piece that somehow joined a sock pile, you finally reach the finish line. So the big question arrives: should you break it apart and put it back in the box, or turn it into wall art? If the image is beautiful, meaningful, or hard-won, framing it is the obvious upgrade.
Learning how to frame a puzzle is not complicated, but it does reward a little patience and a lot less panic. The trick is to protect the finished puzzle, secure the pieces, add proper backing, and choose a frame that actually fits the real finished size, not the size you guessed with optimism and a tape measure from across the room. In this guide, you will learn the easiest way to preserve a completed puzzle, avoid rookie mistakes, and turn your tabletop triumph into home decor that looks polished instead of “craft project survived by luck.”
Why Frame a Puzzle Instead of Taking It Apart?
A framed puzzle can be more than decoration. It can mark a family holiday, a memorable trip, a rainy-weekend tradition, or the one 1,000-piece masterpiece that nearly ended a friendship over suspiciously similar blue pieces. Framing also gives a finished puzzle a second life. Instead of sitting in a closet, it becomes artwork with a story.
That is why puzzle framing has become so popular. A great puzzle image can look surprisingly elegant on a wall, especially when paired with the right frame, backing board, and glazing. Some people frame landscapes, maps, vintage art, seasonal scenes, or custom photo puzzles. Others frame puzzles simply because they worked too hard to watch the thing get disassembled in under four minutes. Both reasons are valid. Deeply valid.
What You Need Before You Start
- Finished puzzle
- Wax paper, parchment paper, or another protective surface
- Puzzle glue, puzzle glue sheets, or puzzle preserver
- Sponge applicator, brush, or spreader
- Foam board, backing board, or mounting board
- Utility knife or craft knife for trimming backing if needed
- Frame sized to the finished puzzle
- Clean cloth and hanging hardware if your frame does not include it
Before you buy the frame, remember one important detail: a 1,000-piece puzzle is not one universal size. Different brands can finish at very different dimensions. Measure the completed puzzle itself. Trust the ruler, not the box’s vibes.
Step 1: Decide Whether the Puzzle Is Worth Framing
Not every finished puzzle needs a permanent spot on your wall. Choose one that has visual impact, sentimental value, or colors that work with your space. Scenic views, art reproductions, panoramic city scenes, botanical prints, and nostalgic holiday puzzles tend to frame especially well.
This is also the moment to inspect the surface. If the puzzle has metallic accents, glitter, lenticular effects, or a delicate glossy finish, be careful with wet glue. Some specialty surfaces can react poorly to liquid products. In those cases, adhesive sheets applied to the back can be the safer option.
Step 2: Prep Your Workspace Like a Calm, Organized Genius
Place the finished puzzle on a flat, stable surface. Slide wax paper or parchment paper underneath if possible, or build the puzzle on a portable board from the start. This small move saves you from gluing your masterpiece to the dining table and having to explain why the family now eats around a lighthouse scene forever.
The puzzle should be lying as flat as possible. If pieces are raised, press them down gently with your hands. Good lighting helps here. So does coffee, though maybe not too much coffee.
Step 3: Glue the Front in Thin, Even Coats
Now comes the “do not sneeze” phase. Pour a small amount of puzzle glue or puzzle saver onto the front surface. Spread it evenly with a sponge applicator, brush, or spreader so it works into the cracks between pieces. The goal is coverage, not a swamp. A light first coat is usually best.
Let that coat dry according to the product directions. After that, add a second medium coat if needed. Two coats are often enough for a standard cardboard puzzle. If the edges still feel loose, touch them up lightly. Avoid overloading the surface, because thick glue can dry cloudy or create uneven texture.
A smart tip for better results
Always let the puzzle dry flat. Rushing this step is how people end up with curling edges, tacky surfaces, and language not suitable for a family craft blog.
Step 4: Reinforce the Back if the Puzzle Needs Extra Support
For many standard cardboard puzzles, a properly glued front is enough to hold the image together. But if your puzzle is large, heavy, slightly wavy, or you plan to move it around before framing, reinforcing the back can make life easier. Some puzzlers glue the back lightly. Others use adhesive puzzle sheets or mounting products on the reverse side.
If the puzzle curls after drying, a light coat on the back can sometimes help pull it flatter. Another option is to place the dry puzzle under a large flat object with gentle weight for a day. Think “pressing flowers,” but with more cardboard and mild obsession.
Step 5: Mount the Puzzle on Foam Board or Backing Board
This step is what separates a nicely preserved puzzle from one that feels like a floppy oversized cracker. Place the dried puzzle on foam board, mounting board, or another sturdy backing. Trace the shape if needed and trim the board carefully so it fits.
Why bother with backing? Because a framed puzzle needs support. Backing helps keep pieces aligned, reduces flexing, makes transport safer, and gives the finished piece a more professional feel. For larger puzzles, this step matters a lot. Without support, the puzzle can sag inside the frame or shift during hanging.
Best backing options
- Foam board: Lightweight, sturdy, easy to trim
- Mounting board: More polished, good for long-term display
- Cardboard: Acceptable in a pinch, but less durable
Step 6: Measure the Finished Puzzle and Choose the Right Frame
Here is where many people get humbled. A 1,000-piece puzzle from one brand may finish around 20 by 27 inches, while another may be closer to 24 by 30 inches. Some are panoramic, some are square-ish, and some seem designed specifically to ruin standard frame shopping. So measure the actual finished puzzle width and height after it is dry and mounted.
Once you have those dimensions, choose a frame that fits the puzzle and has enough depth. Standard poster frames often work for typical cardboard puzzles. Custom frames are better for unusual sizes, premium presentation, or puzzles with mats. If your puzzle is especially thick, such as a wooden puzzle or a chunkier board design, a shadow box frame may be the safer choice.
You can also think about glazing. Acrylic is lighter and often easier to handle than glass, especially for larger wall pieces. UV-protective acrylic can be a nice upgrade if the framed puzzle will hang in a bright room.
Step 7: Assemble the Frame Carefully
Clean the inside of the frame glazing before sealing everything up. Dust trapped inside a frame becomes magically more visible once the frame is closed. It is one of life’s more annoying laws.
Then place the mounted puzzle into the frame just as you would with a poster or print. Make sure it sits evenly, with no buckling or corner pressure. Secure the backing and close the frame tabs or hardware. If you are adding a mat, ensure it does not cover important details in the puzzle image.
If you are transporting the puzzle to a craft store or custom framer before assembly, sandwich it between large pieces of cardboard to keep it protected. That extra step can prevent cracked edges, popped pieces, and heartbreak in the car.
Step 8: Hang It, Style It, and Protect It
Once framed, choose a spot away from direct sunlight, excessive humidity, and dramatic temperature swings. In other words, do not hang it where steam, glare, and chaos all meet for brunch. Use the right hanging hardware for the frame’s weight, and make sure the wall placement fits the room.
A framed puzzle works beautifully in a hallway, office, den, family room, or game room. Seasonal puzzles look great swapped throughout the year. A vintage map puzzle can look smart in a study. A botanical puzzle can soften a bedroom. A chaotic candy collage puzzle can brighten a kitchen and also make guests hungry.
Common Mistakes to Avoid
- Buying a frame before measuring the finished puzzle
- Using too much glue and creating a cloudy surface
- Skipping backing board on a large puzzle
- Framing before the glue is fully dry
- Using liquid glue on delicate specialty finishes without testing first
- Forgetting to clean dust from the inside of the frame glazing
- Hanging the finished puzzle in direct sun or a humid room
Quick Example: Framing a 1,000-Piece Landscape Puzzle
Let’s say you finished a mountain landscape puzzle that measures 20 by 27 inches. First, you slide parchment paper underneath and apply a thin front coat of puzzle glue. After it dries, you add a second coat, let it cure fully, then mount the puzzle to foam board. Next, you measure again, choose a 20 by 27 frame with enough depth, clean the acrylic, place the mounted puzzle inside, secure the back, and hang it above a console table. Result: instant art, zero missing pieces, maximum smug satisfaction.
Final Thoughts
Framing a puzzle is one of those DIY projects that feels far fancier than it really is. The process is mostly about patience, careful measuring, and resisting the urge to freestyle with too much glue. Once you know the basics, the whole thing becomes surprisingly simple: preserve, support, measure, frame, display.
So if you have a finished puzzle that deserves more than a quick photo and a return trip to the box, give it the spotlight. A framed puzzle adds personality, tells a story, and proves that your hours of sorting tiny cardboard islands were not just a hobby. They were interior design.
Experiences People Often Have When Framing a Puzzle
One of the most common experiences people describe is the emotional shift that happens after the last piece goes in. While the puzzle is still on the table, it feels temporary, like a small victory that will soon disappear. The moment someone decides to frame it, the puzzle changes from entertainment into something closer to a keepsake. That shift surprises a lot of people. They expected a craft project. What they got was a memory with edges.
Many first-time framers also say they underestimated how much the image itself matters once it leaves the table and enters the room. A puzzle that looked merely “nice” while being assembled can become stunning on the wall when surrounded by a simple black, white, or natural wood frame. On the flip side, a puzzle that was fun to build but visually busy may feel overwhelming once displayed. That is why experienced puzzlers often talk about framing only the puzzles they truly want to live with, not just the ones they survived.
Another frequent experience is discovering that the hardest part is not the glue. It is the flip. People often feel confident right up until they realize they must move a fully completed puzzle from one surface to another without turning it into accidental confetti. This is where cardboard sheets, puzzle mats, and a second pair of hands suddenly become heroic. Nearly everyone who has framed more than one puzzle has a story that begins with, “Everything was going great until I tried to flip it.”
There is also the surprise of how professional a finished framed puzzle can look. People expect something homemade, but when the puzzle is mounted properly and placed behind clean glazing, it can easily pass for store-bought wall art. Guests often do not realize it is a puzzle until they step closer, and that moment of recognition is half the fun. Suddenly the frame becomes a conversation piece, not just decor.
Families often connect puzzle framing with rituals. A holiday puzzle gets framed and brought out every winter. A vacation puzzle ends up in the guest room. A custom photo puzzle becomes a gift. In many homes, framed puzzles quietly document family history in a way that mass-produced art never could. They hold the memory of who helped, who argued over edge pieces, who stayed up too late, and who insisted the sky section was “basically impossible” before finishing it anyway.
And then there is the final experience almost everyone shares: the odd pride of walking past the finished framed puzzle and thinking, “Yes, I did that.” Not painted it. Not photographed it. Not bought it ready-made. Built it. Preserved it. Hung it. It is a small thing, maybe, but it feels wonderfully earned. That is why puzzle wall art keeps growing in popularity. It is not just pretty. It is personal.


