Table of Contents >> Show >> Hide
- What Formatting an SD Card Actually Does
- Before You Format: Pick the Right File System
- How to Format an SD Card on Windows
- How to Format an SD Card on Mac
- How to Format an SD Card on Android
- How to Format an SD Card in a Camera
- Common SD Card Formatting Mistakes to Avoid
- Troubleshooting: If the SD Card Won’t Format
- Final Takeaway
- Real-World Experiences With Formatting SD Cards
Formatting an SD card sounds like one of those tiny tech chores you’ll handle in thirty seconds and forget forever. Then your camera throws a “card error,” your Android phone refuses to recognize the card, or your computer suddenly offers three file systems and zero confidence. Great. Now the humble SD card has become the main character.
The good news is that formatting an SD card is usually simple once you know two things: which device you’re formatting it on and which file system makes sense for how you plan to use it. Whether you need to format an SD card on Windows, erase a microSD on a Mac, clean up storage on Android, or prep a memory card for your camera, the steps are straightforward when you stop letting the menu names sound scarier than they really are.
This guide walks through the right way to format an SD card on Windows, Mac, Android, and cameras, explains which format to choose, and covers the mistakes that turn “quick fix” into “why is nothing working now?” We’ll keep it practical, friendly, and mercifully free of techno-drama.
What Formatting an SD Card Actually Does
Formatting an SD card prepares it for use by creating or refreshing the file system your device needs to read and write data. In normal-person language, it wipes the old structure, clears out the mess, and gives the card a fresh start.
That means formatting is useful when you want to:
- Erase everything on the card before reusing it
- Fix minor file corruption or weird read/write issues
- Switch the card between devices
- Set the card up with the right file system for your camera, phone, or computer
- Turn an Android card into portable or internal-style storage, depending on the device
One very important detail: formatting deletes the data on the card. So before you do anything heroic, back up the photos, videos, documents, or random screenshots of memes you absolutely swear were for work.
Before You Format: Pick the Right File System
This is where people either look brilliant or accidentally make a perfectly good SD card unusable in the device they actually care about. The file system matters.
FAT32
FAT32 is the old reliable option. It works with a wide range of devices, especially older cameras, dash cams, game systems, and basic electronics. If you’re using a smaller SD card or dealing with older hardware, FAT32 is often the safest bet.
The trade-off is that FAT32 has limitations, especially with larger files. If you record long high-resolution video, FAT32 may become annoying fast.
exFAT
exFAT is usually the best choice for modern SD cards, especially larger ones. It plays nicely with current Windows and Mac systems and is common on SDXC cards used for high-resolution photos and 4K video. If you have a 64GB card, 128GB card, or larger, exFAT is often the format you want.
For most modern users, exFAT is the sweet spot: roomy, flexible, and much less dramatic than forcing a giant memory card into an older format.
NTFS
NTFS is mainly a Windows-focused file system. It can be useful if the SD card will only live in a Windows environment, but it is usually not the best choice for cameras, Android phones, or cross-platform use. If your goal is compatibility, NTFS is not the hero of this story.
Rule of thumb: choose FAT32 for older devices and smaller cards, exFAT for larger modern cards and cross-platform use, and NTFS only if the card is staying in a Windows-only workflow.
How to Format an SD Card on Windows
If you’re using Windows 10 or Windows 11, formatting an SD card is usually quick through File Explorer. You can also use Disk Management if the card is acting stubborn.
Method 1: Format SD Card in File Explorer
- Insert the SD card into your computer or card reader.
- Open File Explorer and go to This PC.
- Find your SD card by its drive letter.
- Right-click the SD card and select Format.
- Choose a file system:
- FAT32 for smaller cards or older devices
- exFAT for larger cards and most modern use
- NTFS only if you specifically need Windows-only use
- Enter a volume label if you want a name for the card.
- Leave Quick Format checked for routine formatting.
- Click Start, then confirm.
That’s it. Windows will do the job in a moment or two, and your card should be ready to go.
Method 2: Use Disk Management if File Explorer Fails
Sometimes the Format option is unavailable, the card has a strange partition setup, or Windows acts like it has never seen storage before in its life. That’s when Disk Management helps.
- Right-click the Start button and open Disk Management.
- Find the SD card in the list of drives.
- Right-click the volume and choose Format.
- Select the default settings or change the file system if needed.
- Confirm the warning and continue.
If the SD card shows up but has errors, this method is often the cleaner fix. Just make sure you are formatting the correct drive. Accidentally formatting the wrong disk is a memorable experience for all the wrong reasons.
How to Format an SD Card on Mac
On a Mac, the easiest path is Disk Utility. The trick is choosing the right format and, when needed, the right scheme. If you want the card to work with Windows or many cameras, don’t pick Apple-only formats like APFS just because they’re sitting there looking confident.
Steps to Format SD Card on Mac
- Insert the SD card into your Mac or card reader.
- Open Disk Utility.
- Click View and choose Show All Devices.
- Select the SD card from the sidebar.
- Click Erase.
- Enter a name for the card.
- Choose the format:
- MS-DOS (FAT) for 32GB or smaller cards and broad compatibility
- ExFAT for cards over 32GB and most modern use
- Choose Master Boot Record as the scheme when you want broad device compatibility.
- Click Erase.
Once the process finishes, your SD card is ready. If your Mac previously read the card but could not save files to it, reformatting to exFAT can solve that issue in many cases, especially when the card was using a less compatible format.
How to Format an SD Card on Android
Formatting an SD card on Android depends on the phone brand and Android version. The menu wording may vary slightly, but the general idea is the same. You go into storage settings, select the SD card, and format it there.
Format as Portable Storage
Portable storage is the best choice if you want to move the card between devices. It works well for photos, videos, downloads, and file transfers.
- Insert the SD card into your Android phone.
- Open Settings.
- Tap Storage.
- Select the SD card.
- Open the menu in the upper-right corner.
- Choose Format or Format card.
- Confirm the action.
Format as Internal or Adoptable Storage
Some Android devices let you format the SD card as adoptable storage, which ties the card more closely to the phone and can make it behave more like internal storage. That can be handy, but it also means the card is less portable and may be harder to use in other devices later.
If your phone offers this option, the steps usually look like this:
- Open Settings.
- Tap Storage.
- Select SD Card.
- Open the menu and go to Storage Settings.
- Choose the option to format another way or use it as internal storage.
- Confirm formatting.
One important note: not every Android phone supports adoptable storage. For example, many Samsung Galaxy devices focus on microSD cards as expandable portable storage rather than internal adoptable storage. So if you do not see that option, your phone is not necessarily broken. It may simply be designed that way.
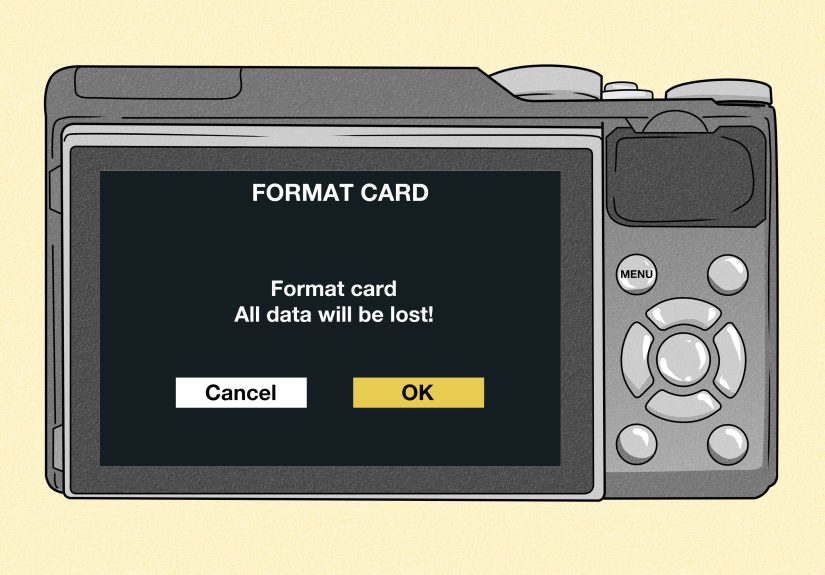
How to Format an SD Card in a Camera
If you plan to use the card in a camera, the best practice is usually simple: format the card in the camera itself after backing up your files.
Why? Because cameras often create their own folder structure and prefer cards formatted to the device’s expectations. A card formatted on a computer may still work, but in-camera formatting is usually the safer, cleaner, and less headache-inducing choice.
General Camera Formatting Steps
- Insert the SD card into the camera.
- Turn the camera on.
- Open the Menu.
- Go to the Setup, Storage, or Tools tab.
- Find Format, Format Card, or Initialize.
- Select the card if the camera has multiple slots.
- Confirm the format.
This approach is common across major camera brands. Canon, Nikon, Sony, and GoPro all emphasize formatting in the camera when preparing a card for that device. Some cameras even offer a quick format and a fuller format option. If your camera has been acting sluggish, having write-speed issues, or throwing odd card warnings, a deeper in-camera format can be worth trying.
Also, do not remove the battery, pop the card out, or power down the camera while formatting is in progress. That is the exact kind of impatience that creates tomorrow’s troubleshooting session.
Common SD Card Formatting Mistakes to Avoid
- Formatting without a backup: This is the classic mistake. If the files matter, copy them first.
- Choosing the wrong file system: exFAT may be perfect for a modern 128GB card, but an older device may prefer FAT32.
- Using NTFS for cameras or phones: Great way to make a card less compatible than it needs to be.
- Formatting on the computer, then blaming the camera: If the card will live in a camera, format it again in the camera.
- Ignoring card size and device limits: Not every phone, camera, or reader supports every SD card capacity.
- Interrupting the process: Pulling the card early is a speedrun to corruption.
Troubleshooting: If the SD Card Won’t Format
If the card refuses to cooperate, try these fixes:
1. Check the physical lock switch
Full-size SD cards often have a tiny lock tab on the side. If it is set to lock, the card may act write-protected. Slide it back and try again.
2. Try a different card reader or port
Sometimes the card is fine and the card reader is the diva. Swap the adapter, port, or computer.
3. Reinsert the card
Especially on Android phones, removing and reinserting the card can make it appear correctly in storage settings.
4. Format on the target device
If the card is for a camera, format it there. If it is for a phone, format it on the phone. Matching the format process to the device often solves compatibility issues.
5. Test with another device
If the card is unreadable everywhere, it may be corrupted or failing. At that point, formatting may not rescue it, and replacement could be the smarter move.
Final Takeaway
If you remember only one thing, let it be this: format your SD card on the device you actually plan to use whenever possible. Use Windows or Mac for general formatting and file-system changes, use Android settings for phone storage setup, and use the camera menu for camera work. That one habit prevents a surprising amount of frustration.
For modern large-capacity cards, exFAT is usually the most practical choice. For smaller cards and older gadgets, FAT32 still earns its keep. And if you are about to format a card full of photos from a vacation, a road trip, or your dog finally learning how to sit like a civilized creature, back it up first. Future you deserves that kindness.
Real-World Experiences With Formatting SD Cards
In real life, most people do not think about SD card formatting until something stops working five minutes before they need it. That is usually how the story begins. A camera says “cannot use this card,” an Android phone suddenly marks storage as corrupted, or a laptop sees the card one day and pretends it has never met it the next. Formatting becomes less of a technical task and more of a peace treaty.
One common experience happens with cameras after a card has been used in multiple devices. A card records drone footage, then gets plugged into a Windows PC, then goes into a mirrorless camera, and suddenly the camera refuses to behave. The fix is often simple: back up the files, put the card back in the camera, and reformat it there. It feels almost too easy, which is annoying because you probably spent twenty minutes assuming the camera was haunted.
Another familiar scenario is the giant microSD card inside an Android phone. At first, everything is fine. Then apps lag, files disappear from the gallery, or the phone asks to “set up” the card again. In many cases, people discover the card was formatted years ago on another device with a less-than-ideal setup. Reformatting the card as portable storage often clears up the problem, especially if the card is mostly being used for photos, videos, and downloads rather than pretending to be permanent internal storage.
Mac users run into a slightly different flavor of confusion. They open Disk Utility and suddenly face a list of formats that sound like they require a computer science degree and a beard of wisdom. The most practical lesson many people learn is this: if the card needs to work with Windows, Android, or cameras, keep it simple and choose exFAT or MS-DOS (FAT) when appropriate. Picking a Mac-specific format may be technically elegant, but elegance is not very helpful when your camera responds with absolute refusal.
Windows users often discover that formatting is easy until they hit an odd edge case. Maybe the card shows the wrong capacity. Maybe the Format option fails. Maybe the card was previously used in a camera, game console, or Chromebook and now Windows is confused. That is when Disk Management becomes the backup quarterback. It is not flashy, but it gets the job done.
The biggest lesson from experience is that formatting is not just about erasing data. It is about matching the card to the device and the job. A 32GB card used in an older trail camera may be happiest with FAT32. A 128GB card for 4K recording will usually make more sense as exFAT. A camera card should usually be formatted in the camera. A phone card should be set up in the phone. Once you follow that logic, formatting stops feeling mysterious and starts feeling like routine maintenance.
And that is really the best mindset: not panic, not guesswork, not clicking random options like a game show contestant under pressure. Just backup, choose the right format, use the right device, and let the SD card start fresh.


