Table of Contents >> Show >> Hide
- Before You Start: What “Copying by Hand” Really Means
- What You’ll Need
- Step 1: Pick the Right Reference (and Decide the Goal)
- Step 2: Match the Size, Crop, and Orientation
- Step 3: Choose Your Accuracy Method (Freehand, Measuring, Grid, or Transfer)
- Step 4: Block In the Biggest Shapes First (No Eyelashes Allowed Yet)
- Step 5: Measure Proportions Using a Pencil (and One Brave Eyeball)
- Step 6: Use Angles and Negative Space to Catch Sneaky Errors
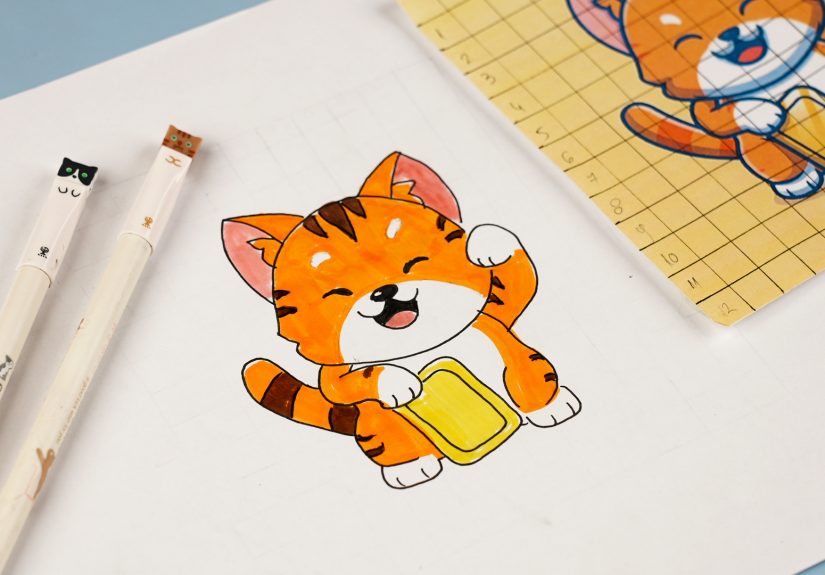
- Step 7: Add a Light Grid (Optional) to Lock Placement
- Step 8: Refine the Contour (Clean Lines, Smart Edges)
- Step 9: Map Your Values Before You Render (Yes, Before)
- Step 10: Render the Forms (Shading That Actually Wraps Around Stuff)
- Step 11: Do a Final Accuracy Check (Then Make It Look Like You Meant It)
- Common Mistakes (and How to Avoid the Pain)
- Extra: Real Experiences Copying Drawings by Hand (What It Actually Feels Like)
- Conclusion
Copying a drawing by hand is the artistic equivalent of reverse-engineering a burger: you’re not trying to become
the burger, you’re figuring out why it tastes goodbun-to-bun. Whether you’re studying a master sketch,
translating a photo into linework, or trying to recreate your friend’s doodle of a suspiciously confident frog,
hand-copying is one of the fastest ways to level up your observation, accuracy, and control.
This guide walks you through a practical, low-drama process to copy a drawing or picture by hand in 11 clear steps.
You’ll learn how to keep proportions believable, avoid the classic “my eyes drifted to the forehead” issue, and build
clean lines and convincing shading without rage-erasing your paper into a lint snowstorm.
Before You Start: What “Copying by Hand” Really Means
There are two big reasons artists copy images: practice and production.
Practice copying is how you train your eyeangles, shapes, values, edges, and proportion. Production copying is when you
need accuracy for a finished piece (illustration, portrait gift, mural, etc.). Both are valid.
Also: “by hand” doesn’t mean you must do everything the hardest possible way while wearing a hair shirt. Tools like
a grid, careful measuring, a light box, or transfer paper can help you land accuracy while still drawing and rendering
by hand. Think of them as training wheels you can remove whenever you want.
What You’ll Need
- Reference image (photo, printed picture, or another drawing)
- Paper (sketch paper for practice; heavier paper if you’ll shade a lot)
- Pencils (HB for light sketching; 2B–6B for darker values)
- Eraser (kneaded eraser for lifting; standard eraser for cleanup)
- Ruler (optional but helpful for bounding boxes and grids)
- Optional helpers: light box, graphite transfer paper, tracing paper, masking tape
Step 1: Pick the Right Reference (and Decide the Goal)
Start with a reference you can actually read. If your photo is blurry, backlit, or taken from a mile away,
your drawing will feel like you’re copying a mystery. Choose a reference with clear shapes and a readable light source.
Ask yourself one quick question: Am I copying to learn, or copying to finish?
If you’re learning, pick something with simple forms (a mug, a shoe, a portrait with clear lighting). If you’re finishing,
choose the best-quality version you can get and plan your accuracy tools upfront.
Quick ethics note: Copying for practice is common in art education. If the reference is copyrighted,
don’t publish or sell a near-identical copy without permission. Practice in private? Totally normal. Posting it as your
original masterpiece? That’s a different conversation.
Step 2: Match the Size, Crop, and Orientation
Most proportion problems begin before the first line, when you accidentally draw the subject 30% wider than your page
allows. Fix that by setting boundaries.
- Choose orientation: portrait or landscape to match the reference.
- Create a bounding box: lightly draw a rectangle that matches the reference’s overall frame.
- Decide your scale: same size, larger, or smaller. Bigger is usually easier for detail.
Example: If your reference is a 4×6 photo and your paper is 8.5×11, you can copy it at the same ratio
(keep the 2:3 relationship) and simply enlarge the rectangle. Keeping the ratio is like keeping the recipemess with it,
and the cake collapses emotionally.
Step 3: Choose Your Accuracy Method (Freehand, Measuring, Grid, or Transfer)
This is the fork in the road. There’s no “one true way,” but there is a right tool for your situation.
Option A: Freehand + Measuring
You draw normally, but you constantly compare relationships: widths, heights, angles, and alignment. This builds skill fast,
especially when paired with quick self-checks.
Option B: The Grid Method
You overlay a grid on the reference and draw a proportional grid on your paper. Then you copy square-by-square.
It’s slower to set up, but it’s excellent for accuracy from photos, enlargements, and complex subjects.
Option C: Sight-Size (or “Same Size, Same World”)
You set things up so your drawing appears the same size as the subject from your viewing position. It’s a classic atelier
approach and can be extremely accurateespecially for portraits and still lifewhen you can control the setup.
Option D: Transfer (Light Box / Graphite Paper)
You trace the main contours onto the new surface and then do the real workrefining, shading, edges, and finishingby hand.
This is common for paintings and projects where accuracy matters more than “I suffered for this sketch.”
If you’re unsure, start with freehand + measuring for learning, or a light grid for reliable accuracy.
Step 4: Block In the Biggest Shapes First (No Eyelashes Allowed Yet)
Your job here is to capture the “silhouette truth” before you chase details. Work from general to specific:
big shapes → medium shapes → small shapes.
- Use simple forms: ovals, boxes, wedges.
- Look for the overall gesture or direction (even in a still object).
- Keep lines light. You want “erasable planning,” not “final tattoo.”
Example: Copying a portrait? Start with the head shape, center line, and rough placement of the face.
Copying a bicycle? Start with the big wheel circles and the triangle frame shapes before you draw 900 spokes.
Step 5: Measure Proportions Using a Pencil (and One Brave Eyeball)
One of the most practical accuracy hacks is comparative measuring. Extend your arm, hold a pencil, and use your thumb
to mark a length. Compare that unit to other parts of the subject.
- Measure a height, then compare it to a width.
- Check relationships: “The mug is about 1.5 handles wide.”
- Keep your arm extended consistently; bending the elbow changes everything.
Pro tip: Check alignment. Ask: “Does the corner of the eye line up with the edge of the nostril?”
These vertical and horizontal comparisons catch drift before it becomes a full-blown face migration.
Step 6: Use Angles and Negative Space to Catch Sneaky Errors
Measuring length helps, but measuring angles and spaces between things is where the magic happens.
Negative space is the shape of the empty area around or between objects. It’s brutally honestunlike your brain,
which is happy to “symbol draw” a hand as a mitten and call it a day.
- Compare angles: tilt your pencil to match an edge in the reference, then transfer that angle to your drawing.
- Draw the “holes”: the triangle between an arm and torso, the gap inside a chair, the space between a mug handle and cup.
- Squint to simplify shapes and see big value patterns.
If your negative space shapes match, your drawing usually matches. If they don’t, congratulationsyou found the problem
before you shaded it for two hours.
Step 7: Add a Light Grid (Optional) to Lock Placement
If you chose the grid method, do it lightly and logically:
- Place a grid over the reference (digitally or with a clear overlay).
- Draw a proportional grid on your paper inside the bounding box.
- Copy the main lines and landmarks square-by-square.
You don’t need a million tiny squares. A simplified grid (a few major divisions) often gives enough structure to keep
things accurate without turning your drawing into a spreadsheet with feelings.
Note: When drawing from photos, grids are popular because they break complex information into manageable chunks and
help you maintain proportion while scaling up or down.
Step 8: Refine the Contour (Clean Lines, Smart Edges)
Once the structure is correct, refine the contour. This is where your drawing starts looking intentional instead of like
a map of tiny panic decisions.
- Replace scratchy “search lines” with fewer, clearer strokes.
- Vary pressure for line weight: thicker in shadow or overlap, lighter in light areas.
- Keep edges consistent with the reference: sharp where forms cut strongly, soft where they turn gradually.
If you plan to shade, keep your contour understated. A heavy outline can fight your values later and make everything look
like a sticker.
Step 9: Map Your Values Before You Render (Yes, Before)
Value is what makes a flat copy become a believable form. Before you shade every pore like you’re being paid per graphite molecule,
do a quick value plan:
- Identify the light source (where is it coming from?).
- Simplify into 3–5 value groups: light, mid, shadow, darkest accents, and highlights.
- Consider the background: values read differently depending on what surrounds them.
Example: Copying a black-and-white portrait? Decide early where the darkest darks live (pupils, nostrils, hair masses)
and where the lightest lights live (forehead highlight, cheek planes). Then build everything else between.
Step 10: Render the Forms (Shading That Actually Wraps Around Stuff)
Now you shade. Work from light to dark, keeping control:
- Start with midtones to establish the “base” of the form.
- Build shadows gradually so you don’t crush everything into one dark blob.
- Watch edges: soft edges suggest roundness; hard edges suggest sharp transitions or cast shadows.
- Blend sparingly. Smudging can help, but too much turns your drawing into a fog machine.
If you’re copying from a photo, remember: cameras sometimes flatten value relationships. Use your judgment. A good copy is accurate,
but a great copy is accurate and readable.
Step 11: Do a Final Accuracy Check (Then Make It Look Like You Meant It)
The final step is part detective work, part finishing pass.
- Flip your drawing (mirror it or view it in reverse). Errors jump out instantly.
- Step back and compare big shapes first. Details can wait.
- Correct proportion drift: small adjustments to angles and spacing often fix “something feels off.”
- Unify values: deepen the darkest darks if needed, clean highlights, and refine transitions.
- Clean up: lift grid lines, remove smudges, and sharpen focal areas.
Finally, ask: “What did I learn?” Copying isn’t only about getting a perfect duplicateit’s about training your eye so your
next drawing is better even when you’re not copying.
Common Mistakes (and How to Avoid the Pain)
1) Starting with details too early
If you draw eyelashes before the skull is correct, you’re decorating a house while the foundation is still arguing with gravity.
Always block in big shapes first.
2) Guessing instead of measuring
Your brain wants symbols. Measuring forces reality. Use comparative measuring and alignment checks often.
3) Ignoring negative space
Negative space is the lie detector for drawing. If the “empty shapes” are wrong, the subject is wrong.
4) Over-darkening too fast
Build values gradually. It’s easier to darken than to resurrect a highlight you obliterated with a 6B pencil.
5) Using tools with guilt
Tools are tools. Grids, light boxes, and transfer paper don’t replace skillthey support it. The hand still has to draw,
and the eye still has to judge.
Extra: Real Experiences Copying Drawings by Hand (What It Actually Feels Like)
Let’s talk about the part tutorials usually skip: the weird, very human experience of trying to copy something and realizing
your hands are not, in fact, printers.
Experience #1: The “This Should Take 20 Minutes” Trap.
The first time you copy a photo with a grid, you’ll think the grid is a magical shortcut. Then you’ll spend 12 minutes on one
square because the curve of a cheek doesn’t behave like a curve in your imagination. The grid isn’t slowit’s honest. It forces you
to stop “drawing what you think you see” and start placing shapes exactly where they belong. The surprise is that the slower pace is
oddly calming. You enter a small square, solve a tiny visual puzzle, then move on. It feels less like “making art” and more like
“assembling accuracy,” which is strangely satisfying.
Experience #2: The Moment Negative Space Saves Your Sanity.
Copying a chair is a classic confidence destroyer because chairs are basically geometry pretending to be furniture. If you copy the
“chair parts,” you’ll likely drift. But when you focus on the empty shapestriangles, rectangles, odd little trapezoids between legs
the chair snaps into place. It’s almost comedic: you stop drawing the chair and start drawing the air, and suddenly the chair
looks like a chair. This is also why negative space is a cheat code for hands, bicycle frames, plants, and anything else with gaps.
Experience #3: The First Time You Try Transfer Paper (and Realize It’s Not a Crime).
If you’ve ever felt guilty about transferring an outline, you’re not alonemany beginners worry it’s “cheating.” Then you try it on a
watercolor piece and realize the real challenge wasn’t the outline; it was making values, edges, and color relationships work. Transfer
methods can be a lifesaver when you’re working on a final piece and want to spend your energy on rendering instead of re-drawing the same
contour five times. The key is to transfer lightly, avoid pressing hard (nobody wants embossed paper scars), and then treat the transferred
lines as a starting pointnot a finished drawing.
Experience #4: Upside-Down Copying and the “Wait, I Can Actually Draw” Moment.
Turning a reference upside down sounds silly until you notice what it does: it reduces the brain’s urge to label things (“eye,” “nose,”
“mouth”) and pushes you to see shapes and angles. The first time you copy upside down, you may feel clumsy for a few minutesthen you
notice you’re making fewer symbolic errors. It’s like sneaking past your brain’s overconfident autopilot. When you flip the drawing right
side up, you get that rare thrill of seeing something that looks more accurate than you expected. It’s a small miracle powered by mild
confusion.
Experience #5: The Final Check That Hurts a Little (But Makes You Better).
Near the end, you compare your drawing to the reference and spot a mistake you can’t unsee: the jaw angle is off, the mug handle is
slightly too high, or the ear has migrated to a new ZIP code. This moment stingsthen it becomes the exact moment you improve. Fixing
late-stage errors teaches your eye what “off” looks like. Next time, you catch it sooner. And eventually, you start catching it while
you’re drawing, which is basically the goal: building a fast feedback loop inside your own head.
If you take nothing else from these experiences, take this: copying by hand is not about being perfect. It’s about getting better at
seeing, placing, and correcting. Every careful comparison you make is a rep at the visual gym. And unlike the regular gym, you can do it
in pajamas while listening to whatever makes you feel like a Renaissance genius (or a raccoon with a pencilboth are valid).
Conclusion
To copy a drawing or picture by hand, you don’t need magical talentyou need a reliable process:
set boundaries, block in big shapes, measure relationships, use negative space, plan values, then refine and render with control.
Whether you go freehand, use a grid, try sight-size, or transfer an outline, the skill you’re building is the same:
the ability to see accurately and translate what you see onto paper.
Practice with simple subjects, do quick accuracy checks often, and give yourself permission to use tools when they serve your goal.
Your future drawings will thank you. Probably not out loud. Drawings are famously quiet.


