Table of Contents >> Show >> Hide
In today’s interconnected world, printers have moved beyond simple standalone devices. Whether you’re working from home, at the office, or even on the go, having the ability to connect to a network printer is essential. A network printer allows multiple devices to access the printer, making it an efficient way to share resources across different computers. In this guide, we will walk you through the process of connecting to a network printer on both Windows and Mac devices, step by step. This article covers everything you need to know, including setup tips, troubleshooting, and useful features.
Understanding Network Printers
Before diving into the steps, let’s first understand what a network printer is and how it functions. A network printer is a printer connected to a network (wired or wireless), allowing multiple users and devices to print from the same printer. It can be accessed via an IP address or connected directly to your router. The key advantage of using a network printer is that you don’t have to connect it to a specific computer each time you want to print. It’s available to all authorized users connected to the same network.
How to Connect to a Network Printer on Windows
Windows operating systems have an easy process for connecting to network printers. Here’s a simple step-by-step guide to help you connect your Windows PC to a network printer:
Step 1: Ensure the Printer is Connected to the Network
The first step is to make sure the printer is connected to the same network as your Windows PC. If the printer is not yet connected, use the printer’s control panel to find and connect it to your Wi-Fi network or via an Ethernet cable to your router.
Step 2: Open the Settings Menu
On your Windows PC, click the “Start” button and go to “Settings.” From the Settings menu, select “Devices” and then “Printers & Scanners.”
Step 3: Add the Printer
In the “Printers & Scanners” section, click the “Add a printer or scanner” button. Windows will automatically search for available printers on the same network. If your printer appears in the list, select it and click “Add Device.” If not, click on “The printer that I want isn’t listed,” and enter the printer’s IP address manually.
Step 4: Install Printer Drivers
If your printer is not already installed, Windows will attempt to download and install the necessary drivers. If this doesn’t happen automatically, visit the printer manufacturer’s website, download the drivers manually, and install them.
Step 5: Test the Printer
Once connected, print a test page to ensure that the printer is working correctly. You can do this by right-clicking on the printer under the “Printers & Scanners” section and selecting “Manage,” then choosing “Print a test page.”
How to Connect to a Network Printer on Mac
Connecting to a network printer on a Mac is just as straightforward as it is on Windows. Follow these steps to set up your printer on a Mac device:
Step 1: Connect the Printer to the Network
Ensure that your network printer is properly connected to your Wi-Fi or wired network. This can typically be done using the printer’s onboard menu or the web interface, which can be accessed through its IP address.
Step 2: Open System Preferences
On your Mac, click on the Apple menu and select “System Preferences.” Then, click on the “Printers & Scanners” icon.
Step 3: Add the Printer
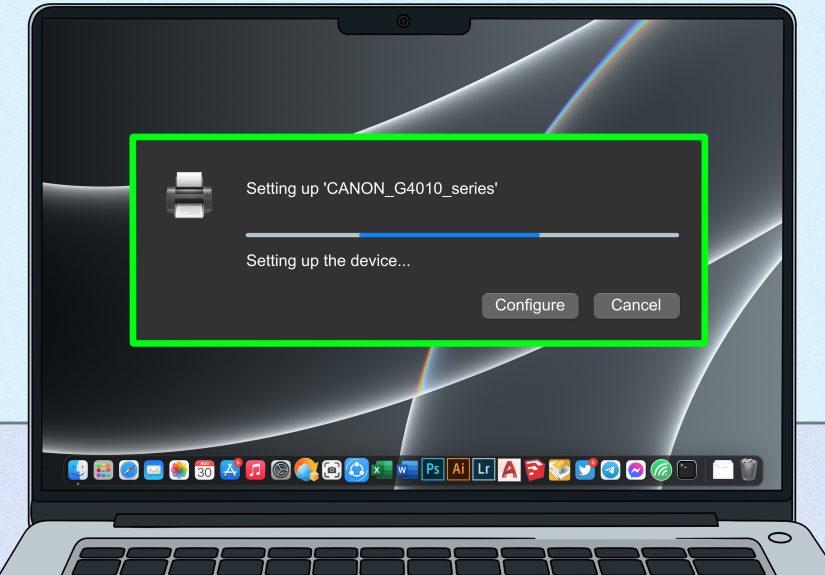
Click the “+” button under the “Printers & Scanners” menu to add a new printer. Your Mac will automatically search for nearby printers connected to the same network. Select your printer from the list and click “Add.”
Step 4: Install Printer Drivers
If your Mac doesn’t automatically detect the required printer drivers, it will prompt you to download them. Follow the on-screen instructions to complete the installation. Once the printer is installed, you should be able to use it immediately.
Step 5: Print a Test Page
Just like in Windows, it’s important to verify the connection by printing a test page. To do this, select your newly added printer and click on “Options & Supplies” to access the settings. You can find the “Print Test Page” option here.
Network Printer Troubleshooting
If you’re having trouble connecting to a network printer, don’t worry. Here are a few common issues and troubleshooting tips to help you resolve them:
- Issue: Printer Not Detected – Ensure the printer is properly connected to the network. Check your Wi-Fi connection or Ethernet cable to verify the printer is on the same network as your computer.
- Issue: Printer is Offline – Check the printer’s settings to make sure it is set to online mode. Sometimes the printer may be paused or have a print queue that needs to be cleared.
- Issue: Driver Problems – If you can’t print, try reinstalling the printer drivers or updating them. Visit the manufacturer’s website to get the latest drivers for your printer model.
- Issue: IP Address Changes – If the printer’s IP address has changed, you may need to update the printer’s settings on your computer with the new IP address. This can be done manually through the printer’s settings menu.
Tips for Optimizing Your Printer Setup
Once you’ve successfully connected your printer to the network, here are some additional tips for optimizing your printer setup:
- Use a Static IP Address – Setting a static IP address for your printer ensures that it will always have the same IP address, making it easier to find and connect to the printer in the future.
- Install Printer Software – Many printer manufacturers offer software packages that include additional features like remote printing, monitoring ink levels, and printer maintenance.
- Enable Cloud Printing – For users with Google Cloud Print or other cloud-based services, enabling cloud printing allows you to print from any device, anywhere.
Conclusion
Connecting to a network printer is a straightforward process on both Windows and Mac. By following the steps outlined above, you can easily set up your printer and start printing from any device on your network. Be sure to troubleshoot common issues like driver problems or IP address conflicts, and follow our tips for optimizing your printer setup for the best performance. With network printers, you’ll be able to share resources, improve efficiency, and enjoy seamless printing across all your devices.
Personal Experiences with Network Printers
As someone who frequently uses a network printer in both home and office environments, I’ve experienced the convenience that comes with it. Setting up a network printer for the first time was a bit daunting, but once it was done, it made life so much easier. The ability to print from different devices without the hassle of connecting directly to the printer is a huge time-saver. I’ve also encountered issues like the printer not being detected or going offline, but these were usually resolved by ensuring the printer was connected to the correct network and checking for driver updates.
One of the best experiences I had was being able to print from my smartphone while sitting on the couch. I simply connected the printer to my Wi-Fi, and I was able to send print jobs from my mobile device, which made printing documents while relaxing much more convenient. If you’re new to network printing, I highly recommend trying it out. It may take a few extra steps initially, but the long-term benefits, such as the ability to print from multiple devices, are well worth the effort.


