Table of Contents >> Show >> Hide
- Before You Start: Legal, Safety, and Ant-Farm Reality Check
- How to Catch Ants for an Ant Farm: 10 Steps
- Step 1: Check local rules and keep it local
- Step 2: Pick the right kind of ant project (workers vs. queen)
- Step 3: Learn basic ant identification before collecting
- Step 4: Gather a simple ant-catching kit
- Step 5: Choose the right time to look for ants
- Step 6: Find a colony safely (soil nests, mounds, or under rocks)
- Step 7: Collect worker ants gently and from one colony only
- Step 8: If you want a long-term ant farm, look for a queen after a nuptial flight
- Step 9: Transport ants carefully and minimize stress
- Step 10: Set up the ant farm and monitor the first 48 hours
- What to Do After You Catch Ants for an Ant Farm
- Common Mistakes Beginners Make
- Beginner Experiences and Lessons from Real Ant-Farm Setups
- Final Thoughts
Building an ant farm is one of the coolest ways to watch a tiny city run itself. You get tunnel construction, food hauling, teamwork, and the occasional “why is everyone carrying the same crumb?” mystery. But before the ants become your new roommates, you need to catch them the right way.
This guide walks you through how to catch ants for an ant farm in 10 practical steps, with beginner-friendly advice on safety, legal rules, ant identification, and what to do after collection. It also covers the big question every new ant keeper asks: Should I catch worker ants, or do I need a queen? (Short answer: it depends on how long you want your ant farm to last.)
If you’re aiming for a fun science project, classroom observation, or a small home ant habitat, this article will help you do it safely and responsiblywithout turning your afternoon into a surprise fire ant documentary.
Before You Start: Legal, Safety, and Ant-Farm Reality Check
Let’s start with the not-boring-but-important stuff. In the United States, moving live ants across state lines can be regulated. That means catching local ants in your area is usually the simplest and safest path, while buying, shipping, or transporting ants can involve restrictions depending on species and location. If you’re in doubt, stick with local collection and don’t move ants to another state.
Also, not all ants are good candidates for a beginner ant farm. Some species sting, some bite, and some are invasive. Fire ants are a hard pass for beginners. Your goal is to collect a manageable local species and observe them, not start a tiny war.
- Worker-only ant farm: Easier and faster to start, but usually temporary.
- Queen-based colony: Takes patience, but it can become a real long-term colony.
- Local species: Best for legality, safety, and responsible ant keeping.
How to Catch Ants for an Ant Farm: 10 Steps
Step 1: Check local rules and keep it local
Before you collect anything, make sure you are catching ants in a place where you’re allowed to do so (for example, your yard or another permitted area). Avoid parks or protected land unless collection is clearly allowed. Most importantly, do not transport live ants across state lines unless you know the rules for your species.
This is the easiest beginner rule to remember: Catch local ants, keep local ants. It protects native ecosystems and keeps your project simple.
Step 2: Pick the right kind of ant project (workers vs. queen)
Decide what you want your ant farm to be:
- Short-term observation farm: Catch worker ants from one colony. This is great for learning and watching tunnel behavior.
- Long-term colony: You’ll need a mated queen, usually collected after a nuptial flight (the mating flight).
Many beginners start with workers because it’s faster. Just know that a worker-only setup won’t become a permanent colony because workers do not reproduce. If you want the full ant-kingdom experience, a queen is the real MVP.
Step 3: Learn basic ant identification before collecting
This step saves you a lot of trouble. Ant species differ in size, food preferences, nesting habits, and defensiveness. Spend a little time observing first:
- Where are they nestingsoil, under rocks, wood, cracks?
- Are they moving in long trails or swarming aggressively?
- Do they appear reddish and mound-building (possible fire ants)?
If you’re not sure what species you found, treat them as “look, don’t touch” until you confirm. A local extension office or field guide can help. This is one of those moments where being a detective is way cooler than being a hero.
Step 4: Gather a simple ant-catching kit
You do not need expensive gear. A basic kit works great:
- Small hand shovel or spoon
- Clear plastic container or glass jar with a tight lid
- Soft paintbrush (for gently guiding ants)
- Gloves
- Closed-toe shoes
- A notebook or phone notes (for location and species observations)
If you’re collecting for a temporary observation project, bring a little of the original soil too. Ants settle better when their habitat doesn’t feel like a sudden apartment relocation.
Step 5: Choose the right time to look for ants
Ant activity depends on weather and season. In general, ants are easier to find when it’s warm. Spring and summer are prime time because ants are more active and visible. Cold weather usually means slower movement and fewer easy sightings.
For queen hunting, timing matters even more. Mated queens are often easiest to find around mating flights, which can be triggered by conditions like warm weather and rainfall. That means your best queen-hunting day may not be on your calendarit may be on the ants’ calendar.
Step 6: Find a colony safely (soil nests, mounds, or under rocks)
Once you’re outside, look for common nesting spots:
- Soil nests: Small entry holes or mounds in bare dirt
- Under rocks: A classic hiding spot for many ants
- Near wood: Some ants nest in or around dead wood
If you check under rocks, lift carefully and replace them when done. Rocks are tiny apartments for all kinds of creatures, not just ants. Also avoid obvious fire ant mounds, and never stand directly on or near a mound while inspecting.
Step 7: Collect worker ants gently and from one colony only
For a standard ant farm, catch worker ants from one colony (not random ants from different places). Mixing ants from different colonies can cause fighting because they recognize colony members by chemical signals.
Here’s a simple method:
- Locate the nest entrance.
- Use a hand shovel to gently lift a small amount of soil near the entrance.
- Let worker ants crawl into your container or guide them in with a soft brush.
- Add a little soil from the same spot.
- Close the lid securely (ants are surprisingly good climbers).
Collect only as many as your habitat can support. For many beginner ant farms, a small group is better than a crowded one.
Step 8: If you want a long-term ant farm, look for a queen after a nuptial flight
Catching a queen is the path to a lasting colony. Newly mated queens are often seen walking on the ground after mating, sometimes with wings still attached and sometimes wingless. They are usually much larger than worker ants.
Good places to look:
- Near mature ant colonies after a flight event
- On sidewalks, driveways, or bare ground after warm rain
- Near cracks in soil where queens may begin digging
If you spot one, gently place her into a small container. A cotton ball can provide moisture during temporary holding. Bonus tip: if you find several queens, collect more than one (where legal and appropriate), because not every queen successfully starts a colony.
Step 9: Transport ants carefully and minimize stress
Your ants are tiny, but they still appreciate a calm ride home. Keep the container:
- Out of direct sunlight
- Secure and upright
- Not overheated (hot cars are bad news)
Avoid shaking the container unless you need to safely move ants away from the lid while transferring them. If you’re moving ants into the farm later, do it gently and work over a tray or table so escapees don’t become “free-range ants.”
Step 10: Set up the ant farm and monitor the first 48 hours
Place your ants into a prepared ant farm habitat with the correct substrate (sand or approved ant-farm medium, depending on your setup). Keep the habitat in a quiet spot at room temperature and out of direct sunlight.
In the first day or two, ants may gather in a corner, move slowly, or seem “confused.” That’s normal. Once they settle in, you’ll usually see tunnel building, sand moving, and organized traffic patterns. Basically, their construction crew clocks in once they feel safe.
If you are keeping workers only, enjoy the observation phase. If you caught a queen, focus on stability and patiencenew colonies take time.
What to Do After You Catch Ants for an Ant Farm
Feed the right foods (and tiny amounts)
Different ants eat different things, but many species do well with very small portions of safe foods. For common ant-farm species (such as harvester-type ants in commercial setups), tiny seeds or tiny bits of fruit/vegetable can work. The key is small portions and removing leftovers before they mold.
In the wild, ants may eat insects, nectar, and even honeydew from aphids, so they are not one-food creatures. That said, your ant farm is not a buffet. A crumb the size of a boulder is still a boulder.
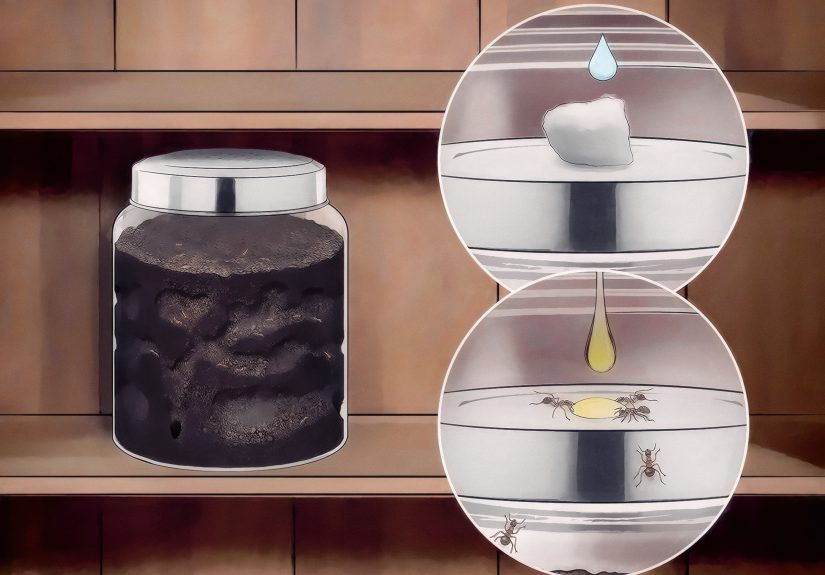
Water carefully
Overwatering is one of the fastest ways to wreck a new ant farm. Too much moisture can collapse tunnels or encourage mold. Add only the amount recommended for your habitat type, and don’t panic-water just because the ants look busy.
Keep observation notes
If this is for school, a science project, or just curiosity, write down:
- Date and location collected
- Habitat type (soil, under rock, wood area)
- Behavior during the first 24–48 hours
- Food preferences
- Tunnel patterns
This turns your ant farm into a real observation project instead of “I watched ants be awesome and forgot the details.”
Common Mistakes Beginners Make
1) Catching fire ants by accident
This is the big one. Wear closed-toe shoes, avoid obvious mounds, and don’t handle unknown ants directly. If you’re in a region with fire ants, be extra careful and step away immediately if you see aggressive swarming.
2) Mixing ants from different colonies
Ants from separate colonies often fight. Always collect from one colony for a single ant farm.
3) Expecting a worker-only colony to last forever
Worker-only ant farms are educational and fun, but they are usually temporary. For long-term colony growth, a queen is essential.
4) Too much food and water
Overfeeding and overwatering create mold, mess, and stressed ants. Start small and adjust slowly.
5) Keeping the ant farm in a sunny window
It looks cute. It is not cute for the ants. Direct sun can overheat the habitat quickly.
Beginner Experiences and Lessons from Real Ant-Farm Setups
One of the most common beginner experiences is collecting ants successfully, getting home, and then realizing the ant farm was not actually ready. The ants are in the jar, everyone is excited, and suddenly someone is searching for sand, a lid, and a dropper at the same time. The best lesson here is simple: set up the habitat before you collect. Ants handle transfer much better when they move quickly from collection container to prepared habitat.
Another very common experience is the “wrong ant, wrong day” problem. A beginner finds a large mound, sees lots of activity, and thinks, “Jackpot!” A few seconds later, the ants swarm, and the collector learns the difference between curiosity and chaos. This is why identification matters so much. Many experienced hobbyists say their biggest improvement came from spending 10 extra minutes watching the colony before touching anything.
A lot of people also expect instant tunnel-building. In reality, ants often spend the first several hours just clustering together, grooming, or scouting. New keepers sometimes think something is wrong and start tapping the habitat or moving it around to “help.” That usually makes things worse. A quiet, stable habitat almost always gets better results than constant check-ins. Think of it like moving into a new house: you probably wouldn’t start renovating while someone shakes the walls every five minutes.
For people trying to catch a queen, the most repeated experience is “I looked for hours and found none… then found one by accident after rain.” Queen collecting is often about timing more than effort. Beginners who succeed usually report the same pattern: they watch mature colonies, pay attention to weather, and then look on warm, humid days when flights are likely. They also learn quickly that queens can look very different from workerslarger body, bulkier thorax, sometimes wings or visible wing scars.
In classroom-style setups, another helpful lesson is keeping track of the collection site. Teachers and families often collect a small number of ants for short observation, then return them to the original location later. Writing down the exact spot makes this much easier and more responsible. It also helps students connect the ant farm to a real ecosystem instead of treating the ants like disposable science props.
Finally, nearly every beginner learns the “less is more” rule with food and water. It is incredibly tempting to give ants extra snacks because they look busy all day. But experienced keepers know that tiny portions, clean habitat conditions, and patience create the healthiest setup. The best ant-farm experiences come from observation, not over-management. In other words, let the ants do the anting.
Final Thoughts
Learning how to catch ants for an ant farm is part science, part patience, and part good planning. If you keep it local, identify species carefully, avoid dangerous ants, and collect gently, you’ll have a much better experienceand a healthier ant habitat.
Start simple with a worker-only observation farm, or level up and try queen hunting when you’re ready for a long-term colony. Either way, ants are amazing teachers. They’re organized, efficient, and somehow better at traffic flow than most parking lots.


