Table of Contents >> Show >> Hide
- What Are Feather Tag Ornaments?
- Why Feather Tag Ornaments Work So Well
- Materials You’ll Need
- Three Popular Feather Tag Ornament Styles
- How to Make Feather Tag Ornaments (Step-by-Step)
- Design Ideas That Make Them Look Boutique-Level
- Common Mistakes and How to Avoid Them
- How to Make Feather Tag Ornaments Feel Extra Special
- Crafting Experiences and Lessons from Feather Tag Ornament Makers (Extended Notes)
- Conclusion
If gift tags and Christmas ornaments had a stylish little cousin, it would absolutely be the feather tag ornament. It’s part gift topper, part tree decor, part “Wait… you made that?” conversation starter. And the best part? This project can be as simple or as fancy as you want. You can go full glitter-and-metallic glam, keep it rustic with natural tones, or make modern paper versions that look like something from a boutique holiday display.
Feather tag ornaments are popular because they solve a very real holiday problem: people want wrapping that looks special, but they don’t want to spend a million hours doing it. A feather tag ornament adds shape, texture, and movement in one lightweight piece. It can be tied to a gift, then reused as a tree ornament, hung on a garland, or clipped onto a wreath. That means your wrapping becomes part of the gift instead of becoming instant trash. Your recycling bin will be less dramatic, and your presents will look like they took much more effort than they actually did.
What Are Feather Tag Ornaments?
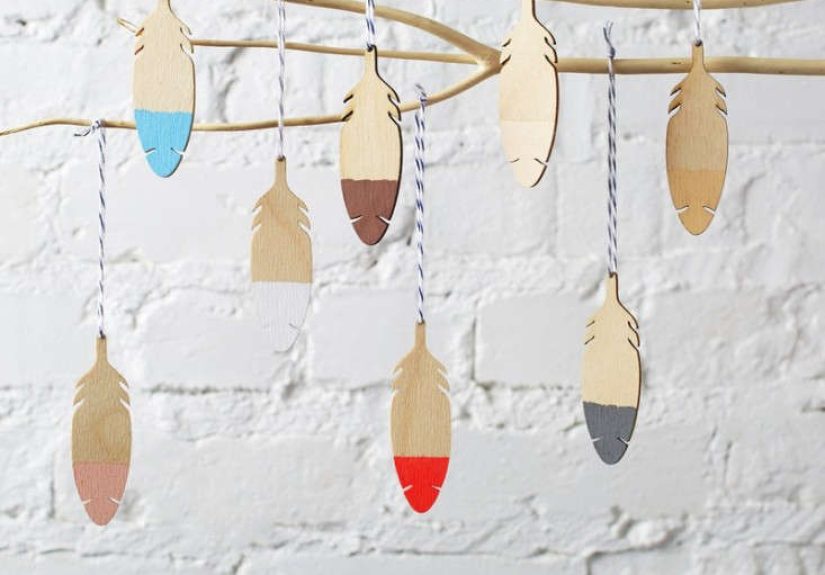
A feather tag ornament is exactly what it sounds like: a tag or ornament shaped like a feather (or made with real craft feathers) that works as both decoration and a functional gift label. Some versions are cut from cardstock, watercolor paper, or felt. Others use real feathers inside clear fillable ornaments. Some are flat and layered, while others are dimensional and textured.
This craft idea sits right at the intersection of three trends that never seem to leave the holiday chat: handmade gift tags, personalized ornaments, and natural-looking decor. Feather details also work in more than one season. They look festive at Christmas, soft and airy in winter, and even spring-ready when done in pastel paper or painted finishes.
Why Feather Tag Ornaments Work So Well
1) They look elevated without being complicated
Feathers have built-in texture, so they instantly make a plain tag look designed. Even a simple paper feather with a metallic tip looks polished. If you’re using real feathers, the softness creates visual contrast against crisp wrapping paper and ribbon. That contrast is what makes handmade projects feel intentional instead of “craft table exploded at 11 p.m.”
2) They’re easy to personalize
Add a name, initial, year, or short message and suddenly it’s a keepsake. If you use a cutting machine, personalization is even faster. If you prefer handmade, a metallic paint pen or calligraphy marker works beautifully on cardstock or watercolor paper.
3) They can match any decorating style
Feather tag ornaments are surprisingly flexible:
- Modern: White, gold, black, and clean typography
- Rustic: Kraft paper, twine, muted feathers, wood beads
- Vintage: Cream, blush, metallic accents, soft ribbon
- Kid-friendly: Bright colors, glitter tips, plastic fillable ornaments
- Natural farmhouse: Feathers paired with greenery, acorns, or pine
Materials You’ll Need
Basic Supplies for Flat Feather Tags
- Cardstock, watercolor paper, or scrapbook paper
- Scissors or craft knife
- Pencil (for sketching feather shapes)
- Hole punch
- Twine, ribbon, or string
- Glue stick or craft glue
- Metallic paint, acrylic ink, or glitter cardstock (optional)
Basic Supplies for Feather Ornament Versions
- Clear fillable ornaments (plastic is great for families with kids)
- Craft feathers (white, neutral, or colorful)
- Fine glitter (optional)
- Acrylic paint (optional for dipped tips)
- Ribbon or thread for hanging
If you want a hybrid project, combine both ideas: make a flat feather tag for the front and attach a mini clear ornament with a feather inside. It sounds fancy, but it’s basically “tag + charm,” and it looks fantastic on gift bags.
Three Popular Feather Tag Ornament Styles
1) Stenciled Paper Feather Tags
This version is artsy and elegant. Start with watercolor paper, add a stenciled or painted pattern, then cut a feather shape and snip small slits along the edges to create feather texture. A swipe of gold acrylic ink or metallic paint instantly makes it holiday-ready. Punch a hole at the top and thread silver or gold string through it.
This style is perfect if you like a handmade, painterly look. It also works well for garlands because the tags are lightweight and flat.
2) Layered Cricut Feather Gift Tags
This is the “clean and sparkly” option. Cut a full feather base in white cardstock and a smaller feather-tip layer in glitter cardstock, then glue the two together. You can cut several at once, which makes this a good choice when you’re wrapping a lot of gifts. The layered look gives a polished finish without requiring advanced crafting skills.
The nice thing about paper feather files is that you can scale them. Small ones work as gift tags, medium ones work as tree ornaments, and oversized ones look great tied to wreaths or stockings.
3) Clear Feather Fillable Ornaments
These are classic for a reason. Put one or a few feathers inside a clear ornament, add a ribbon loop, and you’re done. You can keep them minimal with a single fluffy white feather, or go extra with painted tips, glitter, tiny name tags, or a year charm. If you attach one to a wrapped gift, it becomes a decorative topper and an ornament in one.
A simple design tip: don’t overstuff the ornament. Feather projects usually look better when there’s room inside the ornament for the feather to move and be seen. Minimal fills look more expensive.
How to Make Feather Tag Ornaments (Step-by-Step)
Version A: Flat Feather Tag Ornament
- Create your feather base: Draw or trace a feather shape on cardstock or watercolor paper. If you want symmetry, fold a small sheet in half and draw half the feather on the fold before cutting.
- Add texture and color: Paint, stencil, or ink the paper before cutting if you want a more artistic finish. For a glam look, brush metallic paint or acrylic ink along one edge or the tip.
- Cut feather slits: Fold the feather lightly down the center. Snip small angled cuts from the outer edge toward the center line to mimic real feather strands. Don’t cut all the way through.
- Layer for dimension: Glue a smaller glitter or metallic feather tip over the base if you want a two-tone design.
- Punch and thread: Punch a hole at the top. Add twine, ribbon, or metallic string. Leave enough length so it can tie onto a gift or hang on a tree.
- Add the name: Write the recipient’s name on the back, or add a tiny paper label on the front. You can also stamp initials or attach a mini charm.
Version B: Feather-Filled Ornament Tag
- Prep the feathers: Use craft feathers in colors that match your wrapping. For a dressed-up look, paint the tips and sprinkle glitter while the paint is still wet.
- Let them dry completely: This matters. Damp paint inside a clear ornament turns into a smudge festival.
- Fill the ornament: Open the top and insert the feather shaft-end last so the feather sits nicely inside. Try one feather first before adding more.
- Add the hanger: Use thin ribbon, metallic cord, or thread. Ribbon loops often look softer and more finished than standard metal hooks.
- Attach a tag: Tie a small cardstock tag directly to the ornament loop with the recipient’s name. Now it’s a tag ornament.
- Secure to the gift: Tie it onto ribbon or twine on your wrapped package. Bonus points if the ornament colors coordinate with the wrapping paper.
Design Ideas That Make Them Look Boutique-Level
Color Pairings That Always Work
- White + Gold: timeless, elegant, and very holiday-friendly
- Blush + Champagne: soft and upscale for gift wrapping
- Forest Green + Copper: cozy, woodsy, and slightly rustic
- Black + Silver: dramatic and modern
- Pastels: beautiful for spring feather tags or Swedish-style feather decor
Texture Combinations
Feather tag ornaments shine when you mix textures. Try pairing soft feathers with:
- Velvet ribbon
- Kraft paper
- Glitter cardstock
- Matte watercolor paper
- Natural twine
- Wood beads
Ways to Use Them Beyond the Tree
- Gift tags for holiday presents
- Place cards at a dinner table
- Napkin ties for holiday hosting
- Garland accents
- Stocking labels
- Wreath embellishments
- Keepsake ornaments with names and dates
Common Mistakes and How to Avoid Them
Overstuffing the ornament
This is the most common issue with fillable ornament versions. It’s tempting to add “just one more feather,” but too many feathers make the ornament look crowded. Start with one or two, step back, and check the shape before adding more.
Using glue that shows through
For flat tags, use a thin layer of glue stick or clear-drying adhesive. Too much wet glue can wrinkle paper or seep through light cardstock. If you’re layering glitter cardstock, press it under a book for a minute while it sets.
Skipping the dry time
Glitter and metallic paint are beautiful, but only if they’re dry. If you rush the process, you’ll transfer shimmer onto everything, including your hands, your gift wrap, and probably your face (holiday magic, but make it messy).
Making the hanger too short
If the string loop is tiny, it may look cute but be hard to tie onto gifts. Leave a little extra length so the recipient can also reuse it easily as an ornament.
How to Make Feather Tag Ornaments Feel Extra Special
The best version of this craft isn’t necessarily the most expensive one. It’s the one that feels personal. Add a year to the back. Write a tiny note. Use colors that match the recipient’s personality. Make a set for siblings with the same design but different colors. Or create one feather ornament style for everyone at a holiday dinner so the tags double as take-home favors.
If you’re making them in batches, create an assembly line:
- Cut all feather shapes
- Add paint or glitter accents
- Punch holes
- Thread string
- Add names last
This method keeps things fast and helps you stay consistent, especially if you want all your gifts to look coordinated.
Crafting Experiences and Lessons from Feather Tag Ornament Makers (Extended Notes)
One of the most interesting things about feather tag ornaments is how often crafters describe the same experience: they start with a simple idea, then end up making a whole batch because the first one turns out better than expected. That’s especially true with fillable ornaments. Many makers assume they need a lot of feathers or complicated fillers, but once they try a single feather inside a clear ornament, they realize the design already looks complete. That “less is more” moment shows up again and again in holiday crafting because feathers naturally create shape and softness without needing extra decoration.
Another common experience is discovering how much the hanger changes the final look. A plain metal hook works, but ribbon or metallic thread makes the ornament feel gift-ready. It’s a tiny detail, but it changes the vibe from “craft project” to “decor piece.” People also notice that matching the hanger to the wrapping ribbon makes everything look intentional, even when the tag itself is simple. In other words: coordination does a lot of heavy lifting.
Crafters who use paper feather tags often talk about how relaxing the process is once they find their rhythm. Trace, cut, snip, punch, thread. It becomes a cozy repeatable task, especially when making tags in a small color palette. The cutting step is where many beginners get nervous, but feather shapes are forgiving. Real feathers are naturally imperfect, so paper versions look more realistic when they’re not identical. That makes this project beginner-friendly in a way that many “perfect holiday crafts” are not.
Families also tend to have a strong opinion about glitter. Some love it. Some fear it. Both sides are correct. The most practical experience-based tip is to keep glitter on a smaller area, like just the feather tip, instead of coating the entire tag. You still get sparkle, but cleanup is easier and the design looks more balanced. Metallic paint or acrylic ink is another favorite because it gives shine without the holiday confetti effect that somehow survives until spring.
A lot of makers enjoy turning these into traditions. Some create one feather tag ornament for each person every year and write the year on the back. Over time, those tags become tiny keepsakes that hold memories of different holidays, wrapping styles, and even family phases. Kid-safe plastic ornaments are especially popular in homes with younger children because everyone can help insert feathers and tie loops without worrying about breakable glass.
Finally, many people say feather tag ornaments solve a practical problem they didn’t realize they had: gift tags are usually tossed, but ornaments are saved. Combining the two makes the effort feel worth it. The tag doesn’t disappear after the present is opened. It goes on the tree, into a storage box, or onto a garland the next year. That little bit of reuse gives the project a more meaningful feel, and honestly, it’s one of the best reasons to make them.
Conclusion
Feather tag ornaments are one of those rare holiday crafts that hit the sweet spot between beautiful and doable. They can be handmade with scissors and paper, upgraded with a cutting machine, or turned into delicate fillable ornaments with just a few supplies. They work on gifts, trees, garlands, and tablescapes. They can be elegant, playful, rustic, or modern. And because they double as keepsakes, they offer more value than a standard gift tag ever could.
If you’re trying to make your holiday wrapping look more special this year without creating a full-time glitter emergency, this craft is a great place to start. Make one. Then three. Then suddenly you’ll be the person everyone asks for “those pretty feather tags” every December. Not a bad reputation to have.


