Table of Contents >> Show >> Hide
- Why the Dual-Screen Laptop Idea Is Suddenly Everywhere
- What a DIY Dual-Screen Laptop Build Actually Means
- Why This Build Works So Well in Real Life
- The Technical Stuff You Really Need to Know
- How to Build a Setup That Feels Clean, Not Clunky
- The Ergonomics Question: Cool Setup, Happy Neck?
- Potential Downsides Before You Fall in Love With the Idea
- Who Should Build One?
- What the Experience Feels Like Over Time
- Experience-Based Take: Living With a DIY Dual-Screen Laptop Build
- Conclusion
A regular laptop is great until your tabs start multiplying like rabbits on espresso. One minute you are answering email, the next you are juggling a spreadsheet, a browser full of research, a chat app, and one mysterious window you are afraid to close because it may contain your last good idea. That is exactly why the dual screen laptop concept has become so appealing. More screen space means less window shuffling, better multitasking, and a setup that feels closer to a desktop without chaining you to one desk forever.
The fun part is that you do not need to buy an expensive futuristic machine to get there. Yes, premium dual-screen laptops exist, and they look like something a product designer built after drinking three cold brews and whispering “the future is now.” But a DIY dual screen laptop build can deliver many of the same practical benefits with less cost, more flexibility, and fewer regrets. Instead of replacing your whole computer, you can pair your existing laptop with a portable monitor, a clever stand, and the right cable setup to create a compact second-screen workstation that actually travels well.
That is what makes this idea slick. It is not slick because it is flashy, though it certainly can look cool. It is slick because it solves a real problem in a surprisingly clean way. A good second-screen setup helps students research faster, remote workers keep chat and documents visible at once, coders park documentation on one display while working on the other, and creatives keep a timeline, preview window, or reference board open without constantly minimizing everything like they are playing desktop whack-a-mole.
Why the Dual-Screen Laptop Idea Is Suddenly Everywhere
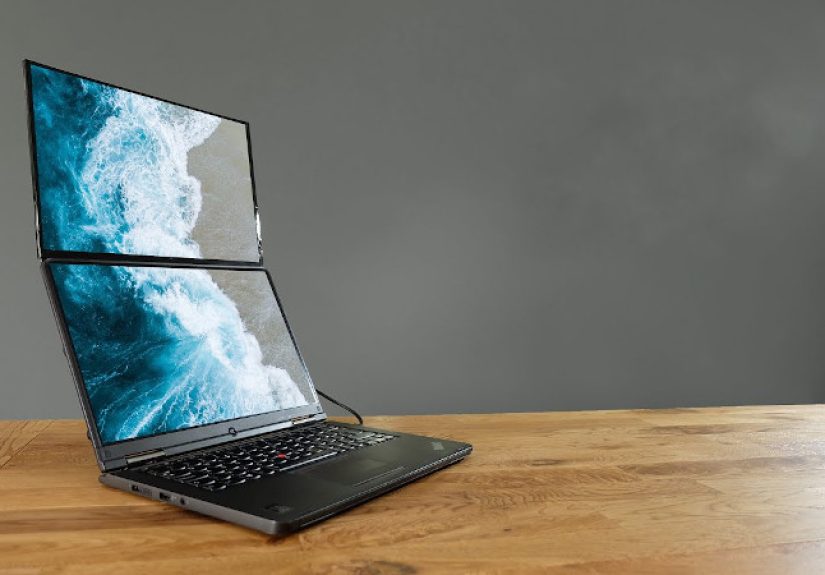
The rise of modern dual-display laptops is not random. Manufacturers have been experimenting with extra displays for years, but newer designs have made the idea more practical. Recent dual-screen models show that people genuinely want more workspace in a portable device. Some use two full displays stacked vertically, while others combine a main panel with a smaller secondary screen above the keyboard. The big lesson is simple: once people get a taste of two screens on the go, going back to one can feel like moving from a studio apartment into a closet.
Still, buying a purpose-built dual-screen laptop is not the right move for everyone. These systems can be pricey, heavier than standard laptops, and sometimes less comfortable for lap use. A DIY solution gives you a similar productivity boost without forcing you into one hardware design. You can build around the laptop you already own, choose the screen size that fits your work, and upgrade piece by piece instead of going all-in on a machine that may or may not suit your workflow six months from now.
What a DIY Dual-Screen Laptop Build Actually Means
Let us clear something up: a DIY build does not have to mean opening your laptop with a screwdriver while dramatic music plays in the background. In most cases, the smartest build is not invasive at all. It is a modular setup that turns a regular notebook into a portable dual monitor laptop setup.
The Core Parts of the Build
A practical DIY setup usually includes a few simple ingredients:
First, the laptop. This is the brain of the operation. If it has USB-C with DisplayPort Alt Mode or Thunderbolt support, life gets much easier because one cable can often handle video and power. If it does not, you may need HDMI plus separate power for the display.
Second, a portable monitor. Most people land in the 13.3-inch to 15.6-inch range, which is large enough to be useful but still easy to carry. Some models are ultra-slim, lightweight, and built for single-cable USB-C connections. Others include HDMI, pass-through charging, or built-in kickstands.
Third, a stand or mounting trick. This is where the setup goes from “helpful” to “oddly elegant.” A folding stand, laptop riser, magnetic attachment, or clip-on monitor extender can position the second display beside or above the laptop screen. The best choice depends on whether you want maximum portability or a more desk-friendly layout.
Fourth, the cables and power plan. A dual-screen dream can turn into cable spaghetti in about nine seconds if you do not plan this part well. A clean build depends on using the correct cable type and knowing whether your laptop can supply enough power to the extra display.
Why This Build Works So Well in Real Life
1. More Room for Actual Work
The biggest win is obvious: you can keep two things visible at once. That may not sound revolutionary until you stop bouncing between tabs every six seconds. A second screen makes side-by-side work feel natural. You can draft on one screen and research on the other. You can edit video on one screen and park tools or source files on the second. You can keep a Zoom call visible without letting it take over your entire digital life like an uninvited houseguest.
2. A DIY Build Can Cost Less Than a New Premium Laptop
A dedicated dual-screen laptop can be impressive, but it can also carry a premium price. By contrast, a DIY setup lets you spread out the cost. If your current laptop is still fast enough, adding a second display can be a much more economical way to boost productivity. That makes this route especially appealing for freelancers, students, remote workers, and anyone who would rather not explain to their bank account why they bought a luxury laptop because spreadsheets felt cramped.
3. You Get Flexibility Instead of Lock-In
A modular setup is easier to adapt. Need a travel mode? Bring the laptop and leave the extra screen at home. Working from a hotel, library, or shared office? Pack the portable display. Want a better home setup? Pair the same laptop with a dock and larger monitor later. A DIY dual-screen build is less like buying one gadget and more like assembling a toolkit that can grow with your work.
The Technical Stuff You Really Need to Know
USB-C Is Great, but Not Every USB-C Port Does Video
This is the part that trips people up. A USB-C port can look modern, elegant, and full of promise while secretly refusing to send video. For a smooth dual screen laptop DIY build, your laptop’s USB-C port should support DisplayPort Alt Mode or Thunderbolt. If it does, many portable monitors can connect with a single cable for both display signal and power. If not, you may need HDMI for video and another connection for power. In other words, the port may look like the hero, but the spec sheet decides whether it gets the cape.
Power Matters More Than People Expect
Some portable monitors draw enough power from the laptop to work fine with one cable. Others may need pass-through charging or a second USB-C connection if the laptop cannot deliver enough juice. That is especially relevant if you are using a bright display, charging the laptop, and running demanding apps all at once. Translation: yes, the build is slick, but physics still expects to be paid.
Screen Placement Changes the Experience
The best layout depends on what you do all day. A side-by-side display is great for writing, research, messaging, and spreadsheets. A stacked vertical layout can work beautifully for coding, long documents, and reference-heavy tasks. Some users prefer clip-on screen extenders because they fold neatly for travel, while others prefer a separate portable monitor because it is lighter, more flexible, and easier to reposition.
How to Build a Setup That Feels Clean, Not Clunky
Choose the Right Monitor Size
If your laptop is compact, a 13.3-inch portable monitor often feels balanced and easier to carry. A 15.6-inch monitor gives you more room and can feel closer to a true workstation. Bigger is not always better, though. If the second screen makes your bag heavy, your cables messy, or your café table cry for help, you may stop using it. The best build is the one you will actually bring with you.
Think About Stand Quality
A flimsy stand can ruin an otherwise good setup. If the screen wobbles every time you type, your slick DIY build starts feeling like a science fair project held together by optimism. Look for a stable kickstand, a folding aluminum stand, or a monitor design with a built-in cover that doubles as a stand. If you work long hours, aim for a layout that raises the screen into a more natural viewing position.
Use Software to Make Hardware Better
On Windows, multitasking features like Snap layouts can make a two-screen setup feel dramatically more organized. Instead of manually resizing everything, you can lock apps into clean arrangements and keep your workflow under control. That means the hardware gives you space, and the software helps you avoid turning that space into chaos.
The Ergonomics Question: Cool Setup, Happy Neck?
This is where the grown-up advice enters the room. More screen space is wonderful, but only if your body does not hate you afterward. Ergonomic guidance consistently points to one major issue with laptop-based setups: the screen is often too low. If your second display is also low or poorly angled, you can end the day feeling like a pretzel with deadlines.
A better setup places the most-used screen closer to eye level and keeps the keyboard in a comfortable typing position. A laptop stand, adjustable monitor stand, or well-designed portable display can make a huge difference. If you plan to use your DIY dual-screen build for long sessions, comfort is not a bonus feature. It is the difference between “I love this setup” and “Why does my upper back feel like it lost a bet?”
Potential Downsides Before You Fall in Love With the Idea
Battery Drain
Running an external monitor can reduce battery life, especially if the laptop is also handling demanding work. A power bank, wall adapter, or monitor with pass-through charging can help, but it is wise to expect more power use than a one-screen setup.
Port Limitations
Some laptops have the right-looking ports without the right capabilities. Others support video out but have limited bandwidth or awkward port placement. Checking your laptop’s exact specs before buying anything is one of the least glamorous steps in this process and one of the most important.
Travel Practicality
Portable is not the same as effortless. A second screen still adds weight, setup time, and a little more gear to manage. For some people, that is a small price to pay. For others, it is the reason the monitor ends up living in a drawer beside three unused phone tripods and one cable of unknown origin.
Who Should Build One?
A DIY dual screen laptop setup makes the most sense for people who work with multiple windows all day and move around enough to benefit from portability. That includes writers, editors, students, analysts, coders, designers, consultants, and remote workers. It is also great for people who want a productivity upgrade without replacing a perfectly good laptop.
If your work is mostly email and occasional browsing, you may not need the extra screen. But if you constantly compare documents, manage dashboards, attend video calls while taking notes, or live in a browser with fifteen tabs open before lunch, a second screen can feel less like a luxury and more like a rescue mission.
What the Experience Feels Like Over Time
Here is the real charm of the build: the first day feels cool, but the second week feels useful. The novelty wears off, and what remains is efficiency. You stop thinking “wow, two screens” and start thinking “wow, I finished that faster.” That is the sign of a good setup. It disappears into the workflow and quietly makes your day less annoying.
It also changes how you think about your laptop. Instead of treating it as a fixed object with one tiny built-in display, you start seeing it as the center of a flexible work system. At home it can connect to a dock. On the road it can travel with a slim second monitor. In a meeting it can go back to being a plain old notebook. That adaptability is what gives the DIY build its staying power.
Experience-Based Take: Living With a DIY Dual-Screen Laptop Build
Using a DIY dual-screen laptop setup in day-to-day life feels a lot less like owning a gimmick and a lot more like discovering that your computer finally learned some manners. In the morning, the second screen often becomes the “parking spot” for everything that normally gets in the way. Email can live there. Chat apps can live there. A calendar, a to-do list, a reference PDF, or a music app can sit there quietly without stealing the main screen every five minutes. That alone changes the pace of work.
For writing and research, the difference is huge. On a single screen, the rhythm is usually write, switch tabs, read, switch back, forget the sentence you were composing, repeat. With two screens, the research stays visible while the draft stays in motion. It feels smoother, less fragmented, and oddly more relaxing. The same is true for spreadsheets, coding, and design work. Once the supporting material has its own home, the primary task stops competing for attention.
Video calls are another place where the setup earns its keep. On a normal laptop, a call tends to dominate the whole machine. With a second screen, the meeting can stay visible while notes, documents, or follow-up tasks remain open on the main display. You look more organized, feel more organized, and do not have to pretend you remember every action item while frantically searching for the right window.
Travel use is where the build becomes a bit more honest. In a hotel room, coworking space, or client office, it can feel brilliant. You unpack one extra screen, connect a cable, and suddenly your temporary desk feels much more serious. In a tiny café, though, the build may ask for more elbow room than the table can provide. That does not make it bad. It just means the best portable setups are the ones designed with restraint. A thin monitor, a stable stand, and a simple cable plan matter more than flashy accessories.
There is also a learning curve in how you arrange things. At first, people tend to treat the second screen like extra wallpaper. Then they start assigning jobs to it. One screen becomes “active work.” The other becomes “supporting information.” Once that habit forms, the setup clicks. It starts to feel intentional rather than experimental.
The funniest part is going back to a single-screen laptop afterward. It can feel weirdly cramped, like trying to cook a holiday dinner on one cutting board. Nothing is technically impossible, but everything takes more shuffling. That is why a slick DIY dual-screen laptop build sticks with people. It is not only about looking modern. It is about reducing friction in dozens of tiny moments across the workday. And those tiny moments add up fast.
Conclusion
Dual Screen Laptop Is A Slick DIY Build is more than a catchy headline. It is a genuinely practical idea for anyone who wants more workspace without buying an entirely new premium machine. With the right portable monitor, proper port support, a stable stand, and a little planning, you can create a cleaner, more productive setup that travels better than a full desktop replacement. It is a smart middle ground between a standard laptop and a purpose-built dual-screen system.
The best part is that the build can be as simple or as refined as you want. Start with one extra screen. Improve your stand. Add a dock later. Tweak the layout. Use Snap features. Test what works. The result is not just more screen space. It is a better flow, fewer interruptions, and a laptop that finally feels like it can keep up with the way modern people actually work.