Table of Contents >> Show >> Hide
- What Are “Iced Winter Branches,” Exactly?
- Quick Planning: Choose Your Frost Style
- Supplies You’ll Want on Hand
- Step 1: Prep Your Branches Like You Mean It
- Method 1: The Classic Snowy Salt Frost
- Method 2: Chunky “Ice” Branches That Look Expensive
- Method 3: Outdoor-Friendly Snow (Without the Salt Drama)
- Method 4: Crystal Frost (The Science-Geek Showstopper)
- How to Make Your Frost Last Longer
- Styling Ideas: Where DIY Iced Branches Look Best
- Troubleshooting: Fix Common Frost Fails
- FAQ
- My Real-World Experience Making DIY Iced Winter Branches
- SEO Tags
If your winter decor is looking a little… emotionally available (read: bland), it’s time to give it a glow-up.
DIY iced winter branches are the easiest way to fake that “just stepped out of a snow globe” vibewithout
needing a blizzard, a cabin in Aspen, or a personal relationship with a hot glue gun.
In this guide, you’ll learn several realistic ways to create frosted, snowy, and “icy” branches using
inexpensive suppliesplus how to make them last, how to style them like a pro, and what to do when your
“delicate winter sparkle” starts looking like “salty breadstick.”
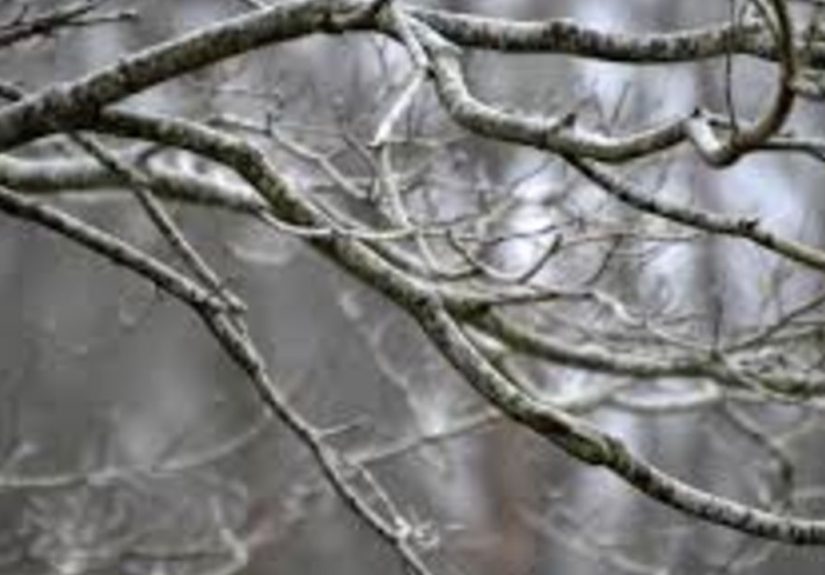
What Are “Iced Winter Branches,” Exactly?
DIY iced winter branches are real (or faux) branches decorated to look like they’ve been kissed by frost.
Depending on the technique, you can create:
- Powdery snow (soft, white, freshly-fallen look)
- Glitter frost (sparkle that catches light like tiny ice crystals)
- Chunky ice (glass-like texture that looks like frozen rain)
- Crystal growth (a science-y frost effectbeautiful but more delicate)
They’re perfect for a winter centerpiece, holiday mantel styling, winter weddings, porch planters, or that
awkward corner of your living room that needs a purpose besides “holding shame.”
Quick Planning: Choose Your Frost Style
Before you start, pick the finish that matches your patience level and where you’ll use the branches.
Here’s the practical breakdown:
Best for indoor vases and tabletops
- Snowy salt finish (fast, budget-friendly, looks surprisingly real)
- Decoupage + salt (more durable and controllable coverage)
- Chunky “ice” finish (dramatic sparkle, upscale look)
Best for covered outdoor spots
- Artificial snow finish or paint splatter snow (holds up better if there’s humidity)
Prettiest, but most fragile
- Crystal-growth frost (jaw-dropping up close, but hates moisture and handling)
Supplies You’ll Want on Hand
You do not need a craft room the size of a studio apartment. Most of this is pantry + basic DIY stuff.
Pick supplies based on the method you choose.
Branches
- Real branches (dry is easiest) or faux branches
- Pruners or sturdy scissors
- Old towel or damp cloth for cleaning
Core “ice” ingredients (choose one set)
- Snowy salt look: craft glue or decoupage medium + coarse salt or Epsom salt
- Chunky ice look: tacky glue + crushed plastic “ice” filler (or similar decorative ice bits)
- Outdoor-friendly snow: artificial snow spray or white paint
- Crystal frost: Epsom salt + very hot water (adult-supervised), plus a heat-safe container
Optional glow-up extras
- Fine iridescent glitter (use lightlythis is frost, not disco)
- White or off-white paint for a base coat
- Clear matte sealer spray (helps reduce shedding indoors)
- Drop cloth/newspaper and a tray for catching excess
Safety note: If you’re using spray products (paint, adhesive, sealer, snow spray), work in a
well-ventilated area and protect surfaces. If you’re using decorative “ice” pieces, handle gentlythey can be
sharp depending on the material.
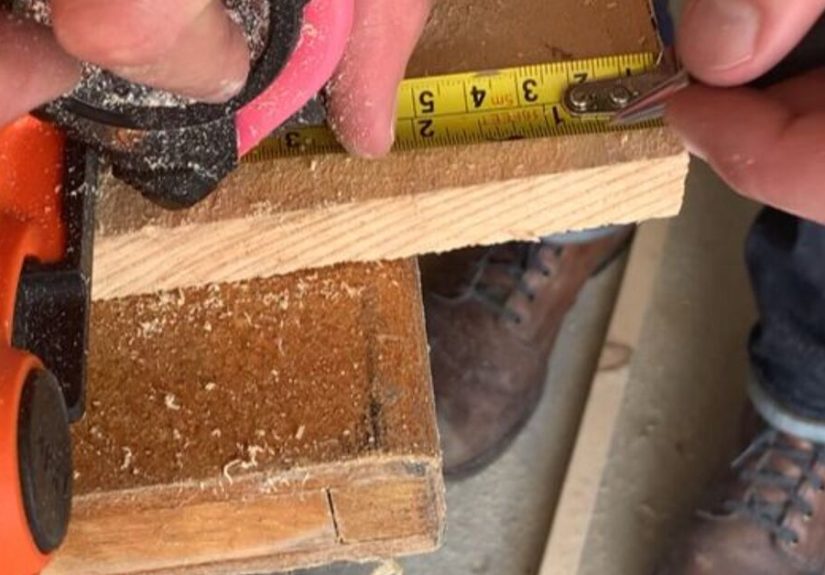
Step 1: Prep Your Branches Like You Mean It
The difference between “designer winter centerpiece” and “yard debris in a vase” is prep. Here’s the simple
process:
- Pick sturdy branches. Look for branching shapes with interesting silhouettes.
- Clean them. Wipe off dirt and loose bark. Let them fully dry.
- Trim to size. Make heights varied if you’re building an arrangement.
- Optional: add a pale base coat. A quick white/off-white coat helps frost look brighter and more even.
Pro tip: Leave the bottom 4–6 inches bare so you can place branches into foam, gravel, or a vase
without scraping off your frosty finish.
Method 1: The Classic Snowy Salt Frost
This is the go-to “looks like snow, costs like a snack” technique. It’s fast, forgiving, and photographs
beautifully.
What you’ll use
- Craft glue or decoupage medium
- Epsom salt or coarse salt (coarse gives a fluffier snow look)
- Tray or baking sheet to catch excess
- Optional: a pinch of fine iridescent glitter
How to do it
- Work in sections. Brush glue onto a 6–10 inch area at a time so it doesn’t dry too fast.
- Snow it up. Sprinkle salt generously over the glue while rotating the branch.
- Let it set. Dry time varies, but give it at least 30–60 minutes before handling.
- Tap off loose salt. Gently shake the branch over your tray.
- Optional sparkle. Add a whisper of glitter while glue is still tacky (less is more).
Longevity: Indoors, this can last for seasons if you store it dry. In humid areas, salt-based
finishes can softenso keep these away from steamy kitchens and bathroom “spa vibes.”
Method 2: Chunky “Ice” Branches That Look Expensive
If you want that “frozen rain just happened and everything is glittering” look, this is your method. The texture
is more dramatic and catches light like crazy.
What you’ll use
- Tacky glue
- Decorative crushed “ice” filler (often sold as vase filler)
- Tray to catch extra pieces
- Optional: fine iridescent glitter
How to do it
- Apply glue generously. Coat the branch (leave the base bare).
- Press the “ice” into it. Sprinkle pieces over the glue, then gently press so they grip.
- Let it rest. Lay the branch in the extra filler on the tray for 10 minutes.
- Flip and repeat. Cover the other side for full sparkle coverage.
- Dry completely. Give it a few hours before arranging.
Best use: Indoor winter centerpiece ideas, entry table vases, and winter wedding decor where
lighting is soft and flattering (like your best friend who always says your bangs look “so cute”).
Method 3: Outdoor-Friendly Snow (Without the Salt Drama)
Want snow-covered branches for a porch planter or an entry display? Skip salt finishes if your branches might
face humidity or moisture. Instead, use one of these:
Option A: Artificial snow spray
- Place branches on a drop cloth.
- Spray in light layers from 8–12 inches away.
- Rotate and build up coverage gradually.
- Let dry thoroughly between coats.
Option B: “Paint splatter snow” for realistic speckles
- Thin white paint slightly with water.
- Dip a stiff brush (or toothbrush) in paint.
- Flick bristles toward the branches to create random snow specks.
- Layer lightlytoo much looks like a frosting accident.
Bonus: If you want sparkle outdoors, add a light dusting of glitter while the last layer is tacky.
Keep it subtle so it reads as “frost” instead of “craft store explosion.”
Method 4: Crystal Frost (The Science-Geek Showstopper)
This method uses a saturated Epsom salt solution so crystals form as the water cools or evaporates. It can create
delicate, needle-like frost that looks wildly convincing up closelike your branches got locked in a deep freeze.
What you’ll use
- Epsom salt
- Very hot water (adult-supervised handling)
- Heat-safe container
- Optional: refrigerator cooling to encourage faster crystal formation
How to do it (simple version)
- Make a saturated solution. Stir Epsom salt into very hot water until it won’t dissolve easily.
- Dip or paint on. Quickly coat parts of the branch with the solution (a brush helps control).
- Let crystals form. As it cools and dries, crystals appear on the surface.
- Handle gently. This finish is beautifulbut it’s the diva of the group.
Reality check: Crystal frost is more sensitive to humidity and touch than the glue-and-salt methods.
Use it for decorative displays that won’t be handled much (a vase arrangement is perfect).
How to Make Your Frost Last Longer
Nobody wants to vacuum “winter magic” off the floor for the next six weeks. Here’s how to reduce shedding and
keep branches looking fresh:
- Let everything dry fully. Overnight drying prevents fingerprints and bald spots.
- Seal lightly (optional). A clear matte sealer can help lock down loose glitter and salt indoors.
- Store smart. Wrap branches in kraft paper or tissue and keep them in a dry bin.
- Avoid humidity. Salt finishes soften if stored damp or displayed near steam.
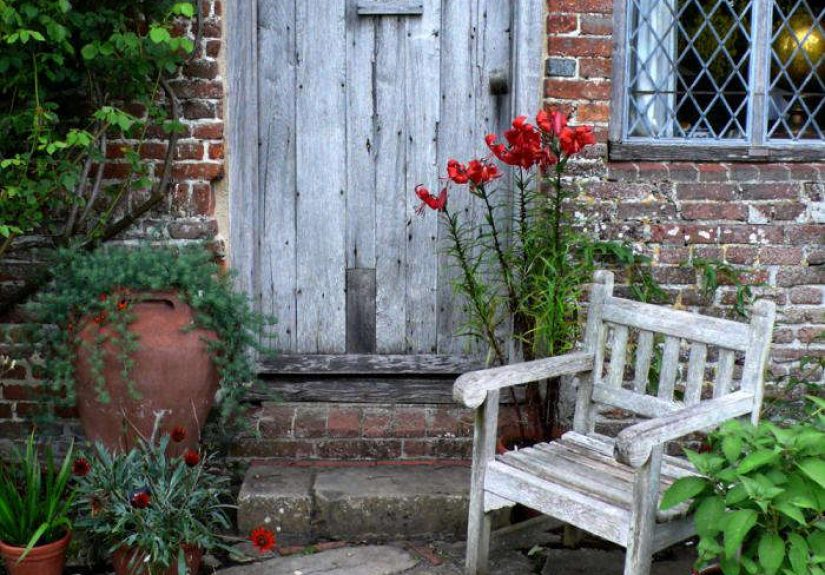
Styling Ideas: Where DIY Iced Branches Look Best
These branches are basically the little black dress of winter decor: they work everywhere and instantly make
the room look “done.” Try these ideas:
Winter centerpiece
Place branches in a vase with fairy lights, pinecones, or neutral ornaments. Add candles around the base for a
cozy winter glow (battery candles if pets or kids are involved).
Mantel or shelf styling
Lay a few branches horizontally along a mantel with greenery, soft lights, and metallic accents. It reads
“winter lodge,” even if you live in a one-bedroom with a view of a parking lot.
Winter wedding decor
Use taller branches in floor vases near an entry, or shorter frosted branches in table arrangements. Chunky “ice”
versions look especially upscale under venue lighting.
Porch planters (covered outdoor use)
Use outdoor-friendly snow spray or paint splatter snow. Pair with evergreen stems and ribbon for a simple, elegant
winter planter moment.
Troubleshooting: Fix Common Frost Fails
Problem: My salt won’t stick.
Your glue layer is too thin or drying too fast. Work in smaller sections and apply a thicker coat. Also, sprinkle
salt immediatelydon’t scroll your phone “for inspiration” mid-step. (Ask me how I know.)
Problem: It looks patchy.
Patchy can be prettyreal snow isn’t perfect. But if you want fuller coverage, add a second layer: glue + salt
again after the first is dry.
Problem: It’s shedding everywhere.
Tap off loose salt over a tray, then consider a very light sealer coat for indoor branches. Also, don’t over-glitter.
Glitter is like cologne: one spritz is charming; seven is a life event.
Problem: My “snow” turned yellow-ish.
That can happen if the branch had sap/residue or if the base coat wasn’t fully dry. Clean branches well before
starting, and let paint dry completely before frosting.
FAQ
Can I use fresh, green branches?
You can, but fresh greenery contains moisture and oils that may affect certain finishes. For a snowy look on
fresh greens, many crafters prefer Epsom salt over regular salt, or use paint/snow spray methods for better
stability.
Do DIY frosted branches attract bugs?
If you bring in branches from outdoors, clean them thoroughly and let them dry before crafting. Using dry branches
reduces the chance of hitchhikers.
Will these work in a Christmas tree?
Yesespecially smaller, lighter branches. Just make sure the finish is fully dry and avoid heavy “ice” textures
that could weigh down delicate tree branches.
My Real-World Experience Making DIY Iced Winter Branches
The first time I made DIY iced winter branches, I thought I was being very responsible. I covered the table,
laid out supplies, and even wore “painting clothes.” Ten minutes later, I was standing in a glitter cloud,
holding a branch that looked less like “winter wonderland” and more like “dessert garnish.” The lesson? Frost is
a vibe. Glitter is a lifestyle. Choose wisely.
What surprised me most was how much the base layer matters. When I skipped painting the branches and
went straight to glue + salt, the finish looked fine… from far away. Up close, the dark bark showed through,
and the “snow” read more like “seasoning.” Once I started doing a quick pale base coat first, everything looked
brighter and more realisticespecially under warm indoor lights. If you’re aiming for that airy, snowy look, a
light base color is basically the cheat code.
I also learned the hard way that humidity is the villain in this story. Salt-based frost is gorgeous, but it
prefers a dry environment. One year, I put a big snowy branch arrangement near the kitchen because it looked
festive while I cooked. By day three, the branches still looked nice, but they felt slightly tacky and some of
the “snow” started slumping. It wasn’t a disaster, but it did teach me to keep salt-frosted decor away from
steam, simmering pots, and anything that makes your windows fog up. If you want branches for a spot that gets
humid, the paint splatter snow or snow spray method is a better long-term friend.
My favorite resulthands downcame from mixing textures. I did a soft snow base (glue + salt) and then added a
tiny bit of fine iridescent glitter only at the tips and along the top edges where “real frost” would catch.
That small detail made the branches look like they had depth, like actual ice crystals reflecting light. The
trick is to keep sparkle restrained; you want a gentle shimmer, not a branch that looks like it’s headed to
Vegas.
And finally, storage matters more than people admit. The branches that lasted multiple seasons were the ones I
let dry overnight, gently tapped to remove loose salt, and then stored wrapped in paper in a dry bin. The ones
I shoved into a closet uncovered? They came out looking like they’d survived a minor avalanchebald patches,
crumbs, and sadness. If you’re making these for winter decor every year, treat them like ornaments: dry, wrap,
store, repeat. Your future self will thank you, probably while drinking cocoa and feeling superior.
Bottom line: DIY iced winter branches are one of those crafts that look fancy but don’t require fancy skills.
Do a little prep, pick a method that matches where you’ll display them, and embrace the fact that “perfect snow”
doesn’t exist in nature anyway. If your branches look slightly organic and varied, congratulationsyou nailed it.