Table of Contents >> Show >> Hide
- Before You Start: The 10-Minute Upgrade That Makes Cardboard Look Expensive
- 1) Peel-and-Stick “Wallpaper” Bins for Shelves and Cabinets
- 2) No-Sew Fabric-Wrapped Storage Bins That Look Store-Bought
- 3) Rope-Wrapped “Basket” Boxes for Cozy, High-End Texture
- 4) Cereal-Box Magazine and Mail Holders (Not Just for Magazines)
- 5) Faux Galvanized-Metal Desk Organizer (Yes, From Cardboard)
- 6) Custom Drawer Dividers and Trays That Actually Fit Your Drawer
- 7) A Space-Saving Cardboard Shoe Rack for Small Closets
- 8) Decorative “Book” Storage Boxes (Secret Storage That Looks Like Decor)
- Conclusion: Cardboard, But Make It Chic
- Real-World Experiences: What People Learn After Living With DIY Cardboard Storage
If your home receives deliveries the way mine receives notifications (constant, loud, and slightly judgmental),
you probably have a pile of cardboard boxes “temporarily” living in a corner. And if you’re like most humans,
you’ve looked at that pile and thought: I should recycle these… right after I finish reorganizing my
entire life. Good news: those boxes can become the organizing system you keep promising you’ll buy.
With a few basic suppliesfabric scraps, contact paper, glue, and the confidence of someone who has watched
exactly two DIY videosyou can turn plain cardboard into storage that looks intentional. Like,
“Yes, I totally bought these matching bins on purpose,” not “This used to be a diaper box, please don’t look.”
Before You Start: The 10-Minute Upgrade That Makes Cardboard Look Expensive
Cardboard is the underrated hero of quick organization, but it’s also… cardboard. It can sag, tear, and absorb
moisture like it’s training for the Olympics. Do this quick prep to make your DIY storage sturdier, cleaner,
and nicer to use.
Pick the right boxes
- Best: thick corrugated shipping boxes, sturdy shoe boxes, and clean cereal/cracker boxes (great for smaller organizers).
- Avoid: boxes that smell like food, have grease spots, or feel soft/wavy (moisture damage = future sadness).
Reinforce like you mean it
- Tape the bottom seams (even if the box is “not that heavy,” famous last words).
- Double up thin areas with spare cardboard panels (glue them inside the walls).
- Cover sharp cut edges with tape or fabric trim so they don’t fray or scratch shelves.
Use cardboard wisely
Cardboard storage is fantastic for dry, indoor spacesclosets, shelves, offices, playrooms.
But it’s not the best long-term home for items sensitive to moisture, pests, or acidity (like important papers,
photos, or heirlooms). For those, use archival or sealed containers and keep them in a stable environment.
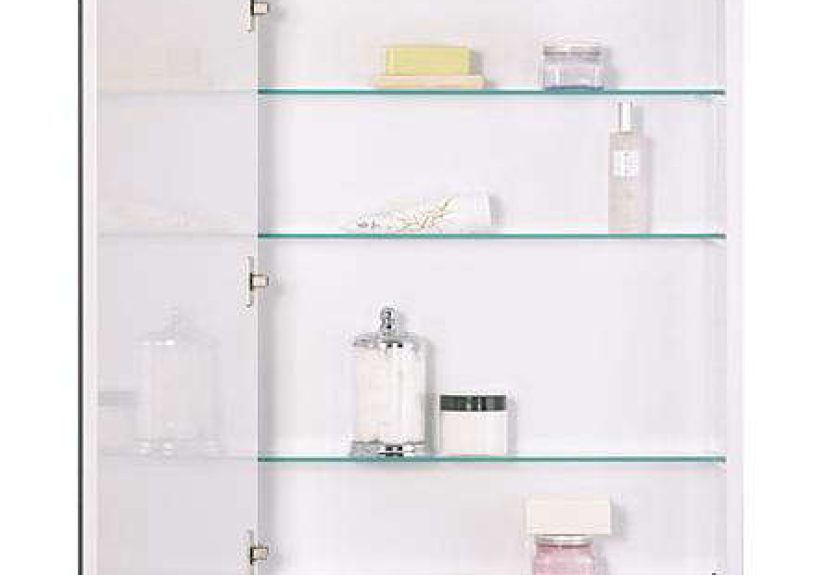
1) Peel-and-Stick “Wallpaper” Bins for Shelves and Cabinets
Want the clean, coordinated look of store-bought bins without the store-bought price? Cover a plain box with
contact paper or peel-and-stick wallpaper. It’s the fastest “wow, that looks legit” upgrade.
Best for
Pantry snacks (sealed), craft supplies, cables, kids’ small toys, closet shelves, linen closets.
What you’ll need
- Sturdy box (shoebox or small shipping box)
- Contact paper / peel-and-stick wallpaper
- Scissors or a utility knife (carefully)
- Ruler/straight edge, pencil
- Optional: a drawer knob + screw (for a fancy pull)
How to do it
- Trim the box: Cut off the top flaps if you want an open bin. Keep the lid if you want a lidded box.
- Measure smart: Cut one long strip for the sides (faster), plus pieces for the bottom and inside if you want a fully finished look.
- Create neat corners: Mark and cut little diagonal “tabs” at corners so the paper folds cleanly instead of bunching up.
- Apply slowly: Peel a few inches at a time, smoothing as you go. If it goes crooked, lift and re-stickcontact paper is forgiving.
- Add a pull: Make a hole in the front and attach a knob (or cut a simple handle slot). Suddenly it looks like a boutique bin.
Style tip: Use the same pattern for a whole shelf, then label each bin. Your brain loves categories almost as much as it loves procrastination.
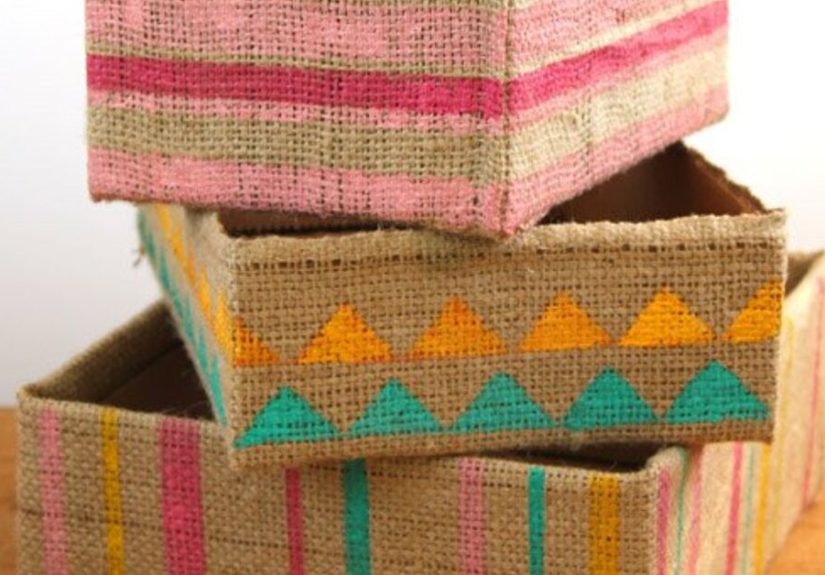
2) No-Sew Fabric-Wrapped Storage Bins That Look Store-Bought
Fabric instantly upgrades cardboard. It hides logos, adds texture, and makes the whole thing look like it
belongs in a catalog instead of in your “I’ll deal with this later” pile.
Best for
Cube organizers, closets, nursery shelves, craft rooms, entryway gloves/hats, toy shelves.
What you’ll need
- Cardboard box (a file box works great, but any sturdy box is fine)
- Fabric (canvas, drop cloth, upholstery scraps, or quilting cotton)
- Spray adhesive and/or hot glue
- Scissors, ruler
- Optional: webbing/rope for handles, iron-on hem tape for crisp edges
How to do it
- Square it up: Trim uneven edges and cut off flaps.
- Cut fabric with allowance: Measure bottom + sides and add extra (about 1 inch) so you can wrap and fold edges neatly.
- Wrap the outside: Spray adhesive on one side, press fabric flat, then repeat around the box.
- Finish the top edge: Fold fabric inward for a clean rim and glue it down.
- Line the inside (optional but lovely): Add a second fabric layer inside so it looks finished even when empty.
- Add handles: Cut two small holes and thread rope/webbing through, knotting insideor glue straps on for a softer look.
Durability tip: If the bin will hold heavier items, glue an extra cardboard panel inside the bottom first. Cardboard loves support. Same.
3) Rope-Wrapped “Basket” Boxes for Cozy, High-End Texture
Rope (or twine/jute) is the cheat code of DIY decor. Wrap a plain box and it suddenly looks like a
woven basket you definitely paid full price for. Add a fabric liner and it’s basically a glow-up montage.
Best for
Blankets (lightweight), hats/scarves, kids’ toys, shelf baskets, bathroom extras (in a dry space).
What you’ll need
- Sturdy cardboard box (diaper boxes are famously great for this)
- Jute rope, sisal rope, or thick twine
- Hot glue gun + lots of glue sticks
- Optional: fabric for a liner, felt for the bottom
How to do it
- Prep the box: Cut off flaps, tape seams, and (optional) paint the box a similar color to the rope so gaps won’t stand out.
- Start wrapping: Glue the rope end near the bottom edge, then wrap around, gluing every few inches (or continuously for extra strength).
- Keep lines tight: Push each row snugly against the last. This is weirdly satisfying.
- Finish cleanly: Tuck the rope end under the last wrap and glue securely.
- Add a liner: Glue fabric inside for a polished look and to protect delicate items from rough rope texture.
- Protect the floor: Glue felt underneath so it slides nicely and doesn’t scratch shelves.
Reality check: This one is glue-heavy. Put on music, embrace the craft chaos, and remember: you are saving money and creating a forearm workout.
4) Cereal-Box Magazine and Mail Holders (Not Just for Magazines)
The classic cereal-box hack is popular because it works. Cut one box, cover it with paper, and you get a slim
organizer perfect for that awkward “too tall for a drawer, too messy for a counter” category of stuff.
Best for
Mail, school papers, coloring books, foil/plastic wrap boxes, notebooks, pantry bag storage, crafting vinyl sheets.
What you’ll need
- Cereal or cracker box
- Pretty paper (wrapping paper, scrapbook paper) or fabric
- Mod Podge (or glue + clear sealer)
- Scissors/utility knife, ruler
- Optional: label holder, ribbon trim
How to do it
- Make the shape: Cut a diagonal line from a lower front corner up to the back, creating that classic magazine-file slope.
- Cover it: Apply paper with glue/Mod Podge, smooth bubbles, and fold edges inward for clean lines.
- Seal it: Add a top coat so it wipes clean and resists scuffs.
- Label it: If you don’t label it, you’ll create a “mystery slot,” and mystery slots always turn into chaos portals.
Kitchen bonus: These are amazing for organizing foil, plastic wrap, and snack bags vertically. Your drawers will finally stop exploding.
5) Faux Galvanized-Metal Desk Organizer (Yes, From Cardboard)
If you want a “how is that cardboard?” moment, this is it. Using metallic finishes, you can make cereal boxes
look like industrial metal organizersperfect for an office, craft room, or homework station.
Best for
Paper sorting, notebooks, folders, art supplies, remote controls, charging station corral.
What you’ll need
- Old cereal and cracker boxes
- Box cutter, hot glue
- Spray adhesive
- Hammered metal spray paint (or metallic paint)
- Optional: labels/file markers
How to do it
- Build compartments: Cut boxes to different heights and glue them together into a multi-slot organizer.
- Reinforce edges: Cardboard edges show the illusion. Tape or add thin cardboard strips to neaten seams.
- Paint in layers: Use a hammered-metal spray for texture, then lightly dry-brush with rust/silver tones for depth.
- Label like a pro: Add file tabs or labels so it’s functional, not just pretty.
Design tip: Make one tall slot for folders, one medium for notebooks, and two short for pens and sticky notes. Your future self will feel extremely supported.
6) Custom Drawer Dividers and Trays That Actually Fit Your Drawer
Store-bought drawer organizers are either too big, too small, or shaped like they were designed for a totally
different species. Cardboard lets you build dividers that fit your drawer, down to the millimeter.
Best for
Junk drawers, makeup drawers, socks/underwear, office supplies, kitchen utensils, craft drawers.
What you’ll need
- Shipping box cardboard (sturdy corrugated is best)
- Ruler/tape measure, pencil
- Utility knife/scissors
- Hot glue or strong double-sided tape
- Optional: contact paper to cover trays, Velcro to stop sliding
How to do it
- Measure the drawer: Note the interior width, depth, and height (subtract a tiny bit so it doesn’t jam).
- Create the “tray” base: Cut rectangles to make shallow boxes, or use small existing boxes trimmed to size.
- Add divider strips: Cut strips the height of your tray and create a grid by cutting notches halfway through each strip so they interlock.
- Secure it: Glue the grid in place and (optional) use Velcro or tape underneath to prevent shifting.
- Cover it: Contact paper makes it wipeableespecially helpful for makeup or kitchen use.
Example: For a “charging drawer,” make one long channel for cords, a small square for adapters, and a skinny section for batteries. Suddenly you’re organized like a person who has their life together.
7) A Space-Saving Cardboard Shoe Rack for Small Closets
Shoes are sneaky. You put them “just here for now,” and within hours they’ve multiplied and formed a union.
This clever rack uses triangular cardboard tubes so you can store shoes one behind the other, using closet depth
instead of just width.
Best for
Closets, dorm rooms, apartments, kid closets, guest rooms.
What you’ll need
- Large cardboard sheets
- Duct tape (or strong packing tape)
- Measuring tape, utility knife
- Optional: contact paper or paint to make it pretty
How to do it
- Measure your shoes: Your tube width should comfortably fit one shoe (and consider bulky sneakers).
- Make triangle tubes: Cut rectangles, score them into three equal panels, then fold and tape into triangular tubes.
- Stack and connect: Arrange tubes into a honeycomb-like rack and tape/glue them together.
- Upgrade the look: Wrap the front edges with contact paper or paint the whole rack a neutral color.
Small-space win: This design uses depth, so you store more shoes without widening your footprint. Your closet floor can finally breathe.
8) Decorative “Book” Storage Boxes (Secret Storage That Looks Like Decor)
Want storage that hides in plain sight? Turn cereal boxes into book-shaped containers that stack on a shelf like
a cute little library momentexcept these “books” hold your cables, receipts, craft supplies, or the tiny stuff
that normally lives in junk piles.
Best for
Office shelves, living room built-ins, bedroom nightstands, craft rooms, entryway drop zones.
What you’ll need
- Cereal boxes (or thin chipboard boxes)
- Decorative paper or printable “book cover” designs
- Glue/Mod Podge, ruler, craft knife
- Optional: magnetic dot or Velcro to keep it shut
How to do it
- Create the opening: Carefully cut along an existing seam so the box opens like a clamshell (think: lid attached).
- Reinforce the spine: Tape or glue a thin strip of cardboard along the “spine” area so it holds shape when opened.
- Cover like a real book: Wrap with paper (or a faux book-jacket print), folding edges neatly inside.
- Add closure: A small magnet, Velcro dot, or ribbon tie makes it feel intentional and keeps contents contained.
- Stack it: Make a few in coordinating colors and stack them horizontally like decorative books.
Fun bonus: Make one labeled “Manuals” for random appliance papers. You’ll still rarely read them, but you’ll know exactly where they are. That’s growth.
Conclusion: Cardboard, But Make It Chic
The secret to beautiful cardboard storage isn’t fancy toolsit’s consistency. Pick two or three finishes
(like linen fabric + black labels, or white contact paper + brass knobs) and repeat them across a shelf.
That repetition turns “random boxes” into a system.
Start with one problem area: the snack shelf, the sock drawer, the entryway pile, the desk that’s
40% paperwork and 60% regret. Make two bins. Label them. Enjoy the weird thrill of finding things quickly.
Then ride that momentum like it’s a productivity unicorn.
Real-World Experiences: What People Learn After Living With DIY Cardboard Storage
Here’s the part most tutorials don’t tell you: the first day your new cardboard bins look perfect, you will feel
like a home organization wizard. The second day, someone (possibly you) will toss something into the wrong bin
and you’ll briefly consider labeling every object you own like a museum exhibit. Totally normal.
In real homes, the biggest “aha” is that cardboard storage works best when it has rules.
A bin without a category becomes a “miscellaneous portal,” and miscellaneous portals are where socks go to vanish.
The fix is simple: label clearly and keep categories specific. “Chargers” beats “Electronics Stuff” every time.
“Winter Gloves” beats “Cold Weather Things,” because “things” is how clutter legally changes its name and squats.
Another common lesson: weight limits are real. Cardboard is sturdy, but it’s not a miracle.
When people overload bins with heavy books or big bottles, the bottom can bow and the sides can flare.
If you want the bin to hold something denselike tool accessories, bulky cables, or stacks of notebooksreinforce the
bottom with an extra cardboard panel and tape the seams before you decorate. It’s much easier to build strength first
than to watch your beautiful bin do the slow-motion collapse of doom later.
The next reality check is moisture. Most people learn this one the hard way: cardboard and humidity are not best friends.
A bin that looks great in a bedroom closet can turn sad in a damp basement. That’s why cardboard storage shines indoors
where the temperature and humidity stay relatively steady. If you need storage for a bathroom, laundry area, garage,
or basement, use these cardboard projects only in the driest spotsor consider sealing surfaces thoroughly and keeping
items elevated. The prettiest bin in the world can’t outsmart water vapor forever.
Adhesives also have a “real life” learning curve. Hot glue is quick and strong, but it can create bumps under paper
if you’re not careful. Spray adhesive is smooth, but it needs ventilation and patience (and a surface you don’t mind
getting a little sticky). Many people find a hybrid approach works best: spray adhesive for large, flat fabric areas,
hot glue for folded corners and finishing edges. If you’re covering a box with contact paper, you’ll learn the zen art
of smoothing slowlypeel a little backing, press, smooth, repeatbecause the moment you rush is the moment you trap a
bubble the size of a small planet.
Finally, the biggest “experience-based” win is psychological: when storage looks nice, people actually use it.
A cute rope basket in an entryway invites hats and gloves to land inside it. A labeled cereal-box file makes mail feel
like it has a home instead of a life sentence on your counter. Beautiful storage doesn’t just hide clutterit changes
behavior. And if a cardboard box can help your household put things away more often, that’s not just DIY.
That’s basically magic (budget-friendly magic, but still).