Table of Contents >> Show >> Hide
- Before You Start: What Counts as a “Repair” (and What Doesn’t)
- Way #1: Rejoin a Separated Mercury Column (The Most Common “Repair”)
- Way #2: Use Professional Reconditioning for Stubborn Separations (Lab-Only Methods)
- Way #3: Repair a Specialty Mercury Thermometer by Resetting the Mechanism (Max/Min Types)
- Way #4: Restore Readability and Usability (Cleaning, Mounting, and Support Repairs)
- Way #5: Repair the Measurement Problem, Not the Glass (Calibration, Retirement, or Replacement)
- Important Safety Notes If a Mercury Thermometer Breaks
- How to Prevent Mercury Thermometer Problems in the First Place
- Conclusion
- Experience Notes (Extended Section): Real-World Scenarios and Lessons Learned
If you found an old mercury thermometer in a drawer, toolbox, lab kit, or weather station, you’re not alone. These shiny glass classics have been around forever, and they can still be surprisingly accurate. But they also come with one big catch: mercury is hazardous, and the glass is fragile. So before we talk about “repair,” let’s clear something up right away: you should not try to repair a cracked or leaking mercury thermometer at home.
The good news? Many thermometers that look “broken” are actually just out of service because of a separated mercury column, a stuck index (on specialty models), poor visibility, or accuracy drift. Those issues may be fixable. In this guide, we’ll cover five practical ways to repair (or restore) a mercury thermometer safely, plus when to stop and replace it with a mercury-free alternative.
Before You Start: What Counts as a “Repair” (and What Doesn’t)
Let’s define the job so we don’t accidentally turn a small problem into a chemistry scene.
Usually Repairable (Sometimes)
- Separated mercury column (a gap in the silver line)
- Specialty max/min thermometer index issues (such as a Six’s thermometer setup)
- Dirty exterior glass or hard-to-read markings
- Mounting/holder problems (frame, shield, float holder, bracket)
- Accuracy verification needs (calibration or re-checking)
Not Repairable at Home (Do Not Attempt)
- Cracked glass tube or bulb
- Any mercury leak or visible droplets outside the thermometer
- Oxidized or contaminated mercury that won’t rejoin
- Missing scale markings that affect safe reading
Rule of thumb: if the thermometer is intact, you may have a restoration project. If it is broken, you have a cleanup-and-disposal project.
Way #1: Rejoin a Separated Mercury Column (The Most Common “Repair”)
This is the classic issue. You look at the thermometer and the silver column has a gap, or there’s a tiny bead of mercury stranded elsewhere in the tube. The thermometer may still look fancy, but the reading is no longer trustworthy.
In labs and calibration settings, technicians often refer to this as rejoining or reuniting a separated column. This is not the same as fixing broken glass. It’s more like getting a train car back on the trackexcept the train is toxic and made of glass, so no pressure.
Safe DIY-Level Steps (Only for an Intact Thermometer)
- Inspect first under good light. Confirm there is no crack, no chip, and no mercury outside the tube.
- Stand it upright and let it rest. Sometimes a recently moved thermometer settles after a few hours at a stable room temperature.
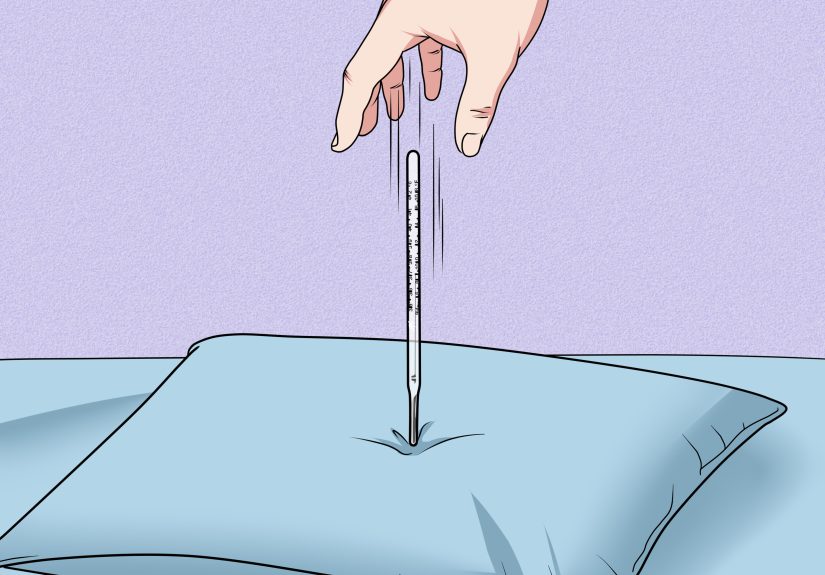
- Use only gentle handling. If the manufacturer allows it, very gentle tapping against a padded surface or a gloved hand may help small separations migrate and rejoin. Never use force.
- Stop if it resists. Repeated tapping or “shaking like a cocktail shaker” increases the chance of breakage. (Please don’t turn this into a home bar experiment.)
If the separation remains, move to a professional repair/calibration route (see Way #2 and Way #5). Many separations can be corrected, but the safer path is often a trained technician with proper equipment.
Way #2: Use Professional Reconditioning for Stubborn Separations (Lab-Only Methods)
Some mercury separations require controlled cooling or warming methods performed with specialized equipment. Professional guidance (including NIST technical documents and industrial thermometer service instructions) describes methods that use carefully controlled temperature baths and highly specific handling steps.
Here’s the important part for general readers: these are not kitchen-counter DIY methods. They require experience, temperature control, safety procedures, and spill preparedness. Improvised heating is especially risky and can crack the bulb or create pressure problems inside the thermometer.
When to Choose Professional Reconditioning
- The mercury is separated in multiple places
- A droplet is trapped outside the normal reading area
- The thermometer is a certified lab instrument
- The thermometer has sentimental or high replacement value
- You need traceable accuracy (lab, industrial, research, QA work)
If you’re writing procedures for a workplace, the best SEO keyword in this section is not “quick fix.” It’s “calibration lab service.” Fast DIY tricks are cheap until they become expensive hazardous waste.
Way #3: Repair a Specialty Mercury Thermometer by Resetting the Mechanism (Max/Min Types)
Not all mercury thermometers are simple fever thermometers. Weather instruments and max/min thermometers (such as certain Six’s thermometer setups) may have index markers, holders, or mounting systems that need maintenance.
In these cases, the “repair” is often mechanical: resetting an index, cleaning deposits from the exterior, or rejoining a separated column in the installed assembly according to the manufacturer or operating manual.
Examples of Specialty Repairs
- Index reset using the correct magnet (for instruments designed for it)
- Rejoining a separated column using the procedure specified for that instrument type
- Keeping the thermometer in its holder/frame during maintenance if the manual requires it
- Cleaning external salt deposits or grime from weather-exposed units (without stressing the glass)
If you’re working with an outdoor weather thermometer, do the maintenance in a safe, open area and avoid obstacles. Many specialty manuals stress this because a swinging or handling method can go wrong fast if you’re near hard surfaces. In plain English: don’t repair delicate glass next to brick, concrete, or your metal patio table.
Way #4: Restore Readability and Usability (Cleaning, Mounting, and Support Repairs)
Sometimes the thermometer is fine, but reading it is the problem. Dust, grime, faded contrast, or a damaged mount can make a perfectly good instrument look broken.
This kind of repair is the safest and often the most rewarding, especially for vintage kitchen or workshop thermometers.
What You Can Repair Here
- Dirty exterior glass (clean gently with a soft cloth)
- Loose wall mount or bracket (replace hardware, not the glass tube)
- Damaged protective housing (replace the housing if compatible)
- Poor visibility (improve lighting, background contrast, or placement)
What Not to Do
- Don’t scrape the scale markings aggressively
- Don’t soak the whole unit if the mount/backing can warp
- Don’t polish glass with abrasive pads
- Don’t “straighten” a bent-looking stem with pressure (that’s how breakage happens)
Think of this as antique restoration rules: support the object, clean the surroundings, and don’t wrestle the fragile part.
Way #5: Repair the Measurement Problem, Not the Glass (Calibration, Retirement, or Replacement)
This is the most underrated repair method: fix the result you need (accurate temperature readings) instead of forcing a risky physical repair.
Option A: Verify Accuracy
If the thermometer is intact and readable, it may simply need an accuracy check. For some applications, a basic comparison against a reliable reference thermometer (or a proper calibration check) can tell you whether the instrument is still usable.
In professional settings, recalibration is often part of routine maintenance. Even liquid-in-glass thermometers can drift over time, especially with heavy use, transport, or exposure to extreme temperatures.
Option B: Retire and Replace
If the thermometer is damaged, leaking, or unreliable after rejoining attempts, replacement is the smart move. Modern mercury-free thermometers (digital and non-mercury liquid-in-glass alternatives) are widely available and usually faster, easier to read, and safer to store.
For most home users, replacement is not “giving up.” It’s the correct repair decision for the household.
Important Safety Notes If a Mercury Thermometer Breaks
If your thermometer breaks while you’re trying to repair or move it, stop immediately and switch to spill cleanup mode.
Do This First
- Keep children and pets away
- Ventilate the area (open windows/doors to outside)
- Avoid tracking contamination on shoes or clothing
- Follow local hazardous waste disposal guidance
Never Do This
- Never vacuum mercury
- Never use a broom
- Never pour mercury down a drain
- Never wash contaminated items in a washing machine
Those “never” rules matter because vacuuming, sweeping, or spreading mercury can break it into smaller droplets and increase vapor exposure risk. If exposure is suspected, contact Poison Control or your physician for guidance.
How to Prevent Mercury Thermometer Problems in the First Place
- Store upright when possible
- Avoid rough transport and sudden temperature swings
- Inspect the column and bulb before use
- Keep it in a protective case or holder
- Use mercury-free thermometers for routine household tasks
Prevention is boring, yes. But it is dramatically more fun than explaining to your family why the kitchen is now a hazardous-materials learning center.
Conclusion
When people search for “how to repair a mercury thermometer,” they usually mean one of two things: “Can I make this readable again?” or “Can I fix this safely?” The answer is yessometimesbut only if the thermometer is intact and the issue is something like a separated column, a specialty reset, or a maintenance problem. If there’s broken glass or a mercury spill, don’t repair it. Contain it, clean it safely, and dispose of it properly.
The best repair is the one that restores accurate temperature readings without creating a bigger risk. That may mean gentle rejoining, professional reconditioning, recalibration, or simply replacing the device with a modern mercury-free thermometer. Smart repair is not about heroics. It’s about judgment.
Experience Notes (Extended Section): Real-World Scenarios and Lessons Learned
The following experiences are composite, educational examples based on common real-world situations involving mercury thermometers. They’re included to provide practical context and help you make safer decisions.
1) The “It’s Broken!” Kitchen Thermometer Panic. A home cook found an old glass candy thermometer in a utensil drawer and noticed a gap in the silver column. The first instinct was to toss it in the sink and run water over it. Bad ideathankfully avoided. After a closer inspection under bright light, the glass was intact and the issue was a separated column, not a crack. Instead of forcing it, they stopped, compared the cost of repair versus replacement, and switched to a digital candy thermometer for daily use. The old one was kept only as a decorative piece. The lesson: sometimes the safest repair is changing how the tool is used.
2) The Science Teacher’s Lab Thermometer Rescue. In a school lab, a mercury thermometer had been transported in a crowded drawer and developed a visible separation. The teacher almost tried a “YouTube hack,” but the school’s safety policy required lab staff to document the condition and remove it from student use. A trained technician later handled reconditioning and calibration. The lesson: a thermometer used in instruction or testing should not be repaired casually, especially when students are involved.
3) The Weather Station Surprise. A volunteer maintaining a backyard-style weather setup noticed strange max/min readings on a specialty instrument. It turned out the issue wasn’t the weather at allit was a separated mercury column and an index that needed proper resetting. Once the mounting, cleaning, and reset procedure were done correctly, the readings returned to normal. The lesson: “repair” can mean restoring the mechanism around the thermometer, not just the mercury line.
4) The Vintage Collector Mistake (Almost). A collector bought an old wall thermometer at a flea market and wanted to polish it until it looked new. They started with an abrasive pad on the metal frame, then nearly used the same pad on the glass tube. Catching the mistake in time saved the scale markings and the glass surface. The collector ended up cleaning only the exterior housing, stabilizing the mount, and leaving the actual thermometer untouched. The lesson: cosmetic restoration and instrument restoration are not the same thing.
5) The “Tiny Spill, Big Stress” Household Cleanup. In another case, a family dropped a fever thermometer in a bathroom. Nobody was injured, but the room instantly became a stress festival. One person reached for a vacuum; another remembered hearing that this was exactly what not to do. They isolated the room, ventilated it, kept pets out, followed official cleanup guidance, and contacted local disposal resources. The cleanup took patience, but the outcome was safe. The lesson: what you do in the first five minutes matters more than how brave you feel.
6) The Accuracy Problem Disguised as a Repair Problem. A small workshop owner believed an old thermometer needed “fixing” because process temperatures looked inconsistent. After checking the setup, the real issue was poor placement near a draft and heat sourcenot a damaged thermometer. Once the measurement position was corrected and the thermometer was compared to a reliable reference, the readings made sense again. The lesson: before repairing the instrument, troubleshoot the measurement environment.
These examples all point to the same takeaway: repairing a mercury thermometer is less about clever tricks and more about correct diagnosis, gentle handling, and knowing when to stop. If you remember that, you’ll make better decisions than most people do when they see a shiny silver line acting weird.


