Table of Contents >> Show >> Hide
- Before You Start: The Golden Rules of Dry Erase Marker Stain Removal
- Method 1: Rubbing Alcohol for Fast Dry Erase Marker Removal
- Method 2: Alcohol-Based Hand Sanitizer When You Are in a Pinch
- Method 3: White Vinegar and Dish Soap for a Gentler Approach
- Method 4: Laundry Stain Remover or Ink Remover for Stubborn Marks
- Method 5: Oxygen Bleach or Chlorine Bleach for White and Color-Safe Fabrics
- What Not to Do When Removing Dry Erase Marker From Clothes
- How to Remove Dry Erase Marker From Different Types of Clothing
- Can You Remove Old Dry Erase Marker Stains?
- Extra Experience: Real-Life Lessons From Dry Erase Marker Disasters
- Conclusion
Dry erase markers are supposed to disappear with one satisfying swipeon a whiteboard. On clothes, they behave more like a tiny ink goblin with a long-term lease. One minute you are leading a meeting, helping a child with homework, or labeling boxes like a productivity hero. The next minute, there is a blue, black, red, or green streak across your shirt, pants, hoodie, or school uniform.
The good news: you do not have to immediately retire that garment to the “yard work only” pile. Dry erase marker stains can often be removed from washable clothes with the right technique, a little patience, and a strict no-panic policy. The key is understanding what you are dealing with. Dry erase marker ink usually contains pigments, release agents, and alcohol-based or solvent-like ingredients that help it wipe off slick whiteboard surfaces. Fabric, unfortunately, is not slick. It has fibers, texture, and a talent for holding onto stains like they are family heirlooms.
This guide explains how to remove dry erase marker from clothes using five easy, practical methods. You will also learn what not to do, how to handle different fabrics, and how to avoid making the stain worse. Put down the dryer sheet, step away from the hot water, and let’s save that shirt.
Before You Start: The Golden Rules of Dry Erase Marker Stain Removal
Before choosing a cleaning method, follow these simple rules. They can make the difference between “Wow, it came out!” and “Well, now it is abstract art.”
Act quickly, but do not attack the stain
Fresh dry erase marker stains are usually easier to remove than old, set-in stains. However, do not scrub aggressively. Scrubbing can push the ink deeper into the fabric and spread it into a larger, fuzzier stain. Blotting is boring, yes, but boring wins here.
Place paper towels behind the stain
Before applying any cleaning solution, slide a stack of white paper towels or a clean white cloth behind the stained area. This helps absorb the ink as it transfers out of the fabric. It also prevents the stain from bleeding through to the other side of the garment.
Work from the back of the fabric when possible
Treating the stain from the reverse side helps push the marker ink out the way it came in instead of driving it deeper into the fibers. Think of it as politely showing the stain the exit.
Use cold water, not hot water
Hot water can help set some stains and make them harder to remove. Rinse dry erase marker stains with cold water after treatment, then wash according to the care label.
Never put the garment in the dryer until the stain is gone
Heat can set leftover ink. Always air dry the garment after washing, then inspect it in good light. If you still see a shadow of the stain, repeat the treatment before using the dryer.
Method 1: Rubbing Alcohol for Fast Dry Erase Marker Removal
Rubbing alcohol is one of the most effective ways to remove dry erase marker from clothes because it helps break down ink and lift it from fabric fibers. It is especially useful on cotton, polyester, denim, and many washable blends. However, it should always be tested first because some dyes and delicate fabrics may react poorly.
What you need
- Rubbing alcohol, preferably 70% or 90% isopropyl alcohol
- White paper towels or a clean white cloth
- Cotton balls or cotton pads
- Cold water
- Laundry detergent
Step-by-step instructions
- Lay the garment stain-side down over a stack of white paper towels.
- Test the rubbing alcohol on an inside seam or hidden area.
- If the fabric color does not bleed, dab rubbing alcohol onto the back of the stain using a cotton ball.
- Blot gently. You should see ink transferring onto the paper towels.
- Replace the paper towels as they pick up color.
- Continue until the stain fades significantly or no more ink transfers.
- Rinse the area with cold water.
- Wash the garment as usual, following the care label.
- Air dry and inspect before putting it in the dryer.
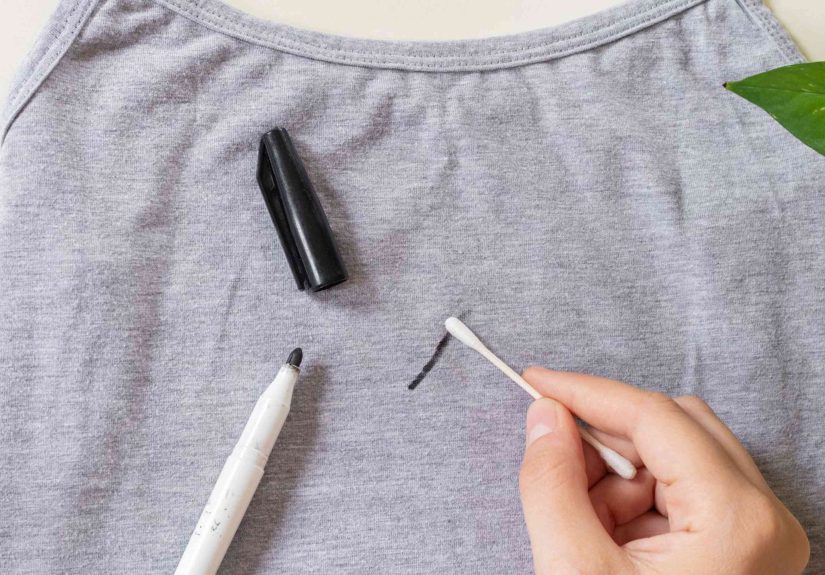
This method works best when you are patient. If the stain is large, move slowly from the outside edges toward the center to prevent spreading. For a tiny mark, a cotton swab may give you more control than a cotton ball.
Best for
Rubbing alcohol is best for fresh or moderately stubborn dry erase marker stains on washable cotton, polyester, denim, and sturdy fabric blends.
A quick warning
Rubbing alcohol is flammable, so keep it away from flames, candles, stovetops, and heat sources. Use it in a ventilated area, and wash the garment thoroughly after treating.
Method 2: Alcohol-Based Hand Sanitizer When You Are in a Pinch
No rubbing alcohol in the cabinet? Alcohol-based hand sanitizer can be a useful backup. Because many hand sanitizers contain alcohol in gel form, they can sit on the stain long enough to loosen the marker ink before washing. This makes it handy for classrooms, offices, and households where dry erase markers seem to multiply like rabbits.
What you need
- Clear alcohol-based hand sanitizer
- White paper towels
- Clean cloth or cotton pad
- Liquid laundry detergent
- Cold water
Step-by-step instructions
- Place paper towels behind the stain.
- Apply a small amount of clear hand sanitizer directly to the dry erase marker stain.
- Let it sit for two to five minutes. Do not let it dry completely.
- Blot gently with a clean cloth or cotton pad.
- Rinse with cold water.
- Rub a small amount of liquid laundry detergent into the treated area.
- Wash as directed on the garment care label.
- Air dry and check the stain.
Choose a plain, clear sanitizer if possible. Avoid formulas with dyes, glitter, heavy fragrance, moisturizers, or novelty colors. Your shirt already has one problem; it does not need sparkle gel joining the party.
Best for
This method is best for quick treatment when you are away from home or do not have rubbing alcohol available. It works especially well on small marks and fresh stains.
When not to use it
Avoid hand sanitizer on delicate fabrics such as silk, wool, acetate, and some rayon garments unless the care label allows it and a hidden test area looks safe. When in doubt, take delicate or expensive clothing to a professional cleaner.
Method 3: White Vinegar and Dish Soap for a Gentler Approach
White vinegar and dish soap are not always as powerful as alcohol on dry erase marker stains, but they can help with lighter marks, delicate washable fabrics, or stains that have already been partially lifted. This method is also a good option if you prefer to start with a less aggressive cleaning solution.
What you need
- White vinegar
- Mild liquid dish soap
- Cold water
- Clean white cloth
- Bowl or sink
Step-by-step instructions
- Mix one tablespoon of white vinegar, one teaspoon of mild dish soap, and two cups of cool water.
- Place a white towel behind the stained area.
- Dip a clean cloth into the solution and blot the stain gently.
- Let the solution sit for 10 to 15 minutes.
- Blot again, moving to a clean section of cloth as ink transfers.
- Rinse thoroughly with cold water.
- Apply a small amount of laundry detergent and wash as usual.
- Air dry and inspect.
This method may require more than one round. It is not the “dramatic movie rescue” of stain removal, but it can be useful when the marker stain is light or when the fabric needs a gentler touch.
Best for
Use vinegar and dish soap for light dry erase marker stains, washable school clothes, cotton shirts, polyester blends, and fabrics that tolerate mild acidic cleaning solutions.
Important safety note
Never mix vinegar with chlorine bleach. That combination can create dangerous fumes. If you plan to try bleach later, rinse the garment thoroughly first and wash out any vinegar solution completely.
Method 4: Laundry Stain Remover or Ink Remover for Stubborn Marks
Commercial laundry stain removers are designed to help break down stains before the wash cycle. For dry erase marker stains, look for products labeled for ink, marker, or tough stains. Some stain removers work better on food, grease, or body oils, so read the label before expecting miracles. Even the best stain remover cannot read your mind, although that would be convenient.
What you need
- Laundry stain remover spray, gel, stick, or ink remover
- Cold water
- Laundry detergent
- White paper towels
Step-by-step instructions
- Blot any fresh marker ink with a clean paper towel.
- Place paper towels behind the stain.
- Apply the stain remover according to the product directions.
- Let it sit only for the recommended amount of time.
- Gently rub the fabric together if the care label allows it.
- Rinse with cold water.
- Wash with detergent using the warmest water safe for the fabric, unless the stain-remover label says otherwise.
- Air dry and check the result.
For stains that have already gone through the wash but not the dryer, a stain remover may help remove the remaining shadow. For stains that have been dried with heat, you may need repeated treatments or a professional cleaner.
Best for
This method is best for stubborn stains, school uniforms, work shirts, denim, and garments that can tolerate standard prewash treatment.
Pro tip
If the stain remover label says to wash immediately after treatment, do not let the product sit overnight. More time is not always better. Some formulas can weaken fibers or affect color if left too long.
Method 5: Oxygen Bleach or Chlorine Bleach for White and Color-Safe Fabrics
Bleach can be helpful, but it must be used carefully. Oxygen bleach is generally safer for many washable colored fabrics, while chlorine bleach should only be used on white, bleach-safe items. Always check the care label first. If the label says “do not bleach,” believe it. Clothing labels may be tiny, itchy, and annoying, but they are not joking.
Option A: Oxygen bleach soak for washable fabrics
Oxygen bleach can help lift leftover ink shadows after alcohol or stain remover treatment. It is often useful for washable whites and many colorfast fabrics.
Steps
- Fill a sink or bucket with cool or lukewarm water.
- Add oxygen bleach according to the package directions.
- Submerge the stained garment fully.
- Soak for several hours or as directed.
- Wash as usual with detergent.
- Air dry and inspect.
Option B: Chlorine bleach for white, bleach-safe clothing
Chlorine bleach may help remove remaining marker stains from plain white cotton or other bleach-safe fabrics. It should not be used on spandex, wool, silk, leather, or colored garments unless the care label specifically allows it.
Steps
- Confirm the garment is white and bleach-safe.
- Dilute chlorine bleach according to the product label.
- Apply or soak only as directed.
- Wash immediately after treatment if the label instructs you to do so.
- Air dry and check the stain.
Best for
Oxygen bleach is best for lingering stains on washable, colorfast fabrics. Chlorine bleach is best reserved for white, bleach-safe clothing when other methods have not fully worked.
What Not to Do When Removing Dry Erase Marker From Clothes
Sometimes the fastest way to fix a stain is to avoid the classic mistakes. Here are the big ones.
Do not scrub like you are cleaning a grill
Hard scrubbing can damage fabric and spread ink. Gentle blotting is the better move.
Do not use hot water first
Cold water is safer during the early stain-removal process. Save warmer water for the wash cycle only if the care label allows it and the stain has been pretreated.
Do not dry the garment too soon
A dryer can set the stain. Air dry first, inspect, and repeat treatment if needed.
Do not mix cleaning chemicals
Never mix bleach with vinegar, ammonia, rubbing alcohol, or other household cleaners. Chemical cocktails belong in zero laundry rooms.
Do not treat delicate fabrics casually
Silk, wool, acetate, leather, suede, and some rayon garments need special care. If the clothing is expensive, sentimental, or labeled dry clean only, bring it to a professional cleaner.
How to Remove Dry Erase Marker From Different Types of Clothing
Cotton shirts
Cotton usually responds well to rubbing alcohol followed by laundry detergent. Place towels behind the stain, blot with alcohol, rinse cold, wash, and air dry.
Polyester and blends
Polyester blends can often handle rubbing alcohol, but test first. Some dyes may bleed. If alcohol lifts color, switch to a gentler vinegar and dish soap solution or a fabric-safe stain remover.
Jeans and denim
Denim is sturdy, but marker ink can settle into the weave. Use rubbing alcohol from the back of the fabric and replace the paper towels often. Repeat before washing if needed.
School uniforms
Uniform fabrics vary, so check the label. Start with alcohol-based treatment on a hidden seam. If the fabric is colorfast, proceed carefully. For white uniform shirts, oxygen bleach or bleach-safe methods may help with leftover shadows.
Delicate fabrics
For silk, wool, acetate, or dry-clean-only garments, avoid DIY solvent experiments. Blot gently, do not add heat, and contact a professional cleaner. Tell the cleaner the stain is from dry erase marker so they can choose the right treatment.
Can You Remove Old Dry Erase Marker Stains?
Yes, sometimes. Old dry erase marker stains are harder to remove because the ink has had more time to bond with the fibers. If the garment has already been through the dryer, the stain may be even more stubborn. Still, do not give up after one attempt.
For old stains, start with rubbing alcohol or a commercial ink remover. Blot from the back, rinse, apply laundry detergent, wash, and air dry. If a shadow remains, repeat the process. You can also try an oxygen bleach soak if the fabric is washable and colorfast.
Be realistic, though. Some old stains may fade but not disappear completely. In that case, you have three honorable options: wear the garment under a sweater, turn it into weekend clothing, or pretend it is a limited-edition fashion detail.
Extra Experience: Real-Life Lessons From Dry Erase Marker Disasters
Anyone who has spent time around classrooms, home offices, craft tables, or meeting rooms knows that dry erase markers are sneaky. They roll off desks. They lose their caps. They end up in children’s hands five seconds before family photos. And somehow, even though they are designed for whiteboards, they have a special talent for landing on clothing.
One of the most common real-life mistakes is treating dry erase marker like a regular washable marker. Parents often toss the stained shirt directly into the washing machine, hoping detergent will handle it. Sometimes the stain fades, but often it comes out looking like a pale ghost of the original mark. Then, if the shirt goes into the dryer, that ghost becomes a permanent roommate. The better habit is to pause before washing, pretreat the stain, and only launder once the ink has started to lift.
Another lesson: paper towels matter more than people think. When you apply rubbing alcohol without anything behind the fabric, the ink can dissolve and spread into nearby fibers. With a white paper towel behind the stain, the loosened ink has somewhere to go. It transfers out instead of traveling sideways. Replacing the towel often is also important. If the towel is already full of ink, it can redeposit color back onto the clothing. Stain removal is glamorous like thatlots of paper towel management.
Hand sanitizer is a surprisingly useful emergency tool, especially in schools and offices. If a child comes home with a fresh streak on a cotton uniform shirt, a small dab of clear alcohol-based sanitizer can keep the stain from settling deeply before a proper wash. However, sanitizer is not perfect. Some formulas contain moisturizers, dyes, or fragrance ingredients that can leave residue. That is why rinsing and following with detergent matters. The sanitizer helps loosen the ink; the detergent helps carry away the mess.
White vinegar and dish soap can be helpful, but experience shows they are best for lighter stains or final cleanup after alcohol treatment. If someone has drawn a bold black line across a white cotton sleeve, vinegar alone may not be strong enough. But if a faint stain remains after blotting with alcohol, a vinegar-and-soap solution can help reduce the leftover shadow. It is also a good first step for people nervous about using stronger solvents on colored fabrics.
Bleach is where many laundry adventures go sideways. Chlorine bleach can be effective on white, bleach-safe cotton, but it is not a universal stain eraser. Use it on the wrong fabric, and the stain may be gonebut so might the color, stretch, or texture of the garment. Oxygen bleach is often more forgiving, especially for washable colorfast fabrics, but it still needs time and label-following. The best experience-based advice is simple: bleach should be a planned move, not a panic move.
Finally, patience wins. A dry erase marker stain may need two or three rounds of treatment. That does not mean the method failed; it means the ink is stubborn. Blot, rinse, wash, air dry, inspect, and repeat if needed. The dryer should be the final celebration, not part of the rescue mission. Once the stain is gone, then you can dry the garment normally and return it to regular lifehopefully far away from uncapped markers.
Conclusion
Dry erase marker on clothing looks dramatic, but it is not always a laundry tragedy. Start by blotting, not scrubbing. Place paper towels behind the stain, treat from the back when possible, and use cold water during the removal process. Rubbing alcohol is usually the strongest first choice for washable fabrics, while alcohol-based hand sanitizer can help in a pinch. Vinegar and dish soap offer a gentler option, commercial stain removers can tackle stubborn marks, and oxygen bleach or chlorine bleach may help when used correctly on safe fabrics.
The most important rule is also the easiest to forget: do not put the garment in the dryer until the stain is completely gone. Heat can set the ink and turn a fixable problem into a permanent reminder of that one very enthusiastic whiteboard session.
If the clothing is delicate, expensive, or labeled dry clean only, skip the home chemistry experiment and call a professional cleaner. For everyday washable clothes, though, these five methods give you a strong chance of removing dry erase marker stains and getting your outfit back into the rotation.
Note: This article is written for general washable clothing care. Always check the garment care label, test cleaning solutions on a hidden area first, avoid mixing chemicals, and air dry until the stain is fully removed.


