Table of Contents >> Show >> Hide
- Before You Blow Dry: The Short Hair Prep That Changes Everything
- Way 1: Blow Dry Short Hair Smooth and Sleek
- Way 2: Blow Dry Short Hair for Volume
- Way 3: Blow Dry Short Curly or Textured Hair With a Diffuser
- Common Blow-Drying Mistakes With Short Hair
- How to Choose the Best Blow-Dry Method for Your Short Hair
- of Real-Life Experience: What Actually Helps When Blow Drying Short Hair
- Conclusion
Short hair is supposed to be easy, right? That is what everyone says until they stand in front of the mirror with damp bangs pointing east, a cowlick staging a tiny rebellion, and a blow dryer roaring like a leaf blower. The good news: learning how to blow dry short hair is not about owning twelve salon tools or having professional wrists. It is about using the right direction, heat, brush, and timing for the style you actually want.
Whether you have a pixie cut, a short bob, a crop, a bixie, a tapered cut, or short curly hair, the blow-dry method matters. A few inches of hair can go sleek, fluffy, flat, frizzy, polished, piecey, or cartoon-villain dramatic depending on how you dry it. The secret is to guide the roots first, then shape the ends. Roots decide the volume; ends decide the finish. Everything else is just your bathroom lighting trying to humble you.
This guide breaks down three reliable ways to blow dry short hair: a smooth and sleek finish, a voluminous round-brush blowout, and a textured or curly diffuser style. You will also find preparation tips, product advice, common mistakes, and real-life experience notes at the end so your next short-hair blowout looks intentional instead of “I opened the car window once.”
Before You Blow Dry: The Short Hair Prep That Changes Everything
Before choosing a blow-dry technique, start with smart preparation. Short hair dries quickly, which sounds helpful until one section dries in the wrong direction and refuses to negotiate. Prep gives you control before heat locks the hair into shape.
1. Blot, Do Not Scrub
After washing, gently squeeze out excess water and wrap your hair in a towel or microfiber towel for a few minutes. Avoid rough towel-scrubbing, especially if your hair is fine, color-treated, curly, or prone to frizz. Wet hair is more fragile, and aggressive rubbing can create flyaways before the dryer even enters the chat.
2. Apply Heat Protectant
Heat protectant is not a fancy extra; it is the seat belt of blow drying. Mist or distribute it evenly through damp hair, focusing on mid-lengths and ends. If you have a pixie or very short crop, use a light hand so the hair does not become greasy or heavy. For fine hair, choose a lightweight spray. For thick or coarse hair, a blow-dry cream may give better control.
3. Pick the Right Attachment
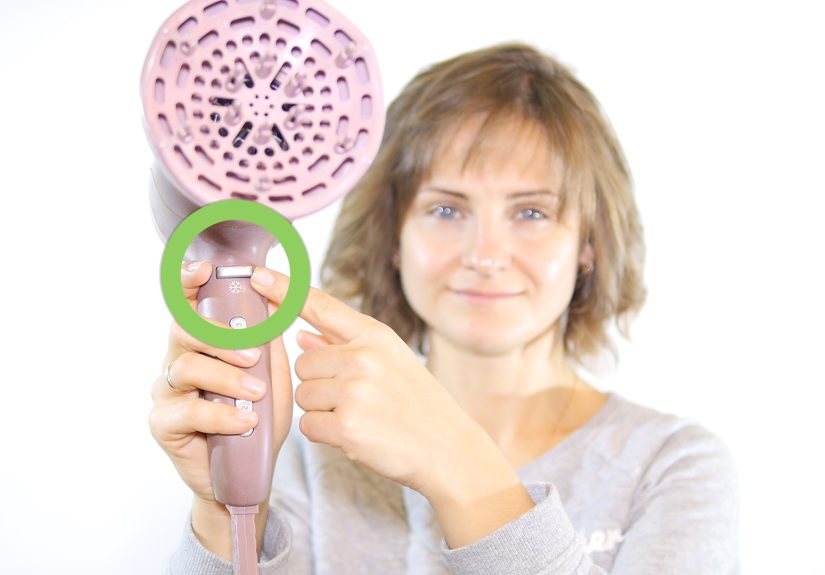
A concentrator nozzle helps direct airflow for smooth styles and volume. A diffuser spreads airflow gently, making it ideal for curls, waves, and texture. Drying short hair without an attachment can work for rough-drying, but for a polished finish, the nozzle is your tiny plastic best friend.
4. Start Damp, Not Dripping
Most short styles behave better when the hair is damp rather than soaking wet. If water is running down your neck, you are not blow drying; you are power-washing your shoulders. Let hair air-dry briefly or blot well before using heat. For sleek or voluminous short hair, rough-drying until about 70% to 80% dry can reduce heat exposure and speed up styling.
Way 1: Blow Dry Short Hair Smooth and Sleek
This method is perfect for short bobs, blunt cuts, pixies with longer top layers, short lobs, side-swept styles, and anyone who wants a clean, polished look without puffiness. The goal is smooth roots, controlled ends, and shine that says, “Yes, I made an effort,” but not “I canceled plans to wrestle my hair.”
Best For
This sleek blow-dry method works best for straight, wavy, fine, medium, or moderately thick short hair. It is especially useful if your hair flips out at the ends, grows in different directions, or gets bulky around the sides.
What You Need
- Blow dryer with concentrator nozzle
- Paddle brush, vent brush, or small flat brush
- Heat protectant spray or cream
- Light smoothing serum or anti-frizz cream
- Clips for sectioning, if your hair is bob-length
Step-by-Step: The Smooth Short Hair Blowout
Step 1: Create your part while hair is damp. Short hair remembers where it dries. If you want a side part, center part, or swept-forward pixie, place it early. Waiting until hair is dry and then changing the part is like asking a cat to move politely.
Step 2: Rough-dry the roots in the direction you want them to sit. Use your fingers and the dryer on medium heat. For a sleek bob, direct air downward from roots to ends. For a pixie, dry the sides and back close to the head in the direction you want the hair to lay.
Step 3: Use the nozzle and brush together. Aim the nozzle downward along the hair shaft while brushing the hair into shape. This helps smooth the cuticle, reduce frizz, and create a cleaner finish. Keep the dryer moving instead of parking it on one spot.
Step 4: Control the sides. Short hair often expands at the sides, especially around the temples and ears. Brush the side sections downward or slightly forward while following with the dryer. If your hair has a cowlick near the hairline, dry it first before it sets itself into chaos.
Step 5: Shape the ends. For a tucked-under bob, turn the brush slightly inward at the ends. For a sharper, modern finish, brush straight down and avoid too much bend. For a pixie, use your fingers to pinch the ends into soft separation.
Step 6: Finish with cool air. Once the hair is dry and shaped, use the cool-shot button for a few seconds. Cool air helps set the style and reduces that “freshly toasted” feeling nobody asked for.
Pro Tips for a Sleeker Finish
Keep the dryer several inches away from your scalp, use medium or low heat when possible, and avoid blasting hair upward unless you want volume. A small amount of serum can tame flyaways, but apply it only after drying and only from mid-lengths to ends. Short hair can go from shiny to oily in one enthusiastic pump.
Way 2: Blow Dry Short Hair for Volume
If your short hair falls flat five minutes after styling, this method is for you. The volume blowout uses root lift, over-direction, and a round brush to create body. It works beautifully on pixies, layered bobs, bixies, short shags, and fine hair that needs a little motivational speech.
Best For
This technique is ideal for fine hair, flat roots, short layered cuts, side-swept bangs, short bobs, and anyone who wants bounce without teasing their hair into a tiny helmet.
What You Need
- Blow dryer with concentrator nozzle
- Small or medium round brush
- Root-lifting spray, volumizing mousse, or blow-dry spray
- Clips for sectioning
- Light hairspray or texture spray
Step-by-Step: The Voluminous Short Hair Blowout
Step 1: Apply volume product at the roots. Use mousse or root spray on damp hair, focusing on the crown, front hairline, and top layers. Avoid loading product on the ends unless you want them to feel stiff.
Step 2: Rough-dry upside down or side to side. Flip your head forward or tilt it left and right while drying the roots. This encourages lift before the brush work begins. Stop when hair is about 70% to 80% dry.
Step 3: Section the top. Clip the top section away and start with the bottom or side layers. Short hair may not need many sections, but even two or three can make the difference between “salon-ish” and “wind tunnel.”
Step 4: Lift at the root with a round brush. Place the round brush under a small section near the root. Pull the section upward and slightly away from your head while aiming the dryer at the root area. This is where volume is born. The ends are just along for the ride.
Step 5: Over-direct the crown. For more height, pull crown sections forward or upward while drying. Over-direction means drying the hair opposite the way it naturally falls so it settles back with more lift. It sounds technical, but it is basically telling your roots, “Stand up, please.”
Step 6: Add bend to the ends. Once the roots are dry, roll the brush slightly through the ends. For a soft bob, curve them under. For a modern tousled look, alternate directions or leave ends straighter.
Step 7: Let each section cool before touching it. Hair sets as it cools. If you yank the brush out immediately and start rearranging everything, the volume can collapse. Give each section a few seconds, then release.
Pro Tips for Volume That Lasts
Use a smaller round brush for short layers and bangs, and a medium brush for a bob. If your hair is very fine, avoid heavy oils before drying. After blow drying, lift sections at the crown and mist lightly with hairspray or texture spray. Dry shampoo can also add grip to clean, slippery hair, because sometimes freshly washed hair is just too innocent to hold a style.
Way 3: Blow Dry Short Curly or Textured Hair With a Diffuser
Short curly hair can be magical, but it does not appreciate being blasted around like confetti. A diffuser softens airflow so curls and waves dry with shape instead of frizz. This method works for short curls, waves, coils, tapered cuts, curly pixies, and short natural hair.
Best For
Use this method if you want to enhance natural curl pattern, preserve wave definition, reduce frizz, or add soft volume without stretching the hair too much.
What You Need
- Blow dryer with diffuser attachment
- Leave-in conditioner, curl cream, mousse, or gel
- Heat protectant suitable for textured hair
- Microfiber towel or cotton T-shirt
- Pick or fingers for final volume
Step-by-Step: The Diffuser Method for Short Hair
Step 1: Style while wet or very damp. Curly and textured hair often forms best when styling products are applied early. Work in leave-in conditioner, curl cream, mousse, or gel using your fingers. Scrunch upward to encourage shape.
Step 2: Remove extra water gently. Use a microfiber towel or cotton T-shirt to squeeze curls upward. Do not rub. Rubbing breaks curl clumps apart, and once frizz arrives, it brings luggage.
Step 3: Set the dryer to low speed. Low speed is key. High airflow can scatter curls and create frizz. Use low or medium heat depending on your hair’s tolerance, and switch to cool air toward the end.
Step 4: Cup, lift, and hold. Place a small section of curls into the diffuser bowl, bring the diffuser toward the scalp, and hold it still for several seconds. Moving the diffuser too much can disturb the curl pattern. Think gentle drying, not smoothie blending.
Step 5: Move around the head. Dry one section at a time. Tilt your head to the side for more volume, especially if your curls sit close to the scalp. For short curls at the crown, lift gently with the diffuser prongs.
Step 6: Stop before over-drying. Diffuse until hair is mostly dry, then let the final bit air-dry if possible. Once completely dry, scrunch out any crunchy gel cast with clean hands or a tiny amount of lightweight oil.
Pro Tips for Short Curls and Waves
Do not touch curls constantly while drying. The more you touch, the more frizz you invite. If your roots dry flat, hover the diffuser near the scalp for a few moments, then lift gently with your fingers after the hair is fully dry. For short natural hair, focus the diffuser near the roots and avoid pulling curls taut unless you want a stretched look.
Common Blow-Drying Mistakes With Short Hair
Using Too Much Heat
Short hair dries fast, so high heat is usually unnecessary. Medium heat and steady airflow are enough for most styles. If your scalp feels hot, your hair is probably getting too much heat as well.
Skipping the Roots
The roots determine shape. If you dry the ends first, the style may look unfinished or flat. Always guide the roots in the direction you want the hair to move.
Holding the Dryer Too Close
Keep some distance between the dryer and your hair. Holding the dryer too close can roughen the cuticle, increase dryness, and make styling harder over time.
Using the Wrong Brush Size
A giant round brush on very short hair is a recipe for frustration and possibly a brush-related emergency. Short hair needs a small or medium round brush so the hair can wrap around it enough to create lift or bend.
Overloading Product
Short hair shows product buildup quickly. Start with less than you think you need. You can always add more, but removing too much mousse usually requires either shampoo or acceptance.
How to Choose the Best Blow-Dry Method for Your Short Hair
Choose the sleek method if you want shine, control, and a polished shape. Choose the volume method if your hair gets flat at the crown or you want movement in a pixie, bob, or layered crop. Choose the diffuser method if your natural texture is the star and you want curls, waves, or coils to stay defined.
Hair type matters, but your desired result matters more. The same short bob can be sleek on Monday, bouncy on Wednesday, and softly textured by Friday. Short hair is versatile; it just needs direction. Literally.
of Real-Life Experience: What Actually Helps When Blow Drying Short Hair
Here is the honest truth about blow drying short hair: the first few tries may feel awkward. Long hair gives you more room to hide mistakes. Short hair reports every decision immediately. If you dry one side backward, it will announce itself. If you forget the crown, it will collapse. If you overdo the mousse, your bangs may form a small committee. But once you understand how short hair responds, styling becomes faster and more predictable.
One of the biggest lessons is that short hair needs attention right away after washing. With longer hair, you can wander around in a towel, answer emails, make coffee, and then come back to style. With short hair, especially pixies and bobs, waiting too long can let cowlicks and parts set in place. A smart habit is to blot your hair, apply product, create your part, and quickly dry the roots in the desired direction. Even if you do not finish the full blowout immediately, setting the roots early saves effort later.
Another real-world tip: the front section deserves VIP treatment. Bangs, face-framing layers, and the hair around the temples are what people notice first. Dry those areas before the back. For a side-swept pixie, guide the front across the forehead with your fingers or a small brush. For curtain-style short bangs, dry them forward first, then split them gently. For a bob, smooth the front sections downward with the nozzle pointed from root to end. The back can be a little imperfect; the front is the headline.
Short hair also teaches you that volume is not about making every strand bigger. It is about putting lift in the right places. Too much volume at the sides can make a bob look triangular. Too much puff at the crown can look dated. Focus lift at the roots on top, especially near the crown and front. Keep the sides smoother unless your cut is designed to be round or fluffy. This balance makes short hair look styled instead of inflated.
For curly short hair, patience matters more than speed. A diffuser works best when you let curls sit in place long enough to dry without disturbance. It may be tempting to keep moving the dryer around because it feels productive, but stillness often creates better definition. Once curls are dry, then you can fluff the roots, shake the shape, or separate pieces. Touching too early is the fastest route to frizz, and frizz has excellent attendance.
Finally, do not expect one product or one tool to do everything. Fine short hair may need mousse at the roots and almost nothing on the ends. Thick short hair may need smoothing cream and a concentrator nozzle. Curly short hair may need leave-in conditioner, gel, and a diffuser. The best routine is the one that gives your hair enough support without making it feel coated. Start simple, adjust one thing at a time, and remember: short hair is not less work because it is shorter. It is less work once you know where to aim the dryer.
Conclusion
Blow drying short hair is easier when you stop treating it like long hair’s tiny cousin. Short hair has its own rules: set the roots first, choose the right attachment, use controlled heat, and style with the final shape in mind. For sleek hair, direct airflow downward and smooth with a brush. For volume, lift the roots and use a round brush strategically. For curls and texture, let the diffuser do the gentle work.
The best part? Once you learn these three blow-dry methods, you can change your look without changing your haircut. Smooth bob today, bouncy pixie tomorrow, defined curls for the weekend. Your blow dryer is not just a drying tool; it is a tiny weather system you can control. Use it wisely, and your short hair will finally stop acting like it has separate weekend plans.
Note: This article is written for general hair-styling education. For severely damaged hair, scalp irritation, or hair loss concerns, consult a licensed stylist, dermatologist, or healthcare professional.


