Table of Contents >> Show >> Hide
- First, the $40 Reality Check (So You Don’t Rage-Return Everything)
- Pick Your Under-$40 Shiplap Method
- The Budget Blueprint: How to Stay Under $40 Without Looking Cheap
- Materials & Tools (Budget-Friendly List)
- Step-by-Step: How to Build a Faux Shiplap Wall Under $40
- Step 1: Decide Your “Under-$40 Zone”
- Step 2: Measure and Plan Your Plank Layout
- Step 3: Prep the Wall (A Little Prep = A Lot More “Wow”)
- Step 4: Cut Your Plywood Into Planks (Cheapest “Shiplap” in the Building)
- Step 5: Pre-Paint or Prime (Your Future Self Will Thank You)
- Step 6: Install the First Plank Perfectly Level
- Step 7: Keep Your Gaps Consistent (The “Shiplap Glow-Up”)
- Step 8: Stagger the Seams Like Real Planking
- Step 9: Cut Cleanly Around Outlets and Obstacles
- Step 10: Fill, Caulk, and Paint for the “Built-In” Look
- Example Budgets That Actually Hit Under $40
- Design Tips to Make Cheap Shiplap Look Expensive
- Common Mistakes (And How to Avoid the DIY Sad Trombone)
- Quick FAQ
- Real-Life Lessons From a $40 Faux Shiplap Adventure (500-ish Words of Experience)
- Conclusion
You want that cozy, “I totally have my life together” shiplap look… without paying “custom millwork” money.
Good news: you can pull off a shiplap-style accent wall for under $40if you play the game smart:
keep the wall size modest, go faux (plywood strips or panel planks), and lean on supplies you may already have
(paint, caulk, nails, adhesive). In other words: we’re going for “farmhouse chic,” not “farmhouse mortgage.”
This guide breaks down the most budget-friendly methods, a realistic materials list, step-by-step installation,
and the sneaky cost-saving tricks that keep your DIY shiplap wall under $40 while still looking like you meant to do it.
First, the $40 Reality Check (So You Don’t Rage-Return Everything)
“Under $40” is absolutely doable for a small-to-medium accent areathink a 4′ x 8′ section (32 sq ft),
a half wall, behind a desk, a nook, or a fireplace bump-out. For a giant living room wall, $40 is still possible
only if you already have most supplies and you’re scoring materials on sale, using leftovers, or repurposing.
The trick is separating your budget into two buckets:
- Plank material (the “shiplap” itself): where we aim to spend most of the $40.
- Consumables (paint, caulk, filler, nails): ideally already in your stash, borrowed, or bought in small quantities.
If you’re starting from zero (no paint, no nails, no adhesive, no tools), you can still do itbut you’ll be
doing some “resourceful goblin” moves like borrowing a nailer, using leftover paint, or picking one wall section
instead of a whole room. Which, honestly, is how many of the best DIYs are born.
Pick Your Under-$40 Shiplap Method
Option A: The “One-Sheet Wonder” Faux Shiplap (Best Value)
Buy a single 4′ x 8′ sheet of thin underlayment plywood (often 1/4″) and have it cut into long strips.
Installed horizontally with small gaps, it reads like classic shiplapespecially once caulked and painted.
One sheet covers about 32 sq ft (minus a bit for waste).
Why it’s great: clean look, light weight, easy to paint, budget-friendly, and you can control plank width.
Why it’s not: you’ll need cutting (or store cuts), and edges may need sanding for a nicer finish.
Option B: MDF/Hardboard Planking Panels (Fast + Consistent)
Some big-box stores carry primed wall planking (often MDF) that installs with nails and/or adhesive.
It’s uniform, beginner-friendly, and saves time on ripping sheets into strips. If you find it on sale or use a small wall,
it can slip under $40.
Why it’s great: straight boards, less prep, often already primed.
Why it’s not: full-wall coverage can exceed $40 quickly if the area is large.
Option C: Peel-and-Stick “Shiplap Style” (Rental-Friendly-ish, Small Areas Only)
Peel-and-stick wood paneling can be quick and surprisingly convincingbut it’s usually best for smaller projects if you’re staying under $40.
Think: a narrow entry wall, a bar front, a backsplash area (if appropriate), or a tiny powder-room feature.
Why it’s great: no saw, low mess, fast gratification.
Why it’s not: larger coverage tends to blow the budget.
The Budget Blueprint: How to Stay Under $40 Without Looking Cheap
Here’s the strategy that works most often:
- Choose a wall section around 32 sq ft so one sheet of plywood (Option A) covers it.
- Have the store cut the sheet into strips (often cheaper than buying new tools, and saves time).
- Use what you already own: leftover interior paint, caulk, spackle/wood filler, and a few nails.
- Keep plank widths reasonable (5″–8″ is a common “shiplap vibe” range).
- Plan for a “nickel gap” or small spacer gap for that crisp shadow line.
If you’re a numbers person, here’s a simple planning formula:
- Wall square footage: width (ft) × height (ft)
- Sheet coverage: one 4’×8′ sheet = 32 sq ft
- Waste factor: add ~10% if your wall has outlets, windows, or lots of cuts
Materials & Tools (Budget-Friendly List)
The goal is to keep the shopping list short and the results high-end.
Materials
- 1/4″ plywood underlayment (one 4’×8′ sheet for ~32 sq ft coverage)
- Construction adhesive (optional but helpfulespecially if studs don’t line up perfectly)
- Brad nails or finish nails (or a combo of nails + adhesive)
- Caulk (paintable) for seams/edges
- Wood filler or spackle for nail holes
- Primer/paint (often you can use leftover wall paintmatte or eggshell is forgiving)
Tools
- Stud finder (or the old-school “knock and guess,” but stud finder is better for your sanity)
- Level (longer is better)
- Measuring tape + pencil
- Utility knife (for quick trimming and outlet tweaks)
- Saw (miter saw/circular saw) or store cutting service
- Nail gun (optional) or hammer + nail set
- Sanding block or sandpaper
Step-by-Step: How to Build a Faux Shiplap Wall Under $40
Step 1: Decide Your “Under-$40 Zone”
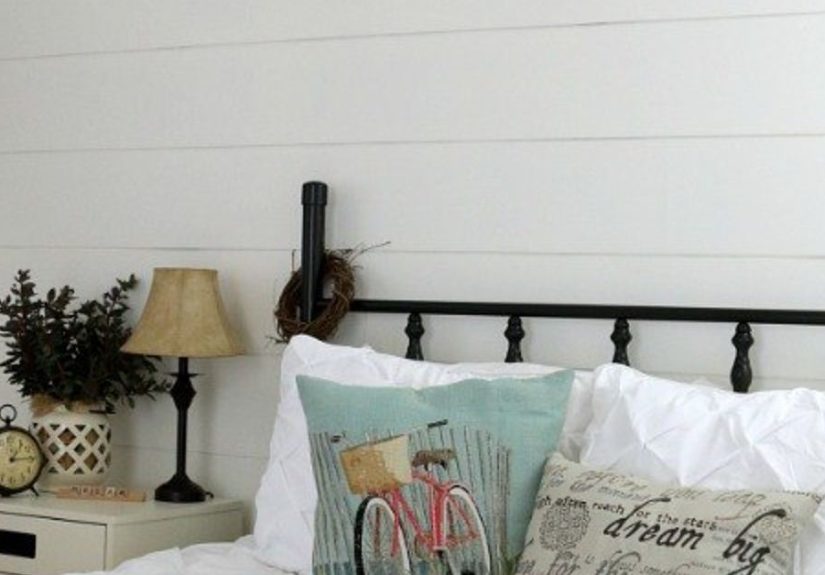
Choose a section that looks intentional: behind a bed, around a TV, a hallway end wall, or a breakfast nook.
A smaller accent wall often looks more designer than “I panicked and stopped halfway because I ran out of plywood.”
Step 2: Measure and Plan Your Plank Layout
Pick your plank width (6″ is a classic starting point). Then do a quick layout:
- Measure wall height in inches.
- Divide by (plank width + gap). Example: 6″ planks with a 1/8″ gap.
- Adjust so you don’t end up with a sad 1″ sliver at the topunless that sliver is your enemy and you must defeat it.
Step 3: Prep the Wall (A Little Prep = A Lot More “Wow”)
- Remove outlet covers and any wall hooks.
- If you’re installing where baseboards exist, decide:
- Pro look: remove baseboards, install planks, reinstall baseboards.
- Fast look: run planks above the baseboard and add a small trim piece if needed.
- Mark studs with a vertical pencil line so your nails hit something solid.
- If your wall is a dark color and you’re doing white shiplap, paint the wall a lighter “backer” color first so gaps don’t show.
Step 4: Cut Your Plywood Into Planks (Cheapest “Shiplap” in the Building)
If the store can rip the sheet into strips, do it. It’s faster, cleaner, and your garage won’t look like a sawdust festival.
If you cut at home, use a straightedge guide and take your time.
Pro tip: Lightly sand the cut edges. Even a quick pass improves the “finished carpentry” vibe.
Step 5: Pre-Paint or Prime (Your Future Self Will Thank You)
Painting planks before installation is a game-changer because tight gaps are annoying to paint afterward.
If your planks are raw, prime first. If they’re already primed, you can go straight to paint.
Step 6: Install the First Plank Perfectly Level
The first row is the boss level. If it’s crooked, every row above it will be crooked in solidarity.
Start at the bottom, level it carefully, then attach with nails into studs. Adhesive is optional but adds stability.
Step 7: Keep Your Gaps Consistent (The “Shiplap Glow-Up”)
Use a spacer for that crisp shadow linepeople often use a nickel or similar thin spacer.
Keep the gap consistent across the wall for a polished look.
Step 8: Stagger the Seams Like Real Planking
Avoid stacking seams in a straight vertical line. Stagger them so it looks intentional and helps reduce noticeable patterns.
Use offcuts to start the next row to reduce waste (and keep your budget from wandering off).
Step 9: Cut Cleanly Around Outlets and Obstacles
Measure twice, cut once, and then measure again because outlets love humiliation.
A jigsaw helps, but careful scoring and a utility knife can work for thin plywood.
Note: If your planks add thickness, you may need outlet box extenders so the outlet sits flush with the new surface.
Step 10: Fill, Caulk, and Paint for the “Built-In” Look
- Fill nail holes with wood filler or spackle.
- Caulk edges where planks meet trim/ceiling for a seamless finish (don’t caulk between every plank gapkeep the shadow lines!).
- Touch up paint. Two coats usually look best, especially in bright rooms.
Example Budgets That Actually Hit Under $40
Budget Example 1: 4′ × 8′ Accent Wall (32 sq ft)
- 1 sheet 1/4″ underlayment plywood: ~$18–$30
- Nails (small pack) or a few leftover: ~$0–$5
- Adhesive (optional, partial tube): ~$0–$6
- Paint/primer (using leftovers): ~$0
- Total: Often $24–$39 if you already have paint/caulk/filler
Budget Example 2: Half Wall Wainscoting-Style (6′ × 4′ = 24 sq ft)
- 1 sheet underlayment plywood (with leftovers for mistakes): ~$18–$30
- Optional small trim piece (if needed): ~$0–$8
- Total: Very doable under $40, and looks high-end with a chair rail or cap trim.
Why these budgets work: you’re keeping coverage within one sheet and treating paint/caulk/filler as “shop supplies”
instead of buying everything fresh for a single project.
Design Tips to Make Cheap Shiplap Look Expensive
- Choose a consistent plank width (5″–8″) and keep gaps uniform.
- Paint matters more than perfection: a smooth finish hides tiny flaws.
- Keep the seams intentional: stagger them and avoid tiny slivers.
- Edge caulk = pro finish: clean transitions at trim and corners look custom.
- Don’t overdo rustic: a little wood texture is charming; splinters are not.
Common Mistakes (And How to Avoid the DIY Sad Trombone)
“My lines are wavy.”
Use a level often. If your walls aren’t perfectly straight (many aren’t), follow a level reference line and let trim hide tiny sins.
“My gaps look messy.”
Use spacers. Don’t eyeball it unless you enjoy chaos.
“The plywood edges look rough.”
Sand edges lightly and consider a quick prime coat. That small step upgrades the whole wall.
“It’s cracking at the seams.”
Wood can move with humidity. Leave a little breathing room at edges and avoid forcing boards too tightly.
Quick FAQ
Is faux shiplap “real” shiplap?
Traditional shiplap has overlapping (rabbeted) edges. Faux shiplap usually recreates the look with flat planks and a consistent gap.
Visually? Most people won’t know the difference unless they’re carrying calipers and a dream.
Can I install shiplap over textured walls?
Yes, but very heavy texture can create uneven contact. Adhesive helps, and you may need extra nails into studs.
Do I need a nail gun?
Nope. A nail gun is faster, but finish nails + a hammer and nail set work fineespecially on small projects.
What paint finish looks best?
Matte and eggshell hide imperfections well. Satin is easier to wipe clean but shows flaws more. Pick based on the room and your tolerance for fingerprints.
Real-Life Lessons From a $40 Faux Shiplap Adventure (500-ish Words of Experience)
The first time I attempted a “Shiplap Wall for UNDER $40,” I strutted into the store with the confidence of someone who had watched
exactly two DIY videos and therefore considered myself a licensed contractor. I bought one sheet of underlayment, smiled at the cashier,
and thought, “That’s it. I’m basically Joanna Gaines now.”
Then I got home, held the sheet up to my wall, and realized a critical truth: walls are not flat, square, or emotionally supportive.
They are, at best, politely crooked. My “simple” accent area had an outlet, a vent, and a corner that looked 90 degrees
only if you squinted and believed in miracles.
Here’s what saved the project: I stopped trying to make it perfect and started trying to make it consistently good.
That’s the secret sauce. A shiplap wall doesn’t need museum-level precision; it needs even spacing, straight rows, and clean paint.
I used a spacer for every single plank gapno eyeballing allowedbecause the moment you eyeball it, your gaps become a Jackson Pollock painting.
The second big lesson was pre-painting. I thought I could paint after installation to “save time.” This was adorable.
Painting between narrow gaps after the wall is up is like trying to floss a tiger. Pre-painting the planks meant I only had to do touch-ups,
and the finished wall looked crisp instead of “I fought drywall dust and lost.”
Third lesson: don’t underestimate sanding. The plywood edges looked fine in the store, but once ripped into planks, they had that fuzzy,
splintery vibe that screams “discount lumber.” A quick sand on the edges made the planks feel finished. And when the edges feel finished,
the whole wall reads higher-endeven if your budget is aggressively low.
I also learned to embrace “strategic trim.” I didn’t remove baseboards (because I value my free time and remaining sanity), so I ran the planks
above them and added a small trim piece where needed. It looked intentional, like a design choice, not a compromise. That’s another DIY secret:
if you commit confidently, people assume it was on purpose.
Finally, the under-$40 part: I stayed under budget because I treated paint, caulk, and filler as household staplesnot project expenses.
Leftover paint from a previous room saved me the biggest cost. I borrowed a brad nailer for an hour, which is the DIY version of borrowing a
friend’s fancy car for prom. And I planned my wall size around one sheet of plywood instead of trying to “make it work” on a bigger wall.
The result looked custom, photographed beautifully, and cost less than a dinner date that ends with, “So… we should do this again sometime,”
and then never does.
If you’re on the fence, start small. Do a 4’×8′ section. Learn the rhythm. Get the satisfaction of a finished wall in a weekend.
Then, if you love it, expand later. Shiplap is patient. Your budget is not.
Conclusion
A “Shiplap Wall for UNDER $40” is totally achievable when you design around the budget: pick a manageable accent area, use one-sheet faux planks
or sale-priced panels, and rely on simple finishing stepslevel lines, consistent gaps, filled holes, and clean paint. The end result is a wall
that looks custom, feels warm, and adds instant character without turning your bank account into a haunted house.


