Table of Contents >> Show >> Hide
- Quick Jump
- Step 1: Diagnose the Damage (Because “It’s Torn” Is a Whole Genre)
- Supplies You’ll Want Nearby
- Step 2: Clean and Prep Like a Pro (This Is Where Most DIY Repairs Win or Lose)
- Fix #1: How to Repair a Small Clean Tear (Edges Meet Nicely)
- Fix #2: How to Repair a Tear With a Gap or a Small Hole (Sub-Patch + Filler Method)
- Fix #3: How to Handle Split Seams and High-Stress Tears
- Color Matching Without Turning Your Couch Into a Patchwork Quilt
- Seal, Cure, and Condition (The “Make It Last” Part)
- When to Stop DIY and Call a Professional
- How to Prevent the Next Tear (Because You Deserve Nice Things)
- Frequently Asked Questions
- Real-World Experiences: What Actually Happens When People Repair a Leather Couch Tear (and What They Learn)
Your leather couch is supposed to be the grown-up, “I have my life together” piece of furniture. Then one day it catches a belt buckle, a zipper, a cat
decides it’s their personal climbing wall, or moving day turns into a wrestling match… and rip. The good news: many tears and small holes can be
repaired at home with a leather repair kit, a little patience, and the willingness to do a quick color-mixing audition like you’re competing on a tiny
paint-themed reality show.
This guide walks you through what to do (and what not to do) based on common repair methods used by DIYers and upholstery pros: cleaning and prep, backing
patches (sub-patches), flexible adhesive, leather filler, gentle sanding, color matching, sealing, and conditioningplus when it’s smarter to call a pro.
You’ll finish with a couch that looks normal again… not “freshly attacked by a mountain lion.”
Step 1: Diagnose the Damage (Because “It’s Torn” Is a Whole Genre)
Not all leather damage is created equal. Before you buy anything or start gluing like you’re assembling a spaceship, figure out what you’re dealing with:
1) Surface scratches (no open tear)
If the leather isn’t split, you might only need cleaning, gentle buffing, and conditioningor a light recolor. This is the “whew” category.
2) A clean cut or small tear (edges meet)
Think: a straight rip from a sharp edge where the two sides can be pushed together neatly. These often repair well with flexible adhesive, minimal filler,
and careful blending.
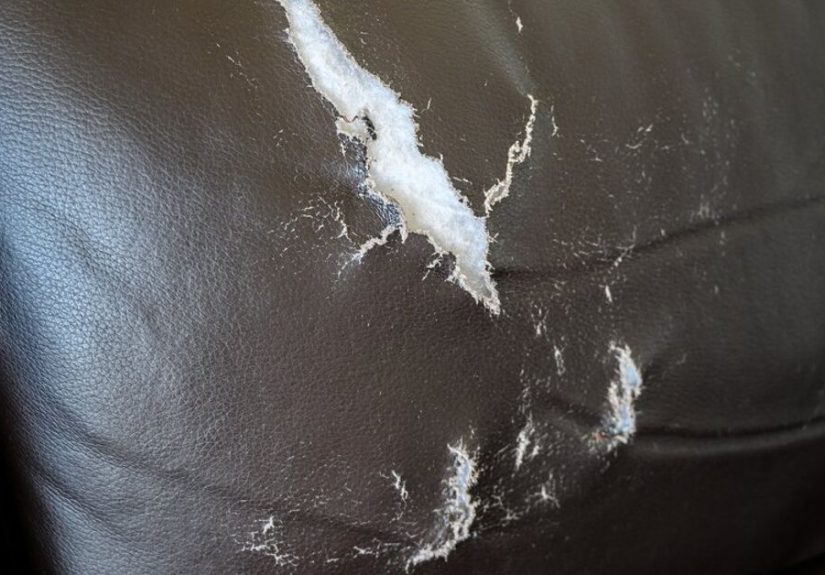
3) A tear with a gap or a small hole (material missing or stretched)
If you can see a gap, the repair needs support underneath (a sub-patch/backing) and usually filler to level the surface.
4) A split seam
Seams fail because of stress and tension. Sometimes you can reinforce from behind, but many seam splits need stitching or professional help to hold up long-term.
5) Faux leather (PU/vinyl) that’s peeling
Peeling faux leather is its own beast. Repair kits can help with small tears, but widespread peeling usually needs patching, slipcovers, or replacement panels.
Still, you can often make a single tear look much better.
Safety note: If you’re under 18, ask an adult to help with sharp scissors/knives, strong adhesives, and sandingnone of this is hard, but
it’s very easy to “oops” your way into a finger bandage.
Supplies You’ll Want Nearby
You can absolutely fix many leather couch tears using a decent leather/vinyl repair kit. Many kits include filler and color pigments, which is ideal for furniture
repairs where matching matters.
- Leather cleaner (or a mild soap solution if recommended for your leather type)
- Lint-free cloths (microfiber is your friend)
- Tweezers (for placing sub-patches without losing your mind)
- Sharp scissors (to trim frayed edges)
- Sub-patch/backing cloth (often included; otherwise thin fabric/mesh made for repairs)
- Flexible leather/vinyl adhesive (preferably from a kit)
- Leather filler/compound (for gaps and holes)
- Applicator (palette knife, small spatula, or craft stick)
- Fine sandpaper (very fine gritsthink “polite sanding,” not “deck refinishing”)
- Leather colorant/dye (or the pigment mixes included in many kits)
- Finish/sealer (sometimes included) and leather conditioner
- Gloves and good ventilation (adhesives can smell like they mean business)
Step 2: Clean and Prep Like a Pro (This Is Where Most DIY Repairs Win or Lose)
Repairs fail for two reasons: (1) the area wasn’t cleaned, so adhesive and filler don’t bond well, and (2) the repair was rushed, so layers didn’t cure.
Prep is the unglamorous hero.
Clean gently, then let it dry
- Dust and wipe the area with a soft cloth. You want dirt and body oils gone so the repair products can stick.
-
Use a leather cleaner or a mild cleaning approach recommended for leather furniture. Avoid soaking the leatherthink “slightly damp,” not
“rainstorm reenactment.” - Dry completely. Give it time. Adhesive + moisture = a repair that pops back open when someone sits down dramatically.
Trim only what’s necessary
If you have frayed edges or loose fibers sticking out, trim them carefully so you can create a clean seam. Don’t enlarge the tear “to make it neat.” You’re
repairing a couch, not giving it a haircut.
Fix #1: How to Repair a Small Clean Tear (Edges Meet Nicely)
This is the best-case tear: the two sides line up and there’s minimal missing material. The goal is to bond the underside and close the cut without creating
a bulky ridge on top.
Step-by-step
- Test products in a hidden area. Leather finishes vary, and testing prevents “surprise glossy patch” syndrome.
- Gently lift the tear enough to apply adhesive beneath the edgeswithout stretching the leather.
-
Apply a small amount of flexible adhesive to the underside of the tear edges (or to a tiny backing strip if your kit recommends it).
Use a toothpick or applicator for control. - Press the edges together and hold them aligned. Some kits suggest using gentle pressure until tacky.
- Wipe any squeeze-out immediately with a clean cloth (barely damp if needed). Do not smear glue across the grain.
- Let it cure according to product directions. This is not the time to “just sit gently.” Leather has no concept of gentle.
Optional: a whisper-thin filler layer
If the seam line is visible or slightly uneven, apply a very thin layer of leather filler over the join, let it dry, and gently smooth it with fine sandpaper.
Multiple thin layers beat one thick blob every time.
Fix #2: How to Repair a Tear With a Gap or a Small Hole (Sub-Patch + Filler Method)
If your tear has a gap, your repair needs structurelike putting a tiny “bridge” underneath the leather so the top surface has something to grab onto. This is
where a sub-patch (backing cloth/mesh) earns its paycheck.
Step-by-step
- Cut a sub-patch slightly larger than the tear in all directions. You want enough overlap so adhesive can bond securely.
- Slide the patch underneath the tear using tweezers. Flatten it so there are no wrinkles. (Wrinkles become permanent bumpsask any couch.)
-
Glue the sub-patch in place by applying adhesive under the leather edges so the leather bonds to the backing. Work in small sections to keep
alignment. - Let the adhesive set per instructions before moving to filler. If the patch isn’t stable, filler will crack when flexed.
- Apply leather filler in thin coats over the gap. Use the applicator to feather edges outward so the repair blends smoothly.
- Dry between coats. Add another thin layer until the surface is level with surrounding leather.
- Lightly sand with fine grit to smooth (not to remove half the couch). Wipe away dust.
- Add colorant/dye in thin layers, allowing each layer to dry before the next. Build up slowly until the repair matches.
Pro tip: many successful repairs use a stippled texture (light dabbing with a sponge) for the final color layer so the surface doesn’t look
“painted on.” Leather has textureyour repair should, too.
Fix #3: How to Handle Split Seams and High-Stress Tears
If the tear is along a seam, or on an edge that gets constant pulling (armrests and seat fronts are frequent offenders), the repair has to handle tension and
flexing. Cosmetic fixes alone may look good for a weekand then reopen the moment someone plops down with popcorn and confidence.
What you can do at home
-
Reinforce from behind: If you can access the underside (sometimes by unzipping a cushion cover or carefully opening a lining), you may be able
to place a backing patch behind the seam area for support. - Use flexible products: Rigid glues can crack when leather flexes. Furniture moves; your repair needs to move with it.
- Minimize bulk: Thick filler at a seam can create a stiff ridge that fails faster.
When seams need a pro
If the seam stitching is broken across a long stretch, or the leather has pulled away from the seam allowance, an upholsterer can restitch and reinforce properly.
That repair often lasts longer than a surface-level DIY patch.
Color Matching Without Turning Your Couch Into a Patchwork Quilt
Color matching is where DIY repairs go from “wow” to “why does my couch have a tan bandaid?”so go slow.
Smart color-matching rules
- Match undertone first (warm vs. cool) before chasing exact darkness.
- Mix tiny amounts and test on a hidden spot or scrap backing material.
- Apply in thin layerscolor deepens as it builds.
- Account for finish: matte vs. satin vs. glossy changes how the color reads.
Also: be cautious with internet “hacks” like random household oils. Some sources note that oils can discolor leather or create new stainsmeaning you’ll end up
“repairing” your repair.
Seal, Cure, and Condition (The “Make It Last” Part)
Once the repair looks good, you want it to stay good.
1) Seal the repair if your kit includes a finish
A finish/sealer helps protect dye and filler from rubbing off and helps blend sheen. Apply lightly and evenly so the repaired spot matches the surrounding leather.
2) Let everything cure
Dry-to-the-touch isn’t the same as cured. Give the repair time before heavy use. If you’re in a hurry, you can often speed drying between thin layers with gentle
airflowjust don’t overheat the leather.
3) Condition the whole cushion section
Conditioning can restore suppleness and help blend minor marks, but it can also slightly darken some leathersso test first. Many care guides recommend conditioning
the larger area (not just the exact spot) so you don’t create a darker “halo” around the repair.
When to Stop DIY and Call a Professional
DIY is great, but some situations are basically leather’s way of saying, “I’d like to speak with a manager.”
- Large missing sections (big holes or shredded panels)
- Long seam failures where stitching and structure are compromised
- Aniline or highly absorbent leathers where color and finish are easy to mess up
- Antique or sentimental pieces where a wrong product choice could permanently change the look
- Repeating failures (the tear keeps reopeningusually a tension or structure issue)
A pro can often re-panel, re-dye, or restitch in a way that blends better and lasts longerespecially on high-use family-room sofas.
How to Prevent the Next Tear (Because You Deserve Nice Things)
- Condition periodically to keep leather from drying out and cracking. Many furniture care guides suggest a simple routine a couple times a year.
- Keep it out of harsh sun and away from heat sources to reduce drying and fading.
- Trim pet nails and consider throws on favorite “launch pads.”
- Clean spills quickly and avoid harsh cleaners that strip finish.
- Don’t use rough paper products that can dry or scuff leatheruse soft cloths instead.
Frequently Asked Questions
Can I repair a leather couch tear without a kit?
For tiny, clean cuts, you might get by with a flexible leather adhesive and careful alignment. But for gaps/holes, a kit is usually worth it because it includes
filler and pigmentsthose are what make the repair blend in.
Is faux leather repaired the same way?
Small tears in vinyl/PU can be repaired similarly with a vinyl/leather kit, but peeling faux leather is harder to “restore” because the top layer is breaking down.
In those cases, patching or covering tends to hold up better than trying to repaint large peeling areas.
Why does my repair feel stiff?
Usually it’s too much filler, not enough cure time, or a product that dries rigid. Leather furniture flexesthin layers and flexible materials help the repair move
with the couch.
What if the color match is slightly off?
Slight mismatches are often less noticeable once you seal and condition, especially if you blended outward and matched the sheen. If it’s clearly off, add thin tint
layers and re-test until you’re close.
Real-World Experiences: What Actually Happens When People Repair a Leather Couch Tear (and What They Learn)
The internet makes leather repair look like a five-minute miracle: dab, wipe, done, couch reborn. In real life, most “success stories” have a few plot twistsusually
involving color matching, drying time, and the moment someone forgets the repair is wet and sits down anyway. Here are the most common experiences DIYers run into,
plus the lessons that turn a “meh” patch into a repair you can live with.
Experience #1: The repair looks perfect… until it dries. Fresh filler and colorant can look slightly lighter or darker while wet, and it’s tempting to
keep adjusting. Then it dries and you’ve accidentally created a little “bullseye” of overworked product. The fix is surprisingly boring: apply thinner coats, let
them dry fully, and evaluate in normal room lighting. Many people also find that matching sheen is as important as matching colorif your couch is matte but
your repair is shiny, it’ll wave hello from across the room.
Experience #2: The patch bumps up like a tiny speed bump. This happens when the sub-patch wrinkles or shifts, or when filler is applied too thickly
in one go. The lesson: use tweezers, flatten the backing carefully, and treat filler like pancake batterthin, even, and in layers. If a bump forms, very gentle
sanding once fully dry can help, but sanding too aggressively can damage surrounding finish and make a bigger blended area necessary.
Experience #3: “Why is the tear reopening?” This is common on seat fronts and armrests where the leather gets pulled every time someone sits down or
uses the armrest as a lever. DIY repairs work best when they’re supported from behind and allowed to cure properly. People who rush the cure time often end up doing
the repair twice. If it keeps reopening, it may not be a “you” problemit may be a structural tension issue that needs reinforcement or professional stitching.
Experience #4: The couch was not actually leather. This one is more common than anyone wants to admit. Some “leather-like” furniture is bonded leather,
PU, or vinyl, and it behaves differentlyespecially if it’s peeling. DIYers who get better results usually start by identifying what they have, then choosing products
that work for that material. With faux leather, many learn to aim for “less noticeable” rather than “factory new,” because the surface layer may keep breaking down.
Experience #5: The repair workedand suddenly everyone is a couch inspector. You may notice the repair more than anyone else. Most visitors will not
crouch down and stare at your sofa like it’s an art exhibit. DIYers often report that once the area is sealed and the whole cushion section is conditioned, the repair
blends better than expected. And even when it’s not invisible, it’s usually a massive improvement over a flapping tear that keeps growing.
The biggest takeaway people share? The win isn’t “perfect.” The win is “stable, smooth, and close enough that you stop thinking about it.” If you get that, your sofa
is officially savedand you can go back to using it for its true purpose: sitting, napping, and pretending you’re not going to eat snacks on it.


