Table of Contents >> Show >> Hide
- Why Upstairs Bathrooms Are Extra Tricky
- Start with Investigation Before Decoration
- Ventilation: The Bathroom’s Unsung Hero
- Waterproofing Comes Before Tile
- Choose Materials That Can Handle Humidity
- Design the Bathroom to Dry Faster
- Plumbing Details That Prevent Future Damage
- Lighting, Storage, and Character
- Budgeting for the Unseen Work
- Cleaning and Maintenance After the Remodel
- When to Call a Professional
- Experience Notes: What This Remodel Teaches You
- Conclusion
Note: This article is prepared for web publishing in clean HTML body format, with SEO metadata placed at the end as requested.
Every bathroom remodel has a moment when the project stops being about tile, faucets, and paint colors and starts testing your soul. In an upstairs bathroom, that moment usually arrives when you discover moisture where moisture has absolutely no business being. A soft patch near the tub. A suspicious shadow behind the vanity. A ceiling stain below that seems to whisper, “Surprise, I have been here longer than your patience.”
Welcome to Mold your Character; Upstairs Bathroom Remodel; Part 7, the chapter where the bathroom teaches humility. Remodeling an upstairs bathroom is not just a home improvement project; it is a personality audit conducted with a pry bar, a flashlight, and a damp sponge. You learn whether you are patient, detail-oriented, flexible, and capable of making three trips to the hardware store without declaring war on plumbing.
Mold prevention is one of the least glamorous parts of a bathroom renovation, but it is also one of the most important. A beautiful bathroom can fail quickly if moisture is trapped behind walls, under flooring, or around poorly sealed fixtures. The goal is not simply to remove what looks bad today. The goal is to build a bathroom that dries properly, ventilates correctly, sheds water intelligently, and stays healthy for years.
Why Upstairs Bathrooms Are Extra Tricky
An upstairs bathroom has all the usual moisture problems of a bathroom, plus one very dramatic bonus: gravity. If a leak develops upstairs, the evidence may appear downstairs as bubbling paint, stained drywall, warped trim, or a ceiling that suddenly develops “character” no designer asked for.
Unlike a powder room, an upstairs full bathroom usually handles daily showers, wet towels, steam, splashes, and sometimes kids who believe the shower curtain is more of a suggestion than a rule. That means the remodel must focus on waterproofing, ventilation, drainage, and durable materialsnot just the pretty finishes that photograph well.
The Three Enemies: Moisture, Poor Airflow, and Time
Mold does not need a luxury invitation. It needs moisture, organic material, and enough time. Bathrooms provide all three if they are poorly designed. Drywall paper, wood framing, dust, caulk residue, and even soap film can support growth when humidity remains high or water keeps returning to the same hidden area.
That is why the smartest upstairs bathroom remodel begins with a simple question: “How will this room dry?” If the answer is vague, the bathroom is not ready for tile yet. A room that dries well is a room that forgives daily use. A room that stays damp becomes a very expensive science experiment.
Start with Investigation Before Decoration
Before choosing the vanity, debating brushed nickel versus matte black, or falling in love with a tile that costs more per square foot than lunch, inspect the bathroom carefully. Look for peeling paint, loose tiles, soft subflooring, swollen baseboards, musty smells, cracked grout, stained caulk, and discoloration around the toilet, tub, and shower.
In an upstairs bathroom remodel, it is especially important to check the ceiling below the bathroom. A tiny leak around a toilet flange or tub drain can create damage long before water visibly drips. If the downstairs ceiling shows staining, do not simply paint over it and move on. Paint is not a repair; it is a polite cover-up.
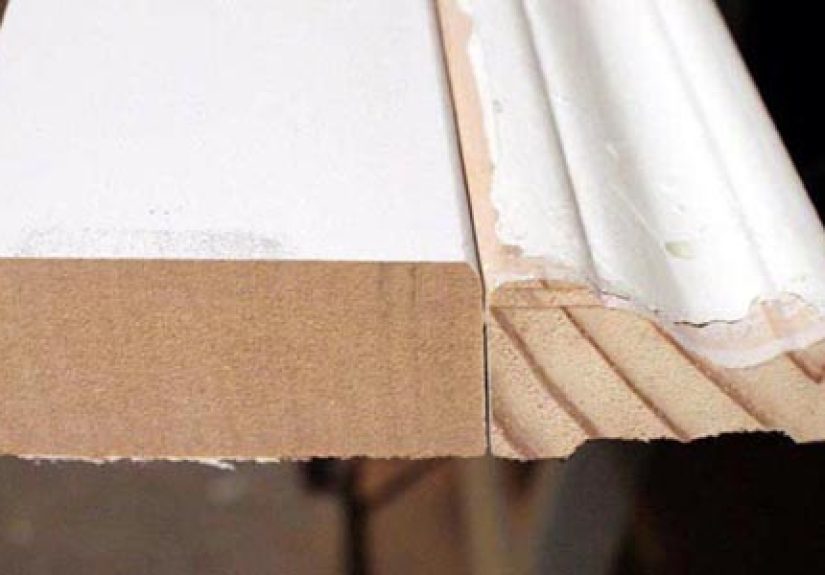
What to Check During Demolition
Once demolition begins, the bathroom starts telling the truth. Old flooring may reveal water damage around the toilet. A removed vanity may expose staining behind plumbing lines. Tub surrounds may hide failed caulk, wet drywall, or moldy insulation. This is the stage where patience matters most.
If you find a small area of surface mold, the next step is not panic. The next step is identifying the moisture source. Was it a leak? Poor ventilation? Failed caulk? Condensation? Splashing? Until the source is corrected, cleaning alone is like mopping during a rainstorm while complimenting yourself on effort.
Ventilation: The Bathroom’s Unsung Hero
A bathroom exhaust fan is not optional decoration. It is the lungs of the room. A properly sized fan removes humid air, helps surfaces dry faster, reduces condensation, and protects paint, cabinetry, drywall, and framing. In many bathrooms, especially enclosed upstairs baths, an open window is not enough.
For a small bathroom, a 50 CFM fan is often considered a minimum baseline. Larger bathrooms typically need more capacity, and a common sizing approach is roughly one CFM per square foot. For example, a 70-square-foot bathroom often calls for about a 70 CFM fan. Bathrooms with separate toilet rooms, large showers, soaking tubs, or long duct runs may need additional planning.
Choose the Right Fan Features
Modern bathroom fans can include humidity sensors, timers, motion sensors, quiet motors, lights, and energy-efficient designs. A timer switch is one of the best upgrades because most people turn the fan off too soon. Steam may disappear from the mirror quickly, but moisture remains on walls, ceilings, towels, grout lines, and trim.
A quiet fan is also worth the investment. If a fan sounds like a small aircraft preparing for takeoff, people will avoid using it. Look for lower sone ratings when possible. The best bathroom fan is not only powerful enough; it is pleasant enough that the household actually uses it.
Vent Outdoors, Not Into the Attic
The fan must vent outdoors. Sending moist bathroom air into an attic, wall cavity, or soffit area can move the mold problem instead of solving it. Use smooth, properly sized ducting with the shortest practical route. Insulate ducts in cold areas when needed to reduce condensation. Check that the exterior termination has a damper and is not blocked by lint, debris, insects, or the mysterious dust of homeownership.
Waterproofing Comes Before Tile
Tile is beautiful, but tile is not waterproof by itself. Grout lines, corners, penetrations, and transitions need a proper waterproofing system behind or beneath the finished surface. A shower wall should be built like it expects water every daybecause it does.
Common waterproofing approaches include waterproof wall boards, sheet membranes, liquid-applied membranes, properly sloped shower pans, sealed seams, and compatible drain assemblies. The exact system matters less than installing one complete system correctly. Mixing random products without following manufacturer instructions is how “DIY confidence” becomes “professional repair invoice.”
Protect the Subfloor
In an upstairs bathroom, the subfloor deserves special attention. Around the toilet, tub, shower, and vanity, inspect for stains, softness, delamination, or odor. Damaged subflooring should be repaired before new flooring goes down. If the floor flexes, tile and grout may crack later, allowing water into places where it can quietly cause trouble.
For tile floors, a suitable underlayment or uncoupling membrane can help create a stable surface. Around fixtures, seal penetrations carefully. At the toilet, install the flange at the correct height for the finished floor and use a proper wax ring or wax-free seal. A toilet leak is often slow, sneaky, and deeply committed to ruining your week.
Choose Materials That Can Handle Humidity
Bathrooms are not ordinary rooms. They are steam rooms with toothbrushes. Materials must be chosen for moisture resistance, cleanability, and durability.
Walls and Ceilings
Use bathroom-rated paint with a durable finish. Satin or semi-gloss finishes are often easier to clean and more resistant to moisture than flat paint. In high-splash areas, use tile, waterproof panels, or other moisture-resistant surfaces. Standard drywall may be acceptable in dry bathroom zones, but wet zones require products designed for wet environments.
Flooring
Porcelain tile, ceramic tile, luxury vinyl plank designed for bathrooms, and properly sealed natural stone are common choices. Avoid carpet in bathrooms. Carpet in a bathroom is basically a sponge with ambition. If you want softness, use washable bath mats that can be dried and cleaned regularly.
Cabinetry and Trim
Vanities should tolerate humidity and occasional splashes. Painted wood, plywood boxes, PVC trim, and moisture-resistant materials often perform better than low-quality particleboard in damp spaces. Caulk gaps where appropriate, but do not rely on caulk to compensate for poor installation. Caulk is a sealant, not a structural life coach.
Design the Bathroom to Dry Faster
Good bathroom design reduces standing water. That means proper shower slope, good drainage, smart storage, and fewer hidden ledges where water can sit. Frameless glass may be easier to squeegee than heavy framed doors with tracks. Niches should be sloped slightly toward the shower. Tub decks, window stools, and ledges should not collect water.
Small habits also matter. After showers, open the shower door or curtain, run the fan, hang towels so they can dry, and use a squeegee on glass or tile. These habits may sound tiny, but bathroom maintenance is mostly a war against tiny droplets that form alliances.
Plumbing Details That Prevent Future Damage
An upstairs bathroom remodel is a good time to inspect supply lines, shutoff valves, drain assemblies, toilet flanges, and venting. Replace corroded valves and old flexible connectors. Make sure drains flow well and traps are properly installed. Confirm that the tub or shower drain is accessible if possible.
If the layout changes, bring in a licensed plumber where required. Moving drains, changing venting, or relocating a toilet can affect code compliance and performance. A bathroom may look simple from above, but below the floor it is a small city of pipes with strong opinions.
Test Before Closing Walls
Before drywall, tile backer, or flooring hides the work, test plumbing connections. Run water. Fill and drain the tub. Flush the toilet. Check shutoffs. Look below if you can. Use your eyes, hands, and patience. A leak found before the wall closes is an inconvenience. A leak found after the remodel is complete is a plot twist.
Lighting, Storage, and Character
The phrase “mold your character” is more than a clever title. A remodel shapes the homeowner as much as the home. You learn to plan before buying, measure before cutting, and breathe before reacting. You learn that good design is not just what guests see; it is what prevents future problems when nobody is looking.
Lighting helps the bathroom feel finished and function well. Use layered lighting: overhead lighting for general brightness, vanity lighting for grooming, and shower-rated lighting where appropriate. Good lighting also helps you spot cleaning issues, failing caulk, or early signs of moisture.
Storage matters too. A cluttered shower holds moisture around bottles, loofahs, razors, and soap dishes. Built-in niches, wall shelves, medicine cabinets, and vanity drawers can reduce wet clutter and help surfaces dry. The cleaner the layout, the easier the maintenance.
Budgeting for the Unseen Work
Bathroom remodel budgets often focus on finishes: tile, vanity, faucets, mirrors, lights, and hardware. But the unseen work is what protects the investment. Ventilation, waterproofing, subfloor repair, plumbing updates, electrical safety, and proper prep may not be glamorous, but they are the bones of a durable bathroom.
Costs vary widely depending on bathroom size, location, labor rates, material choices, and whether the layout changes. Keeping plumbing in the same location can often save money. Splurging on a beautiful faucet while ignoring a weak subfloor is like wearing a tuxedo with wet socks: technically dressed up, but something is wrong.
Where to Spend Wisely
Spend on waterproofing, ventilation, skilled labor for plumbing and electrical work, quality underlayment, durable flooring, and reliable fixtures. Save on accessories, mirrors, shelving, and decorative hardware if needed. You can upgrade a towel hook later. Rebuilding a failed shower pan is not nearly as cute.
Cleaning and Maintenance After the Remodel
A remodeled bathroom still needs maintenance. Keep humidity controlled. Run the fan during and after showers. Repair leaks quickly. Clean grout and caulk lines. Replace failed caulk before water gets behind it. Wash bath mats and towels regularly. Keep the shower area free of bottles that trap water underneath.
Use a humidity monitor if the bathroom feels damp long after showers. If the room stays humid, the fan may be undersized, poorly ducted, blocked, or not running long enough. Prevention is almost always cheaper than repair.
When to Call a Professional
DIY work can be satisfying, but some problems deserve professional help. Call a qualified contractor, plumber, electrician, or mold remediation specialist if you find widespread mold, structural damage, recurring leaks, electrical hazards, or moisture problems you cannot trace.
For larger mold problems, containment and proper removal matter. Disturbing contaminated materials without a plan can spread spores and dust. The goal is not to be fearless. The goal is to be smart enough to know when the bathroom is above your pay grade.
Experience Notes: What This Remodel Teaches You
Every upstairs bathroom remodel creates a few stories. Some are satisfying, some are expensive, and some begin with the phrase, “That probably isn’t a big deal,” which is how many big deals introduce themselves.
The first experience many homeowners have is learning that demolition is not destruction; it is discovery. Removing old tile, trim, or flooring can feel exciting at first. Then you find the stain behind the baseboard or the soft ring around the toilet. That is the moment character enters the room wearing dusty shoes. The best reaction is not frustration. It is curiosity. Why is this wet? Where did the moisture come from? Is the leak active? Has the damage stopped? Those questions turn panic into a plan.
Another lesson is that shortcuts have excellent memory. A sloppy bead of caulk, an unsealed corner, a fan duct that ends in the attic, or a shower niche without slope may not fail immediately. It waits. Then, months or years later, it becomes a problem with interest. Remodeling teaches that the work behind the wall matters more than the photo at the end. A bathroom can be trendy and still be technically weak. Character is choosing the boring correct step when nobody will see it.
There is also the experience of decision fatigue. By Part 7 of a remodel, choosing grout color can feel like a Supreme Court case. White grout looks fresh but may show stains. Gray grout hides more but changes the mood. Large-format tile means fewer grout lines but demands flatter walls and floors. A rainfall showerhead sounds luxurious until you realize water pressure, ceiling height, and splash control matter. Each decision connects to another decision. The cure is to return to priorities: dry, safe, durable, easy to clean, then beautiful.
One of the most useful habits is building a “before closing” checklist. Before covering walls or floors, take photos of plumbing lines, electrical runs, blocking, waterproofing layers, and repaired framing. Label shutoff locations. Test the fan with tissue at the grille. Run water and inspect below. These small steps can save future you from guessing where pipes are hidden. Future you is already busy; be kind to that person.
Finally, an upstairs bathroom remodel teaches respect for maintenance. The project does not end when the mirror goes up. It continues every time someone runs the fan, hangs a towel properly, wipes the shower ledge, or fixes a drip quickly. A bathroom stays healthy through design and habits working together. That is the real character part. You are not just molding a room. You are molding routines that protect the room.
And yes, there will be dust. There will be at least one missing screw. Someone will ask, “Are we almost done?” at the exact moment you are not emotionally prepared to answer. But when the bathroom is finished, dry, bright, well-ventilated, and built to last, the struggle becomes part of the story. The room looks better, the house works better, and you become the kind of person who knows where the shutoff valve is. That is growth.
Conclusion
Mold your Character; Upstairs Bathroom Remodel; Part 7 is really about building a bathroom with discipline. Mold prevention starts with moisture control, but long-term success comes from planning, ventilation, waterproofing, durable materials, and daily habits. In an upstairs bathroom, every detail matters because mistakes do not stay politely contained upstairs. They travel downward, stain ceilings, and become family legends.
The best remodels are not just attractive; they are resilient. Choose a properly sized exhaust fan, vent it outdoors, waterproof wet areas correctly, repair damaged subfloors, select moisture-friendly materials, and test plumbing before closing walls. Then maintain the space with simple routines that keep water from lingering. That is how a bathroom remodel becomes more than a makeover. It becomes a lesson in patience, quality, and doing the hidden work right.