Table of Contents >> Show >> Hide
- What a “Pulled Hamstring” Actually Means
- Immediate Care: The First 10 Minutes to 72 Hours
- When to See a Clinician (and When to Stop Self-Diagnosing)
- Recovery Roadmap: A Smarter Timeline (Not a Magic Date)
- Rehab Exercises That Commonly Help (With Safety Notes)
- Return-to-Activity Checklist: How to Know You’re Actually Ready
- How to Prevent a Repeat Offense
- Conclusion
- Real-World Experiences: What Recovery Often Feels Like (And What People Learn the Hard Way)
A pulled hamstring is the kind of injury that shows up uninvited, ruins your plans, and then has the nerve to ask you to “take it easy” for weeks. Whether you did it sprinting like a superhero or simply bending down like a normal human who forgot gravity exists, the good news is: most hamstring strains heal well with smart immediate care and a step-by-step rehab plan.
This guide covers what to do in the first minutes, what to do in the first days, and how to rebuild strength so you don’t re-pull it the moment you feel “kinda fine.” (That “kinda fine” feeling is the hamstring’s favorite trap.) This article is for educationnot a substitute for medical care.
What a “Pulled Hamstring” Actually Means
Your hamstrings are three muscles on the back of your thigh that help bend your knee and extend your hip. A “pulled hamstring” usually means a strain: the muscle fibers (or the tendon where muscle meets bone) were overstretched and partially torn. In more severe cases, the muscle or tendon can tear significantlyor even pull off the bone (avulsion).
Hamstring strain grades (and what they tend to feel like)
- Grade 1 (mild): Tightness, soreness, maybe a sharp twinge; you can usually walk, but you’ll feel it.
- Grade 2 (moderate): More pain, swelling, weakness, and you may limp; stretching and bending the knee can hurt.
- Grade 3 (severe): Significant tear or complete rupture; you might feel a “pop,” develop bruising, and struggle to bear weight.
Severity matters because hamstring strain recovery time can range from days to months. The trick is treating the injury you actually havenot the one your optimism wishes you had.
Immediate Care: The First 10 Minutes to 72 Hours
Your mission in the early phase is simple: calm pain, limit swelling/bleeding, and protect the tissue without turning your leg into a decorative lamp.
Traditional advice is RICE (Rest, Ice, Compression, Elevation). Many clinicians now emphasize a modern twist: Protection + Optimal Loadingmeaning you rest from the aggravating activity, but you keep gentle, pain-limited movement so you don’t stiffen up unnecessarily.
The “do-this-now” checklist
- Stop the activity. Yes, even if you’re “almost done.” Hamstrings don’t care about your mile split.
- Protect it. Walk carefully. If you’re limping hard, consider crutches for a day or two.
- Ice it. Cold pack 15–20 minutes at a time, several times per day for the first couple days (use a cloth barrier).
- Compress it. Elastic wrap or compression shorts can help limit swelling and provide support.
- Elevate it. When resting, elevate the leg when possible (above heart level is the classic idea).
Ice, compression, elevation: how to do it without making things worse
Ice: Think “short and frequent,” not “freeze it like a popsicle.” Keep sessions around 15–20 minutes. If your skin turns white or numb for a long time, you’re overdoing it.
Compression: Snug is good; numb toes are not. If your foot tingles, gets cold, or changes color, loosen the wrap.
Elevation: This is easiest when you’re already horizontal binge-watching something. Pillows under the calf can workjust avoid forcing a painful stretch in the hamstring.
Pain relief: what’s reasonable
Over-the-counter pain meds can help you stay comfortable enough to move normally. Many people use acetaminophen or NSAIDs (like ibuprofen) if they’re safe for them. If you have kidney disease, ulcers, take blood thinners, are pregnant, or have other medical issues, check with a clinician or pharmacist first. Pain relief should make you functionalnot fearless.
What NOT to do in the first couple days (your hamstring will thank you)
- Don’t aggressively stretch it. Early, forceful stretching can irritate healing fibers.
- Don’t “run it off.” This is not a cramp with feelings; it’s damaged tissue.
- Don’t apply deep heat right away. Heat too early may increase swelling. Save heat for later phases when stiffness is the main issue.
- Don’t massage hard over fresh pain/bruising. Gentle touch is fine; deep pressure early can aggravate bleeding.
When to See a Clinician (and When to Stop Self-Diagnosing)
Mild strains often improve with home care. But some symptoms suggest a more serious tear or another problem that needs evaluation.
Get medical care soon if you have any of these red flags
- You can’t bear weight or you can’t walk more than a few steps without significant pain.
- You felt a pop and now have major weakness, bruising, or a visible “dent” in the muscle.
- Severe bruising/swelling that spreads rapidly (especially toward the knee or up near the buttock).
- Symptoms that worsen instead of improving over several days.
- Numbness, tingling, or weakness below the knee (could suggest nerve involvement).
What an evaluation might include
Clinicians usually diagnose hamstring injuries with a physical examchecking tenderness, strength, range of motion, and functional movement. If a significant tear, tendon injury, or avulsion is suspected, imaging like MRI or ultrasound may be used. The goal is to confirm what’s injured and guide the right rehab intensity.
Recovery Roadmap: A Smarter Timeline (Not a Magic Date)
Recovery isn’t just “wait until it doesn’t hurt.” Hamstrings have a famously high re-injury rate when people rush back. The best approach is phase-based rehab that progresses based on symptoms and function.
Phase 1: Calm it down, keep it moving (days 1–7-ish)
Goals: reduce pain, normalize walking, maintain gentle mobility, and start low-load activation without sharp pain.
- Walk with a short stride if needed (long strides stretch the hamstring more).
- Pain-limited range of motion: gentle knee bends, easy hip movements.
- Isometrics (muscle contraction without movement): light hamstring “sets” where you gently press your heel into the floor while lying down.
- Glute and core work: bridges (if tolerated), side-lying hip exercises, and basic trunk stability help reduce strain on the hamstring later.
Rule of thumb: discomfort is okay; sharp pain is a “nope.” If exercise makes you more stiff or painful the next day, scale back.
Phase 2: Rebuild strength and control (week 1–4+ depending on grade)
Goals: restore strength, improve tolerance to load, and gradually reintroduce lengthening contractions (eccentrics) in a controlled way.
- Bridges (double-leg → single-leg as tolerated)
- Hamstring curls (band or machine, light-to-moderate load)
- Hip hinge patterns (Romanian deadlift with very light weight, focusing on form)
- “Sliders” (heels on a towel or sliders, extending legs slowly and pulling back)
- Gentle mobility as stiffness decreases (progressive, never forced)
This is also when many people benefit from a physical therapistespecially for moderate/severe strainsbecause the right progression is everything.
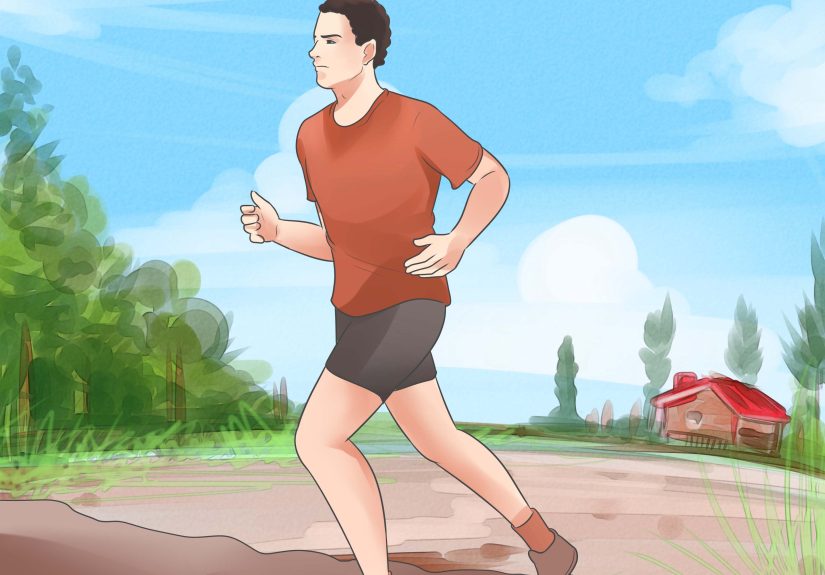
Phase 3: Return to running, sprinting, and sport (weeks 3–12+)
Goals: handle fast lengthening (the thing that caused the injury), regain speed, and rebuild confidence without your hamstring filing a complaint.
- Progressive running: walk/jog intervals → steady easy runs → strides → faster intervals
- Agility drills for cutting sports (start low intensity)
- Sport-specific work: gradual reintroduction of acceleration/deceleration
- Eccentric strengthening at longer muscle lengths (a key component in many rehab programs)
Rehab Exercises That Commonly Help (With Safety Notes)
Below are rehab staples often used in hamstring strain treatment. The right choice depends on your pain level and stage of healing. If you’re unsure, a PT can tailor these to your injury.
Early-stage (when pain is still noticeable)
- Hamstring isometrics: Lie down, knee bent, gently dig heel into the floor for 10–30 seconds.
- Bridge holds: Lift hips, hold briefly, keep it pain-limited.
- Heel slides: Slowly slide heel toward your butt and back, staying comfortable.
Mid-stage (strength building)
- Single-leg bridge (progression): Only when double-leg is easy and pain-free.
- Hamstring curls: Controlled reps; stop before form breaks.
- RDL patterning: Light weight, slow tempo, hip hinge technique.
- Hamstring sliders: Excellent for controlled eccentric loading.
Late-stage (return-to-sport strength and resilience)
- Nordic hamstring exercise: A popular eccentric strength drillhigh payoff, but don’t jump into it too soon.
- Single-leg RDL: Builds hip control, balance, and posterior-chain strength.
- Fast-but-controlled drills: Strides, gradual sprint progressions, and deceleration practice.
Return-to-Activity Checklist: How to Know You’re Actually Ready
A pulled hamstring often feels “fine” before it’s truly ready for high speed. Use criteria instead of vibes.
- Walking is normal with no limp and no next-day flare-up.
- Full range of motion compared to the uninjured side (or close) without sharp pain.
- Strength is near-symmetrical (commonly within about 5–10% of the other leg for athletes).
- You can jog → run → sprint progressively without pain, fear, or compensations.
- Sport-specific tasks are clean: cutting, kicking, jumping, or acceleratingwhatever your sport requires.
If you’re unsure, a return-to-sport assessment can identify deficits you can’t “feel” but your hamstring will absolutely remember later.
How to Prevent a Repeat Offense
Hamstrings are repeat offenders mostly because people return to full speed with half the preparation. Prevention isn’t glamorous, but it’s cheaper than another injury.
Smart prevention habits
- Build eccentric strength (gradually): Nordics, sliders, and controlled RDLs.
- Don’t skip warm-ups: easy running, dynamic mobility, and progressive strides prime the tissue.
- Train the whole posterior chain: glutes, calves, and core help share the workload.
- Increase speed and volume progressively: sudden spikes in sprinting or hill work are classic triggers.
- Respect fatigue: many hamstring strains happen late in sessions when form falls apart.
Conclusion
Treating a pulled hamstring comes down to two things: calm it down early (protect, ice, compress, elevate, and avoid “hero stretching”) and then rebuild it thoughtfully with progressive loadingespecially eccentric strengthbefore you go full send again. If you can’t walk well, felt a pop, or bruising and weakness are significant, get evaluated. Otherwise, a careful rehab plan can get you back to running, lifting, and living without your hamstring acting like it’s in a melodrama.
Real-World Experiences: What Recovery Often Feels Like (And What People Learn the Hard Way)
People recovering from a hamstring strain often describe the experience as oddly confusingbecause the symptoms can change day to day. One common pattern is the “morning surprise.” You wake up thinking, “Nice, I’m better,” then take three steps and realize your hamstring has other plans. That’s usually stiffness, not failure. Gentle movement (within comfort) often helps it loosen up, which is why rehab programs frequently emphasize pain-limited motion instead of total stillness.
Another classic experience: the “I can walk, so I must be healed” assumption. A lot of people with mild-to-moderate strains can walk fairly normally within a few days. Then they try to sprint, jump, kick a ball, or take a big strideand the hamstring immediately reminds them that walking is not the same as high-speed lengthening. This is why return-to-running progressions exist. Easy jogging might feel okay while fast acceleration does not, because sprinting demands much higher force and a rapid eccentric contraction (your hamstring working hard while lengthening).
Office workers and frequent sitters often report a different annoyance: sitting can feel weirdly aggravating, especially if the injury is higher up near the buttock. Long car rides can become a game of “find the seat angle that doesn’t make me regret everything.” In these cases, people often do better when they break up sitting time, use a small cushion, and stay consistent with gentle mobility and strengthening rather than trying one epic stretch session after a long day. Consistency beats intensity here.
Athletes commonly talk about a mental battle as much as a physical one. Even when pain is mostly gone, there can be a lingering “don’t tear again” hesitation. That caution isn’t automatically badit can be useful feedback. The key is to pair it with objective progressions: gradually faster runs, controlled deceleration drills, and strength work that proves your hamstring can tolerate load. Confidence tends to return when your body gets repeated evidence that it’s safe.
Many people also learn (sometimes painfully) that hamstring rehab isn’t just “hamstring rehab.” When glutes are weak, when the core can’t stabilize well, or when hip control is shaky, the hamstring often takes on extra stress. Folks who commit to glute bridges, hip hinges, and single-leg stability work frequently say they come back not just healedbut moving better than before. Not because the hamstring injury was “a blessing” (let’s not get carried away), but because the rehab forced them to address neglected basics.
Finally, there’s the universal lesson: the hamstring loves a sequel. People who return too quickly often describe a re-pull as happening during something almost comically ordinarylike a casual pickup game, a “light” sprint to catch a bus, or a single enthusiastic step over a puddle. The fix is boring but effective: treat rehab like training, not like a temporary inconvenience. When you can walk, jog, run, and sprint without pain or next-day stiffnessand your strength is close to symmetricalyou’re not just “feeling better.” You’re genuinely ready.


