Table of Contents >> Show >> Hide
- Why Dollar Tree Placemats Are Secretly Decor Gold
- Pick the Right Placemat for the Right Project
- Prep Like a Pro (So It Doesn’t Scream “Craft Night”)
- Tools & Supplies You’ll Actually Use
- Five Stunning Placemat Transformations (Step-by-Step)
- Quick Placemat Upgrades (10 Minutes, Maximum Bragging Rights)
- Make It Look Expensive: 6 Styling Rules That Always Work
- Common Mistakes (And How to Avoid Them)
- Budget Breakdown (Example)
- Where These DIYs Look Best
- DIYers’ Real-World Experiences: What People Learn After Their First Placemat Makeover (Extra 500+ Words)
- Conclusion
Some people see a Dollar Tree placemat and think, “Nice… for a table.” DIYers see a Dollar Tree placemat and think, “Nice… for literally everything except a table.” And honestly? That second group is onto something. Placemats are big enough to look like “real décor,” textured enough to feel designer, and cheap enough that you can experiment without the emotional pain of ruining a $60 “artisan woven statement piece” (that you absolutely would have knocked off the wall with your tote bag anyway).
Whether you love boho basket walls, cozy farmhouse texture, modern monochrome, or coastal “I swear I’m relaxed” vibes, placemats can be turned into wall art, trays, mirror frames, tabletop centerpieces, and more. The trick is making them look intentionalnot “I hot-glued this during a commercial break.” (No judgment. We’ve all been there.)
This guide walks you through smart placemat picking, simple prep, and five high-impact transformations with specific stepsplus quick ideas, styling rules, and a longer “what DIYers learn the hard way” experience section so you can skip the mistakes and keep the glow-up.
Why Dollar Tree Placemats Are Secretly Decor Gold
- Instant texture: Woven, ribbed, quilted, bamboo, faux seagrasstexture reads “expensive” faster than almost anything.
- Great scale: Placemats are large enough to become wall décor without looking tiny or fussy.
- Easy shapes: Round placemats become “basket wall” look-alikes. Rectangles become runners, panels, and tray bases.
- Beginner-friendly: No fancy tools requiredscissors, glue, paint, and confidence (or caffeine).
- Budget-proof creativity: If you try something weird and it doesn’t work, you’re out a couple bucksnot your whole personality.
Pick the Right Placemat for the Right Project
Not all placemats behave the same. Before you buy ten and declare yourself “a fiber artist,” do a quick reality check. Here’s how to match material to makeover:
Woven (faux seagrass, rattan-look, rope, bamboo)
- Best for: wall art, mirror frames, trays, lamp shades, basket-wall looks
- Watch out for: paint filling the weave if you go too heavy
Fabric (cotton, poly blends, seasonal prints)
- Best for: no-sew runners, framed textile art, decoupage trays, table décor layering
- Watch out for: fraying edges (easy fix: trim + seal or add binding)
Vinyl or plastic-woven
- Best for: wipeable trays, organizers, kid-friendly décor, outdoor use
- Watch out for: some paints don’t bond welllight sanding and primer help
Prep Like a Pro (So It Doesn’t Scream “Craft Night”)
Prep is the difference between “boutique décor” and “why is this sticky.” Don’t skip it.
- Flatten it: If your placemat is curled, warm it gently with a hair dryer and weigh it flat overnight, or lightly steam fabric versions.
- Clean it: Wipe woven/plastic mats with mild soap and water, then dry fully. Dust kills adhesion.
- Plan your finish: Decide if you’re keeping the natural color, painting it, staining it, or adding accents.
- Paint smart: Use light coats and let texture show. If you’re spray painting, work outdoors or with strong cross-ventilation and protect surrounding surfaces from overspray.
Tools & Supplies You’ll Actually Use
- Hot glue gun + glue sticks (or strong craft glue)
- Scissors + utility knife (for tougher weaves)
- Acrylic paint or spray paint (optional primer for slick surfaces)
- Paintbrushes + foam brush
- Painter’s tape + drop cloth/cardboard
- Sealer (clear acrylic spray or decoupage sealer, optional but helpful)
- Extras for specific projects: mirrors, tray handles, rope trim, faux leather straps, wooden rounds, picture frame backing
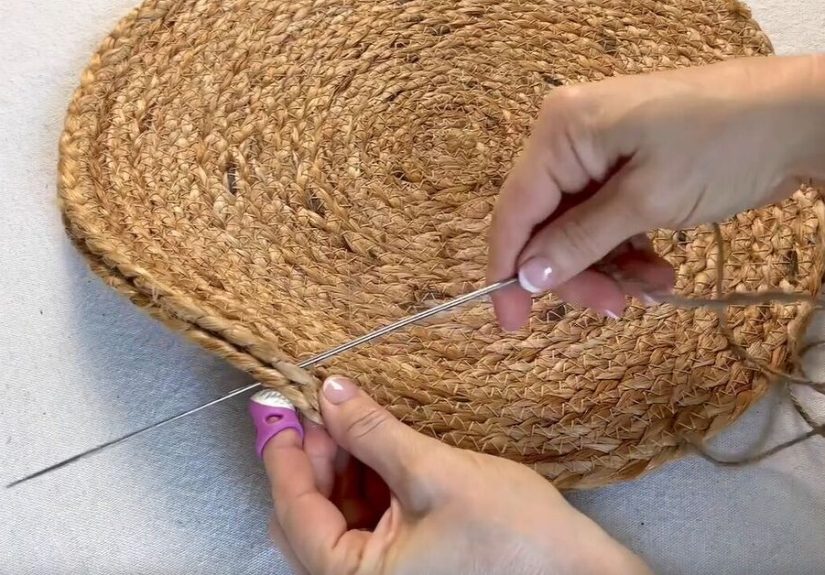
Five Stunning Placemat Transformations (Step-by-Step)
1) “Basket Wall” Statement Art (Using Round Placemats)
Basket walls are popular because they add warmth and dimension without needing “art skills.” Round placemats can deliver the same effectespecially if you mix sizes, textures, and finishes.
- Choose 3–9 round placemats: Aim for varietysome tighter weave, some more open.
- Decide your palette: Natural is classic. For modern, paint a few matte black or creamy white. For coastal, try soft sand + muted blue accents.
- Paint lightly (optional): Mist spray paint from a distance or dry-brush acrylic paint so the weave stays visible.
- Lay out on the floor first: Use an odd-number grouping and stagger edges so it looks collected, not cloned.
- Mount securely: If your placemats are light, removable picture hanging strips can work on smooth walls. Heavier builds may need nails or proper wall hooks.
Design tip: Mix at least two textures and two sizes. The eye loves variety, like it loves fries from someone else’s plate.
2) Mirror Frame Glow-Up (From “Basic” to “Boutique”)
A small round mirror becomes a designer-looking accent when you frame it with woven texture. This works especially well for entryways, powder rooms, and gallery walls.
- Pick a mirror: Round mirrors are easiest. Thrifted mirrors work great too.
- Center the mirror on the placemat: Flip the placemat over if the back is flatter for gluing.
- Attach in sections: Use a strong adhesive (or hot glue for quick hold), pressing firmly as you go.
- Elevate the edges: Add rope trim, faux leather tabs, or a thin wood ring to hide seams and add polish.
- Optional: “Sunburst” vibe: Layer two placematsone rotated slightly behind the otherfor a fuller, sculptural look.
- Seal if needed: A light clear coat can reduce shedding and protect painted finishes.
3) High-End Looking Tray (The “Why Is This From a Dollar Store?” Project)
This is the project people pick up and say, “Where did you buy this?” and you get to say, “I didn’t. I made it. Also, yes, I accept compliments in cash.”
- Create a sturdy base: Use a thin wooden round/rectangle or a lightweight tray insert. (Placemats alone can flex.)
- Wrap with placemats: Glue one placemat to the top and (optionally) one to the bottom for a finished look.
- Hide edges: Rope trim is the easiest “finished” border. Add it around the perimeter in a neat line.
- Add handles: Drawer pulls, faux leather straps, or small handles instantly upgrade the piece.
- Style it: Stack a candle, a small vase, and a bookdone. You now own “curated décor.”
4) No-Sew Table Runner or Layered Centerpiece Base
If you’ve wanted a textured runner but didn’t want to sew (or commit), placemats make it easy.
- Choose 2–4 rectangular placemats: Match pattern or alternate for a patchwork look.
- Join the edges: Use fabric glue, iron-on hemming tape, or hidden stitching if you’re fancy.
- Finish the ends: Add tassel fringe, pom-pom trim, or a folded ribbon band for a “store-bought” edge.
- Use it two ways: As a runner, or as a layered base under a tray, bowl, or centerpiece.
Styling win: A neutral woven runner makes even weeknight takeout look like you planned something.
5) Lamp Shade Makeover (Texture + Glow = Instant Cozy)
Woven texture looks incredible when light filters through it. The result: soft, warm, “I live in a catalog” lighting.
- Start with a simple shade: Drum shades are easiest to wrap.
- Test fit the placemat: For round woven mats, you may overlap edges slightly or cut a clean slit to shape.
- Attach carefully: Use glue in thin lines so it doesn’t seep through the weave.
- Trim the top and bottom: Rope trim, ribbon, or bias tape hides edges and looks intentional.
- Use LED bulbs: They run cooler and are safer for craft materials.
Quick Placemat Upgrades (10 Minutes, Maximum Bragging Rights)
- Framed textile art: Place a fabric placemat in a frame for instant wall art.
- Coasters: Cut a woven placemat into squares/circles, seal edges, and stack like a grown-up.
- Planter “collars”: Wrap around a basic pot to add texture (secure with Velcro or hidden clips).
- Shelf liners: Great for open shelvingespecially in pantries or bathrooms.
- Drawer organizers: Fold and glue into shallow pockets for cosmetics, keys, or cables.
- Wreath base: Use a round placemat as the foundation for a seasonal wreath.
- Serving board topper: Glue a placemat to a board for a decorative (non-food-contact) serving display.
Make It Look Expensive: 6 Styling Rules That Always Work
- Repeat a material: If you use rope trim on a tray, echo rope somewhere else (a vase wrap, a basket, a candle).
- Keep a tight color story: Two neutrals + one accent is the easiest formula.
- Prefer matte finishes: Matte paint and sealers look more modern and less “craft store glossy.”
- Hide raw edges: Trim is your best friend. It’s basically makeup for DIY.
- Go bigger than you think: A single tiny piece can look lost. Group items or scale up.
- Leave breathing room: A basket-wall-style display looks best when it isn’t crammed to the ceiling like a texture emergency.
Common Mistakes (And How to Avoid Them)
Paint looks “gunky” and the weave disappears
Use lighter coats, spray from farther away, or dry-brush acrylic paint. Let texture stay textured.
Glue shows through or strings everywhere
Use thinner glue lines and press firmly. If strings happen (they will), wait until cool and pull them off like you’re harvesting tiny plastic cobwebs.
The piece won’t hang flat
Stiffen it with a backing (foam board, thin plywood, or a frame) or seal both sides to reduce warping.
Edges fray or shed
Trim loose fibers and apply a light sealer coat. For fabric edges, add trim or iron-on hem tape.
Budget Breakdown (Example)
- 3 placemats: ~$3.75–$6
- Rope trim or ribbon: ~$1.25
- Paint/sealer (optional, per project portion): ~$1–$3
- Handles (optional): ~$1.25–$5
Total: Often $6–$15 for décor that looks like $30–$80. Your wallet can unclench now.
Where These DIYs Look Best
- Entryway: Placemat mirror + small tray for keys = instant “put together.”
- Kitchen: Woven wall accents soften hard surfaces and add warmth.
- Bedroom: A placemat-based basket-wall cluster above a dresser reads cozy, not cluttered.
- Bathroom: Woven texture + matte paint gives spa vibes on a dollar-store budget.
DIYers’ Real-World Experiences: What People Learn After Their First Placemat Makeover (Extra 500+ Words)
If you read DIY comments sections (a modern form of anthropology), you’ll notice a pattern: placemat crafts look easy, and they arebut small choices make the difference between “stunning home décor” and “this is definitely a placemat doing side quests.” Here are the most common experiences DIYers share once they’ve made a few placemat transformations, plus what to do with that hard-won wisdom.
1) Buying extras is never a mistake. People often start with “I’ll just get two.” Then they get home, lay out the design, and realize the wall looks better with fiveor that one placemat has a slightly different weave or color. Natural-look materials can vary from batch to batch, so grabbing one or two extra placemats (and saving the receipt) is a low-cost way to protect your vision. Extras also become your test pieces: you can trial paint color, sealer sheen, or trim placement without risking the final set.
2) Glue strategy matters more than glue brand. DIYers quickly learn that hot glue is fast, but it can create bumps, strings, or visible blobsespecially on open weaves. The “aha” moment usually comes when someone switches from big glue puddles to thin glue lines, placed where trim will cover them. Another common trick is working in small sections: glue, press, hold for a few seconds, then move on. That keeps alignment clean and prevents the “oops, it shifted” effect that haunts many a tray rim.
3) Paint can be magicalor it can erase texture. A lot of first-timers go heavy on paint because they want full coverage. Then the placemat loses its woven look and starts resembling a textured pancake. DIYers who love the best results usually end up using one of three approaches: (a) light spray coats from a distance, (b) dry-brushing with a nearly-dry brush to hit raised areas, or (c) a watered-down acrylic wash that tints without filling the weave. The shared takeaway: the texture is the feature, not the problem to cover up.
4) Backing boards turn “cute” into “quality.” Many placemat projects look okay until you try to hang them. If they curl, sag, or wobble, the illusion breaks. People often report their biggest upgrade was adding a simple backing: foam board for lightweight wall art, thin wood for trays, or even a repurposed frame backing for mirror projects. Backing makes the piece feel substantial and helps it sit flattwo things that immediately read “store-bought.”
5) The finishing details are where the “stunning” lives. DIYers frequently say their project didn’t look done until they added a border, a trim, or a clean edge. Rope trim, bias tape, ribbon bands, faux leather tabs, and simple wood rings can hide seams and make the design look intentional. It’s also common to hear that a quick sealer coat reduced shedding and made painted finishes look more consistent. The big lesson: the last 10% of effort often delivers 50% of the visual impact.
6) Styling is part of the DIY. Finally, people learn that even gorgeous pieces can look “crafty” if styled randomly. The best-looking placemat décor is usually grouped with complementary textureswood, ceramic, glass, linenso the woven element feels curated. DIYers often mention that once they repeated the same tone (like matte black accents, or warm natural fibers) across a few items, their placemat projects suddenly looked like a matching collection rather than a one-off experiment. Translation: you didn’t just make décor. You designed a vibe.
Conclusion
Dollar Tree placemats are one of the easiest “blank canvases” in home décor: big, textured, flexible, and budget-friendly. With the right prep, light-handed finishing, and a few design rules, you can turn them into wall art, trays, mirror frames, runners, and lamp shade upgrades that look far more expensive than they are. Start with one project, learn what finish you love, and don’t be surprised if your cart accidentally becomes… all placemats. It happens to the best of us.