Table of Contents >> Show >> Hide
- Why a Drill Brush Attachment Belongs in Your Bathroom Cleaning Kit
- Choosing the Right Drill and Brush for Bathroom Cleaning
- Step-by-Step: How to Make Your Bathroom Shine With a Drill Brush
- Step 1: Clear and Prep the Space
- Step 2: Choose (or Mix) the Right Cleaner
- Step 3: Apply Cleaner and Let It Work
- Step 4: Attach the Drill Brush Correctly
- Step 5: Start Scrubbing With the Drill Brush
- Step 6: Rinse Thoroughly and Check Your Work
- Step 7: Detail the Fixtures and Extras
- Step 8: Dry and Buff for a True Shine
- Targeting the Worst Offenders: Soap Scum, Hard Water, and Grout
- Frequently Asked Questions About Drill Brush Attachments
- Real-Life Experiences and Extra Tips for Using a Drill Brush Attachment
- Conclusion: Let Your Drill Do the Dirty Work
If your shower tile looks like a “before” picture in a cleaning commercial and your tub ring could be carbon-dated, it’s time to bring in the big guns: a drill brush attachment. Think of it as giving your regular old cordless drill a new side hustle as a bathroom power scrubber. Used correctly, a drill brush attachment can cut your cleaning time, blast through soap scum, and make your bathroom shine with way less elbow grease.
In this guide, you’ll learn exactly how to choose the right brush, which cleaners actually work, how to avoid damaging your tile and fixtures, and a step-by-step routine to get your bathroom sparkling. We’ll also cover real-life tips and “wish I’d known that sooner” lessons from people who’ve used drill brushes to rescue seriously grimy bathrooms.
Why a Drill Brush Attachment Belongs in Your Bathroom Cleaning Kit
What Is a Drill Brush Attachment?
A drill brush attachment is a scrub brush with a short shaft that fits into the chuck of your cordless drill or driver. When the drill spins, the brush rotates with it, turning your normal cleaning motion into hundreds of scrubs per minute. Most bathroom-ready drill brushes use durable nylon bristles that are tough on grime but gentle enough for common surfaces like glazed tile, porcelain tubs, shower pans, and fiberglass surrounds.
These attachments usually come in sets: flat brushes for large surfaces, cone or “corner” brushes for tight edges and around fixtures, and sometimes small round brushes for grout lines and narrow spaces. Pick the right shape, and suddenly that awkward corner behind the faucet isn’t so impossible anymore.
Where a Drill Brush Works Best in the Bathroom
Drill brush attachments shine (literally) on surfaces that normally take a ton of scrubbing, such as:
- Shower walls and floors covered in soap scum
- Tile and grout around the tub and shower pan
- Textured tub bottoms that trap grime
- Fiberglass or acrylic surrounds
- Ceramic sinks and around the faucet base
- Porcelain toilet exteriors (bowl exterior, lid, and base)
Anywhere you’d normally use a stiff cleaning brush, a drill brush can usually handle the job fasteras long as you choose the right bristle stiffness and cleaner for the surface.
Choosing the Right Drill and Brush for Bathroom Cleaning
Pick the Best Drill Settings
The good news: you don’t need a fancy drill. Any basic cordless drill or driver that accepts a 1/4-inch hex or smooth shaft will work. For bathroom cleaning:
- Use a low to medium speed. High RPM might sound efficient, but it mainly creates more splash and less control. A moderate speed is enough to power through grime while staying safe and manageable.
- Use the clutch or low torque setting. This gives you more control and helps prevent the brush from “grabbing” and sending your drill flying into the wall.
- Keep a good grip with two hands when possible. One hand on the drill handle, the other supporting the head, especially when you’re working on vertical surfaces.
How to Choose the Right Brush Stiffness
Drill brush kits often use color-coding to indicate bristle stiffness, but check the product description to be sure. As a general guide:
- Soft bristles: Best for delicate surfaces like glass shower doors, acrylic tubs, and chrome fixtures.
- Medium bristles: Great all-purpose choice for most tile, fiberglass, porcelain tubs, and sinks.
- Stiff bristles: Reserved for tough grout lines, textured tile, or outdoor jobs. Use carefully to avoid scratching.
Avoid metal or wire brushes in the bathroom. They’re meant for rust and heavy-duty metal work, not your pretty subway tile. Wire bristles can scratch glaze, dull shiny finishes, and damage grout.
Safety Gear You Actually Need
A drill brush is still a power tool, just wearing a tiny scrubber outfit, so treat it with respect. A few basic protections make cleaning safer and more comfortable:
- Safety glasses or goggles: Cleaning solution and splashed gunk can fly faster than you think.
- Gloves: Protects your skin from cleaning chemicals and hot water.
- Non-slip shoes: Wet bathroom floors plus soap can get slippery quickly.
- Ventilation: Turn on the fan and crack a window if you’re using stronger cleaners.
Step-by-Step: How to Make Your Bathroom Shine With a Drill Brush
Step 1: Clear and Prep the Space
Start by evicting everything from the tub and shower ledgesshampoo, razors, toys, that mystery bottle from 2019. You want open surfaces so the brush can move freely.
Then:
- Rinse walls, tub, and tile with warm water to loosen loose debris.
- Lay an old towel or mat outside the tub to catch splashes and give you a non-slip place to step.
- If you have a detachable showerhead, keep it handy for fast rinsing.
Step 2: Choose (or Mix) the Right Cleaner
The drill brush is the muscle; the cleaner is the chemistry. Pick your solution based on what you’re fighting:
- Light soap scum and everyday dirt: A paste of baking soda and water works well, or a mild bathroom cleaner labeled safe for your surface.
- Heavier soap scum and greasy residue: Baking soda combined with a bit of dish soap makes a gentle but effective scrub.
- Hard water and mineral buildup: A vinegar-and-water mixture can help dissolve mineral deposits on many tiles and glass. Skip vinegar on natural stone like marble or travertineuse a stone-safe cleaner instead.
- Mildew and stains in grout: Hydrogen peroxide (often mixed with baking soda into a paste) can help brighten and sanitize grout lines.
Always read the label and check that the cleaner is safe for your specific material. If in doubt, test your chosen cleaner in a small, hidden area first.
Step 3: Apply Cleaner and Let It Work
Spritz or spread your cleaner on the surfaces you plan to scrub. Don’t rush this stepmany cleaners work best when they sit for several minutes. Let the solution dwell according to the instructions. This softens the gunk so the drill brush doesn’t have to work as hard.
For tough grout or deep stains, apply a thicker paste and let it rest for 10–15 minutes before scrubbing.
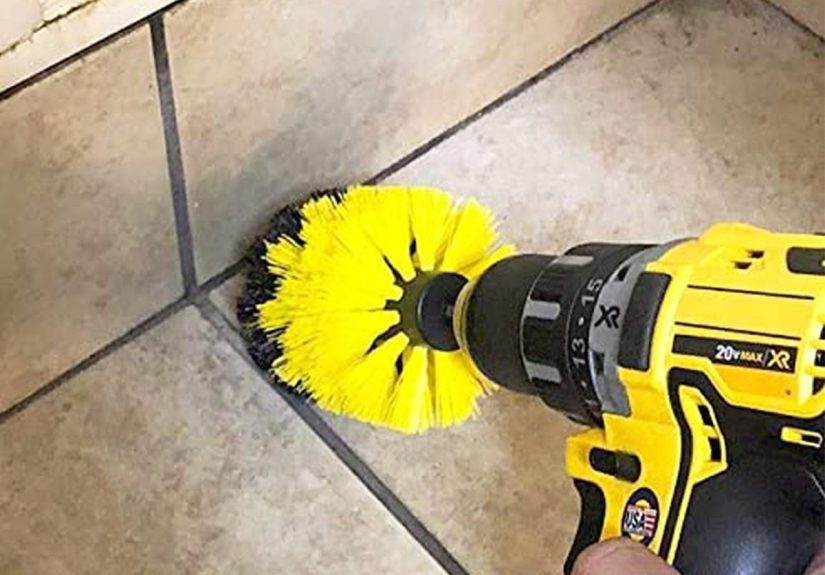
Step 4: Attach the Drill Brush Correctly
Now it’s drill time:
- Open the drill chuck.
- Insert the shaft of the drill brush fully into the chuck.
- Tighten until the brush feels secureno wobble, no slipping.
- Give the trigger a short test spin away from your face to make sure it’s seated correctly.
Choose a flat brush for big areas like shower walls and floors, and a cone or corner brush for edges, corners, and around fixtures.
Step 5: Start Scrubbing With the Drill Brush
Hold the brush bristles flat or slightly angled against the surface. Start with a low speed, gently squeeze the trigger, and move the brush in overlapping passes:
- For walls: Work from top to bottom so dirty water flows down onto areas you haven’t cleaned yet.
- For tubs and shower pans: Work from the back toward the drain, letting gravity help you rinse away loosened grime.
- For grout: Use a smaller, stiffer brush and move along the lines in short passes, applying moderate pressurenot so much that the bristles mash flat.
Let the drill do the work. If you’re straining, you’re pressing too hard or using the wrong cleaner.
Step 6: Rinse Thoroughly and Check Your Work
Once an area looks clean, rinse with warm water. For shower walls and tubs, a detachable showerhead is perfect. For sinks, just run the faucet and wipe downward with a microfiber cloth.
After rinsing, step back and inspect:
- Still see cloudy patches on glass or tile? That’s likely soap scumrepeat with a bit more cleaner and a soft brush.
- Grout still dark in spots? Reapply a peroxide-baking soda paste and give it another pass.
- Hard white crusty lines near the faucet or drain? That’s mineral buildup; target it with a vinegar-based cleaner or a product labeled for hard water stains (unless you have natural stone).
Step 7: Detail the Fixtures and Extras
Swap to a smaller or cone-shaped brush to clean:
- Around faucets and handles
- The base of the toilet (exterior only)
- Shower door tracks
- Soap dishes, niches, and shelves
Be extra gentle on chrome and plated fixturesuse soft bristles and mild cleaner to avoid scratching or dulling the finish.
Step 8: Dry and Buff for a True Shine
Water spots can ruin a perfectly good cleaning session. After rinsing, use a clean microfiber towel to dry glass, tile, and fixtures. Buff in circular motions for that hotel-bathroom shine.
Targeting the Worst Offenders: Soap Scum, Hard Water, and Grout
Soap Scum on Glass and Tile
Soap scum is that hazy film that refuses to budge with basic wiping. The trick is to combine the right cleaner with the drill brush:
- Use a cleaner that contains surfactants (like dish soap) and mild abrasives (like baking soda).
- Apply, let it sit, then scrub with a soft or medium nylon brush at low speed.
- On glass doors, always start with the softest brush to protect the surface.
Finish with a squeegee or a microfiber cloth to prevent new spots as the surface dries.
Hard Water Stains and Mineral Deposits
Chalky white or brownish rings around drains, faucets, and on tile are a sign of hard water. For many surfaces:
- Apply a vinegar-based cleaner or a product specifically designed for mineral buildup.
- Let it sit so it can dissolve the mineralsnot just a quick spray-and-pray.
- Scrub with a medium brush, then rinse thoroughly.
Skip vinegar on natural stone. Use a pH-neutral stone-safe cleaner instead, and stick with softer bristles.
Grout Lines and Mildew Stains
Grout is porous, so it clings to dirt and moisture. To brighten it:
- Apply a grout-safe cleaner, or make a paste of baking soda and hydrogen peroxide.
- Let the solution sit for at least 5–10 minutes so it can penetrate.
- Use a narrow, stiff-bristled drill brush to scrub along each line.
- Rinse and towel dry so dirty water doesn’t settle back into the joints.
Once your grout is clean and dry, consider sealing it with a grout sealer to slow future staining. That way, your next drill-brush session will be more maintenance than rescue mission.
Frequently Asked Questions About Drill Brush Attachments
Can a Drill Brush Scratch My Tile or Tub?
If you stick to nylon brushes and use the right stiffness for your surface, the risk is low. The main scratch risks are:
- Using a stiff or “heavy-duty” brush on soft materials like acrylic or fiberglass.
- Using metal or wire brushes, which are meant for metal and rust removal, not bathrooms.
- Trapping grit or sand under the brushalways rinse first if you see sandy debris.
How Often Should I Use a Drill Brush in the Bathroom?
For most homes, a powered deep clean every 2–4 weeks is plenty, with lighter weekly wipe-downs in between. If you have hard water, a big family, or teenagers who think the shower cleans itself, you may want to use the drill brush more often on grout and high-traffic areas.
Can I Use a Drill Brush on the Inside of the Toilet Bowl?
It’s technically possible with the right shape brush, but usually not worth the splash factor. Most people reserve the drill brush for the exterior of the bowl, the base, and stubborn buildup around the hinges, and use a dedicated toilet brush inside the bowl.
Is a Drill Brush Better Than an Electric Spin Scrubber?
A drill brush is more flexible if you already own a drill and want a budget-friendly upgrade. Electric spin scrubbers are purpose-built cleaning tools with lighter weight, built-in handles, and sometimes longer reach. Many people like having both: a drill brush for heavy-duty jobs and a lightweight spin scrubber for regular maintenance.
Real-Life Experiences and Extra Tips for Using a Drill Brush Attachment
The first time many people try a drill brush in the bathroom, they have the same reaction: “Why didn’t I buy this sooner?” If you’ve ever spent an entire afternoon hand-scrubbing grout with a tiny brush, the difference is dramatic. Instead of sore wrists and knees, you get a powered helper that does the scrubbing for you.
One common beginner mistake is going full speed right away. It feels natural to squeeze the trigger all the way, but that usually results in two things: cleaning solution flying everywhere and the brush trying to run away from you. Starting at low speed and gradually ramping up as you get comfortable gives you more control, less splatter, and better results. Think “firm but gentle” rather than “turbo mode.”
Another lesson people quickly learn: dwell time is everything. If you spray a cleaner on soap scum and immediately start scrubbing, the drill brush is doing all the work. If you give the cleaner a few minutes to soften the buildup first, the brush glides more smoothly and cuts through the grime with less effort. For really stubborn grout or old soap scum, treating the area, walking away to declutter the vanity, and then coming back to scrub can make a huge difference.
Users also tend to figure out which brush shapes become their go-to tools. A flat, medium-stiff brush is usually the everyday heroit handles shower walls, floors, and tub interiors. A smaller, pointed or cone-shaped brush is perfect for detail work: shower door tracks, the base of the toilet, corners where three tiles meet, and the edge where the tub meets the wall. Once you know which shapes you rely on most, you can always replace just those instead of buying a full new kit.
There are some smart comfort hacks too. If you have back or knee issues, a drill brush can be a game changer because it reduces the need to bear down with your body weight. You’re guiding the tool rather than scrubbing manually. Pair it with a long-handled spin scrubber or a drill extension rod, and you can clean most of the shower without crouching or bending as much. That’s especially helpful for large walk-in showers or for cleaning textured floors that normally require a lot of pressure.
Cleanup matters as much as the scrubbing. After you’re done, rinse your drill brush in warm, soapy water and spin it for a few seconds (away from you and anything you care about) to shake out excess water. Let it dry bristle-side down so water doesn’t pool in the base. Taking a moment to clean the brushes means you’re not smearing old, dirty residue around the next time you use them.
Finally, set yourself up for easy maintenance. Once you’ve used a drill brush to get everything truly clean, you can keep your bathroom looking good longer with quick habits: squeegee the shower after use, mist tile with a light daily shower cleaner, and wipe down fixtures during your regular routine. That way, the drill brush becomes your “reset button” every few weeks instead of a desperate last resort when the grout has turned an entirely new color.
In short, a drill brush attachment can turn deep-clean day from a dreaded marathon into a quick, oddly satisfying power session. You get a brighter bathroom, you save time and energy, and your cordless drill gets to live its best double life.
Conclusion: Let Your Drill Do the Dirty Work
Making your bathroom shine doesn’t have to mean hours on your knees with a worn-out hand brush. A drill brush attachment combines the power of your cordless drill with the right cleaners to tackle soap scum, hard water, and stained grout faster and more comfortably. Choose the correct brush stiffness, match your cleaner to the type of grime, let chemistry work before you scrub, and keep your movements controlled and consistent.
With a little practice, you’ll have a repeatable drill-brush routine that keeps your bathroom looking guest-ready with a fraction of the effort. Your future selfstepping into a sparkling shower instead of a grimy onewill be very grateful.


