Table of Contents >> Show >> Hide
- Why a Pilgrim Turkey Wreath Is Such a Fun Thanksgiving Craft
- Supplies You’ll Need
- Pick the Right Base for Your Wreath
- How To Make the Cutest Pilgrim Turkey Wreath: Step by Step
- Easy Custom Ideas for an Even Cuter Wreath
- Common Mistakes To Avoid
- How To Display and Store Your Thanksgiving Wreath
- Why This DIY Thanksgiving Wreath Is Worth Making
- Experiences and Little Moments That Make This Craft Special
- SEO Tags
Some holiday crafts aim for elegant. Some aim for rustic. And some proudly say, “I have googly eyes, a tiny pilgrim hat, and I’m here to charm the socks off your front door.” This pilgrim turkey wreath belongs in that last category.
If you want a Thanksgiving decoration that feels cheerful, homemade, and just a little bit ridiculous in the best way, this is it. A pilgrim turkey wreath combines the cozy look of a fall wreath with the playful personality of a classic turkey craft. The result is festive enough for grown-ups, cute enough for kids, and eye-catching enough that at least one neighbor will ask, “Where did you buy that?” You may then enjoy the deeply satisfying moment of saying, “Oh, this? I made it.”
In this guide, you’ll learn exactly how to make the cutest pilgrim turkey wreath, from choosing the right wreath base to building feather layers, shaping the turkey face, adding a pilgrim hat, and making sure the whole thing hangs nicely without looking like it survived a wind tunnel. This project is beginner-friendly, easy to customize, and perfect for a fall afternoon when you want your home to look festive before the pie arrives.
Why a Pilgrim Turkey Wreath Is Such a Fun Thanksgiving Craft
A good Thanksgiving wreath should do three things: feel seasonal, look welcoming, and survive at least a few weeks on your door. A pilgrim turkey wreath checks every box. It uses classic fall colors like rust, gold, orange, brown, and burgundy. It fits naturally with other Thanksgiving decorations such as pumpkins, corn husks, plaid ribbon, and leaf garlands. Best of all, it has personality.
Unlike more formal fall wreaths made with only foliage or dried stems, a turkey wreath feels playful. That makes it ideal for homes with kids, classrooms, party spaces, and anyone who thinks holiday decor should have a little humor. It is also a smart project for crafters because it can be made from inexpensive materials: a grapevine wreath, foam or felt pieces, faux leaves, ribbon, floral wire, and hot glue do most of the heavy lifting.
Another big advantage is flexibility. You can make your wreath rustic, colorful, farmhouse-style, whimsical, or slightly over-the-top. Want neutral feathers in tan and cream? Lovely. Want dramatic glitter leaves and giant eyes? Also valid. The turkey will not judge.
Supplies You’ll Need
Before you start, gather your materials so you do not end up hunting for scissors with one hand while your glue gun threatens to turn your dining table into a modern art installation.
Main Materials
- 1 grapevine wreath or wire wreath form, 14 to 18 inches
- Faux fall leaves, felt leaves, or mesh ribbon in autumn colors
- Brown felt, craft foam, or cardstock for the turkey face and body details
- Orange felt or foam for the beak and feet accents
- Red felt or foam for the wattle
- 2 googly eyes or flat craft eyes
- Black felt, foam, or cardstock for the pilgrim hat
- Gold or yellow paper/foam strip for the hat buckle
- Hot glue gun and glue sticks
- Floral wire or thin craft wire
- Ribbon, burlap, or jute for a bow or hanging loop
Helpful Extras
- Wire cutters
- Sharp scissors
- Pencil or chalk for tracing shapes
- Mini faux pumpkins, berries, pinecones, or acorns
- Double-sided tape for temporary placement tests
- A wreath hanger for display
If you want the easiest version, use faux leaves for the feathers and felt for the face pieces. If you want a more textured designer look, combine ribbon loops, layered leaves, and a few small natural-looking embellishments.
Pick the Right Base for Your Wreath
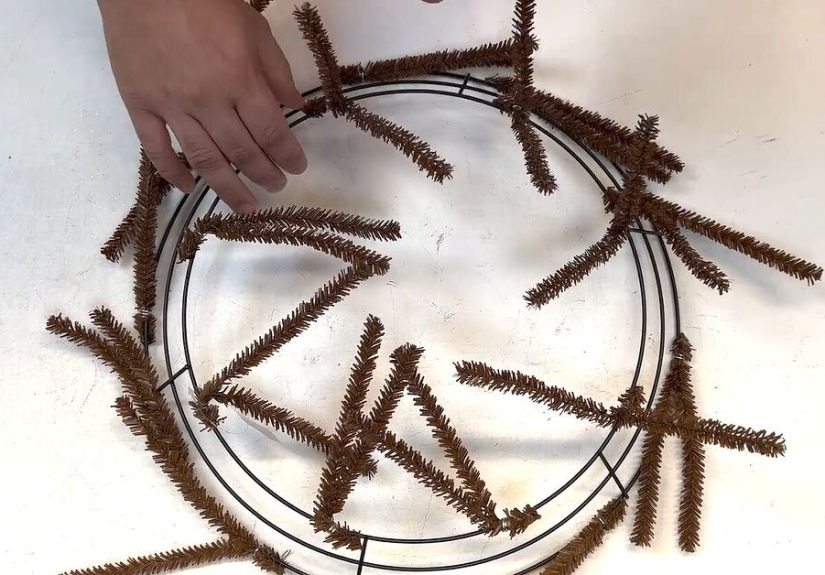
Your wreath base matters more than people think. A grapevine wreath gives instant texture and a cozy handmade look. It is especially good if you want a rustic Thanksgiving wreath with lots of leafy detail tucked into the branches. A wire wreath form works well if you want to wrap the base with ribbon, burlap, or deco mesh and build a fuller, more polished shape.
For most people, a grapevine base is the best choice for a pilgrim turkey wreath because it already looks autumn-ready. It also makes it easier to tuck in leaves and secure lightweight decorations with floral wire. Choose a wreath that is sturdy but not too bulky. Once the feathers, face, and hat are attached, the piece will look much larger than the base alone.
How To Make the Cutest Pilgrim Turkey Wreath: Step by Step
Step 1: Plan the Turkey Shape
Lay your wreath flat on a table and imagine the turkey face sitting in the center or slightly lower center of the wreath. The feather section will radiate around the top half and sides. This is the secret to making it read as “adorable turkey” instead of “confused pile of leaves.”
Arrange your faux leaves loosely before gluing anything. Place larger leaves around the outer edge like feathers, then layer smaller leaves on top for fullness. Mix colors so the wreath looks balanced. Alternate warm shades rather than clumping all the yellow on one side and all the burgundy on the other unless you are going for avant-garde turkey drama.
Step 2: Build the Feather Layer
Start attaching the leaves to the upper half of the wreath. Use hot glue for quick hold and floral wire for anything slightly heavier. Push stems into the grapevine where possible, then secure them. Overlap the leaves so the arrangement looks lush rather than sparse.
For a cute, rounded turkey look, let the feathers fan outward from the center. Use your largest leaves first, then fill gaps with medium and small ones. If you are using ribbon loops or mesh instead of leaves, make the loops similar in size and layer them like tail feathers for a fuller wreath.
Step 3: Create the Turkey Face
Cut a large brown circle or oval for the turkey’s face. Felt is a great option because it looks soft and is forgiving if your cutting skills are more enthusiastic than precise. Cut two white circles for the eyes if you are not using googly eyes, then add black pupils. Cut a small orange triangle for the beak and a red teardrop or squiggle for the wattle.
Glue the face pieces together first before attaching the full face to the wreath. This lets you adjust the expression. Slightly oversized eyes make the wreath cuter. A small beak placed just below center gives it that classic cartoon turkey charm. Once the face is assembled, glue it firmly into the center of the wreath.
Step 4: Make the Pilgrim Hat
The pilgrim hat is what takes this from general turkey decor to full Thanksgiving superstar. Cut a black rectangle with a wider black brim underneath. Then cut a small gold square or rectangle to create the buckle. Glue the buckle to the hat band.
Attach the hat slightly tilted above the turkey’s eyes for extra personality. Straight hats are cute. Tilted hats are cuter. It gives the turkey a confident little “I brought the stuffing” energy.
Step 5: Add Dimension and Texture
Once the basic turkey shape is in place, add small accents around the feathers and lower wreath. Tuck in berry sprigs, mini pinecones, acorns, or tiny faux pumpkins. A simple burlap or plaid bow at the bottom can tie the whole design together and soften the transition between the face and the wreath base.
Be careful not to overload the wreath. The turkey face should still be the star. Think of the extra embellishments as backup dancers, not the lead singer.
Step 6: Check Balance Before Final Gluing
Lift the wreath and hold it upright before you call it finished. Decorations often shift visually once the wreath is vertical. One side may look fuller, the hat may droop, or the turkey’s eyes may suddenly seem to be looking in two different zip codes. Adjust anything that feels off, then reinforce the heavy areas with more glue or floral wire.
Step 7: Add a Hanger
Use ribbon, jute, or the wreath’s built-in structure to make a hanging loop. If the wreath will hang outside, make sure the loop is secure and weather-resistant. A sturdy wreath hanger is usually the easiest option and saves your door from unnecessary drama.
Easy Custom Ideas for an Even Cuter Wreath
Once you know the basic method, you can customize your pilgrim turkey wreath in all kinds of fun ways.
Try a Farmhouse Version
Use cream, tan, muted orange, and soft brown leaves. Add a burlap bow and keep the face simple with stitched-looking felt details.
Go Bright and Playful
Use saturated reds, oranges, and yellows, plus oversized googly eyes and patterned ribbon. This works especially well for family spaces or classroom doors.
Add a Thankful Message
Tuck in a small wooden sign or a tag that says “Thankful,” “Gather,” or “Gobble.” Keep it small so it does not compete with the turkey face.
Make It Kid-Friendly
If children are helping, let them choose the feather arrangement or decorate the hat. Pre-cut the pieces if needed, and save the hot glue step for an adult.
Common Mistakes To Avoid
The biggest mistake is using feathers or leaves that are too small for the wreath base. Tiny leaves on a large wreath can make the design look skimpy. Aim for a mix of sizes so the wreath feels full and layered.
Another common problem is placing the turkey face too high. If the face sits near the top, there is no room for the hat and the whole design can feel cramped. Keep the face in the center area and let the feather fan fill the upper half.
Too much glue is also a sneaky issue. Yes, hot glue is a hero, but visible glue strings can make a cute wreath look messy. Work slowly, pull away glue threads as you go, and let each section cool before moving on.
Finally, do not ignore weight distribution. If you add pumpkins, pinecones, and a giant bow all on one side, your turkey may hang like it had a long Thanksgiving dinner and needs a nap.
How To Display and Store Your Thanksgiving Wreath
This wreath looks adorable on a front door, interior entryway, kitchen wall, mudroom hook, or above a mantel. If it will hang outdoors, faux materials are usually better than fresh ones because they hold their shape longer and are easier to protect from changing weather.
When the season is over, store the wreath in a structured wreath box or a storage bag that helps it keep its shape. If you do not have one, wrap the wreath lightly in tissue or plastic and place it where decorations will not crush the hat or feathers. A climate-controlled storage space is best. In other words, do not lovingly craft the cutest turkey in town only to squash it under a box of tangled lights.
Why This DIY Thanksgiving Wreath Is Worth Making
A pilgrim turkey wreath is one of those crafts that delivers more than expected. It is simple enough for a weekend DIY project, but it has enough texture, color, and personality to look special. It makes your home feel festive without requiring a full decorating overhaul. It is affordable, customizable, and honestly just plain fun to look at.
More importantly, it captures something people love about Thanksgiving decor: warmth, welcome, and a little whimsy. A front door wreath sets the tone before guests even step inside. And when that wreath happens to be a turkey in a pilgrim hat looking pleased with itself, the mood is instantly lighter.
Experiences and Little Moments That Make This Craft Special
One of the best things about making a pilgrim turkey wreath is that the project feels cheerful from the very beginning. Even the supply pile is charming. There is something oddly satisfying about seeing faux leaves, felt scraps, ribbon, and a tiny hat sitting on the table, all waiting to become a turkey with a suspiciously cute face. It does not feel like a serious decorating task. It feels like holiday fun with a glue gun.
This is also the kind of craft that tends to pull people in. You may start the project alone, fully intending to have a quiet, productive afternoon, and then suddenly someone wanders over with opinions. A child may insist the turkey needs bigger eyes. A spouse may suggest a plaid bow. A friend may say the hat should be crooked because “it gives him character.” And honestly, they are usually right. This wreath has a way of turning into a group effort, even when no one officially signed up.
Another memorable part of the experience is how forgiving the project is. Not every leaf has to be perfect. Not every feather needs to match. If one side looks a little fuller than the other, it often just adds to the handmade charm. That is a rare gift in crafting. Some projects make you feel like one wrong move ruins the whole thing. This one practically rewards personality. A slightly lopsided turkey can still be adorable. Sometimes it is even more adorable.
There is also the moment when the wreath finally starts looking like a face. At first, it is just a circle with leaves. Then you add the eyes, beak, and wattle, and suddenly it has a little expression. Add the pilgrim hat, and the whole thing becomes hilariously lovable. That transformation is part of the fun. It feels almost theatrical, like the wreath has entered the stage in full costume and is ready for applause.
People also tend to remember how this craft changes the mood of a space. Hang it on a plain front door, and the entrance instantly looks more festive. Put it in a hallway, and the whole corner feels brighter. It does not need a massive porch makeover or an expensive table setting to make an impact. The wreath carries a lot of visual warmth on its own, which is probably why so many people end up making one and then smiling every time they walk past it.
And perhaps the nicest experience of all is what happens when guests notice it. Holiday decor often blends into the background after a while, but a cute turkey wreath usually gets a reaction. It makes people laugh, comment, and ask questions. It becomes a small conversation starter before the meal even begins. In a season centered on gathering, that is actually kind of perfect. It is not just a decoration. It is a handmade welcome.


