Table of Contents >> Show >> Hide
- What Is Egg Oil, Exactly?
- Before You Start: Safety, Allergies, and Common Sense
- What You’ll Need
- Step-by-Step: How to Make Egg Oil at Home
- How to Store Homemade Egg Oil (So It Doesn’t Turn Funky)
- How to Use Egg Oil (Hair, Scalp, Skin, and Beyond)
- Common Mistakes (And How to Fix Them)
- FAQ: Quick Answers People Actually Want
- Kitchen Notes: Real-World Experiences People Have When Making Egg Oil (500+ Words)
- The smell is “toasty egg,” and it hangs around
- The texture changes are oddly satisfying (until they’re not)
- The moment oil appears feels like magic
- Yield is smaller than you expect (and that’s okay)
- Cleanup is easier if you don’t let the pan cool completely
- Using it on hair: less is more, and shampoo matters
- Using it on skin: patch testing saves drama
- Conclusion
Model: GPT-5.2 Thinking
Egg oil (also called egg yolk oil or ovum oil) is one of those “wait… that’s a real thing?”
DIY projects that sounds like a prankuntil you see it work. You take cooked egg yolks, heat them slowly, and they release a golden, nutty-smelling oil.
People have used egg yolk oil for generations in homemade skin and hair routines, and modern cosmetics still lean on egg-derived lipids for their
softening, conditioning feel.
This guide shows you exactly how to make egg oil at home safely (without turning your kitchen into an egg-scented smoke festival),
how to strain and store it properly, and how to use it in simple DIY wayswhile keeping expectations realistic. Because yes, it can be a lovely
conditioning oil… but no, it is not wizard potion.
What Is Egg Oil, Exactly?
Egg oil is the oil fraction that comes out of egg yolks when you heat them long enough for moisture to evaporate and fats to separate.
Yolk is naturally rich in lipidsmostly triglycerides and phospholipidsso when you apply heat and keep stirring, you’re basically encouraging the
yolk’s fat to break free from the cooked solids and pool as oil.
The result is typically a deep yellow to amber oil with a toasted aroma. Traditional methods often run the yolks until they brown (sometimes very dark),
which is why you’ll also see it called “burnt egg oil” in some DIY circles. Your goal at home is oil release, not a bonfire.
Before You Start: Safety, Allergies, and Common Sense
1) Heat safety (hot oil is still hot oil)
You’ll be working over a stove with a pan that can get very hot. Oil splatters happen when moisture meets fat, so keep the heat moderate, stir often,
and avoid adding water or wet tools to the pan. Use a long spoon or spatula, and don’t leave the pan unattended.
2) Food safety basics (start clean, stay clean)
Even though you’re cooking the yolks, treat eggs like a perishable ingredient: wash your hands, clean your tools, and keep your workspace tidy.
Refrigerate eggs promptly and follow standard egg-handling guidance for best safety and quality.
3) Egg allergy warning (this one matters)
Eggs are a common allergen. If you have an egg allergyor you’re making this for someone who doesdon’t assume “it’s just oil, so it’s fine.”
Homemade egg oil may still contain trace components that could irritate sensitive skin. When in doubt, skip it or ask a clinician.
4) Patch test if you plan to use it on skin
If you’re using egg oil as a skincare or scalp oil, do a simple patch test first. Apply a tiny amount to a small area of skin and wait to see if
redness, itching, or bumps show up. If you react, wash it off and don’t use it.
What You’ll Need
Ingredients
- 6–12 large eggs (more eggs = more oil; small batches are easier to control)
- Optional: a few drops of vitamin E (tocopherol) after straining, to help slow oxidation
Tools
- Medium saucepan (for boiling eggs)
- Skillet or heavy-bottom pan (cast iron or stainless steel works well)
- Spatula or wooden spoon (long-handled = less splatter stress)
- Fine mesh strainer
- Cheesecloth (optional, for extra-clear oil)
- Heat-safe bowl or measuring cup
- Small clean glass jar with a tight lid (dark glass is best)
- Paper towels (this is not a clean hobby)
Step-by-Step: How to Make Egg Oil at Home
Step 1: Hard-boil the eggs
- Place eggs in a saucepan and cover with water.
- Bring to a gentle boil, then reduce to a simmer and cook until hard-boiled.
- Cool the eggs in cold water, then peel.
Tip: Fully cooked yolks work best because you’re starting with a firm base that won’t turn into a runny mess as fast.
Step 2: Separate and mash the yolks
- Cut eggs in half and remove the yolks.
- Mash yolks thoroughly in a bowl (use a fork, potato masher, or the back of a spoon).
The finer the mash, the more evenly the yolks heatand the easier it is for oil to release.
Step 3: Dry-heat the yolks in a pan (the oil-release phase)
- Place the mashed yolks into a dry skillet (no added oil).
- Set heat to low to medium-low.
- Stir constantly, scraping the pan to prevent sticking.
At first, the yolks will look crumbly, then pasty, then they’ll start to darken. As moisture cooks off, you’ll see the texture become grainy
and the fat begin to appear. Eventually, small shiny pools formcongrats, you’re making egg oil.
Smell check: A toasted, “cooked yolk” smell is normal. Harsh smoke is not. If it starts smoking aggressively, lower the heat,
ventilate, and keep stirring. You’re coaxing oil out, not auditioning for a smoke alarm commercial.
Step 4: Keep stirring until oil visibly separates
The yolks will continue browning, and more oil will pool around the solids. This can take anywhere from 10 to 30 minutes
depending on batch size, pan, and heat level.
How dark should it get? Many traditional methods go quite dark to maximize oil release. At home, aim for “deep golden-brown”
to “brown” with clear oil pooling. Very dark/charred solids can produce a stronger burnt odor and a darker oilsome people like it, others don’t.
Step 5: Strain the oil
- Turn off the heat and let the pan cool for 2–3 minutes (still warm, not scorching).
- Pour contents into a fine mesh strainer set over a heat-safe bowl.
- Press the solids gently with a spoon to squeeze out more oil.
- Optional: strain again through cheesecloth for a cleaner finish.
You’ll end up with a small amount of oil. Yield varies a lot based on egg size and how long you cook, but a rough expectation is
about 1–2 teaspoons per 6–8 yolks. If you got less, don’t panicegg oil is concentrated and you can always scale up next time.
Step 6: Cool and bottle
- Let the strained oil cool to room temperature.
- Transfer to a clean, dry glass jar.
- Label it with the date (future-you will appreciate this).
How to Store Homemade Egg Oil (So It Doesn’t Turn Funky)
Egg yolk oil contains fats that can oxidize and turn rancid over timeespecially if exposed to heat, light, or air. Treat it like a delicate oil:
keep it in a tight container, protect it from light, and store it cool.
- Best container: dark glass jar/bottle with a tight lid
- Best location: refrigerator (especially for homemade batches)
- Batch strategy: make small amounts you’ll use up
- Optional: add a few drops of vitamin E after cooling (not magic, but can help slow oxidation)
How long does it last? Homemade egg oil isn’t standardized, so shelf life depends on cleanliness and storage.
A conservative rule is use within 2–4 weeks refrigerated. If it smells sharp, sour, “paint-like,” or just unpleasantly stale,
toss it. Rancid oil is not a glow-up.
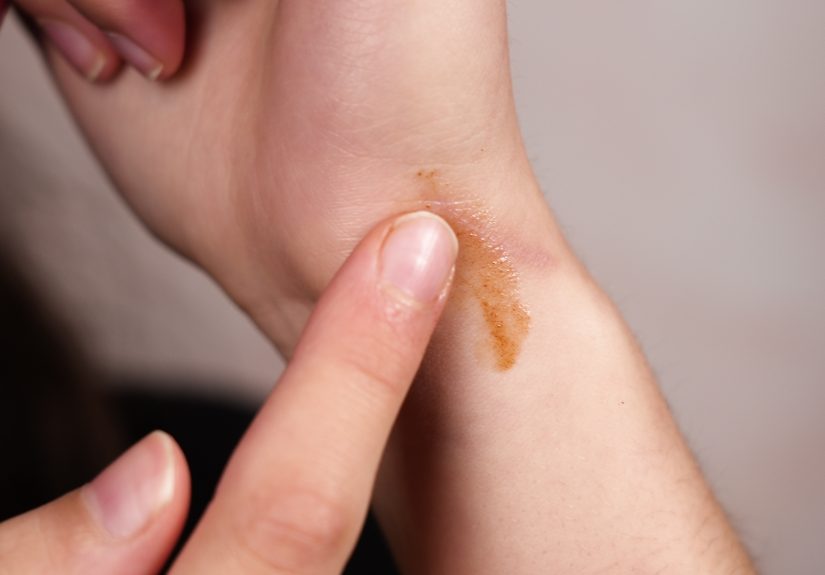
How to Use Egg Oil (Hair, Scalp, Skin, and Beyond)
Egg oil is most often used as a topical conditioner. Because egg yolk contains a mix of triglycerides and phospholipids,
it can feel softening and protectivesimilar to other rich oils. Still, everyone’s skin is different, so start small.
1) Simple scalp oil (for dry scalp feel)
- Warm 3–5 drops between your fingertips.
- Massage into the scalp for 60 seconds.
- Leave on 20–30 minutes, then shampoo thoroughly.
Tip: If your hair gets greasy easily, use less. Egg oil is not shy.
2) Hair ends “shine saver”
- Rub 1–2 drops between palms.
- Lightly smooth over the last few inches of hair.
This is especially helpful if your ends feel dry from heat styling. The keyword is tiny amountunless you’re going for the “freshly buttered bread”
look (no judgment, just accuracy).
3) DIY conditioning blend (less intense, easier to rinse)
Mix 1 teaspoon egg oil with 1 teaspoon jojoba or grapeseed oil. Apply to mid-lengths and ends, leave for 20 minutes,
then shampoo. Diluting can make the texture lighter and the scent milder.
4) Dry skin spot-softener (patch test first)
Dab the smallest amount on rough patches (like knuckles or elbows). If you’re acne-prone, avoid using heavy oils on the faceyour pores may file a complaint.
5) Cuticles and nails
Massage a drop into cuticles at night. It’s an easy use-case because you’re not dealing with large areas of skin, and you can wash hands in the morning.
Common Mistakes (And How to Fix Them)
Mistake: “I’m not getting any oil!”
- Cause: heat too low, not enough time, or yolks not mashed well
- Fix: keep stirring and give it more time; mash finer next batch
Mistake: “It’s smoking like crazy.”
- Cause: heat too high
- Fix: lower heat immediately, ventilate, stir constantly
Mistake: “It smells super burnt and bitter.”
- Cause: solids charred too hard
- Fix: aim for medium-brown next time; use a heavier pan and lower heat
Mistake: “My oil looks cloudy.”
- Cause: fine particles or moisture
- Fix: strain again through cheesecloth; store cold; keep tools dry
FAQ: Quick Answers People Actually Want
Is homemade egg oil safe to eat?
Egg oil is usually made for topical use in DIY settings. Because homemade methods vary and storage is tricky, it’s better to treat it as
a cosmetic-style oil, not a cooking oil.
Does egg oil contain egg protein?
Commercial processes can reduce proteins significantly, but homemade egg oil may still have trace components depending on your method.
If you’re allergic or highly sensitive, don’t gambleskip it or consult a professional.
How many eggs do I need?
Start with 6–8 eggs for a learning batch. Once you like your technique, scale up to 12–18 eggs to make enough for a small jar.
Kitchen Notes: Real-World Experiences People Have When Making Egg Oil (500+ Words)
If you’ve never made egg oil before, the process can feel weirdly dramatic for something that begins with… a normal breakfast food.
Here are common experiences people report when trying DIY egg yolk oil at home, along with practical “next time” lessons.
Think of this as the friendly voice in your ear saying, “Yep, that part is normalkeep going.”
The smell is “toasty egg,” and it hangs around
The first surprise is the aroma. As the yolks heat, they shift from “hard-boiled egg” to “roasted” and sometimes to “deeply toasted.”
If you cook the solids very dark, the smell can become sharper and linger in the kitchen for a while. Most people find that using a stove fan,
cracking a window, and keeping the heat moderate makes the experience much more pleasant. A lot of beginners go too hot too fast,
and that’s usually when the “burnt” note takes over.
The texture changes are oddly satisfying (until they’re not)
Expect a little texture rollercoaster: crumbly → pasty → grainy → oily. Many first-timers worry when the yolks clump or stick.
That’s normal. What matters is continuous stirring and scraping the pan so the solids don’t scorch in one spot. People often discover
that a heavier pan buys them forgiveness, while a thin pan demands constant attention like a needy houseplant.
The moment oil appears feels like magic
There’s usually a specific moment when you finally see shiny pools forming and realize, “Ohthis is actually happening.”
Beginners sometimes stop too early because they see a little sheen and assume it’s done. In reality, oil release tends to increase
after moisture has cooked off and the yolk solids deepen in color. Sticking with the process (on low to medium-low heat) usually improves yield.
Yield is smaller than you expect (and that’s okay)
A common reaction is, “I used all those eggs for this?” Yep. Homemade egg oil is concentrated and typically produced in small volumes.
That’s why experienced DIYers prefer small jars and frequent batches rather than making a huge amount once and hoping it stays fresh forever.
Once people accept that egg oil is more like a “serum” than a “jug of cooking oil,” the yield feels a lot more reasonable.
Cleanup is easier if you don’t let the pan cool completely
The cooked yolk solids can cling to the skillet if they cool down and harden. Many people find it easiest to wipe excess residue while the pan is
still warm (not hot), then wash with hot soapy water. If you wait until everything sets like cement, you’ll be scrubbing like you lost a bet.
Using it on hair: less is more, and shampoo matters
When people try egg oil for hair, the biggest learning is dosage. A few drops go a long wayespecially for fine hair or oily scalps.
Many prefer applying it to ends rather than the roots. If someone applies too much, the hair can feel heavy, and it may take two shampoo rounds
to remove the residue. That’s not a failure; it’s just oil being oil. On the flip side, people with very dry hair often like how soft and coated
their ends feel after a short pre-shampoo treatment.
Using it on skin: patch testing saves drama
A lot of people try egg oil on elbows, hands, or cuticles first because those areas tend to be less reactive than facial skin.
Patch testing is a common “I wish I did that sooner” lessonespecially for anyone with sensitive skin or a history of reactions.
When egg oil works well, people describe it as softening and protective, similar to other rich oils. When it doesn’t, the feedback is usually
irritation or a clogged-feeling texture. Starting small keeps the experiment low-stakes.
The overall takeaway from real-world experience is simple: the process is easy once you control heat and stir patiently, and the product is best treated
like a fresh, small-batch oil. Make it, label it, store it cold, and use it thoughtfullyyour future self (and your kitchen) will thank you.
Conclusion
Making egg oil at home is surprisingly doable: hard-boil eggs, mash the yolks, dry-heat them slowly until oil separates, then strain and store it like
a delicate oil. The “secret sauce” is patiencelow heat, constant stirring, and good storage habits. Used wisely, homemade egg yolk oil can be a handy
DIY conditioner for hair ends, cuticles, or dry spots. Just remember: patch test, keep batches small, and toss it if it smells off.


