Table of Contents >> Show >> Hide
- What Is a Pumpkin Tray Cake Stand?
- Materials You Will Need
- Choosing the Best Pumpkin Base
- Choosing the Tray or Plate Top
- Step-by-Step: How to Make a Pumpkin Tray
- Food-Safe Ways to Use Your DIY Pumpkin Cake Stand
- Design Ideas for Every Fall Style
- Common Mistakes and How to Fix Them
- How to Style Your Pumpkin Tray Like a Designer
- How to Store and Reuse Your Pumpkin Tray
- Budget-Friendly Variations
- Experience Notes: What I Learned Making a Pumpkin Tray Cake Stand
- Conclusion
A pumpkin tray sounds like something Cinderella would use to serve cupcakes after the carriage situation got awkward. But in real life, it is one of the easiest fall DIY projects you can make with a faux pumpkin, a plate or tray, strong adhesive, and a little styling confidence. The result is a chic DIY cake stand that looks boutique-worthy without asking your wallet to dress formally.
This project is perfect for Thanksgiving dessert tables, Halloween snack boards, fall birthdays, cozy brunches, coffee bars, and those moments when you want a humble grocery-store pumpkin muffin to look like it attended finishing school. Best of all, you can make it rustic, glam, modern, farmhouse, spooky, elegant, or “I saw this in a designer catalog and politely declined the price tag.”
In this guide, you will learn how to make a pumpkin tray step by step, how to choose the right supplies, how to keep it stable, how to style it like a pro, and how to avoid common DIY mistakes. We will also cover practical food-safety notes because painted craft pumpkins and frosting should not become best friends without a barrier between them.
What Is a Pumpkin Tray Cake Stand?
A pumpkin tray cake stand is a decorative pedestal made by attaching a plate, charger, wood round, shallow tray, or serving platter to a pumpkin-shaped base. Most DIY versions use a faux pumpkin because it is lightweight, reusable, easy to paint, and does not slowly turn into soup on your dining table. The pumpkin acts as the pedestal, while the top surface holds cupcakes, cookies, mini pies, candles, wrapped candy, napkins, ornaments, or seasonal decor.
Think of it as a cake stand with autumn energy. Instead of a plain glass pedestal, you get a charming pumpkin base that adds height, texture, and personality. It is especially useful on a fall tablescape because height creates visual interest. A flat table full of dishes can look crowded, but a raised pumpkin tray gives your desserts a stage. Cupcakes love applause. They are dramatic like that.
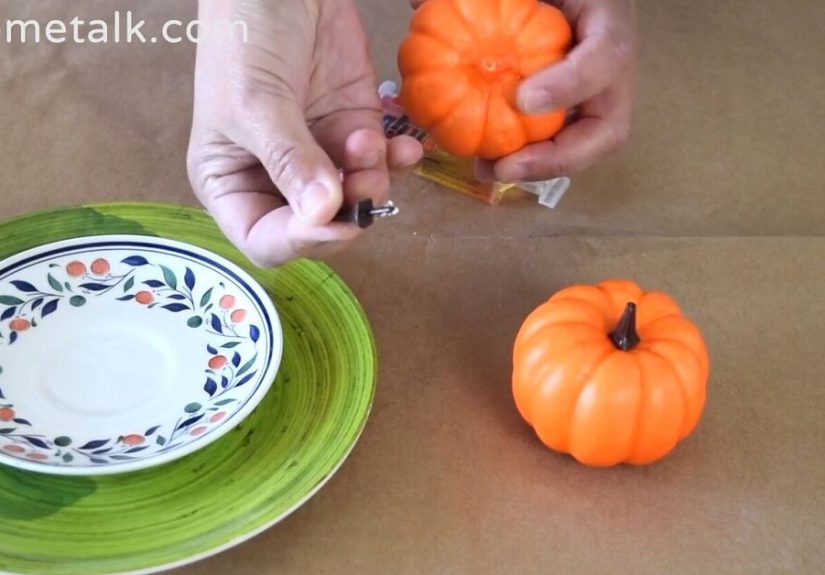
Materials You Will Need
The beauty of this chic DIY cake stand is that the supply list is short and flexible. You can buy everything new from a craft store or give thrift-store finds a second life. Here is a reliable starter list:
- One faux pumpkin, foam pumpkin, ceramic pumpkin, or sturdy plastic pumpkin
- One plate, charger, wood round, shallow tray, or small serving platter
- Strong craft adhesive suitable for the materials you are joining
- Hot glue for temporary positioning, if needed
- Spray paint, acrylic paint, or chalk-style paint
- Painter’s tape
- Fine-grit sandpaper
- Rubbing alcohol or mild soap for cleaning surfaces
- Optional clear sealer for decorative protection
- Parchment paper, cupcake liners, or a food-safe plate insert for serving
For a more polished look, consider extra details such as metallic paint, ribbon, wood beads, faux leaves, velvet pumpkins, dried flowers, gold rub-on wax, or small adhesive feet for the bottom. A simple design often looks the most expensive, but one tiny gold accent can make your pumpkin tray say, “Yes, I own cloth napkins.”
Choosing the Best Pumpkin Base
The pumpkin is not just decoration; it is the support system. Choose a pumpkin with a flat bottom and a wide enough body to balance the tray. A tall skinny pumpkin might look elegant, but it can wobble like a toddler carrying soup. A short, squat pumpkin usually creates a more stable cake stand.
Foam Pumpkins
Foam pumpkins are affordable, easy to cut, and lightweight. They are great for decorative trays, wrapped treats, cupcakes in liners, and lightweight snacks. The downside is that foam can dent, melt under high heat, and sometimes flex under heavy dishes. Use a foam pumpkin for small displays rather than a giant three-layer cake that has trust issues.
Ceramic Pumpkins
Ceramic pumpkins look elegant and feel more substantial. They work well for a chic pumpkin cake stand because the weight helps with stability. However, they can break if dropped, and you need an adhesive that bonds well to ceramic or glazed surfaces. Lightly roughening the bonding area can help create a better grip.
Plastic Pumpkins
Plastic pumpkins are widely available during fall and often come in many colors. They are easy to paint and usually sturdier than foam. Make sure the top is not too curved or flimsy. If the tray rocks before you glue it, it will probably keep rocking afterward, only with more emotional damage.
Choosing the Tray or Plate Top
The top surface determines the final style and function. A white ceramic plate gives the project a clean farmhouse look. A black charger creates a dramatic Halloween display. A wood round feels rustic and cozy. A mirrored tray adds glam. A scalloped plate looks vintage and sweet, like it belongs next to a handwritten recipe card.
Before attaching anything, test the size. The top should be larger than the pumpkin but not so large that it becomes unstable. A good rule is to keep the plate or tray centered and balanced, with the pumpkin covering enough surface area underneath to support the weight. For a small pumpkin, use a dessert plate or small charger. For a larger pumpkin, use a dinner plate, round tray, or wood plaque.
Step-by-Step: How to Make a Pumpkin Tray
Step 1: Clean and Prep the Surfaces
Start by cleaning the top of the pumpkin and the underside of the tray or plate. Dust, sticker residue, oil, and glitter crumbs from last year’s craft bin can weaken the bond. Wipe the surfaces with rubbing alcohol or mild soap and let everything dry completely.
If the pumpkin or plate has a glossy finish, lightly sand the bonding area with fine-grit sandpaper. You do not need to sand like you are restoring a barn door. Just roughen the surface enough so the adhesive has something to grip.
Step 2: Test the Balance Before Gluing
Place the plate or tray on top of the pumpkin and check the balance from every angle. Step back. Squint like an interior designer on television. If it looks crooked, shift the tray until it appears centered. Mark the position lightly with painter’s tape or a pencil on the underside of the tray.
This dry-fit step matters. Once strong adhesive enters the chat, your project becomes much less forgiving. A few minutes of testing can save you from a cake stand that leans like it heard gossip from the next room.
Step 3: Apply the Adhesive
Apply a strong craft adhesive to the top of the pumpkin or to the marked area on the underside of the tray. Use enough to create a secure bond, but not so much that it squeezes out everywhere like frosting from an overfilled pastry bag.
Hot glue can help hold pieces in place quickly, but it is usually not the strongest long-term option for heavier plates or ceramic surfaces. For a sturdier pumpkin tray, use a permanent adhesive designed for mixed materials such as glass, ceramic, plastic, or wood. Always follow the product label for drying and curing time.
Step 4: Center the Tray and Let It Cure
Carefully press the tray onto the pumpkin. Check that it is centered and level. If needed, place a light book on top to hold the contact steady, but do not use anything so heavy that it crushes the pumpkin or shifts the tray.
Let the adhesive cure fully before decorating or using the stand. This is the hardest step because the project already looks cute and your brain starts shouting, “Put cookies on it!” Resist. A fully cured bond is safer, stronger, and less likely to separate during use.
Step 5: Paint for a Chic Finish
Once the stand is secure, paint it if desired. You can paint the pumpkin and tray separately before gluing, but painting after assembly helps create a seamless designer look. Use spray paint for a smooth finish or acrylic paint for better control and brush texture.
For a modern style, try matte black, warm white, clay beige, sage green, champagne gold, or soft taupe. For a glamorous pumpkin tray, use metallic gold or bronze on the pumpkin base and a glossy black tray top. For a rustic farmhouse look, paint the pumpkin cream and lightly dry-brush the grooves with tan or gray.
Step 6: Seal and Protect the Finish
A clear sealer can help protect painted surfaces from scratches, especially if the tray will be used for decor year after year. Choose a finish that matches your style: matte for understated elegance, satin for a soft sheen, or gloss for a polished holiday look.
Important note: a decorative sealer does not automatically make a painted craft surface food-safe. If you plan to serve food, use parchment paper, cupcake liners, wrapped treats, or a removable food-safe plate on top. This keeps the display pretty and practical. Your cookies deserve glamour, not mystery chemistry.
Food-Safe Ways to Use Your DIY Pumpkin Cake Stand
A pumpkin tray is usually best treated as a decorative serving display, not a direct food-contact surface unless the top plate itself is food-safe and unpainted where food touches it. If you paint or seal the tray top, place food on liners, parchment, doilies, small bowls, or a clean plate insert.
This is especially important for moist, oily, or sticky foods such as frosted cupcakes, cheese, fruit, caramel apples, and sliced cake. Dry wrapped candy, packaged cookies, and cupcakes in liners are easier choices. For a Thanksgiving dessert table, you can use the stand for mini pies, pumpkin cupcakes, spice cookies, or wrapped caramel treats. For Halloween, stack it with candy bags, mini donuts, or black-and-orange macarons.
Design Ideas for Every Fall Style
Modern Neutral Pumpkin Tray
Paint the entire stand warm white or beige. Add a thin gold line around the plate rim. Style it with vanilla cupcakes, linen napkins, and eucalyptus. This version looks calm, expensive, and completely unaware of the craft glue on your kitchen counter.
Glam Halloween Cake Stand
Use a black tray top and a gold pumpkin base. Add tiny bats, black ribbon, or a few faux spiders around the bottom. This is ideal for Halloween parties, but keep the look edited. Too many spooky accessories can turn chic into “garage haunted house” very quickly.
Farmhouse Fall Stand
Choose a wood round for the top and a cream or orange pumpkin for the base. Add buffalo check ribbon, dried wheat, mini pinecones, or faux maple leaves. This style works beautifully on a kitchen island or coffee bar.
Thanksgiving Dessert Display
Paint the pumpkin in a soft bronze or copper tone and use a white plate on top. Fill the stand with pumpkin bars, mini cheesecakes, cookies, or small bowls of nuts and chocolates. Add candles nearby, but keep open flames away from faux leaves, ribbon, and painted surfaces.
Common Mistakes and How to Fix Them
The Tray Is Crooked
If the adhesive is still wet, gently reposition the tray and use painter’s tape to hold it in place. If it has already cured, you may need to carefully separate the pieces and reglue them. Next time, mark the center before applying adhesive.
The Paint Looks Streaky
Thin coats are better than one thick coat. Let each layer dry before adding the next. If brush marks bother you, use a foam brush or spray paint. If the streaks are subtle, call it “hand-finished texture” and continue living your best life.
The Stand Wobbles
Check the bottom of the pumpkin. If it is uneven, add small felt pads or clear bumper feet. If the top is too heavy, switch to a lighter plate or use the stand only for decorative items.
The Glue Shows
Wipe away excess adhesive before it dries. If it has already cured, cover the joint with ribbon, rope trim, wood beads, faux leaves, or a narrow band of decorative cord. DIY is basically the art of turning mistakes into “design details.”
How to Style Your Pumpkin Tray Like a Designer
The secret to styling a pumpkin tray is contrast. If the stand is simple, add texture with baked goods, greenery, or patterned napkins. If the stand is bold, keep the toppings simple. A black-and-gold pumpkin cake stand looks stunning with plain white cupcakes or sugar cookies. A rustic wood stand pairs well with cinnamon rolls, apple cider donuts, or mini pumpkin loaves.
Use odd numbers when arranging decorative items. Three mini pumpkins, five cookies, or seven wrapped treats usually look more natural than even groupings. Add height nearby with candlesticks, a vase of branches, or a stack of plates. The tray should be the star, but not the only actor on stage.
For photos, place the stand near natural light and keep the background clean. A linen towel, a wood table, or a simple white wall helps the pumpkin shape stand out. Avoid clutter unless your theme is “fall exploded, but make it festive.”
How to Store and Reuse Your Pumpkin Tray
Store your pumpkin tray in a cool, dry place after the season ends. Wrap it in tissue paper or an old towel to protect the paint. Avoid stacking heavy items on top, especially if the base is foam. If the tray gets dusty, wipe it with a soft dry cloth. Do not soak it in water or put it in the dishwasher.
One of the best reasons to use a faux pumpkin is that you can reuse the stand year after year. You can also repaint it when your style changes. Today it may be farmhouse cream; next year it may become moody black; by 2028 it might be metallic copper with velvet ribbon because apparently we all become a little more dramatic with age.
Budget-Friendly Variations
If you want to keep costs low, shop your home first. An unused plate, old charger, thrifted candlestick-style pumpkin, or leftover craft paint can become the foundation of the project. Dollar stores, craft stores, discount retailers, and thrift shops are excellent places to find supplies. Look for pieces with good shape rather than perfect color, because paint can fix almost anything except a wobbly base and questionable life choices.
You can also make mini pumpkin trays using small faux pumpkins and saucers. These are adorable for individual desserts, place settings, teacher gifts, hostess gifts, or coffee bar decor. For a larger centerpiece, make two or three stands in different heights and group them together.
Experience Notes: What I Learned Making a Pumpkin Tray Cake Stand
The first lesson from making a pumpkin tray is that “centered” is not a feeling. It is a measurement. When you place a round plate on top of a round-ish pumpkin, your eyes may lie to you, especially if the pumpkin has deep grooves. I learned to mark the center of the plate with painter’s tape and then line it up with the pumpkin stem area or top center. That tiny step made the whole project look cleaner and more professional.
The second lesson is that drying time is not optional. A pumpkin tray may look finished after ten minutes, but adhesive strength builds as it cures. Moving it too early can create a weak bond or a slightly shifted top. I like to assemble the stand at night and let it rest until the next day. It feels less like waiting and more like letting the project “sleep on its career goals.”
Paint choice also makes a huge difference. Glossy orange pumpkins can look cute, but if you want a chic DIY cake stand, soft matte colors often feel more elevated. Warm white, mushroom beige, muted olive, charcoal, copper, and champagne gold all look more expensive than bright craft-store orange. That does not mean orange is wrong; it just needs intention. A rich burnt orange with a dark wood tray can look beautiful and seasonal without feeling cartoonish.
I also discovered that the tray top should match the weight of the base. A heavy ceramic platter on a lightweight foam pumpkin can feel unstable, even if the glue is strong. A foam pumpkin works better with a lightweight charger, plastic tray, or thin wood round. A ceramic pumpkin can handle a heavier plate. Stability matters more than size, especially if guests will be reaching for desserts.
Another helpful trick is to style the tray before the party starts. Do not wait until guests arrive to decide where the cupcakes go. Test the arrangement, check the balance, and make sure the stand sits flat on the table. If you are serving food, use parchment paper or cupcake liners so cleanup is easy and the decorative surface stays protected. A pumpkin tray should make hosting easier, not create a craft emergency next to the cranberry sauce.
Finally, the best pumpkin tray is the one that fits your home. If your style is minimal, skip the ribbon and keep the shape clean. If your style is cozy and layered, add leaves, beads, or dried flowers. If your style is Halloween drama, bring on the black paint and tiny bats. The project is simple, but the personality is all yours. That is the real charm of DIY: you get a custom piece, a good story, and the satisfaction of saying, “Thanks, I made it,” while pretending it was no big deal.
Conclusion
Learning how to make a pumpkin tray is an easy way to turn basic fall supplies into a chic DIY cake stand that looks stylish, seasonal, and surprisingly high-end. With a sturdy faux pumpkin, a balanced tray top, the right adhesive, and a thoughtful finish, you can create a reusable piece for Halloween, Thanksgiving, fall birthdays, dessert tables, coffee bars, and cozy home decor.
Keep the project practical by testing balance before gluing, allowing the adhesive to cure fully, and using liners or food-safe inserts when serving treats. Once you understand the basics, you can customize the look endlesslyfrom modern neutral to rustic farmhouse to glam Halloween. It is affordable, beginner-friendly, and just fancy enough to make store-bought cookies look like they came with a publicist.
Note: This pumpkin tray is best used as a decorative serving stand. For direct food serving, place treats on parchment paper, cupcake liners, wrapped packaging, or a removable food-safe plate.