Table of Contents >> Show >> Hide
- Why a Fall-to-Winter Topiary Is Such a Smart Idea
- Choose Your Topiary Style First
- The Best Plants for a Gorgeous Seasonal Topiary
- What You Need
- How to Make the Topiary Step by Step
- How to Make It Look Truly Gorgeous, Not Just “Nice”
- Fall Styling Ideas for Your Topiary
- Winter Styling Ideas for the Same Topiary
- Care Tips So Your Topiary Stays Beautiful
- Common Mistakes to Avoid
- of Real-World Experience and Inspiration
- Conclusion
Some decorations scream “October only.” Others look like they got stranded after the holidays and never emotionally recovered. A well-made seasonal topiary, however, is the rare overachiever that can glide from crisp fall afternoons straight into winter festivities without looking confused. That is exactly why this project works so beautifully: it gives you structure, texture, and evergreen elegance first, then lets you swap a few accents to match the season.
If you want a front porch centerpiece, an entryway statement, or a container design that looks polished without demanding daily pep talks, this guide will walk you through how to make a gorgeous topiary that feels right at home in both fall and winter. We are talking about a living or partly living topiary in a container, styled with cold-season elements like evergreen foliage, berries, ornamental branches, pinecones, and hardy companions. In other words, it is classy, practical, and just dramatic enough to make the neighbors slow down.
Why a Fall-to-Winter Topiary Is Such a Smart Idea
A topiary brings instant structure to seasonal decorating. Even when flowers fade, pumpkins soften, or the weather gets moody, a topiary keeps its shape and presence. That architectural quality is the secret sauce. Instead of rebuilding your porch or patio display every few weeks, you start with a strong evergreen framework and then layer in seasonal accents.
For fall, the topiary can lean warm and textural: think coppery grasses, burgundy foliage, mini gourds, cinnamon-toned ribbon, and muted orange accents. When winter arrives, the same foundation can be refreshed with berry picks, pinecones, magnolia leaves, red twig dogwood, and a cooler color palette. One base, two seasons, zero decorating identity crises.
Choose Your Topiary Style First
Before you grab a pot and start playing garden designer, decide what kind of topiary you want to make. There are two practical approaches for this project, and both can be beautiful.
1. Living evergreen topiary
This is the best option if you want a long-lasting, natural look. Use a compact evergreen or topiary-friendly shrub as the star. Good candidates include boxwood, dwarf arborvitae, small junipers, or certain hollies. These plants provide year-round structure and can be shaped or lightly maintained over time.
2. Frame-based decorative topiary
This style uses a topiary form or wire frame paired with ivy, creeping plants, or even preserved and cut materials. It is especially useful if you want a more formal cone, spiral, or obelisk shape without waiting for a shrub to grow into one. This approach is also excellent for sheltered entryways or indoor-outdoor transitional spaces.
If you are a beginner, a compact evergreen in a handsome container is the easiest path. It gives you a naturally elegant shape, requires less fiddling, and still allows plenty of room for seasonal flair.
The Best Plants for a Gorgeous Seasonal Topiary
The prettiest topiary in the world will still be a headache if the plant is wrong for your climate, light, or container size. Choose with both beauty and realism in mind. Your plant should hold a tidy form, tolerate container life, and look attractive as temperatures dip.
Top picks for a living fall-and-winter topiary
- Boxwood: A classic choice for topiary thanks to its dense foliage and elegant shape. It looks formal but not fussy, which is a rare and beautiful personality trait.
- Dwarf arborvitae: Great for rounded or naturally conical forms. It adds soft evergreen texture and works well in symmetrical porch containers.
- Juniper: A tougher, slightly more rugged option with excellent winter character.
- Holly: Wonderful for winter interest, especially varieties with dense form and decorative berries.
- Ivy on a frame: Perfect for a smaller or more decorative topiary. It can be trained around forms for an elegant, European-inspired look.
- Rosemary or bay laurel in mild climates: These can be stunning, fragrant choices where winters are gentle or where containers can be protected.
The key is not simply choosing a “pretty plant.” Choose one that keeps its cool when the weather stops cooperating. Fall and winter containers live in a far less forgiving world than spring baskets full of optimism.
What You Need
- A sturdy container with drainage holes
- High-quality potting mix
- One evergreen shrub or topiary form with suitable plant material
- Gloves and hand pruners
- Optional topiary frame or support stakes
- Mulch, moss, or decorative top dressing
- Fall accents: ornamental kale, pansies, small pumpkins, seed pods, dried grasses, copper ribbon
- Winter accents: pinecones, berry stems, magnolia leaves, red twig dogwood, evergreen cuttings, weather-safe ribbon
Choose a container that is large enough to anchor the design. If the pot is too small, the arrangement can dry out quickly, tip in wind, or look like your topiary is wearing pants two sizes too short.
How to Make the Topiary Step by Step
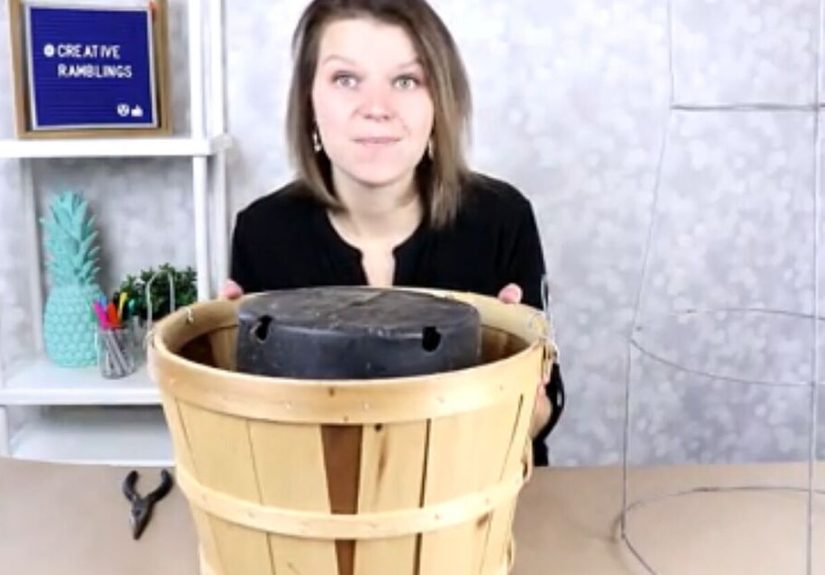
Step 1: Pick the right container
Use a pot that feels substantial and stable. Outdoor fall and winter displays need visual weight as well as physical weight. A lightweight pot can work if it is large enough, but in colder climates a sturdier container is safer. Always make sure it has drainage holes. Wet soil plus freezing temperatures is a recipe for unhappy roots and cracked containers.
Step 2: Fill with quality potting mix
Do not use garden soil scooped from the yard. That shortcut often leads to compaction, poor drainage, and soggy roots. Use a potting mix designed for containers so moisture can be retained without turning the pot into a swamp. Fill the container partway, leaving space to set the plant at the correct height.
Step 3: Set your topiary centerpiece
If you are using a living shrub, remove it from its nursery pot, gently loosen the roots if they are circling, and place it in the center. The top of the root ball should sit slightly above the final soil line rather than sinking too low. Backfill around the root ball and firm the mix gently.
If you are using ivy and a topiary form, plant the ivy at the base of the frame and guide the vines through the structure. Tuck, weave, and clip gently. Think graceful training, not a plant hostage situation.
Step 4: Water thoroughly
After planting, water deeply until moisture runs from the drainage holes. This settles the potting mix and helps eliminate air pockets. Even in cool weather, a newly planted container should never be left bone-dry.
Step 5: Add your fall layer
Now the fun part begins. Around the base of the topiary, add companions and accents that say “fall” without screaming in glitter. Ornamental kale, pansies, heuchera, trailing ivy, or grassy textures work beautifully. Tuck in mini pumpkins, seed heads, or muted orange berry picks if you want a harvest look.
Keep the arrangement balanced. If the topiary is formal and symmetrical, repeat elements evenly on both sides. If it is more relaxed, use asymmetry on purpose, not by accident.
Step 6: Transition it into winter
When late fall gives way to winter, remove any tired seasonal fillers and replace them with cold-weather accents. Fresh evergreen cuttings, red twig dogwood stems, pinecones, magnolia leaves, faux berries, or holly branches can all be tucked into the soil surface around the main topiary. This gives the display depth and a layered designer look.
The reason this works so well is simple: the topiary remains the permanent skeleton, while the decorative materials become the seasonal wardrobe. Fall puts it in a wool coat; winter adds velvet and pearls.
How to Make It Look Truly Gorgeous, Not Just “Nice”
There is a big difference between a topiary that looks professionally styled and one that looks like it was assembled in a hurry between coffee and regret. These details make all the difference.
Use contrast in texture
Pair smooth evergreen foliage with airy branches, soft moss, rough pinecones, or broad leaves. Texture is what makes a monochromatic container feel rich rather than flat.
Stick to a tight color palette
For fall, use rust, plum, burgundy, copper, olive, and soft gold. For winter, shift to evergreen, red, deep brown, cream, silver, or black. A restrained palette always looks more expensive.
Think vertically
The topiary itself gives you height, but tall accents such as twig bundles or berry stems can extend the silhouette and make the whole arrangement feel more dramatic. This is especially effective on large porches or beside entry doors.
Repeat materials
One pinecone is a pinecone. Six pinecones strategically repeated throughout the arrangement look intentional. The same goes for berry stems, ribbon loops, or decorative picks.
Finish the soil surface
Cover exposed soil with moss, mulch, or decorative top dressing. Bare soil can make even a beautiful container feel unfinished. Think of this as the styling equivalent of polishing your shoes before a big night out.
Fall Styling Ideas for Your Topiary
If your goal is a porch display that feels cozy and elevated, here are a few tried-and-true looks:
The harvest classic
Use a boxwood or arborvitae topiary in a dark urn. Surround it with ornamental kale, burgundy heuchera, and tan or bronze grasses. Add a few tiny heirloom pumpkins nearby rather than stuffing the pot like a produce aisle.
The moody modern look
Choose a black or charcoal planter, a neatly shaped juniper, and a minimal skirt of moss. Add dark berry stems and deep plum foliage. This works beautifully on contemporary porches and urban entryways.
The farmhouse warm-up
Start with a rustic pot, then add a rounded evergreen, muted orange ribbon, pinecones, and a few weathered branches. Keep it organic and relaxed.
Winter Styling Ideas for the Same Topiary
Once winter arrives, the same container can become more refined, festive, or woodland-inspired depending on your style.
The classic holiday porch
Layer in noble fir or pine cuttings, holly-style berry picks, magnolia leaves, and red twig dogwood. This creates bold contrast and a timeless red-green winter look.
The neutral winter arrangement
Use cedar, eucalyptus tones, white twigs, brown pinecones, and natural moss. This looks sophisticated long after the holiday season ends.
The elegant symmetrical pair
If you have a front entry with double doors or steps, create two matching topiary containers. Symmetry is one of the quickest ways to make a home look polished and welcoming in winter.
Care Tips So Your Topiary Stays Beautiful
Water when needed, even in cool weather
Newly planted shrubs and containers can still dry out in fall and winter, especially in windy weather. Check moisture regularly, but do not water when the soil is frozen.
Protect from harsh winter wind
Evergreens in exposed spots can suffer from drying winds. If your entryway gets hammered by winter weather, move the pot to a more sheltered location or use loose burlap protection during the worst conditions.
Brush off heavy snow gently
If snow piles onto the branches, gently remove it before weight causes breakage. Avoid trying to chip off ice, which can damage the plant.
Prune lightly, not aggressively
Topiary is about maintenance, not butchery. Trim only enough to maintain shape unless you are doing your main formative pruning at the proper time for the plant.
Feed modestly
Container plants lose nutrients over time, but late-season overfeeding is not helpful. Use a balanced fertilizer during the active growing period rather than trying to power-boost the plant during deep cold.
Common Mistakes to Avoid
- Using a pot without drainage
- Choosing a plant that is not suited to your hardiness zone
- Overcrowding the base with too many accents
- Letting the container dry out completely after planting
- Using cheap decorative materials that fade or collapse in bad weather
- Ignoring scale, especially on a large porch where tiny pots tend to disappear
The biggest mistake, though, is treating a topiary like a one-week decoration. A good one evolves. It should look collected, layered, and alive with the season rather than locked into a single holiday moment.
of Real-World Experience and Inspiration
One of the best things about making a topiary for fall and winter is that the project never feels purely decorative. It becomes part of the rhythm of the season. You start in early fall with the practical task of refreshing outdoor pots, and before long the arrangement becomes the visual anchor for your front porch, patio, or entryway. It is the piece people notice when they visit, the thing you admire when you come home with grocery bags in both hands, and the little burst of order that somehow makes cold weather feel more inviting.
Many gardeners discover that topiary work is strangely relaxing. There is a calm, methodical pleasure in clipping a plant into shape, stepping back, adjusting one branch, then tucking in a few seasonal accents. It is not fast in the way that tossing a pumpkin by the door is fast, but it is deeply satisfying. The process rewards patience and observation. You begin to notice which textures catch the late afternoon sun, which berry stems pop against dark foliage, and how a taller branch can change the entire mood of the arrangement.
Another memorable part of the experience is how adaptable the design can be. In fall, the container may feel warm, textural, and grounded. Add ornamental kale, faded hydrangea blooms, dried grasses, or muted pumpkins, and suddenly the topiary looks like it belongs in a cozy magazine spread. Then winter arrives, and instead of starting over, you simply edit. Out come the more fragile fall details; in go evergreen cuttings, pinecones, magnolia leaves, bright berries, and red twig branches. The arrangement becomes cleaner, sharper, and more architectural. It evolves with the season in a way that feels intentional rather than temporary.
There is also a practical confidence that comes with building one yourself. After the first successful container, you stop feeling intimidated by “designer” porch arrangements because you understand what makes them work: height, structure, repetition, contrast, and a restrained color palette. You realize that a gorgeous topiary is not about buying the most expensive materials. It is about composition. A humble evergreen can look luxurious if the pot is the right size, the silhouette is clear, and the finishing touches are thoughtful.
For many people, these projects also become tied to memory. Maybe you clip evergreen branches with a parent, collect pinecones with your kids, or reuse a favorite old urn that appears every autumn like an old friend who always brings good snacks. Seasonal gardening has a way of becoming personal. The topiary turns into more than a container; it becomes part of how your home announces the season.
And that may be the best reason to make one. A gorgeous fall-and-winter topiary does not just decorate a space. It creates continuity. It helps your home move gracefully from harvest season to holiday season to the quiet weeks after, when you still want something beautiful outside the door. It says the house is cared for, the season is welcome, and even on gray days, there is still a little beauty standing at attention on the porch.
Conclusion
If you want one seasonal project that delivers beauty, versatility, and serious curb appeal, a fall-to-winter topiary is hard to beat. Start with a strong evergreen centerpiece or topiary form, use a well-drained container and quality potting mix, then build the look with seasonal layers that can be refreshed as the weather changes. Fall brings warmth and texture. Winter brings contrast and evergreen drama. The topiary ties it all together.
Best of all, this project works for many styles, from classic and formal to rustic, modern, or farmhouse-inspired. Once you understand the formula, you can repeat it year after year and make it your own. That is the magic of a great topiary: it is structured enough to feel elegant, flexible enough to feel personal, and gorgeous enough to earn a second glance every time you walk past it.


