Table of Contents >> Show >> Hide
- Before You Start: Know What You’re Cleaning (Because Paint Has Feelings)
- What You’ll Need (Most of This Is Already in Your House)
- The Golden Rules (Read These Before You Touch the Stain)
- Method 1: Wet Nail PolishBlot First, Then Clean
- Method 2: Dried Nail PolishLift the Bulk Without Scratching Paint
- Method 3: Mild Abrasive Paste (Great for Stubborn Pigment on Washable Paint)
- Method 4: Melamine Sponge (Magic Eraser-Type)Effective, But Don’t Go Full Sandpaper
- Method 5: Rubbing Alcohol (Isopropyl)Targeted Dabs Only
- Method 6: Non-Acetone Remover or Acetone (Last Resort, Small Spots Only)
- Special Situations (Because Walls Love Plot Twists)
- What Not to Do (Unless You Secretly Want to Repaint)
- If You Accidentally Damage the Paint: Quick Touch-Up That Looks Like You Meant It
- How to Prevent Nail Polish Wall Incidents (A Love Letter to Future You)
- Conclusion: The Calm, Clean-Wall Victory Lap
- Real-Life Style Experiences (500+ Words): What Usually Happens in Actual Homes
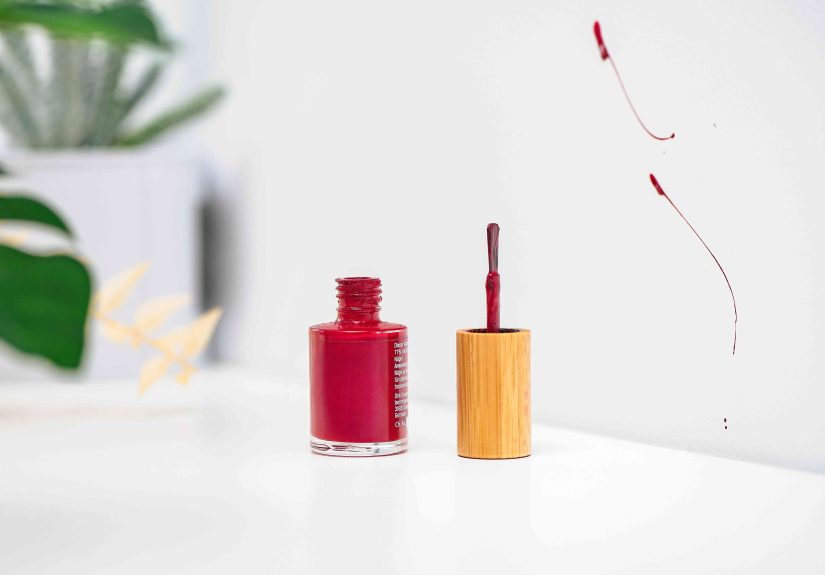
Nail polish has two settings: “perfectly obedient in the bottle” and “missionary of chaos the second you blink.”
If you’re staring at a bright streak on your wall (and questioning every life choice that led to this moment),
breathe. In most cases, you can get nail polish off walls without removing paintyou just need the right
game plan, the right amount of patience, and the humility to start gentle.
This guide walks you through the safest, most effective ways to remove nail polish from painted walls,
step-by-step. We’ll start with the mild stuff (soap and water) and only graduate to stronger options
(like alcohol or tiny, controlled dabs of acetone) when it actually makes sense. Along the way, you’ll learn
how paint finish changes everything, why “scrub harder” is usually the villain, and what to do if the wall
still looks a little… emotionally impacted afterward.
Before You Start: Know What You’re Cleaning (Because Paint Has Feelings)
1) Identify your paint finish
Paint sheen matters because it changes how washable and durable the surface is:
- Flat/Matte: least washable; can burnish (get shiny spots) easily.
- Eggshell/Satin: more durable; usually safer for gentle spot cleaning.
- Semi-gloss/Gloss: most washable; handles careful cleaning best.
2) Check the wall texture
If your wall is smooth, you can usually lift polish without too much drama. If it’s orange-peel,
knockdown, or heavily textured, nail polish likes to nestle into the tiny valleys like it pays rent there.
Textured walls require more “dab and lift” and less “rub like you’re polishing a bowling ball.”
3) Do a quick “fresh or dry?” test
- Wet polish: you want to blot and lift immediately (do not smear).
- Dried polish: you’ll work in layerslift the bulk first, then remove residue.
4) Always do a spot test
Pick a hidden area (behind a picture frame, near a baseboard, inside a closet) and test any method
for 30–60 seconds. If you see paint color on your cloth, the method is too aggressive for your finish.
Switch to a gentler option.
What You’ll Need (Most of This Is Already in Your House)
- Microfiber cloths (or soft cotton rags)
- Cotton swabs (Q-tips) or cotton rounds
- Mild dish soap + warm water
- Soft sponge
- Plastic putty knife or an old plastic card (for dried polish)
- Baking soda or white (non-gel) toothpaste
- Optional: melamine sponge (Magic Eraser-type), used gently
- Optional: rubbing alcohol (isopropyl alcohol), used carefully
- Last resort: non-acetone remover or acetone (tiny controlled dabs only)
- Nitrile gloves + good ventilation if using solvents
The Golden Rules (Read These Before You Touch the Stain)
- Start mild. Most paint damage happens because people panic and go straight to solvents.
- Blot, don’t smear. Especially with wet polish.
- Work from the outside in. Prevents spreading the stain.
- Use minimal moisture. Too much water can leave marks or soften paint, especially matte.
- Let chemistry do the work. Gentle dwell time beats aggressive scrubbing.
Method 1: Wet Nail PolishBlot First, Then Clean
Step-by-step
-
Blot immediately. Use a dry microfiber cloth or cotton round. Press lightly and lift.
If you rub, you’ll spread pigment and make a bigger stain. - Switch to a clean area of the cloth often. Nail polish transfers fast, like gossip.
-
Clean with warm soapy water. Mix a few drops of dish soap into warm water. Dampen (don’t soak)
a soft cloth and gently wipe the area. Then wipe again with clean water and dry.
Example: If you dripped a clear top coat onto a satin hallway wall, you might not even see a stain
just a slightly glossy patch. In that case, soapy water and a gentle wipe often solves it without escalating.
Method 2: Dried Nail PolishLift the Bulk Without Scratching Paint
Step-by-step
-
Use a plastic edge to lift flakes. Gently slide a plastic putty knife or old credit card under the
edge of the dried polish. Your goal is to pop off the “raised” part, not to scrape the wall. - Vacuum or pick up flakes. Don’t grind them into the paint while wiping.
-
Follow with warm soapy water. Use a damp cloth to remove any remaining residue or oily sheen.
Rinse with a clean damp cloth and dry.
If you remove the “bulk” first, you’ll need far less chemical help later. That’s a win for your paint and your blood pressure.
Method 3: Mild Abrasive Paste (Great for Stubborn Pigment on Washable Paint)
If there’s still a faint stain after soap-and-water, a gentle paste can help “lift” residue without harsh solvents.
This works best on eggshell, satin, semi-gloss, and gloss. Use extra caution on flat/matte.
Option A: Baking soda paste
- Mix baking soda with a small splash of water until it forms a soft paste.
- Apply a tiny amount to a damp soft cloth (not directly to the wall if you can avoid it).
- Gently rub in small circles with very light pressure for 10–15 seconds.
- Wipe clean with a damp cloth, then dry.
Option B: White toothpaste (non-gel)
- Use plain white toothpaste (not gel, not whitening-with-micro-crystals, not “volcanic ash luxury spa mint”).
- Rub gently with a soft cloth for 10–15 seconds.
- Wipe clean with a damp cloth and dry.
Pro tip: If your wall is matte and you’re worried about a shiny spot, stop as soon as you see improvement.
Overworking matte paint can create a “cleaner-looking” halo that’s somehow worse than the original mark.
Method 4: Melamine Sponge (Magic Eraser-Type)Effective, But Don’t Go Full Sandpaper
Melamine sponges can remove scuffs and residue, but they’re mildly abrasive. Used gently, they can be a lifesaver.
Used aggressively, they can dull sheen or leave a visible patchespecially on flat paint.
How to use it safely
- Wet the sponge and squeeze until it’s only damp.
- Use light pressure and short strokesthink “polite persuasion,” not “anger management.”
- Check your progress every few seconds.
- Wipe the area with a damp cloth to remove residue, then dry.
Best for: semi-gloss/gloss and durable satin finishes.
Use caution on: flat/matte and freshly painted walls.
Method 5: Rubbing Alcohol (Isopropyl)Targeted Dabs Only
Alcohol can dissolve certain residues, but it can also dull or damage some painted finishes. If you use it,
keep it spot-specific and avoid soaking the wall.
Step-by-step
- Put a small amount of rubbing alcohol on a cotton swab (not directly on the wall).
- Gently dab the nail polish staindo not scrub large areas.
- Switch swabs frequently as the color transfers.
- Wipe with a damp soapy cloth, then wipe again with clean water, and dry.
Example: A tiny red polish dot on a satin bathroom wall often responds well to careful alcohol dabbing.
But if you notice the sheen turning dull around the spot, stop immediately and switch back to mild soap-and-water.
Method 6: Non-Acetone Remover or Acetone (Last Resort, Small Spots Only)
Here’s the truth: nail polish remover can remove nail polish… and sometimes it can remove paint, too.
If you’re determined to try it, treat it like hot sauce: a little goes a long way, and regret is real.
If you try non-acetone remover
- Ventilate the area and wear gloves.
- Apply to a cotton swabnever pour onto the wall.
- Dab the stain lightly for a few seconds.
- Immediately wipe with a damp soapy cloth, then clean water, then dry.
If you use acetone
- Only for tiny specks on durable paint where other methods failed.
- Keep it away from flames/heat and use good ventilation (acetone is highly flammable).
- Use a cotton swab, dab quickly, and rinse immediately with mild soapy water.
Reality check: If the stain is large (like a splash), using acetone might trade a nail polish stain
for a paint-stripped patch. At that point, touch-up paint is usually the smarter “least annoying” solution.
Special Situations (Because Walls Love Plot Twists)
Flat/matte paint
Matte paint is the “delicate flower” of wall finishes. Stick to: dry lifting (plastic edge), mild soap-and-water,
and very light dabbing. Avoid aggressive rubbing and be cautious with Magic Erasers and alcohol.
Textured walls
Use cotton swabs to get into texture pockets. Try soap-and-water first, then a tiny amount of baking soda paste on a
soft toothbrush very lightly (and only after a spot test). The goal is to lift residue without flattening texture
or creating a lighter “clean” spot.
Older paint or unknown paint type
If your paint is older, chalky, or easily rubs off, go ultra-gentle. Sometimes the safest route is:
remove what you can, then plan a small touch-up.
What Not to Do (Unless You Secretly Want to Repaint)
- Don’t use steel wool or abrasive scrub pads.
- Don’t scrub hardyou’ll burnish or remove paint, especially on matte finishes.
- Don’t soak the wall with water or cleaner.
- Don’t mix chemicals (especially bleach with other cleaners).
- Don’t use strong degreasers unless you’re ready for possible paint damage.
- Don’t keep going once the stain improves; over-cleaning can leave a visible patch.
If You Accidentally Damage the Paint: Quick Touch-Up That Looks Like You Meant It
1) Let the area dry completely
Many “oh no” moments look better once fully dry. Give it at least a few hours (overnight is even better).
2) Feather the edges
If the spot looks dull or slightly lighter, gently wipe the surrounding area with a damp cloth to blend the transition.
Don’t overwork itjust soften the boundary.
3) Use a small brush and thin coats
If you have leftover paint, apply thin coats and feather outward. Thick blobs are the enemy of invisible touch-ups.
If you don’t have the exact paint, consider getting a small sample matched.
How to Prevent Nail Polish Wall Incidents (A Love Letter to Future You)
- Do nails on a table with a cheap vinyl tablecloth or towel underneath.
- Keep remover, cotton rounds, and Q-tips handy for immediate cleanup.
- Close bottles between coats (yes, even when you’re “totally coming right back”).
- If kids are involved: set up a “polish station” away from walls, with a tray that has a raised edge.
Conclusion: The Calm, Clean-Wall Victory Lap
If you remember nothing else, remember this: the best way to get nail polish off walls without removing paint is to
start gentle, work small, and escalate only as needed. Soap-and-water solves more than you’d think.
Baking soda paste and careful Magic Eraser use can handle the stubborn leftovers. Alcohol and remover belong in the
“tiny dab” categorynot the “soak the wall and pray” category.
And if the stain is big or the paint is delicate? A small touch-up can be the most professional-looking solution.
Your wall doesn’t need a dramatic makeoverit just needs you to be slightly more patient than the nail polish was.
Real-Life Style Experiences (500+ Words): What Usually Happens in Actual Homes
Let’s talk about the part no one puts in the quick tips: nail polish removal is rarely a single heroic swipe.
In real houseswhere paint finishes vary, lighting is unforgiving, and stains appear exclusively in the most visible
spotsuccess usually looks like a series of small wins.
Scenario 1: The “fresh drip” that wants to become a mural.
Many people discover the drip while it’s still wet. The first instinct is to wipe it like it’s water, which turns a
neat little droplet into a smeared comet tail. The better outcome comes from blotting: lightly pressing with a clean
cloth, lifting, rotating to a fresh section, and repeating. It feels slower, but it prevents the stain from spreading.
Once the bulk is lifted, warm soapy water usually takes care of the remaining haze. The funny part? The “haze” often
looks terrible while damp and then nearly disappears once dryso waiting 10 minutes can be oddly therapeutic.
Scenario 2: The dried splash on an eggshell wall that “won’t budge.”
This is where people get tricked into scrubbing. In practice, the best results tend to come from a two-step approach:
first, gently lifting the raised polish with a plastic edge (so you’re not grinding the polish into paint),
and second, using a mild paste (baking soda or white toothpaste) for the pigment that remains.
The key detail is pressure: light circles for short burststhen wipe, inspect, repeat. Doing five short, gentle rounds
is usually safer than one intense scrubbing session that leaves a shiny burnished patch.
Scenario 3: The “Magic Eraser miracle”… followed by the “why is this spot shinier?” moment.
Melamine sponges are famous for quick results, and they often do workespecially on semi-gloss and glossy walls.
The real-world lesson is that they’re not exactly a cleaner so much as a very fine abrasive. People who get the best
outcomes tend to wet the sponge, squeeze it nearly dry, and use feather-light pressure. The folks who end up annoyed
later usually pressed too hard or kept going long after the stain was gone. If you’re dealing with flat paint, a Magic
Eraser can solve the stain but create a “clean halo.” That halo isn’t dirtit’s the paint finish changing from friction.
Scenario 4: The tiny dot that makes you consider acetone.
In many homes, there’s a moment when everything else worked… except for one stubborn speck. This is where “tiny dab”
rules matter. The controlled approach (cotton swab, quick dabs, immediate rinse with soapy water, then clean water, then dry)
can remove that last dot without obvious damageespecially on durable paint. The uncontrolled approach (soaking a cloth and rubbing)
often removes the dot and the paint, plus a little bit of your peace. If you’re going to try remover, the real-life win is
doing it like a surgeon, not a firefighter.
Scenario 5: The grown-up endingtouch-up paint.
Sometimes the most realistic “experience” is accepting that a large stain on matte paint may never blend perfectly through cleaning alone.
In those cases, the best-looking result is often a small touch-up: let the area dry, apply thin coats, feather the edges, and walk away.
It’s not defeatit’s a strategic retreat. And once it’s done, you’ll stop noticing the wall every time you pass it, which is honestly the
ultimate goal of home care: fewer haunted glances at your own drywall.


