Table of Contents >> Show >> Hide
- Why Use a String Trimmer for Lawn Edging?
- What You Need Before You Start
- How to Edge a Lawn with String Trimmer: 9 Steps
- Step 1: Make Sure Your Trimmer Can Handle Edging
- Step 2: Put on Safety Gear and Clear the Area
- Step 3: Mow the Lawn First
- Step 4: Load the Right Trimmer Line
- Step 5: Mark the Edge if Needed
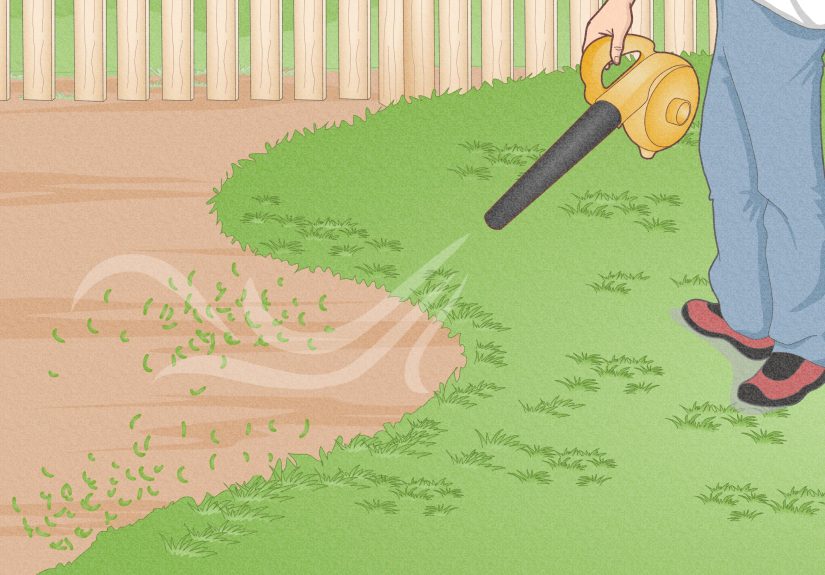
- Step 6: Turn the Trimmer So the Line Cuts Vertically
- Step 7: Start Shallow and Move Slowly
- Step 8: Tidy Up Curves, Beds, and Trouble Spots
- Step 9: Clean Up and Maintain the Edge
- Common Mistakes to Avoid
- Extra Tips for Cleaner Lawn Edges
- Is a String Trimmer Better Than a Lawn Edger?
- Frequently Asked Questions
- Conclusion
- Real-World Experiences and Lessons from Edging with a String Trimmer
If mowing is the haircut, edging is the crisp beard line. It is the small detail that makes your whole yard look like it suddenly got its life together. The good news is that you do not need a dedicated lawn edger to get that clean, sharp border along sidewalks, driveways, and garden beds. In many cases, a string trimmer can do the job just fine when you use the right technique.
This guide walks you through exactly how to edge a lawn with a string trimmer in 9 clear steps. You will learn how to set up the tool, how to hold it, how to avoid chewing up your grass, and how to get that satisfying pro-looking edge without turning your sidewalk into a dust storm. Whether you are a first-timer or someone who has been “sort of winging it” for years, this method will help you edge more neatly, safely, and efficiently.
Why Use a String Trimmer for Lawn Edging?
A string trimmer is one of the most versatile tools in basic lawn care. It trims around fences, mailboxes, flower beds, trees, and other places your mower cannot reach. Many models can also be rotated or angled for edging, which means you can clean up the perimeter of your lawn without buying another machine. For a small to medium yard, that is a pretty sweet deal.
Edging with a string trimmer works especially well along sidewalks, patios, driveways, and mulched beds where grass likes to creep over the line and pretend it owns the place. The goal is not to excavate a miniature moat. The goal is to create a neat visual separation between turf and hardscape so your lawn looks tidy and intentional.
What You Need Before You Start
- A string trimmer or trimmer/edger combo
- Fresh trimmer line in the size recommended by the manufacturer
- Safety glasses
- Hearing protection
- Gloves and closed-toe shoes or work boots
- A leaf blower or broom for cleanup
- Optional: string, hose, or marking paint if you need to define a new edge
One important note before you squeeze the trigger: not every string trimmer is designed the same way. Some convert easily into edging mode with a rotating shaft or wheeled guide. Others can still edge, but you will rely more on body position and control. Always check your owner’s manual before you start. Your trimmer manual is not trying to ruin your Saturday. It is trying to keep the tool from eating its own line.
How to Edge a Lawn with String Trimmer: 9 Steps
Step 1: Make Sure Your Trimmer Can Handle Edging
Before anything else, confirm that your tool is suitable for edging. Some string trimmers are made specifically as 2-in-1 tools and include a rotating head, edging wheel, or guide. Others can still edge manually, but they require a steadier hand and more patience.
If your model has an edging mode, switch it over according to the manual. If it does not, you can still create a vertical cutting path by rotating the tool so the string spins beside the edge rather than flat over the grass. This is the key principle behind clean edging: the line should cut down the border, not slap across the top of it.
Step 2: Put on Safety Gear and Clear the Area
String trimmers are great at cutting grass. They are also very enthusiastic about launching pebbles, mulch, and random crunchy mysteries hiding near the sidewalk. Put on safety glasses, hearing protection, gloves, and sturdy shoes before you start.
Then walk the edge you plan to cut and remove rocks, sticks, toys, loose wire, or anything else the trimmer could throw. If the soil is bone dry and dusty, a light mist of water can help cut down on airborne debris. That makes the whole job cleaner and more comfortable, especially on hot days when the lawn is already trying to turn your face into a pollen filter.
Step 3: Mow the Lawn First
Always mow before you edge. This gives you a clear view of the lawn line, helps you judge the right height, and makes the finished yard look more polished. If you edge first and mow second, you can blur the fresh border you just worked to create. That is a lot like mopping the floor and then immediately making a sandwich with loose shredded lettuce over it.
After mowing, you will have a better sense of where the grass is overgrowing onto the driveway or walkway. That makes it easier to follow the existing edge instead of inventing one on the fly.
Step 4: Load the Right Trimmer Line
Fresh line matters. Old, brittle line breaks faster, feeds poorly, and can make edging feel like an argument. Use the diameter recommended for your specific model. For general lawn edging, many residential trimmers use lighter line such as .065 or .080 inch, while some heavier-duty tools can handle .095 inch or more. Bigger is not always better. If your trimmer is designed for lighter line, forcing a thicker size into it can reduce performance and cause feed problems.
Also make sure the line is trimmed to the proper working length. Most trimmers are designed to cut with the tip of the line, not the whole span. When the line is too long, the tool works harder and your cut gets sloppier.
Step 5: Mark the Edge if Needed
If your lawn already has a visible edge along concrete or pavers, great. Follow it. If the border has gone fuzzy or you are defining a new edge along a bed, mark the path first. A garden hose works well for gentle curves, while string and stakes help with straight runs. You can also use landscape marking paint if you want a stronger guide.
This step is easy to skip, but it makes a huge difference. A marked path helps you keep the cut consistent and prevents the “well, that curve got away from me” effect that turns one nice bed into something shaped like a startled amoeba.
Step 6: Turn the Trimmer So the Line Cuts Vertically
Now for the part that makes edging actual edging. Rotate or position the trimmer so the cutting line runs vertically along the lawn edge. If your model has a wheel or guide, let it ride on the hard surface whenever possible. That helps stabilize the cut and keeps the trench depth more consistent.
Hold the tool comfortably with a firm grip, keep your posture upright, and adjust the handle or shaft length if your trimmer allows it. You should not feel like you are wrestling a stubborn alligator. A stable stance gives you more control and helps you move in a straighter line.
Step 7: Start Shallow and Move Slowly
Do not try to carve a deep edge in one dramatic pass. Start with a shallow cut and move slowly along the sidewalk, driveway, or bed line. Let the tip of the line do the work. If you rush, push too hard, or use too steep an angle, you can scalp the turf, burn through line, and throw debris everywhere.
Work in a smooth, controlled motion. On straight runs, keep a steady pace. On curves, slow down and use a lighter touch. If the edge is badly overgrown, make one light pass to define the line, then a second pass to sharpen it. Two controlled passes almost always look better than one aggressive one.
Step 8: Tidy Up Curves, Beds, and Trouble Spots
Once the main edge is established, go back and refine any messy areas. Around flower beds, pavers, and decorative stone, lower the speed if your trimmer has variable power. That gives you more control and reduces the chance of shredding plants or knocking mulch all over the place.
Be especially careful around trees and shrubs. Never edge right against the bark. String trimmers can injure trunks and expose plants to stress, pests, and disease. The better move is to create a mulch ring around trees so you do not have to trim against the trunk at all. Your trees will appreciate not being gently sandblasted every weekend.
Step 9: Clean Up and Maintain the Edge
After edging, blow or sweep grass clippings and dirt off the hard surfaces so the border looks sharp and finished. Then inspect the edge. If one area looks jagged, touch it up with a light pass. If the trench is clean and consistent, step back and admire your work like the lawn artist you are.
To keep the edge looking good, maintain it regularly. In the active growing season, many homeowners edge every mow or every other mow. Light maintenance is faster, easier on the tool, and much less annoying than letting the grass stage a full takeover and then trying to reclaim the property line in one afternoon.
Common Mistakes to Avoid
Using the Wrong Line
If the line is too thick for the tool, it can feed poorly and strain the motor. If it is too thin for the job, it can snap constantly. Match the line to the model and the type of growth you are cutting.
Going Too Fast
Speed feels productive, but it usually creates wobbly edges. Slow, steady movement gives you straighter lines and less frustration.
Cutting Too Deep Too Soon
A shallow first pass is your friend. Trying to create a deep trench in one shot often tears up the lawn edge and burns through line.
Edging Without Mowing First
This makes it harder to see the border and can leave the yard looking uneven after the mower passes over it.
Trimming Against Tree Bark
This is one of the most common lawn-care mistakes. Use mulch rings around trees and keep the trimmer away from trunks.
Extra Tips for Cleaner Lawn Edges
- Use lower speed near flower beds, pavers, sprinkler heads, and decorative borders.
- If your trimmer rotates counterclockwise, pay attention to where debris exits so you are not blowing clippings into your own path.
- Replace worn line before it becomes a problem. Fresh line cuts better and reduces irritation.
- If your edge is extremely overgrown, divide the work into two passes instead of forcing one heavy cut.
- For very dry soil, lightly dampen the edge before trimming to reduce dust.
- Keep the guide wheel on the hard surface whenever your model includes one. It helps create a straighter, more consistent edge.
Is a String Trimmer Better Than a Lawn Edger?
Not always. A dedicated lawn edger is usually easier if your main goal is deep, perfectly uniform edges along a lot of hardscape. But a string trimmer is more versatile and often more practical for everyday homeowners. If you already own one, it can handle both trimming and edging without adding another bulky tool to your garage. That is a win for your budget and for the corner where mystery lawn equipment goes to retire.
For most people, the best tool is the one they will actually use regularly. A good-looking lawn is usually the result of consistency, not tool snobbery.
Frequently Asked Questions
Should you edge before or after mowing?
After mowing. It helps you see the border clearly and gives the lawn a cleaner final look.
How often should you edge a lawn?
That depends on growth rate, but every mow or every other mow works well for many lawns during the growing season.
Can you edge with any string trimmer?
Many string trimmers can edge, but some make the job easier than others. Always check the manual for compatible edging use and line size.
Why does my trimmer line wear out so fast when edging?
Edging along concrete and other abrasive surfaces naturally wears line faster. Keeping the wheel or guide in the right position and using the correct line can help.
What is the biggest secret to clean edging?
Use the tip of the line, keep the cut vertical, and move slowly. That is where the magic lives.
Conclusion
Learning how to edge a lawn with a string trimmer is one of those home-maintenance skills that pays off immediately. The yard looks sharper, the borders look intentional, and the whole property gets a cleaner, more finished appearance. The trick is not brute force. It is control. Mow first, set up the trimmer correctly, start shallow, and let the line do the work.
Once you get the hang of it, edging becomes one of the most satisfying parts of lawn care. It is quick, visible, and oddly therapeutic. You start with fuzzy borders and end with crisp lines that make the lawn look like it has been professionally detailed. Not bad for a tool that is basically spinning plastic on purpose.
Real-World Experiences and Lessons from Edging with a String Trimmer
One of the biggest surprises people have when they first edge with a string trimmer is how much easier it gets after the first couple of sessions. The first time usually feels awkward. You may hold the tool too stiffly, move too fast, and wonder why the border looks a little wavy. That is normal. The learning curve is short, but there is definitely a moment where your yard teaches you that confidence and technique are not the same thing.
A common real-world experience is discovering that a shallow, patient pass beats a dramatic power move every single time. Many beginners think edging is about force, so they jam the line deep into the turf and end up with clumps of dirt, broken line, and a lawn edge that looks like it lost a fight. Experienced homeowners usually learn to back off, lighten their grip, and let the tip of the line create the cut. The result is cleaner, faster, and much less expensive in replacement string.
Another lesson shows up around curves and flower beds. Straight sidewalks are forgiving. Curved beds are not. The trick most people figure out through practice is to slow down before the curve, not in the middle of it. That tiny adjustment makes the line easier to control and helps the border look intentional instead of accidental. It also keeps you from shaving mulch into the grass or clipping the edges of ornamental plants that were minding their own business.
There is also the universal “tree lesson.” Almost everyone who uses a string trimmer long enough has a moment where they realize how easy it is to nick bark. Usually that realization comes with instant regret. After that, people tend to become strong believers in mulch rings. A simple mulch ring around a tree saves time, reduces trimming headaches, and protects the trunk from damage. It is one of those yard-care decisions that feels annoyingly sensible because it works so well.
Many homeowners also notice that edging becomes easier once a clean border already exists. Maintaining an established edge may take only a few minutes, while reclaiming an overgrown one can feel like a full production. That is why regular upkeep matters so much. A little frequent maintenance is usually easier than one heroic weekend rescue mission with sweaty gloves and a face full of dust.
And then there is the oddly satisfying part: the visual payoff. People often say mowing makes the lawn shorter, but edging makes it look finished. That is exactly right. Even when the grass is not perfect, a crisp border can make the whole yard look sharper and better cared for. It is one of the fastest ways to boost curb appeal without spending much money. Once you see the difference, it is hard to unsee it. Suddenly you become the person who notices everyone’s sidewalk edge while driving through the neighborhood, which is either a sign of lawn-care maturity or a very specific kind of suburban destiny.