Table of Contents >> Show >> Hide
- Can You Actually Darken Hardwood Floors?
- Best Ways to Darken Hardwood Floors
- How to Darken Hardwood Floors Step by Step
- Step 1: Empty the Room Completely
- Step 2: Inspect the Floor
- Step 3: Sand the Floor to Bare Wood
- Step 4: Clean Up Every Speck of Dust
- Step 5: Test Your Stain
- Step 6: Consider Water Popping if Appropriate
- Step 7: Apply the Stain
- Step 8: Decide Whether a Second Coat Is Needed
- Step 9: Apply the Protective Topcoat
- Step 10: Let the Floor Cure
- Which Wood Species Darken Best?
- Common Mistakes to Avoid
- Should You DIY or Hire a Pro?
- What Homeowners Commonly Experience When They Darken Hardwood Floors
- Conclusion
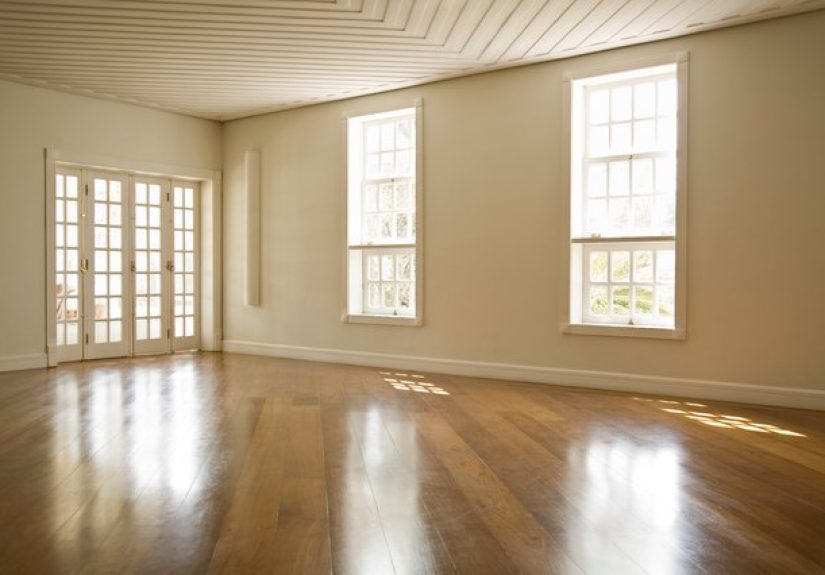
Hardwood floors have a funny way of becoming invisible. They are right there under your feet every day, quietly doing their job, until one afternoon you look down and think, “Why do these floors feel more oatmeal than wow?” If that sounds familiar, darkening your hardwood floors can be one of the most dramatic ways to update a room without changing the entire layout, knocking down walls, or making your wallet file a formal complaint.
A darker floor can add contrast, warmth, and that cozy-rich look people usually describe with phrases like elevated, classic, or expensive. It can also bring out grain patterns beautifully and make outdated orange or yellow undertones look a lot more intentional. But there is a catch: darkening hardwood floors is not usually a “slap on a miracle product and stroll into the sunset” kind of project. To get a lasting result, you need the right method, the right stain, and a realistic understanding of your wood species, finish, and patience level.
This guide walks through how to darken hardwood floors the right way, what mistakes to avoid, when to call a pro, and what real homeowners often experience once the sanding dust settles and the room starts looking suspiciously magazine-worthy.
Can You Actually Darken Hardwood Floors?
Yes, in most cases, you can darken hardwood floors. The most reliable way is to sand the floor down to bare wood, apply a darker stain, and then seal it with a protective topcoat. That is the gold-standard method because it changes the color of the wood itself rather than simply making the existing finish look shinier or warmer.
That said, not every floor is an ideal candidate. Before you rent a sander and develop a close personal relationship with dust, figure out what kind of flooring you have and what condition it is in.
Solid Hardwood vs. Engineered Hardwood
Solid hardwood is usually the best candidate for darkening because it can often be sanded and refinished multiple times over its lifespan. Engineered hardwood is trickier. Some engineered floors have a thick enough wear layer to allow refinishing, but others do not. If your floor is engineered, proceed carefully and assume nothing. A too-aggressive sanding job can turn “moody walnut vibes” into “surprise plywood reveal,” which is not a trending design choice.
If the Floor Has Wax, Damage, or a Failing Finish
If your floor has wax on it, major scratches, pet stains, worn-through spots, or a failing topcoat, a simple refresh will not cut it. You will likely need to sand to bare wood before applying a new darker stain. In other words, if the floor is crying for help, do not offer it a throw pillow. Give it the full treatment.
Best Ways to Darken Hardwood Floors
There is more than one way people try to darken hardwood floors, but only one method is consistently dependable for a true color change.
1. Sand and Restain the Floor
This is the best method if you want a real, even, long-lasting dark finish. It involves removing the old finish, sanding down to bare wood, staining the wood darker, and then applying a protective topcoat.
Best for: major color changes, outdated tones, worn floors, and homeowners who want the most professional-looking result.
2. Apply a Second Coat of Stain
If you are already working with bare wood and the first coat is not dark enough, a second coat can deepen the tone. This works well when you are very close to your desired result but want a richer finish. The key word there is close. A second coat can enhance color, but it cannot magically transform pale maple into dramatic ebony if the wood species simply does not cooperate.
3. Use a Tinted Finish or Color-Enhancing Product
Some homeowners look for shortcuts such as tinted finishes, restorers, or darker-toned topcoats. These can sometimes shift the look slightly, especially on floors that are merely dull, but they are usually not the best solution if you want a true, substantial darkening. Think of these options as makeup, not a full hair-color appointment.
How to Darken Hardwood Floors Step by Step
Step 1: Empty the Room Completely
Take out furniture, rugs, curtains, wall hangings, and anything else that might collect dust or get in the way. Remove vent covers if possible, and seal doorways with plastic to contain sanding dust. This project is messy. Not “a quick wipe will do it” messy. More like “how is there dust inside a drawer that was closed the whole time?” messy.
Step 2: Inspect the Floor
Check for protruding nails, damaged boards, deep stains, or loose planks. Set nails below the surface and replace or repair badly damaged boards before you sand. Dark stain can make some flaws less noticeable, but it will not perform miracles on serious structural problems.
Step 3: Sand the Floor to Bare Wood
This is the step that makes the color change possible. Start with a coarser grit if needed, then work progressively to finer grits. The goal is to remove the old finish evenly and create a clean, consistent surface for the new stain. Edges and corners need the same attention as the center of the room, so do not let them become the awkward afterthought of your flooring makeover.
A coarser grit opens the wood more and can help it absorb stain more deeply, while the final sanding passes smooth the surface and prepare it for a more even finish. Be consistent. Random patchy sanding creates random patchy stain, and that look is only charming on vintage quilts.
Step 4: Clean Up Every Speck of Dust
Vacuum thoroughly, then wipe the floor with the appropriate cloth or cleaner recommended for stain prep. Dust left behind can interfere with stain absorption and leave the final result looking cloudy, gritty, or uneven. This is not the part to rush just because you are eager to get to the fun color stage.
Step 5: Test Your Stain
Always test stain in a closet, under an appliance, or on leftover wood from the same species if you have it. Test more than one shade if needed. Dark walnut, espresso, jacobean-style brown, deep coffee, and near-ebony tones are popular options, but the same stain can look wildly different depending on whether your floor is oak, maple, pine, hickory, or something more exotic.
Look at your test patches during the day and at night. Natural light, lamp light, and overhead lighting can all change how the stain reads. The color that looked “rich and timeless” at noon can suddenly look “tiny haunted cabin” by 8 p.m. if the room has poor lighting.
Step 6: Consider Water Popping if Appropriate
Some floor pros use a technique called water popping, which lightly wets the bare wood to raise the grain and encourage deeper, more even stain penetration. This can be especially useful when going darker. However, it is not a universal must-do, and compatibility depends on the stain and topcoat system you plan to use. Follow the product instructions carefully, especially if you are using a water-based finish system.
Step 7: Apply the Stain
Work in manageable sections and move in the direction of the wood grain. Let the stain penetrate for the time recommended on the label, then wipe off the excess evenly. Maintain a wet edge as you go so you do not create lap marks or dark overlap lines. Plan your route so you end near the exit. Trapping yourself in a corner behind wet stain is a classic DIY move, but not one worth repeating.
Step 8: Decide Whether a Second Coat Is Needed
Once the first coat dries, assess the color honestly. If it is close but not quite there, a second coat may deepen the tone. If it already looks darker than expected, congratulations, you just saved yourself time and product. Do not keep layering stain just because more sounds better. At some point, more becomes muddy.
Step 9: Apply the Protective Topcoat
Once the stain is fully dry, seal the floor with a compatible topcoat. Water-based polyurethane dries clear and keeps the stain color more true, while oil-based polyurethane can add a warm amber cast over time. Choose your sheen carefully too. Satin is a favorite because it looks refined and tends to hide dust, scratches, and imperfections better than a very glossy finish.
Step 10: Let the Floor Cure
Dry to the touch is not the same as fully cured. Respect the product’s drying and cure times before replacing rugs or heavy furniture. A newly darkened floor may look finished, but if you rush the room back into service, you can scuff or mark it before it has reached full strength. That is a frustrating way to end an otherwise beautiful project.
Which Wood Species Darken Best?
Not all hardwood species accept dark stain equally well, and this matters more than many homeowners expect.
Oak
Oak is usually one of the most forgiving species for dark staining. Its open grain and strong texture absorb stain well and can produce beautiful, dramatic results. If you have red or white oak, you are generally in a good position for a successful dark floor transformation.
Maple
Maple is dense and can be stubborn. It often absorbs stain unevenly and is more prone to blotchiness, especially with very dark colors. It can still be darkened, but it usually requires extra care, excellent prep, and realistic expectations. This is the wood species most likely to humble an overconfident weekend warrior.
Pine and Other Softwoods
Pine and similar softwoods can go blotchy under dark stain, especially around knots and grain variations. Conditioners and the right stain system can help, but these floors can be fussy. If your softwood floor is headed toward a very dark finish, testing is absolutely non-negotiable.
Walnut, Hickory, and Others
Some species are already naturally darker or more visually busy, which can work in your favor. Others may have grain patterns or undertones that shift the final color in surprising ways. The lesson is simple: choose based on your actual floor, not on an inspiration photo taken in a different house with different wood and suspiciously perfect lighting.
Common Mistakes to Avoid
Skipping the Test Patch
This is the flooring equivalent of cutting bangs at midnight. It feels bold. It rarely ends the way you hoped.
Choosing a Too-Dark Color for a Small, Dim Room
Dark floors can look rich and dramatic, but in a room without much natural light, they can also make the space feel smaller and heavier. If your room already struggles with brightness, choose a dark brown with warmth instead of a nearly black finish.
Ignoring Maintenance Reality
Dark floors often show light-colored dust, pet hair, crumbs, and surface scratches more readily than mid-tone or light floors. If you have a white dog, three kids, a snack-loving spouse, and limited patience for sweeping, choose your finish with your eyes open.
Using the Wrong Topcoat
Make sure the stain and finish are compatible. Also think about color shift. If you carefully choose a cooler dark stain and then top it with a finish that ambers noticeably, the end result may be warmer than you planned.
Underestimating the Difficulty
Refinishing floors is not impossible for skilled DIYers, but it is not a casual Saturday craft either. Sanding mistakes can leave chatter marks, swirl marks, uneven stain, and edge differences that become painfully obvious once the darker color goes on.
Should You DIY or Hire a Pro?
DIY can make sense if you have solid hardwood, some renovation experience, the right tools, and the patience to prep carefully. It can also save money. But a pro may be the smarter choice if your floor is engineered, your wood species is hard to stain evenly, your room is large, or you want a very dark finish where every flaw will show.
Professionals also tend to have better dust-control equipment, better sanding technique, and a more practiced eye for stain consistency. If you are aiming for a deep, luxurious finish and do not want the learning curve to happen on your actual living room floor, hiring out may be worth every penny.
What Homeowners Commonly Experience When They Darken Hardwood Floors
The first thing many homeowners notice is that darkening hardwood floors changes the entire room faster than almost any wall paint ever could. A medium or pale floor often fades into the background, but once the floor goes darker, it becomes an anchor. Suddenly the walls look lighter, furniture feels more intentional, and the whole room seems to have a stronger point of view. People often say it feels like they upgraded the house, not just the floor.
Another common experience is surprise at how different the stain looks on the actual floor compared with a tiny sample chip. A color that seemed safe on paper can read much redder, cooler, or darker in person. This is why test patches matter so much. Many homeowners end up choosing a stain that is one step lighter than their original plan after seeing how dramatic the first sample looks on real wood under real lighting.
There is also usually a moment of panic during the process. It tends to arrive right after sanding, when the room looks dusty, stripped, chaotic, and not at all like the beautiful after photos living rent-free in your imagination. Then the stain goes down, the grain wakes up, and the room starts making sense again. This emotional roller coaster is remarkably common. Flooring projects are apparently part home improvement, part character-building exercise.
Many homeowners also report that dark floors make them more aware of everyday maintenance. The floor may look incredible, but dust bunnies suddenly lose all sense of privacy. Light pet hair can stand out more. Tiny crumbs become oddly dramatic. This does not mean dark floors are a bad choice. It just means that the glamorous finish may ask for a little more frequent sweeping, especially in high-traffic areas and sunny rooms.
On the positive side, people often love the way darker floors create contrast with trim, cabinets, rugs, and furniture. White baseboards pop more. Mid-tone wood furniture can look richer. Neutral upholstery appears cleaner and more tailored. Even older rooms can feel more current when the floor color is updated thoughtfully. In homes with open layouts, darkened floors can also make the space feel more cohesive and polished from one area to the next.
Finally, there is the satisfaction factor. Homeowners who choose the right stain and finish for their lifestyle often say the project feels worth it every single time they walk into the room. That is the real goal here. Not just darker floors, but floors that suit the space, wear well, and make the room feel more like home. Preferably without any lingering memory of sanding dust in places dust should never be.
Conclusion
If you want to darken hardwood floors successfully, the safest path is also the most proven one: sand to bare wood, test your stain carefully, apply it evenly, and protect it with the right topcoat. Pay attention to your wood species, your room’s lighting, and how much maintenance you are honestly willing to do once the floor is darker. Oak tends to be a star player here, while maple and pine may require extra caution and lower expectations. And if your floor is engineered or your dream finish is very dark and flawless, professional help can be a smart investment.
The good news is that when done well, dark hardwood floors can add drama, elegance, warmth, and serious visual payoff. The bad news is that you may start side-eyeing every other room in your house and wondering what else deserves a glow-up. That part is between you and your budget.


