Table of Contents >> Show >> Hide
- Why Build Raised Beds from Pallets?
- Before You Build: Pallet Safety Comes First
- Best Raised Bed Size for Pallet Builds
- Tools and Materials
- Step-by-Step: How to Build Raised Beds Using Pallets
- 1) Pick the Location First (Not Last)
- 2) Break Down and Sort the Pallets
- 3) Build a Strong Frame (Pallet Boards Need Backup)
- 4) Set the Bed in Place and Level It
- 5) Prepare the Bottom (Drainage Matters More Than You Think)
- 6) Fill with a Raised-Bed Soil Mix
- 7) Plant, Mulch, and Water Like You Mean It
- Common Mistakes to Avoid
- How Long Will a Pallet Raised Bed Last?
- Quick Build Example (Budget-Friendly Layout)
- Conclusion
- Experience Notes: What I Wish Someone Told Me Before Building Pallet Raised Beds (Extra 500+ Words)
If you’ve got a stack of old pallets, a weekend, and a “how hard can it be?” attitude, you’re already halfway to a raised-bed garden. Pallet raised beds can be a smart, budget-friendly way to grow vegetables, herbs, and flowersif you build them safely. That last part matters, because not every pallet is garden-friendly, and not every “free” pallet is actually a bargain once you count splinters, broken boards, and mystery stains.
This guide walks you through how to build raised beds using pallets the right way: choosing safe pallet wood, planning a sturdy bed, assembling it without turning your yard into a nail museum, and filling it with a soil mix your plants will actually enjoy. We’ll also cover common mistakes, maintenance tips, and a real-world experience section at the end with practical lessons learned. (Spoiler: the first bed is always “the prototype.”)
Why Build Raised Beds from Pallets?
Raised beds are popular for good reason. They improve organization, reduce soil compaction, warm up faster in spring, and can make gardening easier on your back. Using pallets adds another benefit: lower material cost. If you can source clean pallets, you’re turning shipping waste into a productive garden structure.
That said, pallet beds are best approached as a smart DIY project, not a random pile of boards screwed together. Pallet lumber is often thinner than standard dimensional lumber, which means you need better reinforcement and more realistic expectations about lifespan. Think “efficient and useful” rather than “heirloom garden furniture.”
Before You Build: Pallet Safety Comes First
Let’s handle the big question: Are pallets safe for raised beds? Sometimes. The short version is this: only use clean, dry pallets with known history (or as much history as possible), and learn to read the markings.
How to Read Pallet Stamps
Many pallets used in international shipping carry an IPPC/ISPM 15 stamp. The stamp typically includes a country code, facility code, and treatment code. The treatment code is the part gardeners care about most.
- HT = Heat-treated (generally the preferred option for garden projects)
- MB = Methyl bromide fumigation (avoid for garden use)
- DB = Debarked (this is not a treatment by itself)
- KD = Kiln-dried (useful information, but not the same as pest-treatment certification)
If you see MB, do not use that pallet for any raised bedespecially not for edible crops. If the pallet has no stamp, unclear markings, or a sketchy history, assume it’s not suitable for food gardening. “Mystery pallet” is a fun band name, not a food safety plan.
Red Flags That Mean “Nope”
- Oily spots, chemical stains, or powder residue
- Strong odors (solvent, fuel, chemical, mold)
- Painted or heavily coated surfaces of unknown origin
- Rot, insect damage, or crumbling boards
- Pallets used in industrial settings with unknown cargo
Even a heat-treated pallet can be contaminated by what it carried. For edible gardens, choose the cleanest pallets you can find and inspect them closely. If you’re in doubt, use the pallet for a compost bin, tool rack, or decorative project insteadand buy new wood for the vegetable bed.
A Quick Note on Old Treated Wood
If you’re mixing pallet boards with other salvaged wood, be extra careful with older pressure-treated lumber. Some older treated wood products used preservatives such as chromated copper arsenate (CCA). Don’t burn treated wood, and don’t use unknown old treated lumber in raised beds. If you must cut any questionable wood, wear PPE and control sawdust.
Best Raised Bed Size for Pallet Builds
You can build almost any size, but raised beds work best when they’re sized for reach. A bed that’s too wide forces you to step into it, which compacts soil and defeats one of the main benefits of raised-bed gardening.
Recommended Dimensions (Practical + Plant-Friendly)
- Width: 3 to 4 feet (4 feet max for most adults if accessible from both sides)
- Length: 4 to 8 feet is a good pallet-friendly range
- Height: 8 to 12 inches is a solid starting point for most vegetables
For taller crops, deep-rooted plants, or beds placed on hard surfaces (patios/concrete), go deeperoften 12 to 24 inches depending on what you’re growing. On soil, shallower beds can still work if roots can access loosened ground below.
If your yard slopes, build the frame level and orient shorter dimensions across the slope when possible. It makes leveling easier and keeps the bed from looking like it’s slowly trying to escape downhill.
Tools and Materials
Materials
- Clean, heat-treated pallets (enough to yield your needed boards)
- Exterior-grade deck screws (2.5″ and 3″ are common choices)
- 2×2 or 2×4 corner posts (recommended for strength)
- Optional center brace(s) for beds longer than 6 feet
- Optional hardware cloth (for rodent-prone areas)
- Optional landscape fabric (especially for beds on hard surfaces; use permeable material)
- Compost + topsoil / raised-bed mix
- Mulch (straw, shredded leaves, or clean wood chips around pathsnot inside seed rows unless appropriate)
Tools
- Drill/driver
- Pry bar or pallet buster
- Hammer
- Reciprocating saw (helpful for nail sections)
- Circular saw or miter saw (optional but useful for clean cuts)
- Tape measure
- Speed square
- Work gloves
- Safety glasses
- Dust mask / respirator (especially when cutting old wood)
- Sander or sanding block (optional, for splinter control)
Step-by-Step: How to Build Raised Beds Using Pallets
1) Pick the Location First (Not Last)
Choose a spot with:
- At least 6–8 hours of direct sun for most vegetables
- Good drainage (don’t build a salad swamp)
- Convenient access to water
- Enough space to walk around the bed comfortably
Clear grass, weeds, and debris. If the bed is going directly on soil, loosen the ground beneath it a bit before filling. If it’s going on a patio or driveway, plan for extra depth and make sure your base/liner allows water to drain.
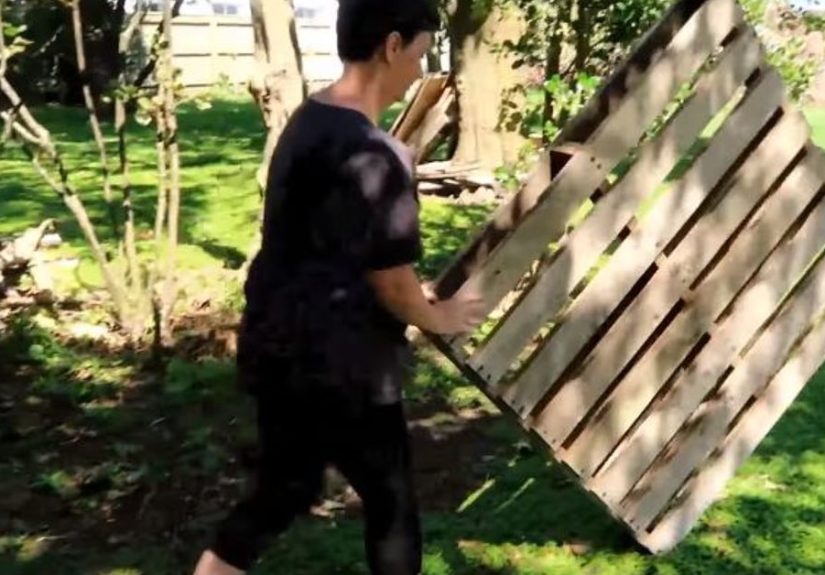
2) Break Down and Sort the Pallets
Disassemble pallets carefully. This is the part where patience saves wood. Pry slowly near nail points, support boards as you lift, and expect some losses. Pallet wood can split if you rush or twist boards too hard.
Sort your boards into piles:
- Best boards: straight, thick, least cracked (use for top edges and long sides)
- Okay boards: small checks, cosmetic flaws (use for lower walls or short sides)
- Nope boards: rotten, deeply split, stained, or nail-shredded
Remove all nails and staples. Then sand rough edges if you want a cleaner finish and fewer surprise splinters.
3) Build a Strong Frame (Pallet Boards Need Backup)
Pallet boards alone are often too thin to function like standard 2x lumber, so the trick is to build a reinforced frame and use pallet boards as the wall cladding.
Simple, sturdy design:
- Make a rectangle using pallet boards in horizontal rows
- Screw boards into corner posts (2×2 or 2×4)
- Add at least one mid-span brace on long sides (especially 8-foot beds)
- Stagger seams if using multiple shorter boards on one side
Check for square before fully tightening everything. (Measure corner-to-corner diagonals; if they match, you’re in good shape.)
4) Set the Bed in Place and Level It
Move the assembled frame into place (or build it in place if it’s large). Use a level and adjust the ground underneath so the frame sits flat. A crooked bed isn’t just cosmeticit can lead to uneven watering and unnecessary stress on the walls.
For extra stability, you can drive stakes outside the frame and screw into them. This is especially helpful in windy areas or when the soil pressure will be high in taller beds.
5) Prepare the Bottom (Drainage Matters More Than You Think)
If the bed sits on native soil:
- Usually keep the bottom open so roots can grow down and water can move through
- Optional: add hardware cloth on the bottom if you have burrowing pests
- Avoid nonpermeable plastic on the bottom, which can trap water
If the bed sits on a hard surface:
- Use a permeable liner (like landscape fabric) to keep soil in while allowing drainage
- Increase bed depth for crops with deeper roots
- Watch watering closely; hard-surface beds dry out faster and heat up more
Some gardeners also line the sides of wooden beds to extend life. If you do, make sure the liner doesn’t block drainage at the bottom.
6) Fill with a Raised-Bed Soil Mix
Don’t fill your bed with random hard-packed yard dirt and call it “premium loam.” Raised beds perform best with a loose, well-drained mix.
Good starting options:
- Topsoil + compost (common and effective)
- Compost + soilless growing mix (especially useful in deeper beds)
- Commercial raised-bed mix if budget allows
Aim for a mix that drains well but still holds moisture. Too much compost can create water-management issues over time, so balance matters. After filling, leave an inch or two at the top for mulch and easier watering.
7) Plant, Mulch, and Water Like You Mean It
Plant based on mature spacing (not the cute seedling size). Raised beds support intensive planting, but overcrowding still causes airflow and disease problems.
Add mulch to reduce weeds and help retain moisture. Then water thoroughly to settle the soil. After that, monitor moisture regularlyraised beds can dry out faster than in-ground plots, especially in hot weather or wind.
If you want a low-maintenance setup, install drip irrigation early. Future You will be grateful when July arrives and the sun starts acting personal.
Common Mistakes to Avoid
- Using unknown pallets for edible crops: Free wood is not worth a food-safety gamble.
- Building too wide: If you have to step inside, soil compaction follows.
- No reinforcement: Wet soil is heavy. Thin pallet boards can bow or separate.
- Bottom lined with plastic: Poor drainage can turn the bed into a root rot experiment.
- Overfilling with pure compost: Great in theory, tricky in practice.
- Skipping maintenance: Pallet wood is often less durable than cedar or redwood.
How Long Will a Pallet Raised Bed Last?
It depends on wood type, climate, soil contact, and whether you lined the sides. In many gardens, a pallet bed made from decent heat-treated lumber may last a few seasons before boards start loosening, cracking, or rotting. That’s normal. Pallet beds shine when you want a budget-friendly, functional bed now and you’re okay with repairs later.
If you fall in love with raised-bed gardening (and you probably will), your pallet bed can be your starter version while you plan a longer-lasting upgrade.
Quick Build Example (Budget-Friendly Layout)
A practical first project is a 4′ x 8′ x 10–12″ bed using pallet boards screwed to corner posts and one brace on each long side. That size is easy to reach from both sides, works for a wide variety of vegetables, and fits standard garden spacing well. If you’re short on materials, build a 3′ x 6′ version first and expand later. Small wins produce actual lettuce.
Conclusion
Building raised beds using pallets is one of the most satisfying DIY garden projects because it combines thrift, creativity, and immediate payoff. You take discarded wood, turn it into a growing space, and thenif all goes welleat tomatoes from it. That’s a pretty good return on a Saturday.
The key is to be selective and safety-minded: use clean, preferably heat-treated pallets, avoid anything with methyl bromide or suspicious contamination, reinforce the frame, and use a proper soil mix. Do that, and your pallet raised bed can be productive, affordable, and surprisingly good-looking.
Start simple. Build one bed. Grow something easy. Learn what works in your yard. Then build another bed with fewer mistakes and 40% more confidence. That’s how most great gardens beginone experimental box at a time.
Experience Notes: What I Wish Someone Told Me Before Building Pallet Raised Beds (Extra 500+ Words)
The biggest lesson from building pallet raised beds is that the wood-selection phase matters more than the screw-driving phase. When people imagine this project, they picture the fun part: assembling the frame, filling it with soil, and planting seedlings. In reality, the quality of your finished bed is mostly decided before you ever touch the drill. If you start with twisted, brittle, half-rotten pallet boards, you’ll spend the entire build fighting the material. If you start with cleaner, straighter boards, the project feels almost easy.
Another practical lesson: pallet wood lies. A board can look solid until you drive a screw near the end and it splits like a cracker. Pre-drilling helps a lot, especially for dry pallet boards. It takes extra time, but it prevents that heartbreaking moment when your best-looking board becomes two decorative kindling strips. Using washers on some screw points (especially on thinner boards) can also help hold things together if the wood is a little weathered.
I also learned that “level enough” is not actually enough. My first bed looked fine from one angle, then I watered it and realized all the water pooled on one side like a tiny farm pond. A few minutes with a level and a shovel before filling the bed would have saved a lot of future annoyance. Once a raised bed is full of soil, adjusting it becomes a workout nobody asked for.
Soil was another surprise. I assumed the hard part was building the frame. Nope. The real heavy lifting starts when you fill it. Even a modest bed takes more soil than most beginners expect. If you can get bulk soil delivered, do it. Bagged soil works for small beds, but for larger builds it gets expensive fast. Mixing in compost made a noticeable difference in how well the bed drained and how happy the plants looked, but going too rich with compost made moisture less predictable in hot weather. Balance beats enthusiasm here.
One thing that worked extremely well was mulching right away. In the bed I mulched, the soil stayed more evenly moist and weeds were way easier to manage. In the bed I didn’t mulch immediately, weeds popped up like they had a group chat. It was a very convincing demonstration.
I also became a believer in reinforcement. The bed that had corner posts and a center brace stayed square and solid. The bed that relied mostly on pallet boards started bulging once the soil settled and got soaked after rain. Wet soil is heavyheavier than it looks, heavier than it feels when you’re shoveling it, and definitely heavier than thin pallet boards would prefer. Extra bracing is not overbuilding; it’s future-proofing.
Finally, the lifespan issue: pallet beds are fantastic for learning, testing layouts, and getting a garden started on a budget. But they are not always forever structures, and that’s okay. My approach now is to treat them like modular beds. I inspect them at the end of each season, replace weak boards, tighten screws, top off soil, and keep going. That maintenance rhythm is part of the project. And honestly, there’s something satisfying about improving the bed a little each year. The garden evolves, your skills improve, and the “temporary” pallet bed becomes the reason you planted your best season yet.


