Table of Contents >> Show >> Hide
- Do Turtles Really Need Baths?
- Before You Bathe a Turtle: Safety Comes First
- Supplies You Need to Bathe a Turtle
- How to Bathe a Turtle Step by Step
- Step 1: Wash Your Hands and Prepare the Area
- Step 2: Add Shallow Lukewarm Water
- Step 3: Place the Turtle in the Water Gently
- Step 4: Let the Turtle Soak
- Step 5: Gently Brush the Shell if Needed
- Step 6: Rinse with Clean Water
- Step 7: Dry Lightly and Return the Turtle to Its Habitat
- Step 8: Clean and Disinfect Everything
- How Often Should You Bathe a Turtle?
- Common Turtle Bathing Mistakes
- When Bathing Is Not Enough
- How to Keep Your Turtle Cleaner Between Baths
- Extra Experiences and Practical Lessons from Turtle Bath Time
- Conclusion
- SEO Tags
Bathing a turtle sounds simple: turtle plus water equals clean turtle, right? Almost. Turtles are not tiny bath toys with opinions; they are sensitive reptiles with specific temperature needs, delicate skin, and shells that are very much part of their living body. A safe turtle bath is less like a bubbly spa day and more like a calm, careful rinse-and-soak session supervised by a responsible human who knows better than to reach for shampoo.
Whether you care for a red-eared slider, painted turtle, map turtle, musk turtle, or box turtle, learning how to bathe a turtle properly helps support hydration, remove light dirt or algae, and gives you a chance to inspect the shell, skin, eyes, and behavior. The key is to keep the bath shallow, clean, lukewarm, soap-free, and short. Your turtle does not need lavender foam, cucumber slices, or a playlist called “Shell Yeah.” It needs safe water, gentle handling, and a clean return to its habitat.
This guide explains when turtles need bathing, what supplies to use, how to clean a turtle shell gently, what mistakes to avoid, and when a “dirty turtle” is actually a “call a reptile veterinarian” situation.
Do Turtles Really Need Baths?
Many turtles spend plenty of time in water, so it is fair to wonder why they would need a bath at all. Aquatic turtles already swim, soak, and occasionally redecorate their tank with the enthusiasm of a tiny underwater bulldozer. However, a separate bath can still be useful when the turtle has algae buildup, stuck debris, mild dirt on the shell, or needs a supervised soak outside the main enclosure.
For aquatic turtles, bathing usually means placing the turtle in a separate container of clean, shallow water and gently brushing the shell if needed. For box turtles and some semi-terrestrial turtles, bathing often means a hydration soak. Box turtles may bathe in their water dish naturally, but a controlled soak helps ensure the water stays clean and the turtle can enter and exit safely.
The important difference is this: bathing is not the same as disinfecting, medicating, or “fixing” a shell problem. A normal bath can remove surface grime. It cannot treat shell rot, deep infection, soft shell, wounds, swelling, or serious odor. If the shell looks damaged, smells bad, feels soft, has pits, has red areas, or seems painful, skip the home spa and contact a reptile veterinarian.
Before You Bathe a Turtle: Safety Comes First
Turtles can carry Salmonella bacteria even when they look healthy. That does not make them villains; it makes them reptiles. Good hygiene protects both you and your pet. Always wash your hands before and after handling a turtle, cleaning its habitat, touching bath water, or handling anything that has been inside the enclosure.
Use a Turtle-Only Bath Container
Choose a plastic tub, shallow basin, or container used only for your turtle. Do not bathe a turtle in the kitchen sink, bathroom sink, bathtub used by people, or any food-preparation area. Turtle bath water and human dinner plans should never share real estate. If you must use a sink for cleaning equipment, disinfect it thoroughly afterward, but a dedicated turtle tub is safer and simpler.
Never Use Soap, Shampoo, Detergent, or Human Products
The safest turtle bath uses plain water. Soaps, dish detergents, shampoos, essential oils, perfumes, and cleaning sprays can irritate a turtle’s skin, eyes, and respiratory system. They can also leave residues that the turtle may absorb or ingest. Even “natural” products can be unsafe for reptiles. If a turtle needs a medicated soak, that should come from a reptile veterinarian’s instructions, not from a random bottle under the sink with a lemon on it.
Keep the Water Lukewarm, Not Hot
Use lukewarm water that feels comfortably mild to your wrist. Many reptile-care recommendations suggest water around the high 70s to low 90s Fahrenheit depending on species, age, and purpose of the soak. The simplest rule for a routine bath is: not cold, not hot, and never guessed blindly if you have a thermometer available. Hot water can burn or stress a turtle, while cold water can slow it down and make the bath unpleasant.
Supplies You Need to Bathe a Turtle
You do not need fancy tools. In fact, the shorter the supply list, the safer the bath usually is. Gather everything before picking up the turtle so you are not wandering around the house holding a confused reptile like a damp sandwich.
- A clean plastic tub or shallow container used only for the turtle
- Lukewarm, dechlorinated water if possible
- A very soft toothbrush or soft reptile brush
- Paper towels or a clean towel used only for turtle care
- A thermometer, especially for young, sick, or sensitive turtles
- Disposable gloves if preferred
- Disinfectant for cleaning the bath area and tools afterward
A soft toothbrush is useful for gently brushing the shell. Choose one with soft bristles and use light pressure. Remember, a turtle’s shell is not a helmet glued onto its back. It contains living tissue, nerves, and blood supply. Turtles can feel pressure and discomfort through the shell, so scrubbing like you are cleaning a barbecue grate is not acceptable.
How to Bathe a Turtle Step by Step
Step 1: Wash Your Hands and Prepare the Area
Start by washing your hands with soap and water. Remove lotions, perfumes, sunscreen, or chemical residues that could transfer to your turtle. Set up the bath container in a calm, safe place away from drafts, loud noises, pets, and curious toddlers who think everything is a drum.
Step 2: Add Shallow Lukewarm Water
Fill the tub with enough water for the turtle to soak comfortably while keeping its head above water. For many turtles, the water should be shallow enough that the turtle can stand or rest without struggling. For box turtles, the water often reaches around the lower shell or up to the chin when the head is extended. For aquatic turtles, slightly deeper water may be acceptable, but only if the turtle is healthy, alert, and supervised.
Never leave a turtle unattended in bath water. Even strong swimmers can become stressed, trapped, flipped over, or chilled. Bath time is not the moment to check your messages, make toast, or learn whether your turtle can audition for an escape-room reality show.
Step 3: Place the Turtle in the Water Gently
Pick up the turtle with both hands, supporting the body securely. Keep your fingers away from the mouth and claws. Some turtles are calm; others react like you have personally insulted their ancestors. Move slowly and confidently. Place the turtle in the water and give it a minute to settle.
If the turtle panics, repeatedly tries to climb out, gasps, floats oddly, or seems weak, end the bath and return it to a safe, warm enclosure. A normal bath should be calm and supervised, not a tiny reptile disaster movie.
Step 4: Let the Turtle Soak
For many routine baths, a soak of about 10 to 20 minutes is enough. Box turtles may benefit from regular soaks for hydration, while aquatic turtles may only need a separate bath when the shell has algae or debris. The correct frequency depends on the species, age, health, humidity, habitat setup, and whether the turtle has access to clean water in its enclosure.
During the soak, your turtle may drink, relax, walk around, or poop. Yes, turtles often use bath water as a bathroom. This is rude, natural, and extremely common. If the water becomes dirty, replace it with clean lukewarm water or end the bath.
Step 5: Gently Brush the Shell if Needed
If the shell has light algae or dirt, use a soft toothbrush with plain water. Brush gently in small circles across the top shell, called the carapace, and the bottom shell, called the plastron, if your turtle tolerates being handled. Avoid the eyes, nose, mouth, and soft skin. Do not pry at scutes, which are the shell’s outer plates. Healthy scutes may shed naturally, and forcing them off can injure the turtle.
Light green algae on an aquatic turtle’s shell is often related to tank conditions, lighting, and water quality. A gentle shell cleaning can help, but the long-term solution is usually better filtration, regular tank maintenance, proper basking space, and correct UVB lighting. In other words, if the turtle keeps turning into a mossy river rock, look at the habitat, not just the toothbrush.
Step 6: Rinse with Clean Water
After brushing, rinse the turtle gently with clean lukewarm water. Do not use strong water pressure. A small cup can help pour water over the shell without startling the turtle. Make sure no debris remains around the shell edges, legs, tail, or folds of skin.
Step 7: Dry Lightly and Return the Turtle to Its Habitat
Use a clean paper towel or turtle-only towel to lightly pat the shell if needed. Aquatic turtles can usually return to their clean enclosure right away. Box turtles should return to a warm, properly humid habitat with access to fresh water. Make sure the enclosure temperature, basking area, lighting, and water quality are correct, because bathing cannot compensate for a poor habitat.
Step 8: Clean and Disinfect Everything
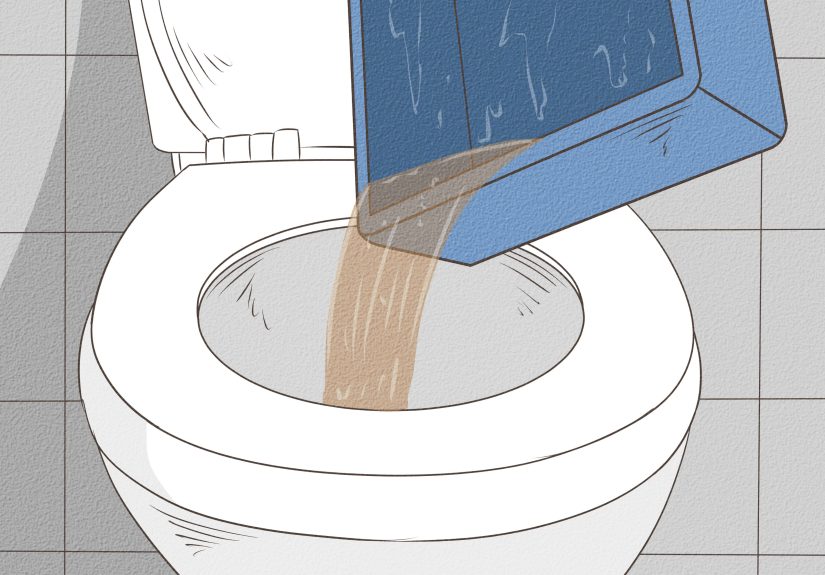
After the bath, dump the water safely into a toilet or utility drain, not a kitchen sink. Wash and disinfect the container and brush according to safe reptile-care hygiene practices. Wash your hands thoroughly. If you used gloves, remove them carefully and wash your hands anyway. Gloves are helpful, but they are not magic force fields.
How Often Should You Bathe a Turtle?
There is no single schedule that fits every turtle. Aquatic turtles do not usually need frequent separate baths if they live in clean, filtered water and have a proper basking area. They may need occasional shell brushing if algae collects. Box turtles and some land-dwelling species may benefit from routine shallow soaks, especially when hydration, humidity, or shedding are concerns.
As a general guide, healthy aquatic turtles may only need a separate bath when visibly dirty or during routine shell checks. Box turtles may soak one to several times per week depending on species and environment. Young turtles, dehydrated turtles, and turtles with medical concerns require individualized advice from a reptile veterinarian.
The best bathing schedule is based on observation. If the shell looks clean, the turtle is active, the habitat water is well maintained, and the turtle has proper basking and UVB exposure, constant bathing may not be necessary. Too much handling can stress some turtles, so do not turn bath time into a daily photo shoot.
Common Turtle Bathing Mistakes
Using Soap or “Shell Shine” Products
A turtle shell should look healthy, not polished like a sports car. Avoid commercial shine products unless specifically recommended by a reptile veterinarian. A shiny shell is not automatically a healthy shell, and oily products may interfere with normal shell function or trap debris.
Scrubbing Too Hard
Gentle means gentle. If dirt does not come off with light brushing and clean water, do not attack it with more force. Stubborn white patches, soft spots, bad smells, or uneven areas may signal shell disease, mineral deposits, retained scutes, or another issue that needs professional evaluation.
Using Water That Is Too Deep
Even aquatic turtles should not be placed in a deep bath without a way to rest and breathe easily. Box turtles are not strong swimmers and can drown if they cannot exit or keep their head above water. When in doubt, keep the water shallow and supervise closely.
Bathing in the Kitchen
The kitchen is for sandwiches, not Salmonella roulette. Keep turtle bathing and habitat cleaning away from food-preparation spaces. Use dedicated tools and disinfect surfaces after any reptile-related cleaning.
Ignoring the Habitat
If your turtle constantly smells bad or grows heavy algae, the problem is likely not the turtle’s attitude toward hygiene. Check water filtration, tank size, water-change schedule, basking temperature, UVB lighting, diet, and waste buildup. A clean turtle living in a dirty tank will become dirty again faster than you can say “shell maintenance.”
When Bathing Is Not Enough
A bath can help with surface dirt, mild algae, and hydration support, but some signs require veterinary help. Contact a reptile veterinarian if you notice soft shell areas, bleeding, deep cracks, foul odor, swollen eyes, discharge from the nose or mouth, lack of appetite, unusual floating, severe lethargy, open wounds, white fuzzy growth, red patches, or shell pits.
Also be careful with wild turtles. If you find a wild turtle, do not bathe it for fun, keep it as a pet, paint its shell, or relocate it far away. Wild turtles know where they are going, even when they appear to be moving at the speed of a confused potato. If the turtle is injured, contact a licensed wildlife rehabilitator or local animal authority.
How to Keep Your Turtle Cleaner Between Baths
The cleanest turtle is usually the one with the best habitat. For aquatic turtles, use strong filtration rated for the tank size, remove uneaten food, perform routine water changes, and provide a dry basking platform where the turtle can fully leave the water. Basking helps the shell dry properly, which can reduce excessive algae and support shell health.
Provide correct UVB lighting and replace bulbs according to manufacturer recommendations, because UVB output decreases over time even when the bulb still glows. Maintain species-appropriate temperatures and humidity. Feed a balanced diet and avoid overfeeding, which can quickly turn water cloudy. A turtle tank is not a soup pot, even if your turtle seems determined to make it one.
For box turtles, keep the water dish clean, shallow, easy to enter, and easy to exit. Change the water daily or whenever it becomes dirty. Maintain proper humidity with safe substrate and misting as needed. A turtle that can hydrate naturally in a well-designed enclosure may need fewer stressful interventions.
Extra Experiences and Practical Lessons from Turtle Bath Time
One of the first things many turtle keepers learn is that turtles have personalities. Some sit in the bath like ancient philosophers considering the meaning of lettuce. Others immediately begin climbing the wall of the container as if they have an urgent meeting across town. This is why preparation matters. When the bath area is ready before the turtle is moved, the whole process feels smoother and safer.
A useful experience-based tip is to keep bath time predictable. Use the same container, the same quiet location, and the same gentle handling routine. Over time, many turtles become less dramatic when they realize nothing terrible happens. They may not send you a thank-you card, but a calmer turtle is a clear win.
Another practical lesson: inspect the turtle before brushing. Look at the eyes, nose, mouth, claws, tail, skin folds, top shell, and bottom shell. A quick bath can become a helpful health check. For example, if you notice one eye looks swollen, the turtle is breathing with effort, or the shell has a soft patch, that information is more important than finishing the bath. In those cases, stop and seek proper veterinary advice.
Many keepers also discover that algae is easier to prevent than remove. If an aquatic turtle’s shell gets green quickly after every bath, the tank may have too much light exposure, weak filtration, infrequent water changes, or not enough basking time. Brushing the shell every week without improving the habitat is like mopping the floor while the sink is still overflowing. The turtle may look cleaner for a day, but the root problem remains.
For box turtles, the biggest lesson is that soaking supports hydration, but it does not replace correct humidity and access to fresh water. A dry enclosure can contribute to dehydration and shedding problems. A shallow soak may help, but the long-term answer is a better environment. Think of the bath as a helpful assistant, not the entire care plan.
It also helps to keep records. You do not need a dramatic diary titled “The Chronicles of Sir Shellington,” although that would be excellent. A simple note on bath dates, shell appearance, appetite, weight, and behavior can reveal patterns. If the turtle suddenly refuses food, acts weak, or develops shell changes, your notes can help a veterinarian understand what changed and when.
Finally, remember that gentle handling builds trust. Move slowly, support the turtle’s body, avoid flipping it unnecessarily, and keep sessions short. Turtles are not cuddly pets in the same way cats or dogs may be, and many prefer being admired with respectful distance. A good turtle bath is not about forcing affection. It is about care, cleanliness, hydration, observation, and returning the turtle to a habitat where it can live comfortably. When done properly, bath time becomes less of a chore and more of a quiet maintenance ritual: warm water, soft brush, clean shell, washed hands, happy turtle. Or at least a turtle that judges you slightly less.
Conclusion
Learning how to bathe a turtle safely is mostly about restraint. Use plain lukewarm water, keep the bath shallow, supervise closely, brush only with gentle pressure, avoid soaps and chemicals, and clean up carefully afterward. A turtle bath should support health, not create stress. When the shell looks abnormal, smells bad, feels soft, or shows signs of injury, bathing is not the answer; a reptile veterinarian is.
The real secret to a clean turtle is not endless scrubbing. It is a clean habitat, correct temperature, proper UVB lighting, safe water access, good filtration, balanced nutrition, and calm handling. Get those basics right, and bath time becomes a simple tune-up instead of a rescue mission.
Note: This article is for general educational turtle-care guidance. For illness, injury, shell damage, unusual behavior, or species-specific medical concerns, consult a qualified reptile veterinarian.